本篇文章完整的说明如和在树莓派上运行 .net core2.1程序,当然也参考了其他的博客,此处结合我自己的经验,再写一篇完整的博客,方便大家,还有我自己进行查阅。
https://blog.csdn.net/weixin_39449466/article/details/80686835
https://blog.csdn.net/sD7O95O/article/details/79395766
https://blog.csdn.net/github_35160620/article/details/52134098
http://shumeipai.nxez.com/2013/10/06/windows-remote-desktop-connection-raspberry-pi.html
https://blog.csdn.net/guanmaoning/article/details/78760428
ok,接下来进入正题,先弄个树莓派,如果都没有,那还玩什么东西。。。。。
准备一个tf卡,准备读卡器,现在要往tf写入操作系统。
官方的地址:https://www.raspberrypi.org/downloads/raspbian/
推荐下载下面的:

下载好之后,准备格式化tf卡
需要下载一个软件(我看教程都是下载软件,系统默认格式化我也不知道行不行,可能格式有区别)
格式化工具:SD card formatter

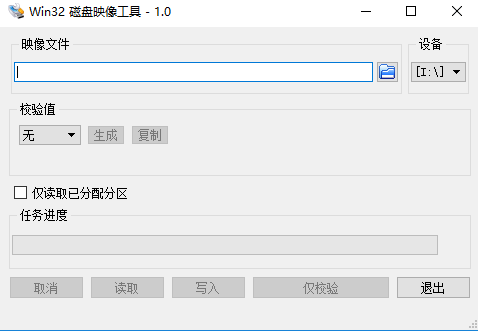
将下载好的系统镜像写入tf卡
写入工具:win32diskimager
开启ssh连接
在tf卡当前的目录下创建一个文件,命名为 ssh 不带任何的后缀
设置无线网连接
country=CN
ctrl_interface=DIR=/var/run/wpa_supplicant GROUP=netdev
update_config=1

network={
    ssid="AMRHU"
    psk="12345678"
    key_mgmt=WPA-PSK
    priority=1
}
这样开机后就能连接上网络。
显示设置
在boot目录下,找到config.txt文件,里面许多选项被注释掉了,我们需要在选择以下命令:
# For more options and information see
# http://rpf.io/configtxt
# Some settings may impact device functionality. See link above for details

# uncomment if you get no picture on HDMI for a default "safe" mode
#hdmi_safe=1

# uncomment this if your display has a black border of unused pixels visible
# and your display can output without overscan
disable_overscan=1#可以去掉开机屏幕周围的黑色边框

# uncomment the following to adjust overscan. Use positive numbers if console
# goes off screen, and negative if there is too much border
#overscan_left=16
#overscan_right=16
#overscan_top=16
#overscan_bottom=16

# uncomment to force a console size. By default it will be display's size minus
# overscan.
#framebuffer_width=1280
#framebuffer_height=720

# uncomment if hdmi display is not detected and composite is being output
hdmi_force_hotplug=1#

# uncomment to force a specific HDMI mode (this will force VGA)
hdmi_group=2#DMT模式
hdmi_mode=58 #分辨率为适应屏幕分辨率的选择

# uncomment to force a HDMI mode rather than DVI. This can make audio work in
# DMT (computer monitor) modes
hdmi_drive=2

# uncomment to increase signal to HDMI, if you have interference, blanking, or
# no display
config_hdmi_boost=4

# uncomment for composite PAL
#sdtv_mode=2

#uncomment to overclock the arm. 700 MHz is the default.
#arm_freq=800

# Uncomment some or all of these to enable the optional hardware interfaces
#dtparam=i2c_arm=on
#dtparam=i2s=on
#dtparam=spi=on

# Uncomment this to enable the lirc-rpi module
#dtoverlay=lirc-rpi

# Additional overlays and parameters are documented /boot/overlays/README

# Enable audio (loads snd_bcm2835)
dtparam=audio=on
目前已经可以接显示器,然后进入系统了。然后修改系统的密码
sudo passwd pi
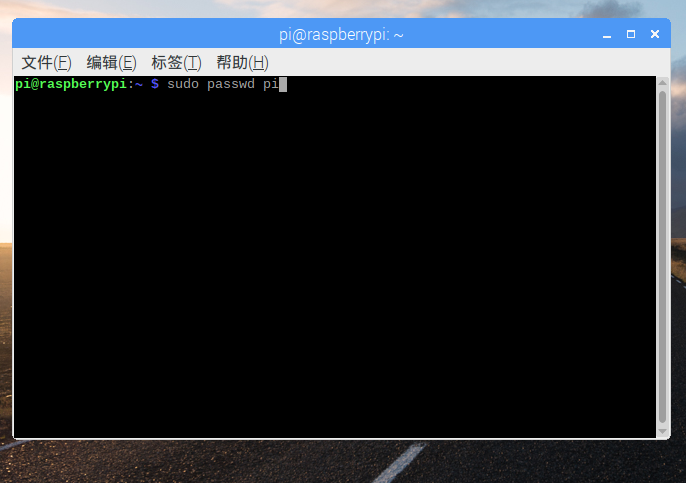
分别输入两次新的密码就可以设置成功了

远程连接
总共运行4条指令
sudo apt-get install xrdp
sudo apt-get purge tightvnc xrdp
sudo apt-get install tightvncserver xrdp
sudo /etc/init.d/xrdp restart
检查端口状态
通过命令:netstat -tnl
查看 3350 3389 5910 这三个端口处于LISTEN,一般就没问题了。
此时,将树莓派重启,然后使用windows自带的远程连接去请求数据

还需要在树莓派配置好ip地址
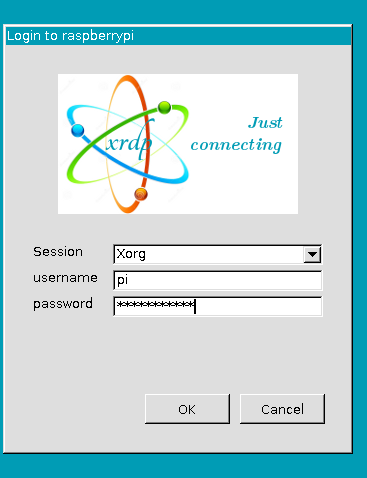
输入用户名和密码即可登录
文件传送
上述的远程桌面确实好用,但是不能传送文件,这个就比较尴尬了,所以使用下面的文件实现
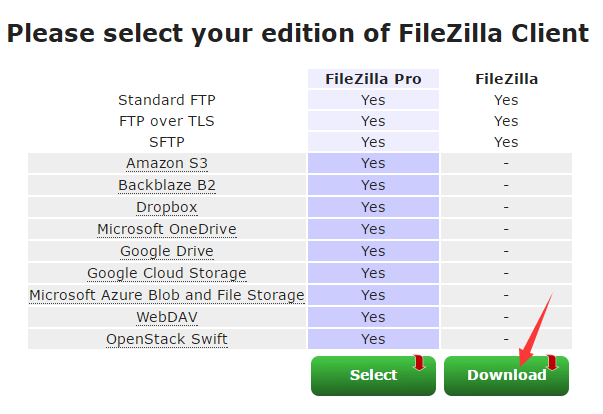
https://filezilla-project.org/download.php 下载一个软件 FileZilla
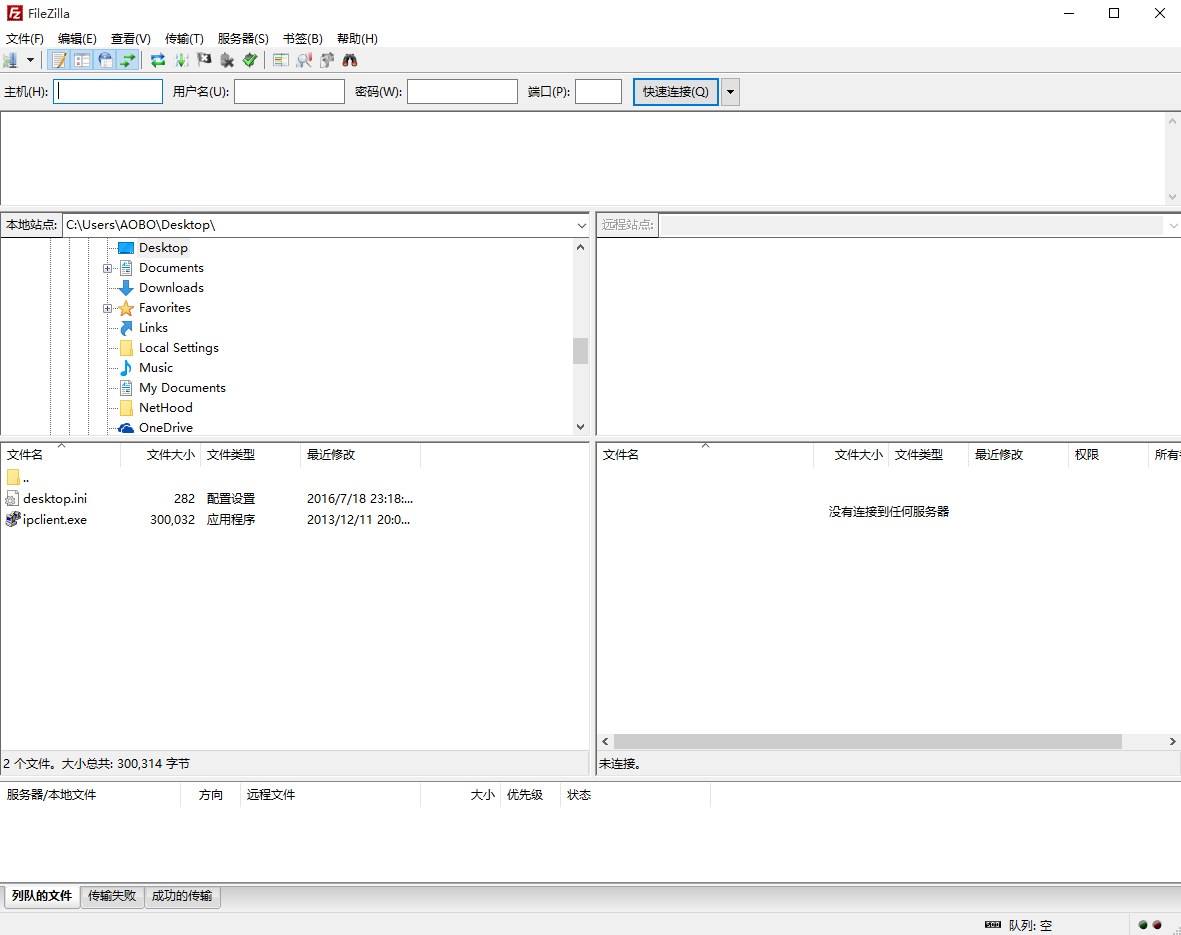
输入ip地址,用户名,密码。及端口,端口一般为22
就可以把文件复制到指定的目录里面。
安装 .net core 环境
sudo apt-get update
sudo apt install curl libunwind8 gettext
curl -sSL -o dotnet.tar.gz https://download.microsoft.com/download/1/f/7/1f7755c5-934d-4638-b89f-1f4ffa5afe89/dotnet-runtime-2.1.2-linux-arm.tar.gz
sudo mkdir -p /opt/dotnet && sudo tar zxf dotnet.tar.gz -C /opt/dotnet
sudo ln -s /opt/dotnet/dotnet /usr/local/bin
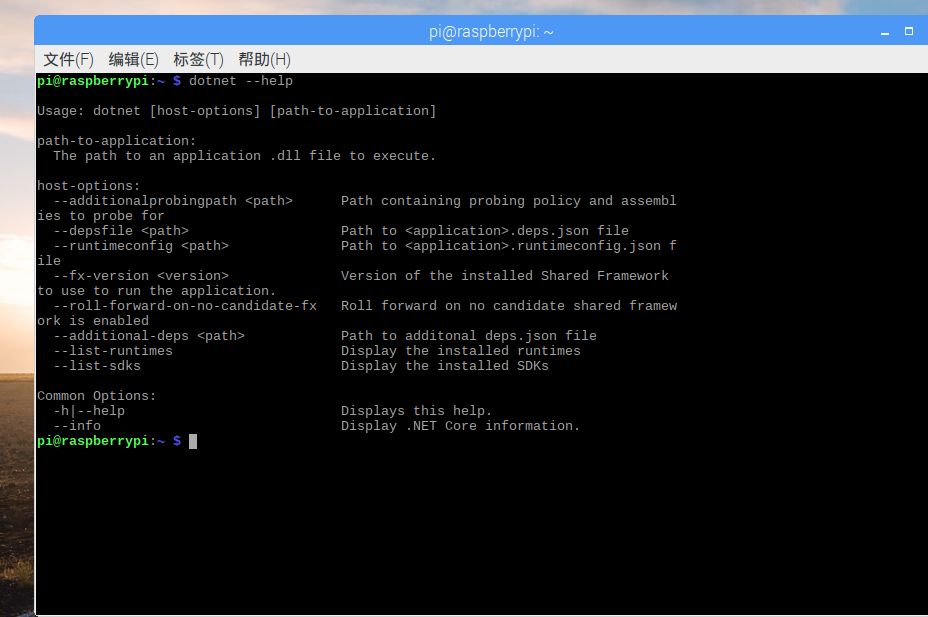
正常的话,显示如下:
在windows上生成你自己的应用程序,通过cmd来编译你的应用程序
dotnet publish -r linux-arm
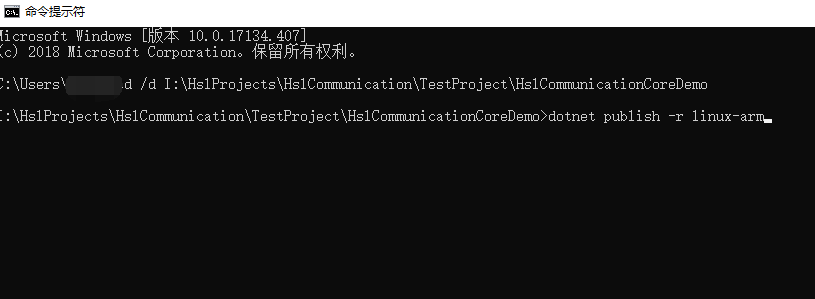
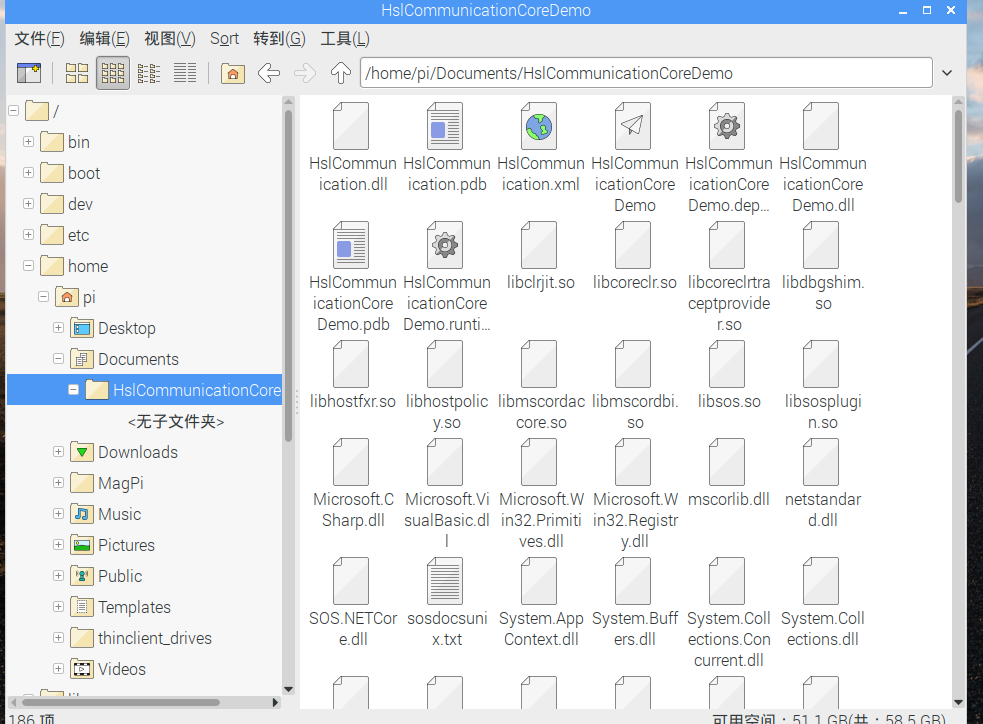
然后把生成的文件拷贝到树莓派里面,具体的拷贝方式,可以把tf卡拔出来拷贝,也可以用上面的远程传输的东西拷贝
准备启动
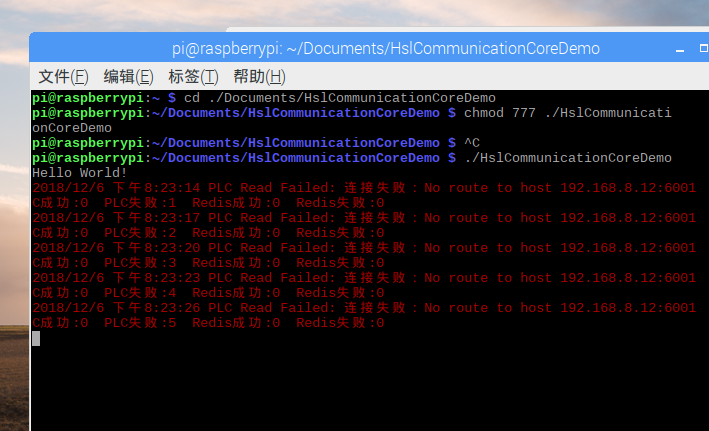
cd ./Documents/HslCommunicationCoreDemo
chmod 777 ./HslCommunicationCoreDemo
./HslCommunicationCoreDemo
然后就正常的跑程序了
开机启动
首先要编写脚本,文件名为 testboot.sh
运行 nano testboot.sh
输入
chmod 777 /home/pi/Documents/HslCommunicationCoreDemo/HslCommunicationCoreDemo

/home/pi/Documents/HslCommunicationCoreDemo/HslCommunicationCoreDemo
测试一下
./testboot.sh
向rc.local文件添加启动代码
修改rc.local文件,在终端输入并回车:
sudo nano /etc/rc.local
在打开的文本中找到exit 0,在此之前添加的代码在启动时都会被执行,在exit 0 之前添加一行代码
exec /home/pi/testboot.sh
如果存在权限的问题,那么使用下面的方法
su pi -c "exec /home/pi/testboot.sh"
ctrl+o保存,ctrl+x退出,然后在终端输入:sudo reboot ,重启系统测试。
如果运行失败,可以输入如下的指令查看状态
sudo systemctl status rc-local
正常情况如下
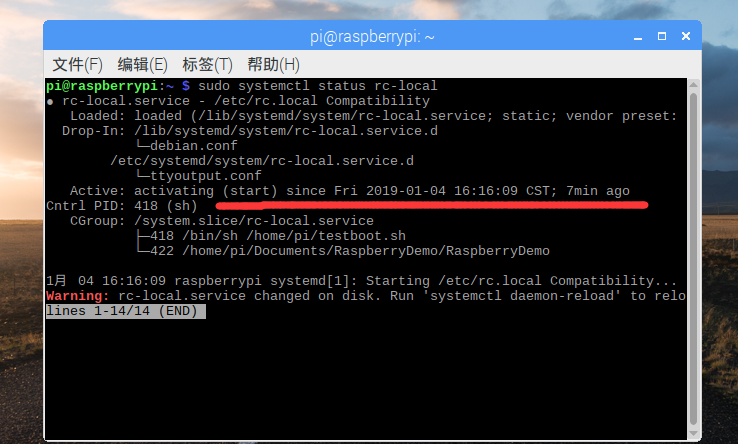
这里的文件替换了另一个,无需理会,这就代表基本成功了。
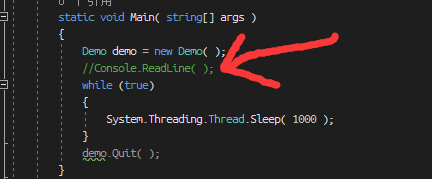
中间有个坑,主程序不能使用readLine来保证程序处于一直运行的状态,否则程序已启动,就立马结束了。需要使用循环来实现。
还有关于中文输入法的问题,下次再补充了