效果图:
1.开始——运行——输入cmd ,输入adb shell,错误:一是“adb不是内部命令或外部命令,也不是可运行的程序或批处理文件”,二是“error:device not found”。
第一个错误,是没找到adb,在环境变量中加入adb.exe![]()

具体位置:
F:adt-bundle-windows-x86-20131030sdkplatform-tools
将这个位置加到你的path下面。
对于第二种错误,是因为没有打开Android虚拟机。因为adb shell命令实际上是对当前虚拟机进行操作,需要进入当前虚拟机的文件结构。如果没有打开虚拟机,本命令当然会报“error:device not found”(就是没有找到设备)的错误了。解决办法就是打开虚拟机.
2.开始——运行——输入cmd ,跳到F:adt-bundle-windows-x86-20131030sdk ools>路径下:
输入adb shell

然后输入 su
获得root权限后在输入chomd -R 777

这时你就可以获得权限了 在chomd -R 777后面加上你想要权限的文件夹。
(解释:首先进入到你安装android包下的tools目录中执行adb shell命令
然后用su获得手机的root权限,有些手机此时会跳出一个框问你是否允许获得root权限,你点 是 然后你就获得了权限
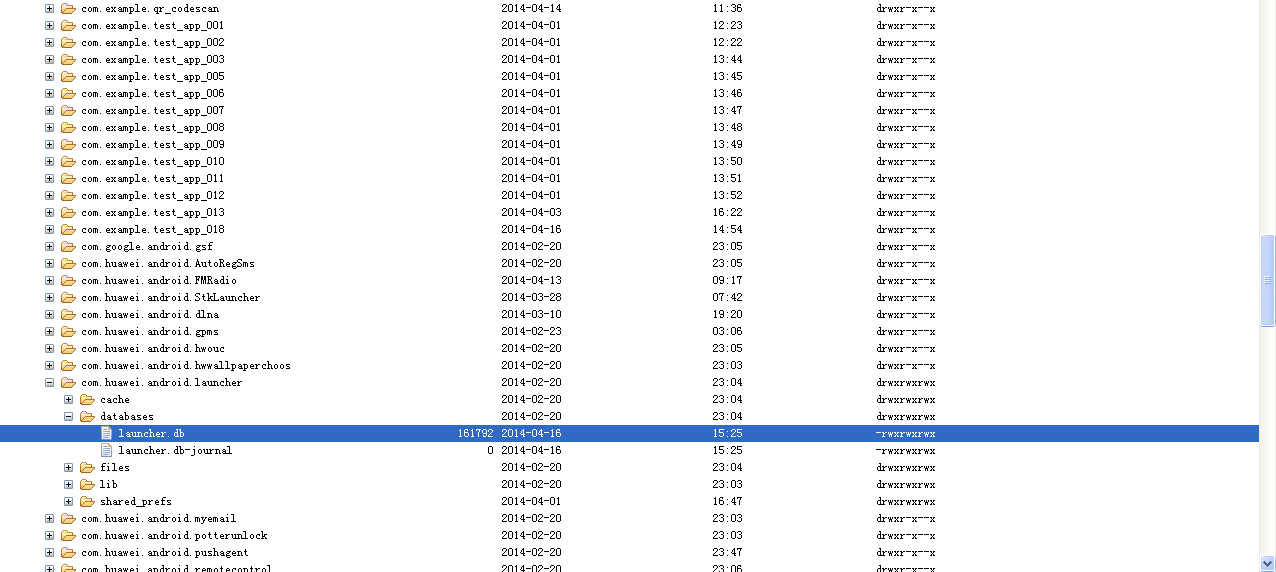
这时候执行chomd -R 777的权限更改命令,后面的路径是你要开启权限的包的路径,后面的那个com.xxx.xxx是你自己的工程包名,下面有databases等文件,在DDMS中显示就是如下图:)
例如:
10|shell@android:/ # chmod -R 777 data
chmod -R 777 data
Unable to chmod data/misc/wifi/load/ar6000.ko: Read-only file system
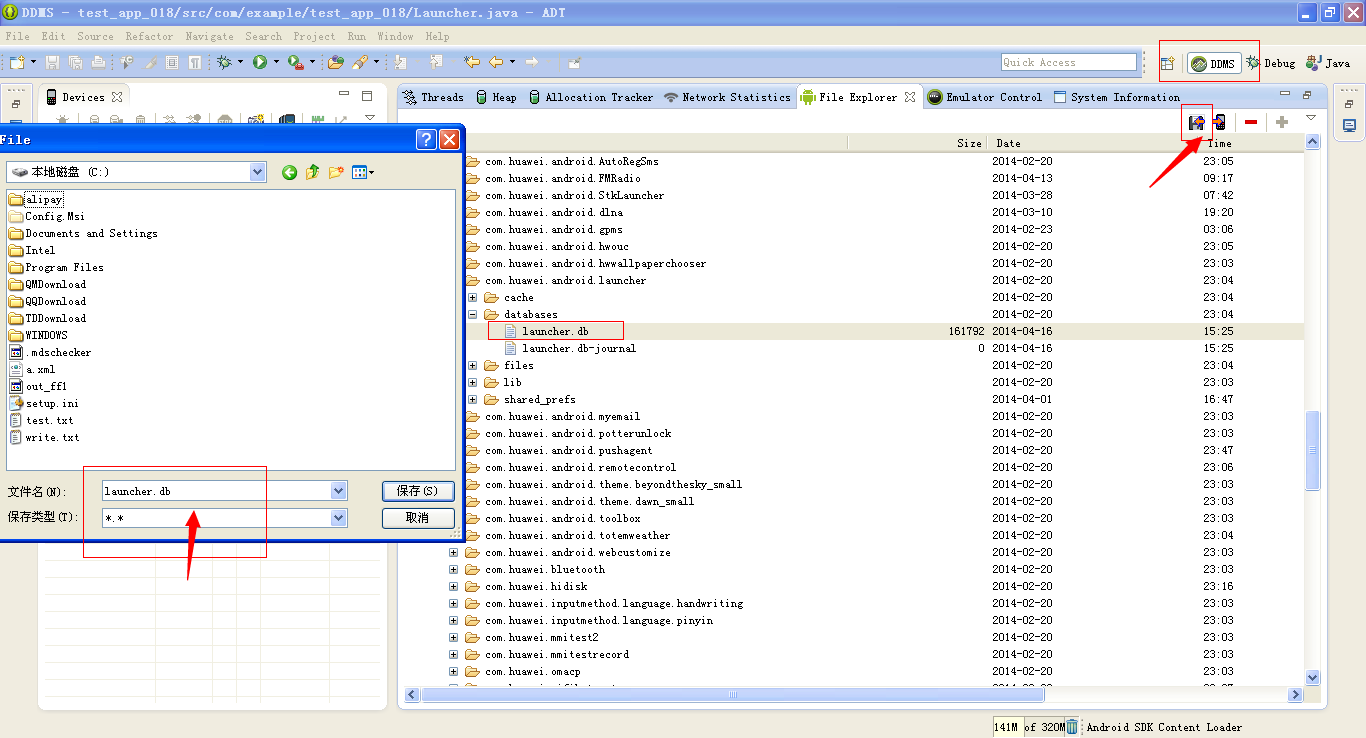
此时,刷新eclipse中的DDMS中的file Explorer 可以看到data文件夹下面的文件了。
一般我们开打的程序的数据库 在data/data/程序的包名/datebases下面
点击文件,导出想要的类文件,保存即可。
导出时出现错误:
[2014-04-16 16:51:15] Failed to pull selection
[2014-04-16 16:51:15] null
原因没找到,解决方法很逗,重启ADT就好了。
使用可视化工具查看

到这里还是很开心的!
参照:http://fruithardcandy.iteye.com/blog/1880672