一运行告警系统
创建一个任务计划crontab -e

每一分钟都执行一次

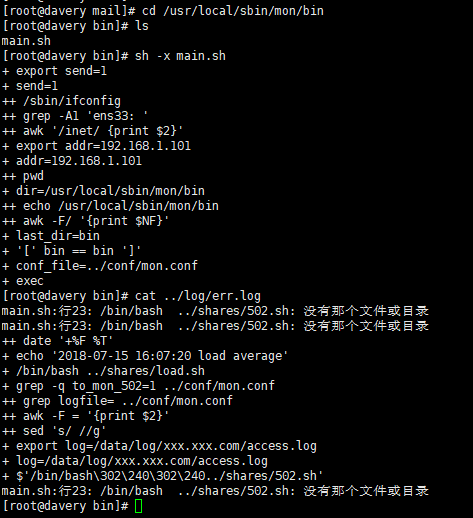
调试时把主脚本里边log先注释掉

再次执行

没有发现502文件说明执行成功了,每日有错误,本机IP 负载不高
二、分发系统-expect讲解
yum install -y expect
自动远程登录
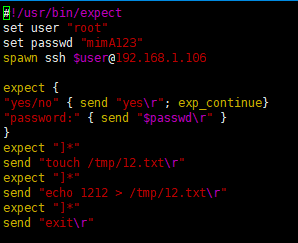
#! /usr/bin/expect
set host "192.168.1.106"
set passwd "mimA123"
spawn ssh root@$host 指向106
expect {
"yes/no" { send "yes "; exp_continue}
"assword:" { send "$passwd " }
}
interact 停留在客户机不退出
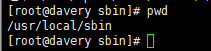
路径/usr/local/sbin/dl.expect

vim dl.expect

[root@davery sbin]# chmod a+x df.expect 更改权限
[root@davery sbin]# ./dl.expect 执行脚本就直接登陆106了
三、 自动远程登录后,执行命令并退出
#!/usr/bin/expect
set user "root"
set passwd "123456"
spawn ssh $user@192.168.133.132
expect {
"yes/no" { send "yes "; exp_continue}
"password:" { send "$passwd " }
}
expect "]*"
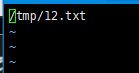
send "touch /tmp/12.txt " 这些文件可以自己改动
expect "]*"
send "echo 1212 > /tmp/12.txt " 这些文件可以自己改动
expect "]*"
send "exit "
路径:/usr/local/sbin/tc.expect
[root@davery sbin]# chmod a+x tc.expect 更改权限
[root@davery sbin]# ./tc.expect 登陆
spawn ssh root@192.168.1.106
四、expect脚本传递参数
/usr/local/sbin/cd.expect
#!/usr/bin/expect
set user [lindex $argv 0]
set host [lindex $argv 1]
set passwd "123456"
set cm [lindex $argv 2]
spawn ssh $user@$host
expect {
"yes/no" { send "yes "}
"password:" { send "$passwd " }
}
expect "]*"
send "$cm "
expect "]*"
send "exit "
路径:/usr/local/sbin/cd.expect
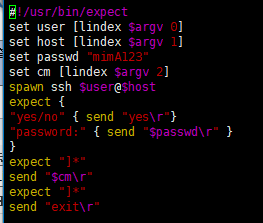
[root@davery sbin]# chmod a+x cd.expect
[root@davery sbin]# ./cd.expect root 192.168.1.106 ls 写用户,ip 传递的命令,
spawn ssh root@192.168.1.106
五、expect脚本同步文件
#!/usr/bin/expect
set passwd "123456"
spawn rsync -av root@192.168.1.106:/tmp/12.txt /tmp/
expect {
"yes/no" { send "yes "}
"password:" { send "$passwd " }
}
expect eof 这个命令停留有传输时间
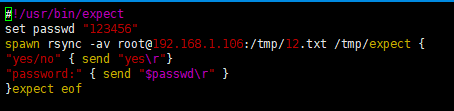
[root@davery sbin]# chmod a+x tb.expect
[root@davery sbin]# ./tb.expect
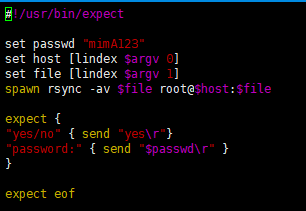
六、指定host和要同步的文件
#!/usr/bin/expect
set passwd "mimA123"
set host [lindex $argv 0]
set file [lindex $argv 1]
spawn rsync -av $file root@$host:$file
expect {
"yes/no" { send "yes "}
"password:" { send "$passwd " }
}
expect eof
路径:/usr/local/sbin/zd.expect
[root@davery sbin]# chmod a+x zd.expect
[root@davery sbin]#
[root@davery sbin]# ./zd.expect 192.168.1.106 "/tmp/12.txt'
七、shell项目-分发系统-构建文件分发系统
需求背景
对于大公司而言,肯定时不时会有网站或者配置文件更新,而且使用的机器肯定也是好多台,少则几台,多则几十甚至上百台。所以,自动同步文件是至关重要的。
实现思路
首先要有一台模板机器,把要分发的文件准备好,然后只要使用expect脚本批量把需要同步的文件分发到目标机器即可。
核心命令
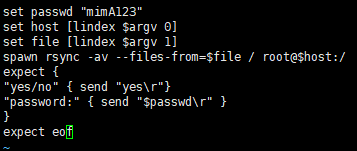
rsync -av --files-from=list.txt / root@host:/
vim rsync.expect
#!/usr/bin/expect
set passwd "123456"
set host [lindex $argv 0]
set file [lindex $argv 1]
spawn rsync -av --files-from=$file / root@$host:/
expect {
"yes/no" { send "yes "}
"password:" { send "$passwd " }
}
expect eof rsync.expect
chmod a+x
[root@davery sbin]# vi /tmp/list.txt
[root@davery sbin]# vim /tmp/ip.txt

[root@davery sbin]# vi rsync.sh
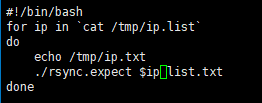
[root@davery sbin]# chmod a+x rsync.expect
[root@davery sbin]# sh -x rsync.sh
八、分发系统-命令批量执行
vim exe.expect
#!/usr/bin/expect
set host [lindex $argv 0]
set passwd "123456"
set cm [lindex $argv 1]
spawn ssh root@$host
expect {
"yes/no" { send "yes "}
"password:" { send "$passwd " }
}
expect "]*"
send "$cm "
expect "]*"
send "exit "
vim exe.sh
#!/bin/bash
for ip in `cat ip.list`
do
echo $ip
./exe.expect $ip "w;free -m;ls /tmp"
done