环境:
- ubuntu:20.04 kernel 5.4
- k8s: v1.20.9 3个节点->三主三从
- docker: 20.10
参考:
实验环境以nginx应用为例进行说明。
yaml文件list:
1 nginx-demo.yaml
2 vip-rbac.yaml
3 vip-configmap.yaml
4 vip-daemonset.yaml
下面是各个文件的具体内容:
nginx-demo.yaml
apiVersion: apps/v1
kind: Deployment
metadata:
  name: nginx-deployment
spec:
  replicas: 3
  selector:
    matchLabels:
      app: nginx
  template:
    metadata:
      labels:
        app: nginx
    spec:
      containers:
      - name: nginx
        image: nginx:1.7.9
        ports:
        - containerPort: 80
---
apiVersion: v1
kind: Service
metadata:
  name: nginx
  labels:
    app: nginx
spec:
  type: NodePort
  ports:
  - port: 80
    nodePort: 30302
    targetPort: 80
    protocol: TCP
    name: http
  selector:
    app: nginx
vip-rbac.yaml
apiVersion: rbac.authorization.k8s.io/v1
kind: ClusterRole
metadata:
  name: kube-keepalived-vip
rules:
- apiGroups: [""]
  resources:
  - pods
  - nodes
  - endpoints
  - services
  - configmaps
  verbs: ["get", "list", "watch"]
---
apiVersion: v1
kind: ServiceAccount
metadata:
  name: kube-keepalived-vip
  namespace: default
---
apiVersion: rbac.authorization.k8s.io/v1
kind: ClusterRoleBinding
metadata:
  name: kube-keepalived-vip
roleRef:
  apiGroup: rbac.authorization.k8s.io
  kind: ClusterRole
  name: kube-keepalived-vip
subjects:
- kind: ServiceAccount
  name: kube-keepalived-vip
  namespace: default
vip-configmap.yaml
apiVersion: v1
kind: ConfigMap
metadata:
  name: vip-configmap
data:
  192.168.181.150: default/nginx # 此处表示以192.168.181.150作为vip,数据源是默认命名空间中名为nginx的service,各位自己测试的时候,应该替换为自己未占用的ip,nm/svc自行更换


**vip-daemonset.yaml**
apiVersion: apps/v1
kind: DaemonSet
metadata:
name: kube-keepalived-vip
spec:
selector:
matchLabels:
app: kube-keepalived-vip
template:
metadata:
labels:
app: kube-keepalived-vip
spec:
hostNetwork: true
serviceAccount: kube-keepalived-vip
containers:
- image: aledbf/kube-keepalived-vip:0.35
name: kube-keepalived-vip
imagePullPolicy: IfNotPresent
livenessProbe:
httpGet:
path: /health
port: 8080
initialDelaySeconds: 15
timeoutSeconds: 3
securityContext:
privileged: true
volumeMounts:
- mountPath: /lib/modules
name: modules
readOnly: true
- mountPath: /dev
name: dev
# use downward API
env:
- name: POD_NAME
valueFrom:
fieldRef:
fieldPath: metadata.name
- name: POD_NAMESPACE
valueFrom:
fieldRef:
fieldPath: metadata.namespace
# to use unicast
args:
- --services-configmap=default/vip-configmap
# unicast uses the ip of the nodes instead of multicast
# this is useful if running in cloud providers (like AWS)
#- --use-unicast=true
volumes:
- name: modules
hostPath:
path: /lib/modules
- name: dev
hostPath:
path: /dev
#nodeSelector:
# type: worker
查看运行情况:
kubectl get po
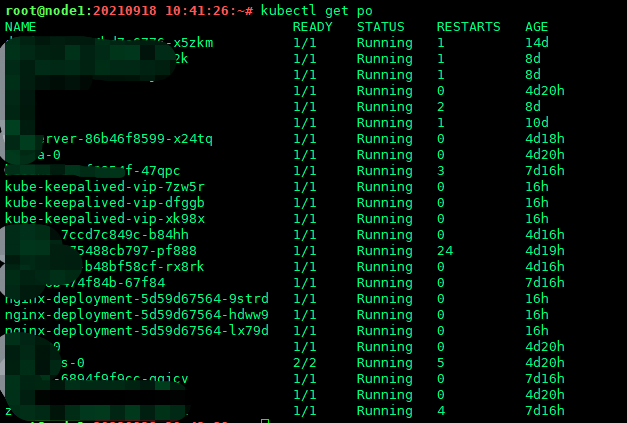
可以看到,keepalived其实是运行了3个pod的,分布在不同的节点上,每个节点分部一个。
测试时可以直接用vip+port测试:
curl 192.168.181.150:80
下面我们看看kube-keepalived-vip pod中的keepalived的配置情况。
进入任意节点的pod中:
kube-keepalived-vip-7zw5r
cat -n /etc/keepalived/keepalived.conf
global_defs {
vrrp_version 3
vrrp_iptables KUBE-KEEPALIVED-VIP
}
Check if the VIP list is empty
vrrp_instance vips {
state BACKUP # 作为备机
interface ens33 # 自动读取网卡
virtual_router_id 50 # 同一id,表示同一kpd集群
priority 102 # 优先级
nopreempt
advert_int 1
track_interface {
ens33
}
virtual_ipaddress {
192.168.181.180 # configmap中设置的data信息,就是绑定的虚拟ip
}
notify /keepalived-check.sh
}
Service: default-nginx # namespace -> default, app -> nginx
virtual_server 192.168.181.180 80 { # 绑定80端口
delay_loop 5
lvs_sched wlc
lvs_method NAT # NAT模式,其他模式有TUN DR
persistence_timeout 1800
protocol TCP
real_server 10.244.1.217 80 { # 服务发现的nginx及端口
weight 1
TCP_CHECK {
connect_port 80
connect_timeout 3
}
}
real_server 10.244.3.26 80 {
weight 1
TCP_CHECK {
connect_port 80
connect_timeout 3
}
}
real_server 10.244.3.27 80 {
weight 1
TCP_CHECK {
connect_port 80
connect_timeout 3
}
}
}
End if vip list is empty
上面的配置其实是pod自动创建的conf文件,怎样,是不是很省事。我们要做的就是创建含应用在内的4个yaml配置,通过configmap进行关联,这样就在k8s中构建了一个高可用的keepalived + lvs的nginx环境。

不要只满足于黑盒实现,接下来,我们进一步地了解这些过程都是怎样实现的。