目录
UICollectionView的定义UICollectionView快速构建GridView网格视图UICollectionView拖拽重排处理(iOS8.x-/iOS9.x+)UICollectionView实现简单轮播
UICollectionView的定义
UICollectionView同UITableView一样,是iOS中最常用到数据展示视图。
官方定义:
An object that manages an ordered collection of data items and presents them using customizable layouts.
提供管理有序数据集合且可定制布局能力的对象

UICollectionView显示内容时:- 通过
dataSource获取cell - 通过
UICollectionViewLayout获取layout attributes布局属性 - 通过对应的
layout attributes对cell进行调整,完成布局
- 通过
UICollectionView交互则是通过丰富的delegate方法实现
iOS10中增加了一个新的预处理protocol UICollectionViewDataSourcePrefetching 帮助预加载数据 缓解大量数据加载带来的快速滑动时的卡顿
UICollectionView视图
一个标准的UICollectionView视图包括以下三个部分
UICollectionViewCell视图展示单元SupplementaryView追加视图,类似我们熟悉的UITableView中的HeaderView、FooterVIewDecorationView装饰视图
1.UICollectionView依然采用Cell重用的方式减小内存开支,所以需要我们注册并标记,同样,注册分为Class及nib两类
// register cell
    if (_cellClassName) {
        [_collectionView registerClass:NSClassFromString(_cellClassName) forCellWithReuseIdentifier:ReuseIdentifier];
    }
    if (_xibName) {// xib
        [_collectionView registerNib:[UINib nibWithNibName:_xibName bundle:nil] forCellWithReuseIdentifier:ReuseIdentifier];
    }
2.Father Apple同样将重用机制带给了SupplementaryView,注册方法同Cell类似
// UIKIT_EXTERN NSString *const UICollectionElementKindSectionHeader NS_AVAILABLE_IOS(6_0);
// UIKIT_EXTERN NSString *const UICollectionElementKindSectionFooter NS_AVAILABLE_IOS(6_0);
- (void)registerClass:(nullable Class)viewClass forSupplementaryViewOfKind:(NSString *)elementKind withReuseIdentifier:(NSString *)identifier;
- (void)registerNib:(nullable UINib *)nib forSupplementaryViewOfKind:(NSString *)kind withReuseIdentifier:(NSString *)identifier;
对于它尺寸的配置,同样交由Layout处理,如果使用的是UICollectionViewFlowLayout,可以直接通过headerReferenceSize 或footerReferenceSize 赋值
3.DecorationView装饰视图,是我们在自定义Custom Layout时使用
UICollectionViewDataSource及UICollectionViewDelegate
这个部分使用频率极高想必大家都非常熟悉,所以笔者列出方法,不再赘述。
UICollectionViewDataSource(*** 需要着重关注下iOS9后出现的两个新数据源方法,在下文中介绍拖拽重排时会用到他们 ***)
@required

- (NSInteger)collectionView:(UICollectionView *)collectionView numberOfItemsInSection:(NSInteger)section;

// The cell that is returned must be retrieved from a call to -dequeueReusableCellWithReuseIdentifier:forIndexPath:
- (__kindof UICollectionViewCell *)collectionView:(UICollectionView *)collectionView cellForItemAtIndexPath:(NSIndexPath *)indexPath;

@optional

- (NSInteger)numberOfSectionsInCollectionView:(UICollectionView *)collectionView;

// The view that is returned must be retrieved from a call to -dequeueReusableSupplementaryViewOfKind:withReuseIdentifier:forIndexPath:
- (UICollectionReusableView *)collectionView:(UICollectionView *)collectionView viewForSupplementaryElementOfKind:(NSString *)kind atIndexPath:(NSIndexPath *)indexPath;

- (BOOL)collectionView:(UICollectionView *)collectionView canMoveItemAtIndexPath:(NSIndexPath *)indexPath NS_AVAILABLE_IOS(9_0);
- (void)collectionView:(UICollectionView *)collectionView moveItemAtIndexPath:(NSIndexPath *)sourceIndexPath toIndexPath:(NSIndexPath*)destinationIndexPath NS_AVAILABLE_IOS(9_0);
UICollectionViewDelegate
- (void)collectionView:(UICollectionView *)collectionView didSelectItemAtIndexPath:(NSIndexPath *)indexPath;
- (void)collectionView:(UICollectionView *)collectionView didDeselectItemAtIndexPath:(NSIndexPath *)indexPath;
- (void)collectionView:(UICollectionView *)collectionView willDisplayCell:(UICollectionViewCell *)cell forItemAtIndexPath:(NSIndexPath *)indexPath NS_AVAILABLE_IOS(8_0);
- (void)collectionView:(UICollectionView *)collectionView willDisplaySupplementaryView:(UICollectionReusableView *)view forElementKind:(NSString *)elementKind atIndexPath:(NSIndexPath *)indexPath NS_AVAILABLE_IOS(8_0);
- (void)collectionView:(UICollectionView *)collectionView didEndDisplayingCell:(UICollectionViewCell *)cell forItemAtIndexPath:(NSIndexPath *)indexPath;
- (void)collectionView:(UICollectionView *)collectionView didEndDisplayingSupplementaryView:(UICollectionReusableView *)view forElementOfKind:(NSString *)elementKind atIndexPath:(NSIndexPath *)indexPath;

- (BOOL)collectionView:(UICollectionView *)collectionView shouldHighlightItemAtIndexPath:(NSIndexPath *)indexPath;
- (void)collectionView:(UICollectionView *)collectionView didHighlightItemAtIndexPath:(NSIndexPath *)indexPath;
- (void)collectionView:(UICollectionView *)collectionView didUnhighlightItemAtIndexPath:(NSIndexPath *)indexPath;
- (BOOL)collectionView:(UICollectionView *)collectionView shouldSelectItemAtIndexPath:(NSIndexPath *)indexPath;
- (BOOL)collectionView:(UICollectionView *)collectionView shouldDeselectItemAtIndexPath:(NSIndexPath *)indexPath;
官方注释解释了交互后调用的顺序
// (when the touch begins)
// 1. -collectionView:shouldHighlightItemAtIndexPath:
// 2. -collectionView:didHighlightItemAtIndexPath:
//
// (when the touch lifts)
// 3. -collectionView:shouldSelectItemAtIndexPath: or -collectionView:shouldDeselectItemAtIndexPath:
// 4. -collectionView:didSelectItemAtIndexPath: or -collectionView:didDeselectItemAtIndexPath:
// 5. -collectionView:didUnhighlightItemAtIndexPath:
使用代理的方式处理数据及交互,好处是显而易见的,代码功能分工非常明确,但是也造成了一定程度上的代码书写的繁琐。所以本文会在快速构建部分,介绍如何使用Block实现链式传参书写
UICollectionViewLayout布局
不同于UITableView的简单布局样式,UICollectionView提供了更加强大的布局能力,将布局样式任务分离成单独一个类管理,就是我们初始化时必不可少UICollectionViewLayout
Custom Layout通过UICollectionViewLayoutAttributes,配置不同位置Cell的诸多属性
@property (nonatomic) CGRect frame;
@property (nonatomic) CGPoint center;
@property (nonatomic) CGSize size;
@property (nonatomic) CATransform3D transform3D;
@property (nonatomic) CGRect bounds NS_AVAILABLE_IOS(7_0);
@property (nonatomic) CGAffineTransform transform NS_AVAILABLE_IOS(7_0);
@property (nonatomic) CGFloat alpha;
@property (nonatomic) NSInteger zIndex; // default is 0
同样也可以通过Layout提供诸多行为接口动态修改Cell的布局属性
贴心的Father Apple为了让我们具备快速构建网格视图的能力,封装了大家都非常熟悉的线性布局UICollectionViewFlowLayout,同样不做赘述
@property (nonatomic) CGFloat minimumLineSpacing;
@property (nonatomic) CGFloat minimumInteritemSpacing;
@property (nonatomic) CGSize itemSize;
@property (nonatomic) CGSize estimatedItemSize NS_AVAILABLE_IOS(8_0); // defaults to CGSizeZero - setting a non-zero size enables cells that self-size via -preferredLayoutAttributesFittingAttributes:
@property (nonatomic) UICollectionViewScrollDirection scrollDirection; // default is UICollectionViewScrollDirectionVertical
@property (nonatomic) CGSize headerReferenceSize;
@property (nonatomic) CGSize footerReferenceSize;
@property (nonatomic) UIEdgeInsets sectionInset;

// 悬浮Header、Footer官方支持
// Set these properties to YES to get headers that pin to the top of the screen and footers that pin to the bottom while scrolling (similar to UITableView).
@property (nonatomic) BOOL sectionHeadersPinToVisibleBounds NS_AVAILABLE_IOS(9_0);
@property (nonatomic) BOOL sectionFootersPinToVisibleBounds NS_AVAILABLE_IOS(9_0);
本文中不展开讨论如何定义Custom Layout实现诸如悬浮Header、瀑布流、堆叠卡片等效果,鶸笔者会在近期写一篇文章详细介绍布局配置及有趣的TransitionLayout,感兴趣的同学可以关注一下

UICollectionView快速构建GridView网格视图
日常工作中,实现一个简单的网格布局CollectionView的步骤大致分成以下几步:
- 配置
UICollectionViewFlowLayout:滑动方向、itemSize、内边距、最小行间距、最小列间距 - 配置
UICollectionView:数据源、代理、注册Cell、背景颜色
完成这些,代码已经写了一大堆了,如果App网格视图部分很多的话,一遍遍的写,很烦-。- 所以封装一个简单易用的UICollectionView显得非常有必要,相信各位大佬也都做过了。
这里笔者介绍一下自己封装的CollectionView
- 基于UIView(考虑到使用storyboard或xib快速构建时,添加UIView占位的情况)
- 使用
UICollectionViewFlowLayout满足最常见的开发需求 - 提供点击交互方法,提供
Block及Delegate两种方式 - 提供普通传参及链式传参两种方式
- 支持常见轮播
- 支持拖拽重排
普通构建方式示例:
// 代码创建
    SPEasyCollectionView *easyView = [[SPEasyCollectionView alloc] initWithFrame:CGRectMake(0, 20, [UIScreen mainScreen].bounds.size.width, 200)];
    easyView.delegate = self;
    easyView.itemSize = CGSizeMake([UIScreen mainScreen].bounds.size.width, 200);
    easyView.scrollDirection = SPEasyScrollDirectionHorizontal;
    easyView.xibName = @"EasyCell";
    easyView.datas = @[@"1",@"2",@"3",@"4"];
    [self.view addSubview:easyView];
链式传参
// chain calls
    _storyboardTest.sp_cellClassName(^NSString *{
        return @"TestCell";
    }).sp_itemsize(^CGSize{
        return CGSizeMake(100, 100);
    }).sp_minLineSpace(^NSInteger{
        return 20;
    }).sp_minInterItemSpace(^NSInteger{
        return 10;
    }).sp_scollDirection(^SPEasyScrollDirection{
        return SPEasyScrollDirectionVertical;
    }).sp_inset(^UIEdgeInsets{
        return UIEdgeInsetsMake(20, 20, 20, 20);
    }).sp_backgroundColor(^UIColor *{
        return [UIColor colorWithRed:173/255.0 green:216/255.0 blue:230/255.0 alpha:1];
    });//LightBLue 			#ADD8E6	173,216,230
这里分享一下链式的处理,希望对感兴趣的同学有所启发。其实很简单,就是Block传值
定义
// chain calls
typedef SPEasyCollectionView *(^SPEasyCollectionViewItemSize)(CGSize(^)(void));
属性示例
// chain calls
@property (nonatomic, readonly) SPEasyCollectionViewItemSize sp_itemsize;
属性处理示例
- (SPEasyCollectionViewItemSize)sp_itemsize{
    return ^SPEasyCollectionView *(CGSize(^itemSize)()){
        self.itemSize = itemSize();
        return self;
    };
}
UICollectionView拖拽重排处理(iOS8.x-/iOS9.x+)

拖拽重排功能的实现,在iOS9之前,需要开发者自己去实现动画、边缘检测以及数据源更新,比较繁琐。iOS9之后,官方替我们处理了相对比较复杂的前几步,只需要开发者按照正确的原则在重排完成时更新数据源即可。
拖拽重排的触发,一般都是通过长按手势触发。无论是哪种系统环境下,都需要LongpressGestureRecognizer的协助,所以我们事先将它准备好
// 添加长按手势
- (void)addLongPressGestureRecognizer{

    UILongPressGestureRecognizer *longPress = [[UILongPressGestureRecognizer alloc] initWithTarget:self action:@selector(handleLongPressGesture:)];
    longPress.minimumPressDuration = self.activeEditingModeTimeInterval?_activeEditingModeTimeInterval:2.0f;
    [self addGestureRecognizer:longPress];
    self.longGestureRecognizer = longPress;

}
说明一下手势处理的几种状态
| GestureRecognizerState | 说明 |
|---|---|
| UIGestureRecognizerStateBegan | 手势开始 |
| UIGestureRecognizerStateChanged | 手势变化 |
| UIGestureRecognizerStateEnded | 手势结束 |
| UIGestureRecognizerStateCancelled | 手势取消 |
| UIGestureRecognizerStateFailed | 手势失败 |
| UIGestureRecognizerStatePossible | 默认状态,暂未识别 |
对手势的不同状态分别进行处理
- (void)handleEditingMode:(UILongPressGestureRecognizer *)recognizer{

    switch (recognizer.state) {
        case UIGestureRecognizerStateBegan: {
            [self handleEditingMoveWhenGestureBegan:recognizer];
            break;
        }
        case UIGestureRecognizerStateChanged: {
            [self handleEditingMoveWhenGestureChanged:recognizer];
            break;
        }
        case UIGestureRecognizerStateEnded: {
            [self handleEditingMoveWhenGestureEnded:recognizer];
            break;
        }
        default: {
            [self handleEditingMoveWhenGestureCanceledOrFailed:recognizer];
            break;
        }
    }

}
如果使用UICollectionViewController,使用系统提供的默认的手势
The UICollectionViewController
class provides a default gesture recognizer that you can use to rearrange items in its managed collection view. To install this gesture recognizer, set the installsStandardGestureForInteractiveMovement
property of the collection view controller to YES
@property(nonatomic) BOOL installsStandardGestureForInteractiveMovement;
iOS8.x-拖拽重排处理
iOS8.x及以前的系统,对拖拽重排并没有官方的支持。
动手之前,我们先来理清实现思路
- 长按Cell触发编辑模式
- 手势开始时:对当前
active cell进行截图并添加snapView在cell的位置 隐藏触发Cell,需要记录当前手势触发点距离active cell的中心点偏移量center offset - 手势移动时:根据当前触摸点的位置及
center offset更新snapView位置 - 手势移动时:判断
snapView同visibleCells的初active cell外所有cell的中心点距离,当交叉位置超过cell面积的1/4时,利用系统提供的- (void)moveItemAtIndexPath:(NSIndexPath *)indexPath toIndexPath:(NSIndexPath *)newIndexPath;进行交换,该接口在调用时,有默认动画,时间0.25s - 手势移动时:需要添加边缘检测功能,如果当前
snapView边缘靠近CollectionView的边缘一定距离时,需要开始滚动视图,与边缘交叉距离变化时,需要根据比例进行加速或减速。同时第4点中用的动画效果,也应该相应的改变速度 - 手势结束时:通过系统api交换Cell时有动画效果,而且它仅仅只是个动画效果,所以我们需要在手势结束时,对数据源进行更新,这就要求我们记录交互开始时
indexPath信息并确定当前结束时的位置信息。同时,需要将snapView移除,将activeCell的显示并取消选中状态
为了帮助实现边缘检测功能,笔者绘制了下图,标注UICollectionView整体布局相关的几个重要参数,复习一下UICollectionView的ContentSize/frame.size/bounds.size/edgeInset之间的关系。因为我们需要借助这几个参数,确定拖拽方向及contentOffset变化范围

我们按照上文中准备好的的手势处理方法,逐步介绍
- handleEditingMoveWhenGestureBegan
- (void)handleEditingMoveWhenGestureBegan:(UILongPressGestureRecognizer *)recognizer{

    CGPoint pressPoint = [recognizer locationInView:self.collectionView];
    NSIndexPath *selectIndexPath = [self.collectionView indexPathForItemAtPoint:pressPoint];
    SPBaseCell *cell = (SPBaseCell *)[_collectionView cellForItemAtIndexPath:selectIndexPath];
    self.activeIndexPath = selectIndexPath;
    self.sourceIndexPath = selectIndexPath;
    self.activeCell = cell;
    cell.selected = YES;

    self.centerOffset = CGPointMake(pressPoint.x - cell.center.x, pressPoint.y - cell.center.y);

    self.snapViewForActiveCell = [cell snapshotViewAfterScreenUpdates:YES];
    self.snapViewForActiveCell.frame = cell.frame;
    cell.hidden = YES;
    [self.collectionView addSubview:self.snapViewForActiveCell];

}
- handleEditingMoveWhenGestureChanged
- (void)handleEditingMoveWhenGestureChanged:(UILongPressGestureRecognizer *)recognizer{

    CGPoint pressPoint = [recognizer locationInView:self.collectionView];

    _snapViewForActiveCell.center = CGPointMake(pressPoint.x - _centerOffset.x, pressPoint.y-_centerOffset.y);
    [self handleExchangeOperation];// 交换操作
    [self detectEdge];// 边缘检测

}
handleExchangeOperation:处理当前snapView与visibleCells的位置关系,如果交叉超过面积的1/4,则将隐藏的activeCell同当前cell进行交换,并更新当前活动位置
- (void)handleExchangeOperation{

    for (SPBaseCell *cell in self.collectionView.visibleCells)
    {
        NSIndexPath *currentIndexPath = [_collectionView indexPathForCell:cell];
        if ([_collectionView indexPathForCell:cell] == self.activeIndexPath) continue;

        CGFloat space_x = fabs(_snapViewForActiveCell.center.x - cell.center.x);
        CGFloat space_y = fabs(_snapViewForActiveCell.center.y - cell.center.y);
        // CGFloat space = sqrtf(powf(space_x, 2) + powf(space_y, 2));
        CGFloat size_x = cell.bounds.size.width;
        CGFloat size_y = cell.bounds.size.height;

        if (currentIndexPath.item > self.activeIndexPath.item)
        {
            [self.activeCells addObject:cell];
        }

        if (space_x <  size_x/2.0 && space_y < size_y/2.0)
        {
            [self handleCellExchangeWithSourceIndexPath:self.activeIndexPath destinationIndexPath:currentIndexPath];
            self.activeIndexPath = currentIndexPath;
        }
    }

}
handleCellExchangeWithSourceIndexPath: destinationIndexPath:对cell进行交换处理,对跨列或者跨行的交换,需要考虑cell的交换方向,我们定义moveForward变量,作为向上(-1)/下(1)移动、向左(-1)/右(1)移动的标记,moveDirection == -1时,cell反向动画,越靠前的cell越早移动,反之moveDirection == 1时,越靠后的cell越早移动。代码中出现的changeRatio,是我们在边缘检测中得到的比例值,用来加速动画
- (void)handleCellExchangeWithSourceIndexPath:(NSIndexPath *)sourceIndexPath destinationIndexPath:(NSIndexPath *)destinationIndexPath{

    NSInteger activeRange = destinationIndexPath.item - sourceIndexPath.item;
    BOOL moveForward = activeRange > 0;
    NSInteger originIndex = 0;
    NSInteger targetIndex = 0;

    for (NSInteger i = 1; i <= labs(activeRange); i ++) {

        NSInteger moveDirection = moveForward?1:-1;
        originIndex = sourceIndexPath.item + i*moveDirection;
        targetIndex = originIndex  - 1*moveDirection;

        if (!_isEqualOrGreaterThan9_0) {
            CGFloat time = 0.25 - 0.11*fabs(self.changeRatio);
            NSLog(@"time:%f",time);
            [UIView beginAnimations:nil context:nil];
            [UIView setAnimationDuration:time];
            [_collectionView moveItemAtIndexPath:[NSIndexPath indexPathForItem:originIndex inSection:sourceIndexPath.section] toIndexPath:[NSIndexPath indexPathForItem:targetIndex inSection:sourceIndexPath.section]];
            [UIView commitAnimations];

        }


    }

}
detectEdge:边缘检测。定义枚举类型SPDragDirection记录拖拽方向,我们设置边缘检测的范围是,当snapView的边距距离最近的CollectionView显示范围边距距离小于10时,启动CADisplayLink,按屏幕刷新率调整CollectionView的contentOffset,当手势离开这个范围时,需要将变化系数ChangeRatio清零并销毁CADisplayLink,减少不必要的性能开支。同时需要更新当前snapView的位置,因为这次位置的变化并不是LongPressGesture引起的,所以当手指不移动时,并不会触发手势的Changed状态,我们需要在修改contentOffset的位置根据视图滚动的方向去判断修改snapView.center。这里需要注意的一点细节,在下面的代码中,我们对baseOffset使用了向下取整的操作,因为浮点型数据精度的问题,很容易出现1.000001^365这种误差增大问题。笔者在实际操作时,出现了逐渐偏移现象,所以这里特别指出,希望各位同学以后处理类似问题时注意
typedef NS_ENUM(NSInteger,SPDragDirection) {
    SPDragDirectionRight,
    SPDragDirectionLeft,
    SPDragDirectionUp,
    SPDragDirectionDown
};
static CGFloat edgeRange = 10;
static CGFloat velocityRatio = 5;
- (void)detectEdge{

    CGFloat baseOffset = 2;

    CGPoint snapView_minPoint = self.snapViewForActiveCell.frame.origin;
    CGFloat snapView_max_x = CGRectGetMaxX(_snapViewForActiveCell.frame);
    CGFloat snapView_max_y = CGRectGetMaxY(_snapViewForActiveCell.frame);

    // left
    if (snapView_minPoint.x - self.collectionView.contentOffset.x < edgeRange &&
        self.collectionView.contentOffset.x > 0){

        CGFloat intersection_x = edgeRange - (snapView_minPoint.x - self.collectionView.contentOffset.x);
        intersection_x = intersection_x < 2*edgeRange?2*edgeRange:intersection_x;
        self.changeRatio = intersection_x/(2*edgeRange);
        baseOffset = baseOffset * -1 -  _changeRatio* baseOffset *velocityRatio;
        self.edgeIntersectionOffset = floorf(baseOffset);
        self.dragDirection = SPDragDirectionLeft;
        [self setupCADisplayLink];
        NSLog(@"Drag left - vertical offset:%f",self.edgeIntersectionOffset);
        NSLog(@"CollectionView offset_X:%f",self.collectionView.contentOffset.x);

    }

    // up
    else if (snapView_minPoint.y - self.collectionView.contentOffset.y < edgeRange &&
             self.collectionView.contentOffset.y > 0){

        CGFloat intersection_y = edgeRange - (snapView_minPoint.y - self.collectionView.contentOffset.y);
        intersection_y = intersection_y > 2*edgeRange?2*edgeRange:intersection_y;
        self.changeRatio = intersection_y/(2*edgeRange);
        baseOffset = baseOffset * -1 -  _changeRatio* baseOffset *velocityRatio;
        self.edgeIntersectionOffset = floorf(baseOffset);
        self.dragDirection = SPDragDirectionUp;
        [self setupCADisplayLink];
        NSLog(@"Drag up - vertical offset:%f",self.edgeIntersectionOffset);
        NSLog(@"CollectionView offset_Y:%f",self.collectionView.contentOffset.y);

    }

    // right
    else if (snapView_max_x + edgeRange > self.collectionView.contentOffset.x + self.collectionView.bounds.size.width && self.collectionView.contentOffset.x + self.collectionView.bounds.size.width < self.collectionView.contentSize.width){

        CGFloat intersection_x = edgeRange - (self.collectionView.contentOffset.x + self.collectionView.bounds.size.width - snapView_max_x);
        intersection_x = intersection_x > 2*edgeRange ? 2*edgeRange:intersection_x;
        self.changeRatio = intersection_x/(2*edgeRange);
        baseOffset = baseOffset + _changeRatio * baseOffset * velocityRatio;
        self.edgeIntersectionOffset = floorf(baseOffset);
        self.dragDirection = SPDragDirectionRight;
        [self setupCADisplayLink];
        NSLog(@"Drag right - vertical offset:%f",self.edgeIntersectionOffset);
        NSLog(@"CollectionView offset_X:%f",self.collectionView.contentOffset.x);

    }

    // down
    else if (snapView_max_y + edgeRange > self.collectionView.contentOffset.y + self.collectionView.bounds.size.height && self.collectionView.contentOffset.y + self.collectionView.bounds.size.height < self.collectionView.contentSize.height){

        CGFloat intersection_y = edgeRange - (self.collectionView.contentOffset.y + self.collectionView.bounds.size.height - snapView_max_y);
        intersection_y = intersection_y > 2*edgeRange ? 2*edgeRange:intersection_y;
        self.changeRatio = intersection_y/(2*edgeRange);
        baseOffset = baseOffset +  _changeRatio* baseOffset * velocityRatio;
        self.edgeIntersectionOffset = floorf(baseOffset);
        self.dragDirection = SPDragDirectionDown;
        [self setupCADisplayLink];
        NSLog(@"Drag down - vertical offset:%f",self.edgeIntersectionOffset);
        NSLog(@"CollectionView offset_Y:%f",self.collectionView.contentOffset.y);

    }

    // default
    else{

        self.changeRatio = 0;

        if (self.displayLink)
        {
            [self invalidateCADisplayLink];
        }
    }

}
CADisplayLink
- (void)setupCADisplayLink{

    if (self.displayLink) {
        return;
    }
    CADisplayLink *displayLink = [CADisplayLink displayLinkWithTarget:self selector:@selector(handleEdgeIntersection)];
    [displayLink addToRunLoop:[NSRunLoop mainRunLoop] forMode:NSRunLoopCommonModes];
    self.displayLink = displayLink;

}

- (void)invalidateCADisplayLink{

    [self.displayLink setPaused:YES];
    [self.displayLink invalidate];
    self.displayLink = nil;

}
更新contentOffset及snapView.center
- (void)handleEdgeIntersection{

    [self handleExchangeOperation];

    switch (_scrollDirection) {
        case SPEasyScrollDirectionHorizontal:
        {
            if (self.collectionView.contentOffset.x + self.inset.left < 0 &&
                self.dragDirection == SPDragDirectionLeft){
                return;
            }
            if (self.collectionView.contentOffset.x >
                self.collectionView.contentSize.width - (self.collectionView.bounds.size.width - self.inset.left) &&
                self.dragDirection == SPDragDirectionRight){
                    return;
            }

            [self.collectionView setContentOffset:CGPointMake(_collectionView.contentOffset.x + self.edgeIntersectionOffset, _collectionView.contentOffset.y) animated:NO];
            self.snapViewForActiveCell.center = CGPointMake(_snapViewForActiveCell.center.x + self.edgeIntersectionOffset, _snapViewForActiveCell.center.y);
        }
            break;
        case SPEasyScrollDirectionVertical:
        {

            if (self.collectionView.contentOffset.y + self.inset.top< 0 &&
                self.dragDirection == SPDragDirectionUp) {
                return;
            }
            if (self.collectionView.contentOffset.y >
                self.collectionView.contentSize.height - (self.collectionView.bounds.size.height - self.inset.top) &&
                self.dragDirection == SPDragDirectionDown) {
                return;
            }

            [self.collectionView setContentOffset:CGPointMake(_collectionView.contentOffset.x, _collectionView.contentOffset.y +  self.edgeIntersectionOffset) animated:NO];
            self.snapViewForActiveCell.center = CGPointMake(_snapViewForActiveCell.center.x, _snapViewForActiveCell.center.y + self.edgeIntersectionOffset);
        }
            break;
    }

}
- handleEditingMoveWhenGestureEnded
手势结束时,我们应该使用动画,将snapView的Center调整到已经交换到位的activeCell位置上,动画结束时,移除截图并将activeCell显示出来,销毁计时器、重置参数
(呼终于大功告成了~ 还没有啊喂,同学,这里得敲黑板了哈~前面可是提到了要注意动画仅仅是动画,不更新数据源的)
- (void)handleEditingMoveWhenGestureEnded:(UILongPressGestureRecognizer *)recognizer{

        [self.snapViewForActiveCell removeFromSuperview];
        self.activeCell.selected = NO;
        self.activeCell.hidden = NO;

        [self handleDatasourceExchangeWithSourceIndexPath:self.sourceIndexPath destinationIndexPath:self.activeIndexPath];
        [self invalidateCADisplayLink];
        self.edgeIntersectionOffset = 0;
        self.changeRatio = 0;

}
因为数据源并不需要实时更新,所以我们只需要最初位置以及最后的位置即可,交换方法复制了上面的exchangeCell方法,其实不用moveForward参数了,全都是因为懒......
- (void)handleDatasourceExchangeWithSourceIndexPath:(NSIndexPath *)sourceIndexPath destinationIndexPath:(NSIndexPath *)destinationIndexPath{

    NSMutableArray *tempArr = [self.datas mutableCopy];

    NSInteger activeRange = destinationIndexPath.item - sourceIndexPath.item;
    BOOL moveForward = activeRange > 0;
    NSInteger originIndex = 0;
    NSInteger targetIndex = 0;

    for (NSInteger i = 1; i <= labs(activeRange); i ++) {

        NSInteger moveDirection = moveForward?1:-1;
        originIndex = sourceIndexPath.item + i*moveDirection;
        targetIndex = originIndex  - 1*moveDirection;

        [tempArr exchangeObjectAtIndex:originIndex withObjectAtIndex:targetIndex];

    }
    self.datas = [tempArr copy];
    NSLog(@"##### %@ #####",self.datas);
}
- handleEditingMoveWhenGestureCanceledOrFailed
失败或者取消手势时,我们直接让snapView回去就好了嘛~必要步骤,销毁定时器,重置参数
- (void)handleEditingMoveWhenGestureCanceledOrFailed:(UILongPressGestureRecognizer *)recognizer{

     [UIView animateWithDuration:0.25f animations:^{
            self.snapViewForActiveCell.center = self.activeCell.center;
        } completion:^(BOOL finished) {
            [self.snapViewForActiveCell removeFromSuperview];
            self.activeCell.selected = NO;
            self.activeCell.hidden = NO;
        }];

        [self invalidateCADisplayLink];
        self.edgeIntersectionOffset = 0;
        self.changeRatio = 0;

}
至此,我们实现了单Section拖拽重排的UICollectionView,看一下效果,是不是感觉还蛮好

iOS9.x+拖拽重排处理
Father Apple在iOS9以后,为我们处理了上文中提到的手势处理、边缘检测等复杂计算,我们只需要在合适的位置,告诉系统位置信息即可。当然,这里苹果替我们做的动画,依然仅仅是动画。

上报位置 处理步骤如下:
- handleEditingMoveWhenGestureBegan:
这里是上报的当前Cell的IndexPath,而且苹果并没有设置类似上文中我们设置的centerOffset,它是将当前触摸点,直接设置成选中cell的中心点。
[self.collectionView beginInteractiveMovementForItemAtIndexPath:selectIndexPath];
- handleEditingMoveWhenGestureChanged:
这里上报的是当前触摸点的位置
[self.collectionView updateInteractiveMovementTargetPosition:pressPoint];
- handleEditingMoveWhenGestureEnded:
简单粗暴,上报结束
[self.collectionView endInteractiveMovement];
- handleEditingMoveWhenGestureCanceledOrFailed:
简单粗暴,上报取消,这里我们需要将选中状态清除
self.activeCell.selected = NO;
[self.collectionView cancelInteractiveMovement];
- 系统新的数据源方法:
处理结束回调,根据交换信息,更新数据源供回调完成后系统自动调用reloadData方法使用
- (void)collectionView:(UICollectionView *)collectionView moveItemAtIndexPath:(NSIndexPath *)sourceIndexPath toIndexPath:(NSIndexPath *)destinationIndexPath{

    BOOL canChange = self.datas.count > sourceIndexPath.item && self.datas.count > destinationIndexPath.item;
    if (canChange) {
        [self handleDatasourceExchangeWithSourceIndexPath:sourceIndexPath destinationIndexPath:destinationIndexPath];
    }

}
上述手势处理,可以直接合并到上文中的各手势阶段的处理中,只需要对系统版本号做判断后分情况处理即可
看一下系统的效果:

UICollectionView实现简单轮播
图片轮播器,几乎是现在所有App的必要组成部分了。实现轮播器的方式多种多样,这里笔者简单介绍一下,如何通过UICollectionView实现,对更好的理解UICollectionView及轮播器也许会有帮助( 毕竟封装进去了嘛( ͡° ͜ʖ ͡° )

思路分析:
- 先确定是否需要轮播,决定开启定时器
Timer,使用scrollToItemAtIndexPath执行定时滚动 - 赋值数据源后,如果需要轮播,创建
UIPageControl,并设置collection的cell数为_totalItemCount = _needAutoScroll?datas.count * 500:datas.count; - 考虑一下几种特殊情况的处理
- 当滚动到总数最后一张时,应该返回第0张,此时动画效果设置为NO
- 当我们手动滑动拖拽CollectionView时,需要停止定时器,停止拖拽时,再次开启定时器
- 通过
contentOffset及itemSize判断当前位置,并结合数据源data.count计算取值位置为cell及pageControl当前位置赋值
几处关键代码:
- 滚动及位置处理
#pragma mark - cycle scroll actions
- (void)autoScroll{

    if (!_totalItemCount) return;
    NSInteger currentIndex = [self currentIndex];
    NSInteger nextIndex = [self nextIndexWithCurrentIndex:currentIndex];
    [self scroll2Index:nextIndex];

}

- (void)scroll2Index:(NSInteger)index{

    [_collectionView scrollToItemAtIndexPath:[NSIndexPath indexPathForItem:index inSection:0] atScrollPosition:UICollectionViewScrollPositionNone animated:index?YES:NO];

}

- (NSInteger)nextIndexWithCurrentIndex:(NSInteger)index{

    if (index == _totalItemCount - 1) {
        return 0;
    }else{
        return index + 1;
    }

}

- (NSInteger)currentIndex{

    if (_collectionView.frame.size.width == 0 || _collectionView.frame.size.height == 0) {
        return 0;
    }

    int index = 0;
    if (_layout.scrollDirection == UICollectionViewScrollDirectionHorizontal) {
        index = (_collectionView.contentOffset.x + _layout.itemSize.width * 0.5) / _layout.itemSize.width;
    } else {
        index = (_collectionView.contentOffset.y + _layout.itemSize.height * 0.5) / _layout.itemSize.height;
    }

    return MAX(0, index);
}
-
数据源处理
-
数据
- (void)setDatas:(NSArray *)datas{
    _datas = datas;

    _totalItemCount = _needAutoScroll?datas.count * 500:datas.count;
    if (_needAutoScroll) {
        [self setupPageControl];
    }
    [self.collectionView reloadData];
}
- 数据源
- (NSInteger)numberOfSectionsInCollectionView:(UICollectionView *)collectionView{
    return 1;
}

- (NSInteger)collectionView:(UICollectionView *)collectionView numberOfItemsInSection:(NSInteger)section{
    return _totalItemCount;
}

- (UICollectionViewCell *)collectionView:(UICollectionView *)collectionView cellForItemAtIndexPath:(NSIndexPath *)indexPath{

    SPBaseCell *cell = [collectionView dequeueReusableCellWithReuseIdentifier:ReuseIdentifier forIndexPath:indexPath];
    cell.data = self.datas[_needAutoScroll?[self getRealShownIndex:indexPath.item]:indexPath.item];

    return cell;

}

- (NSInteger)getRealShownIndex:(NSInteger)index{

    return index%_datas.count;

}
代理方法,处理交互中NSTimer创建/销毁及PageControl.currentPage数据更新
- (void)scrollViewDidScroll:(UIScrollView *)scrollView{

    if (!self.datas.count) return;
     _pageControl.currentPage = [self getRealShownIndex:[self currentIndex]];

}

- (void)scrollViewWillBeginDragging:(UIScrollView *)scrollView{
    if (_needAutoScroll) [self invalidateTimer];
}

-(void)scrollViewDidEndDragging:(UIScrollView *)scrollView willDecelerate:(BOOL)decelerate{
    if (_needAutoScroll) [self setupTimer];
}

- (void)willMoveToSuperview:(UIView *)newSuperview{
    if (!newSuperview) {
        [self invalidateTimer];
    }
}
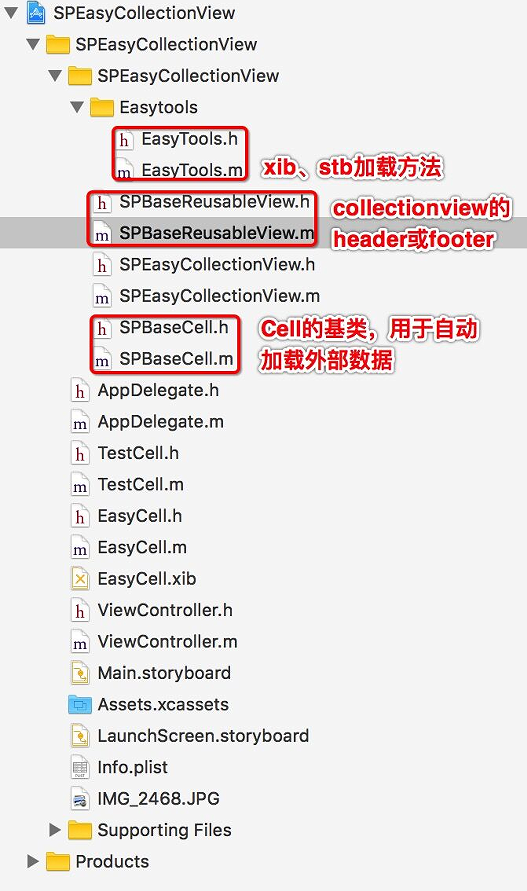
项目结构
总结
UICollectionView作为最最最重要的视图组件之一,我们不仅需要熟练掌握,同时它dataSource/delegate+layout,分离布局的编程思想,也很值得我们去思考学习。
笔者博客地址:iOS-UICollectionView快速构造/拖拽重排/轮播实现介绍
[]( ̄▽ ̄)*iOS-UICollectionView快速构造/拖拽重排/轮播实现
注:本文著作权归作者,由demo大师代发,拒绝转载,转载需要作者授权