概述:
本demo是ros下基于百度语音的,语音识别和语音合成,能够实现文字转语音,语音转文字的功能。
详细:
1. 安装库与环境
首先确保已经安装了以下两个库文件。
1.1 Python 音频处理库 PyAudio
python -m pip install pyaudio
1.2 Python 音频处理库 vlc
pip install python-vlc
1.3 ROS
确保安装了ROS
http://wiki.ros.org/indigo
2. 实时语音识别与语音合成
2.1 运行
Speech Recognition(语音识别):
roslaunch simple_voice simple_voice.launch
Text To Speech(语音合成):
roslaunch simple_voice simple_speaker.launch
2.2 概述
在运行前先确保安装了python的pyaudio 以及 vlc 库文件.
百度语音识别为开发者提供业界优质且免费的语音服务,通过场景识别优化,,准确率达到90%以上,让您的应用绘“声”绘色。
本文中的语音识别功能:采用百度语音识别库,实现语音转化为文字的功能,并且输出为ros话题。
本文中的语音合成功能:采用百度语音识别库,实现将文字转化为语音并且存储为mp3/wav文件。
2.3 Node
包中一共有3个节点:
- node_main.py
- simple_speek.py
- voice_node.py.
node_main.py 是TTS(Text To Speech)的demo节点, 该demo是和laser scanner一起运行的,当laser检测到一个障碍物,node_main将会触发simple_speek.py让机器说出英语或者汉语 'excuse me', 'make a way for me pls'或者'请让一下',等话语。
simple_speek.py 将会订阅 std_msgs/String 消息类型的话题,并且将该话题中输入的文字转化为语音
voice_node.py 将会识别您在5秒内说出的话语并且输出到终端上。
2.4 订阅的 Topic
TTS(Text To Speech - simple_speek.py):
/speak_string(std_msgs/String)
语音合成节点中机器将会说出的文字。
Demo(node_main.py):
/SpeakerSubTopic (std_msgs/String )
这个是也是一个语音合成的demo节点,是用来触发Text To Speech - simple_speek.py节点的,您可以随意更改SpeakerSubTopic中的文本。
当您给该节点发布stop将会立刻出发Text To Speech - simple_speek.py节点开始说话了。
2.5 发布的 Topic
Demo (node_main.py):
/speak_string(std_msgs/String )
该话题将会定义机器的语音合成(TTS)说什么。
Speech Recognition(voice_node.py):
/Rog_result(std_msgs/String )
这个是语音识别程序,功能是将语音转化为文字。
触发是在终点中输入ENTER。
3. 实现过程的部分代码展示
simple_speek.py中播放合成语音部分:
def play_video(self,file_):
#print '
start speaking ', "file://%s"%file_
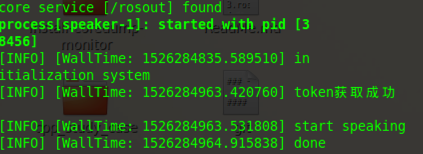
rospy.loginfo('start speaking ')
player = vlc.MediaPlayer("file://%s"%file_)
player.play()
rospy.sleep(1)
while player.is_playing():
pass
#self.pub.publish('PENDING')
rospy.loginfo('done
')
simple_speek.py中订阅消息部分:
class speeker():
	def __init__(self):
		self.define()
		rospy.Subscriber('speak_string', String, self.SpeedCB, queue_size=1)
		rospy.Timer(rospy.Duration(self.ResponseSensitivity), self.TimerCB)
		rospy.spin()
simple_speek.py中语音合成部分:
def SpeedCB(self, data):
	with self.locker:
		speak_string = data.data
		if self.TalkNow:
			self.WavName = speak_string
			self.TalkNow = False
			self.mp3file = '%s'%self.path + self.WavName + '.%s'%self.FORMAT
			if os.path.exists(r'%s'%self.mp3file):
				self.play_video(self.mp3file)
			else:
				self.speek(speak_string)
voice_node.py 触发部分
def __init__(self):
if_continue=''
while not rospy.is_shutdown() and if_continue == '':
	 self.define()
	self.recode()
	words = self.reg()
	reg = rospy.Publisher('Rog_result', String, queue_size=1)
	 reg.publish(words)
	#self.savewav("testing")#testing
	if_continue = raw_input('pls input ENTER to continue')
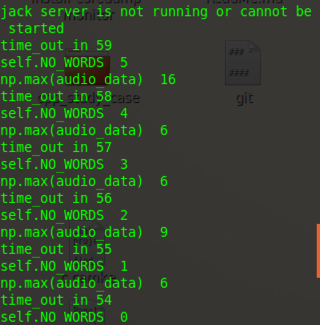
voice_node.py 语音识别部分
while True and NO_WORDS:
	time_out -= 1
	print 'time_out in', time_out # 读入NUM_SAMPLES个取样
	string_audio_data = stream.read(self.NUM_SAMPLES) # 将读入的数据转换为数组
	audio_data = np.fromstring(string_audio_data, dtype=np.short)

	# 查看是否没有语音输入
	NO_WORDS -= 1
	if np.max(audio_data) > self.UPPER_LEVEL:
		NO_WORDS=self.NO_WORDS
	print 'self.NO_WORDS ', NO_WORDS
	print 'np.max(audio_data) ', np.max(audio_data)

	# 计算大于LOWER_LEVEL的取样的个数
	large_sample_count = np.sum( audio_data > self.LOWER_LEVEL )

	# 如果个数大于COUNT_NUM,则至少保存SAVE_LENGTH个块
	if large_sample_count > self.COUNT_NUM:
		save_count = self.SAVE_LENGTH
	else:
		save_count -= 1

	# 将要保存的数据存放到save_buffer中
	if save_count < 0:
		save_count = 0
	elif save_count > 0 :
		save_buffer.append( string_audio_data )
	else:
		pass

	# 将save_buffer中的数据写入WAV文件,WAV文件的文件名是保存的时刻
	if len(save_buffer) > 0 and NO_WORDS==0:
		self.Voice_String = save_buffer
		save_buffer = []
		rospy.loginfo( "Recode a piece of voice successfully!")
	elif len(save_buffer) > 0 and time_out==0:
		self.Voice_String = save_buffer
		save_buffer = []
		rospy.loginfo( "Recode a piece of voice successfully!")
	else:
		pass
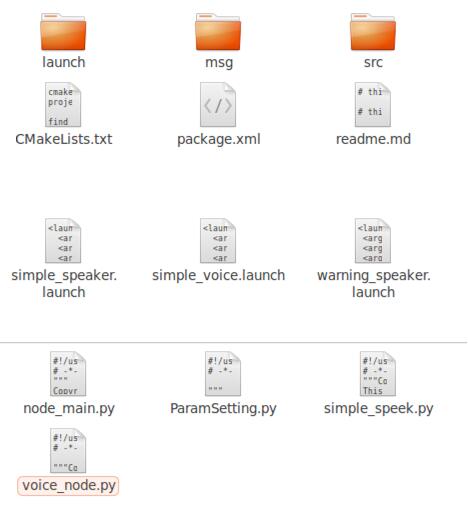
4. 项目文件结构
 ros下基于百度语音的,语音识别和语音合成
注:本文著作权归作者,由demo大师代发,拒绝转载,转载需要作者授权