版本
IDEA 2018.5
Gradle 5.6.3
Spring 5.1.xxx
步骤参考:
https://www.yuque.com/docs/share/a0ebb22b-1dbc-4ad1-b1f7-7999419d27a3?#
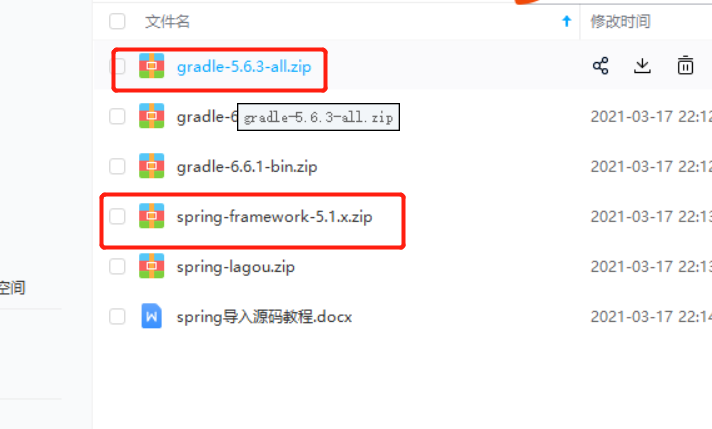
1、下载gradle,Spring 源码
链接:https://pan.baidu.com/s/1hIHb8Y_Ixlr_vqF7LF1J0Q
提取码:gyfi
2、解压配置环境变量
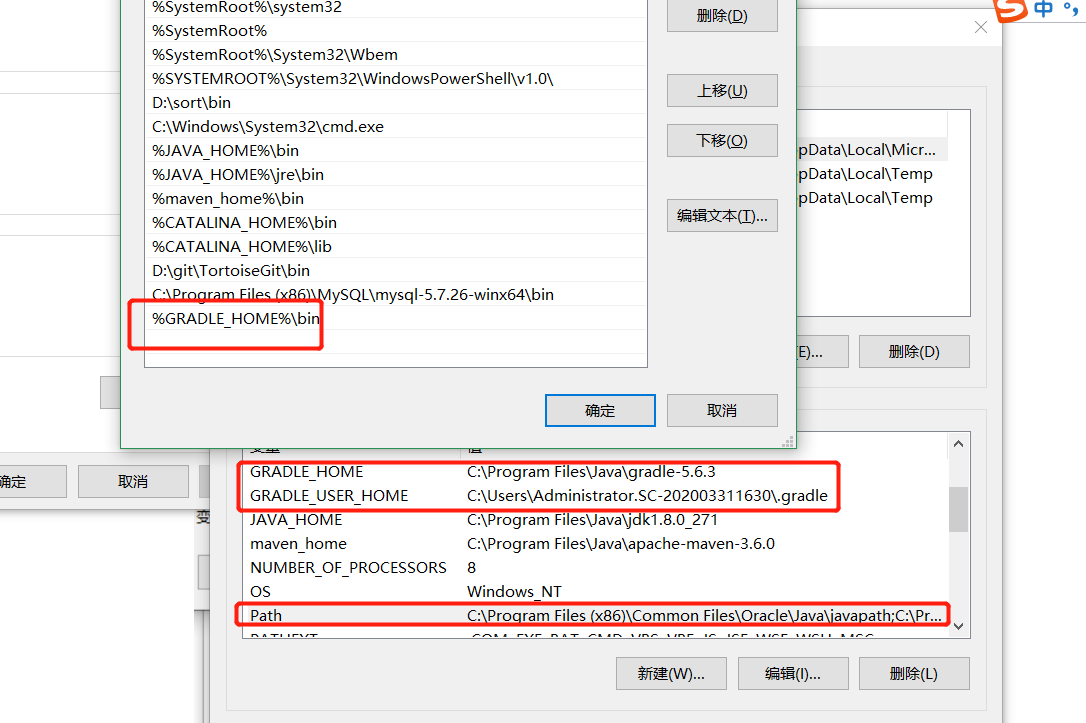
3、配置gradle全局国内仓库
(跟第五条有关联可先不配置)
找到本地gradle仓库地址,一般为 .gradle文件夹。然后在里面添加init.gradle文件,文件内容如下
allprojects{
    repositories {
        def ALIYUN_REPOSITORY_URL = 'http://maven.aliyun.com/nexus/content/groups/public'
        def ALIYUN_JCENTER_URL = 'http://maven.aliyun.com/nexus/content/repositories/jcenter'
        all { ArtifactRepository repo ->
            if(repo instanceof MavenArtifactRepository){
                def url = repo.url.toString()
                if (url.startsWith('https://repo1.maven.org/maven2')) {
                    project.logger.lifecycle "Repository ${repo.url} replaced by $ALIYUN_REPOSITORY_URL."
                    remove repo
                }
                if (url.startsWith('https://jcenter.bintray.com/')) {
                    project.logger.lifecycle "Repository ${repo.url} replaced by $ALIYUN_JCENTER_URL."
                    remove repo
                }
            }
        }
        maven {
                url ALIYUN_REPOSITORY_URL
            url ALIYUN_JCENTER_URL
        }
    }
}

4、导入项目
没有导入import project,
方法1、File >> close project

方法2、Settings > Appearance & Bechavior > Menus and Toolbars.
打开Main menu > File > 选中File 下边任意一个, 点击 右侧按钮 Add After
这里会弹出一个界面让你选择添加的功能
Import Project 选项在Other目录下, 找到import Project ,点击OK保存设置即可
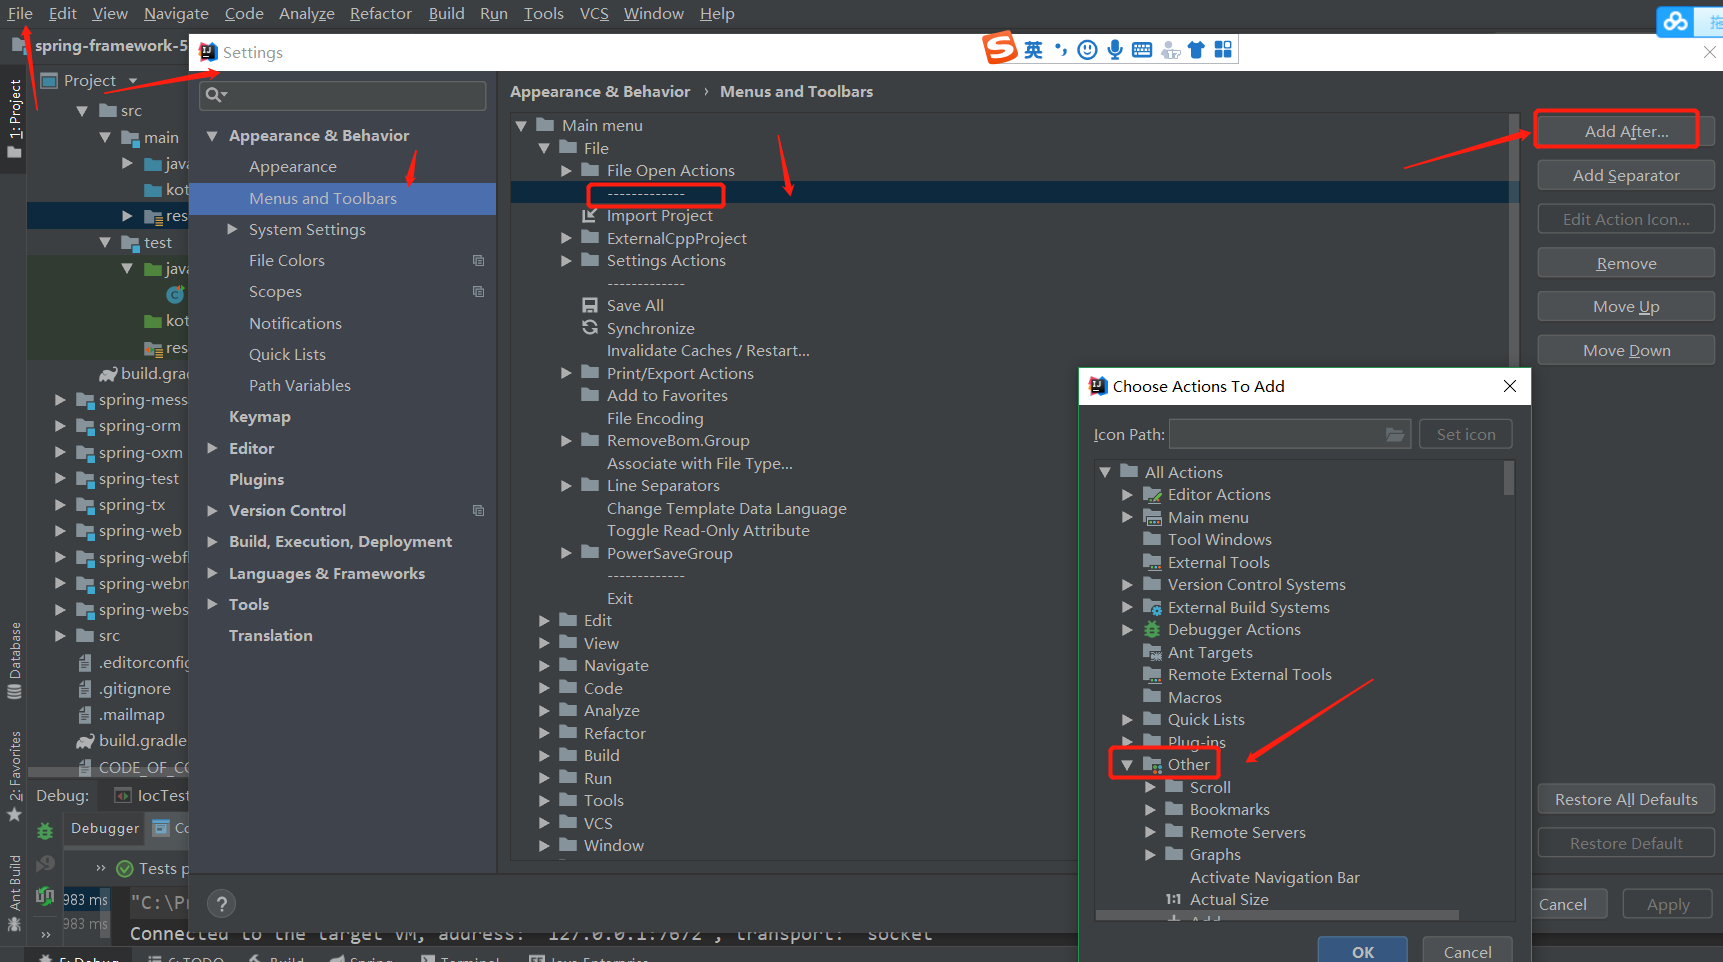
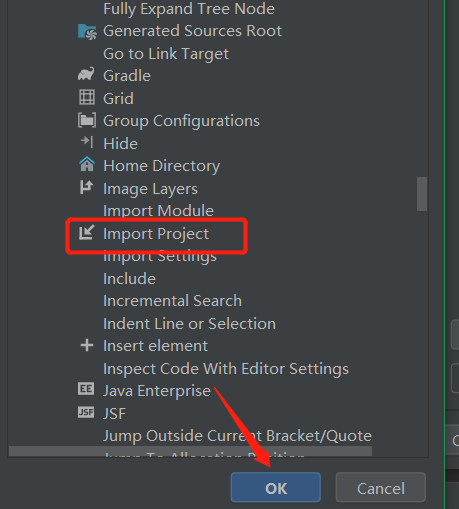
开始导入
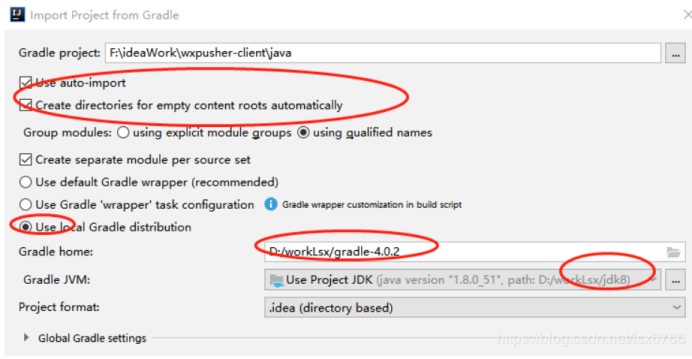
5、修改spring源码部分中的gradle配置
首先找到源码中 spring-framework-5.1.xspring-framework-5.1.xgradlewrapper 文件夹,修改gradle-wrapper.properties中的属性 该处主要是为了防止再次下载其他的版本gradle
distributionBase=GRADLE_USER_HOME
distributionPath=wrapper/dists
distributionUrl=file:///C:Program Files/Java/gradle-5.6.3-all.zip
zipStoreBase=GRADLE_USER_HOME
zipStorePath=wrapper/dists

 repositories {
         maven { url "https://maven.aliyun.com/repository/spring-plugin" }
         maven{ url "https://maven.aliyun.com/nexus/content/repositories/spring-plugin"}
         maven { url "https://repo.spring.io/plugins-release" }
        maven { url "https://repo.spring.io/plugins-release" }
    }
 repositories {
    maven { url "https://maven.aliyun.com/repository/central" }
        maven { url "https://repo.spring.io/libs-release" }
        mavenLocal()
    }
6、编译顺序为:core-oxm-context-beans-aspects-aop
⼯程—>tasks—>compileTestJava
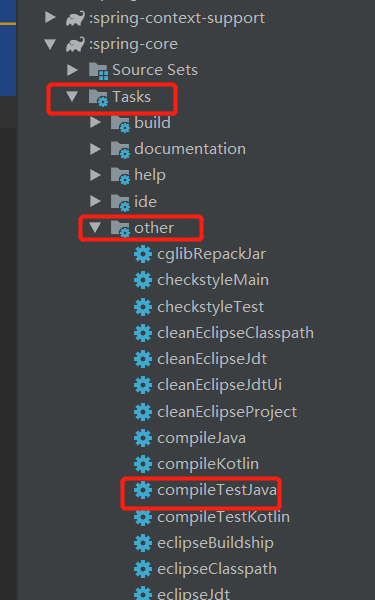
7、测试
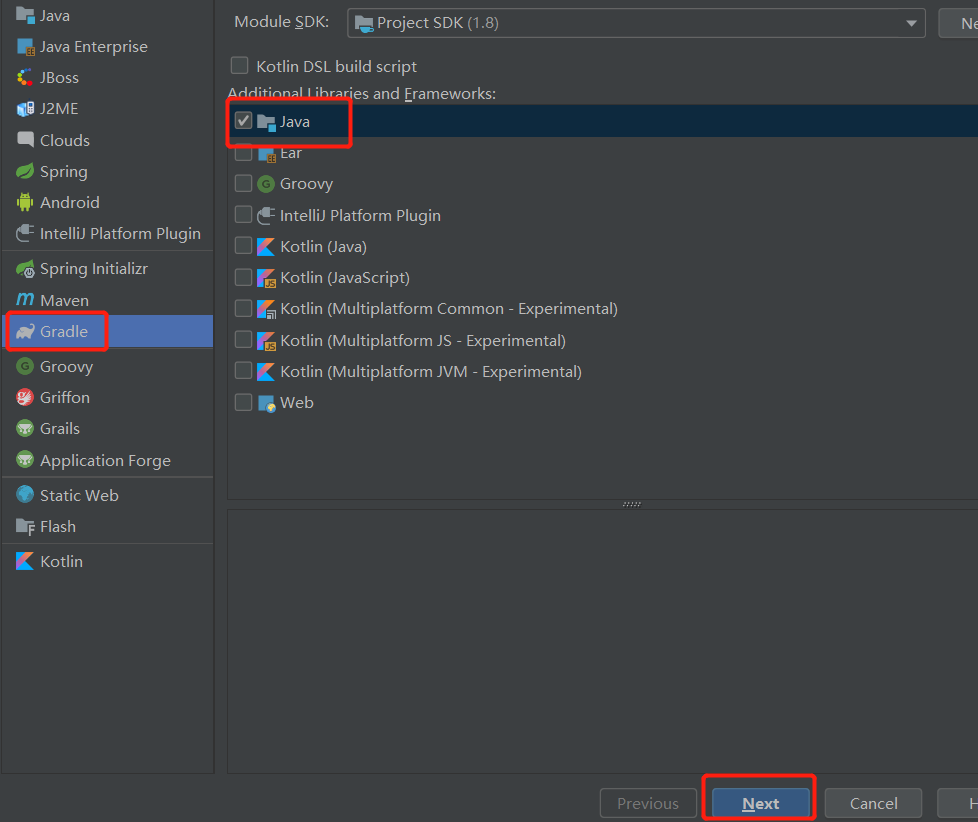
新建model


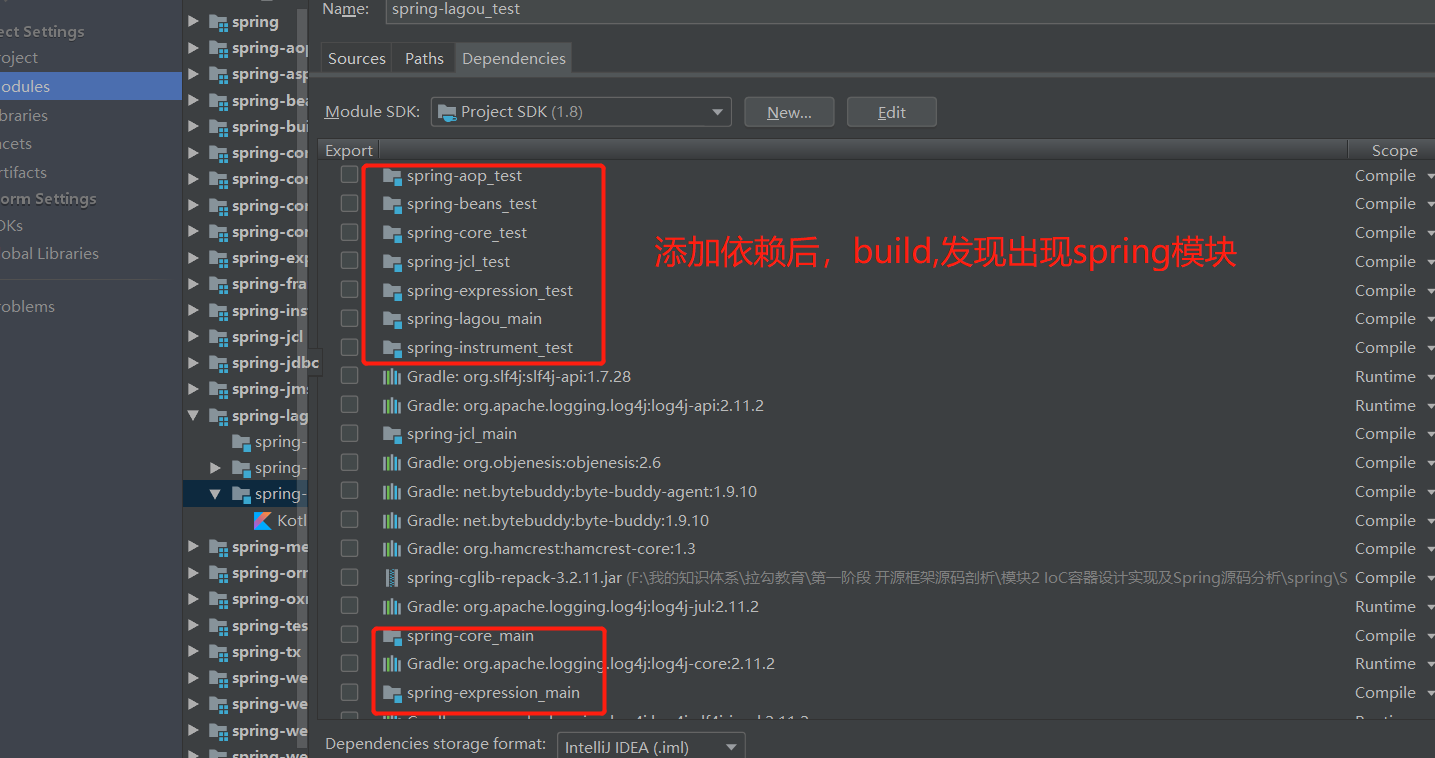
添加依赖(修改红色区域)指定jdk版本号,依赖 spring-context
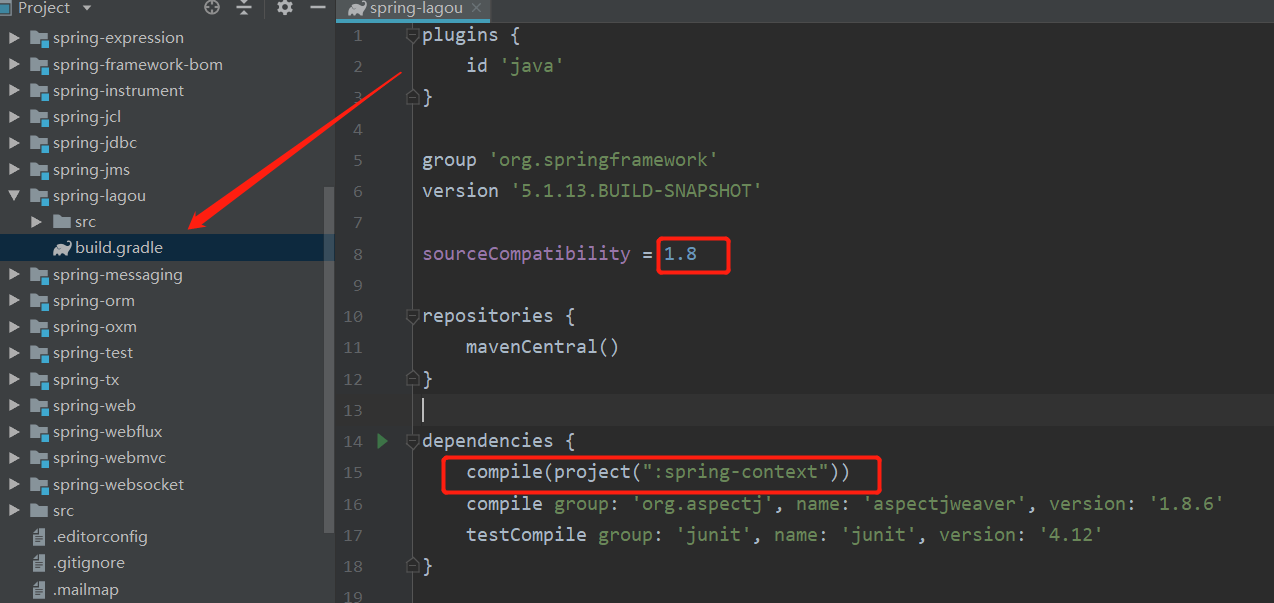

编写测试
public class IocTest {
    @Test
    public void testIoC() {
        ApplicationContext classPathXmlApplicationContext = new ClassPathXmlApplicationContext("classpath:applicationContext.xml");
        LagouBean lagouBean = classPathXmlApplicationContext.getBean(LagouBean.class);
        System.out.println(lagouBean);
    }
}
applicationContext.xml
<?xml version="1.0" encoding="UTF-8"?>
<beans xmlns="http://www.springframework.org/schema/beans"
       xmlns:aop="http://www.springframework.org/schema/aop"
       xmlns:xsi="http://www.w3.org/2001/XMLSchema-instance"
       xsi:schemaLocation="
        http://www.springframework.org/schema/beans
        https://www.springframework.org/schema/beans/spring-beans.xsd
        http://www.springframework.org/schema/aop
        https://www.springframework.org/schema/aop/spring-aop.xsd
">

    <!--循环依赖问题-->
    <bean id="lagouBean" class="com.lagou.edu.LagouBean">
        <property name="ItBean" ref="itBean"/>
    </bean>
    <bean id="itBean" class="com.lagou.edu.ItBean">
        <property name="LagouBean" ref="lagouBean"/>
    </bean>


    <!--<bean id="myBeanFactoryPostProcessor" class="com.lagou.edu.MyBeanFactoryPostProcessor"/>
    <bean id="myBeanPostProcessor" class="com.lagou.edu.MyBeanPostProcessor"/>-->


    <!--<bean id="lagouBean" class="com.lagou.edu.LagouBean">
    </bean>-->


    <!--aop配置-->
    <!--横切逻辑-->
    <!--<bean id="logUtils" class="com.lagou.edu.LogUtils">
    </bean>

    <aop:config>
        <aop:aspect ref="logUtils">
            <aop:before method="beforeMethod" pointcut="execution(public void com.lagou.edu.LagouBean.print())"/>
        </aop:aspect>
    </aop:config>-->


</beans>
创建 LagouBean
public class LagouBean implements InitializingBean, ApplicationContextAware {

    private ItBean itBean;

    public void setItBean(ItBean itBean) {
        this.itBean = itBean;
    }

    /**
     * 构造函数
     */
    public LagouBean(){
        System.out.println("LagouBean 构造器...");
    }


    /**
     * InitializingBean 接口实现
     */
    public void afterPropertiesSet() throws Exception {
        System.out.println("LagouBean afterPropertiesSet...");
    }

    public void print() {
        System.out.println("print方法业务逻辑执行");
    }

    @Override
    public void setApplicationContext(ApplicationContext applicationContext) throws BeansException {
        System.out.println("setApplicationContext....");
    }
}
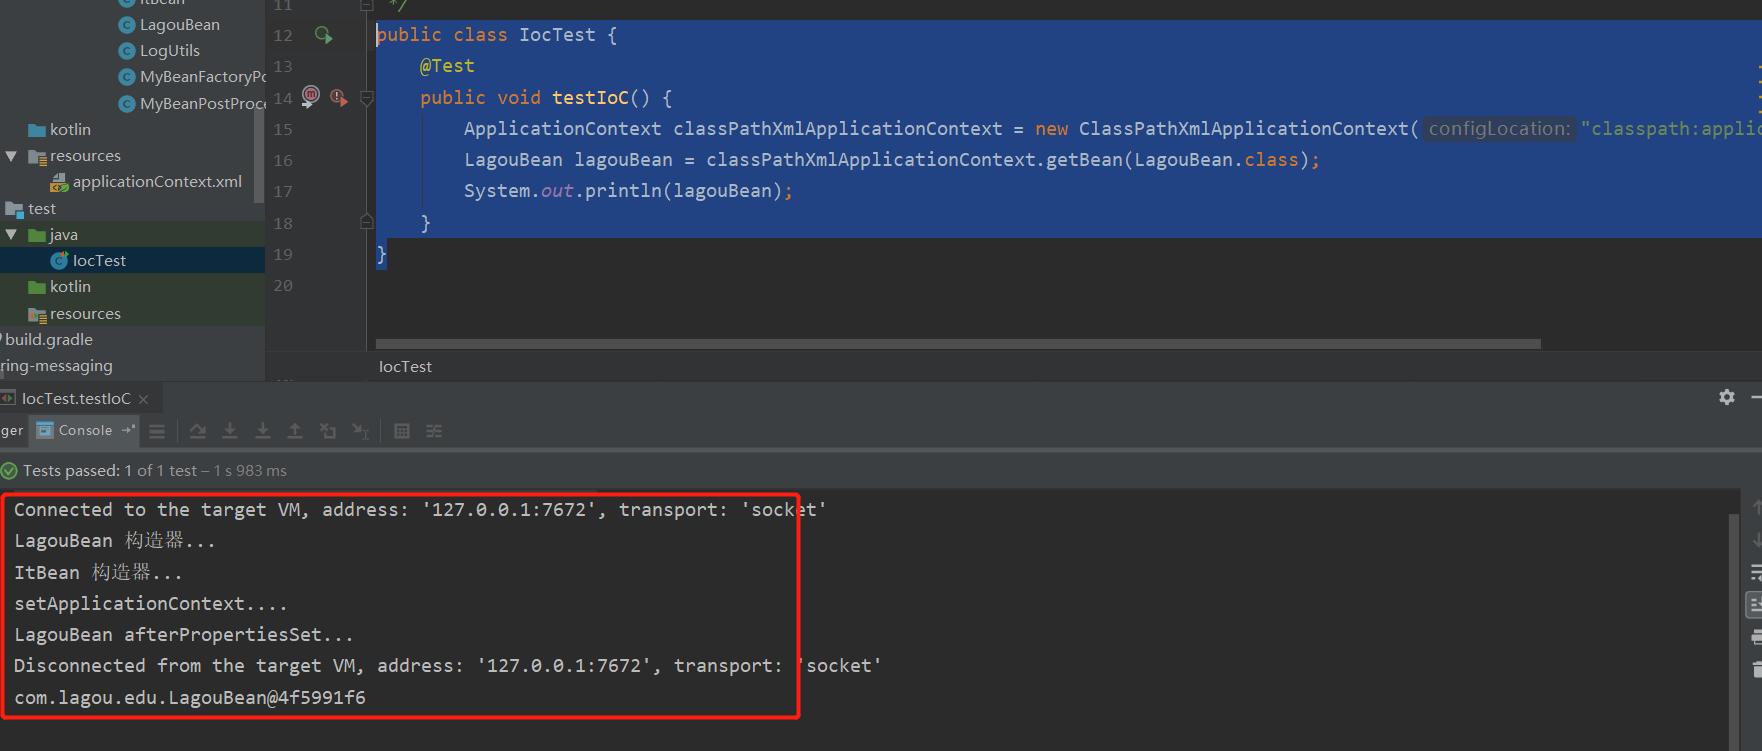
到这,说明 Spring源码构建成功