PyCharm配置Gitee
第一步:下载安装Git
https://git-scm.com/download/win
第二步:配置SSH公钥
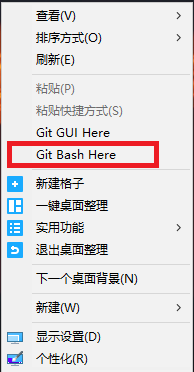
1、在你的项目代码文件夹,或者其他文件夹下,邮件打开git命令行
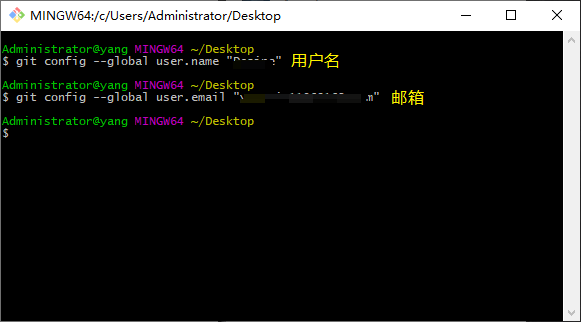
2、配置用户名,和邮箱
3、生成秘钥,一直Enter就可以

4、查看秘钥路径

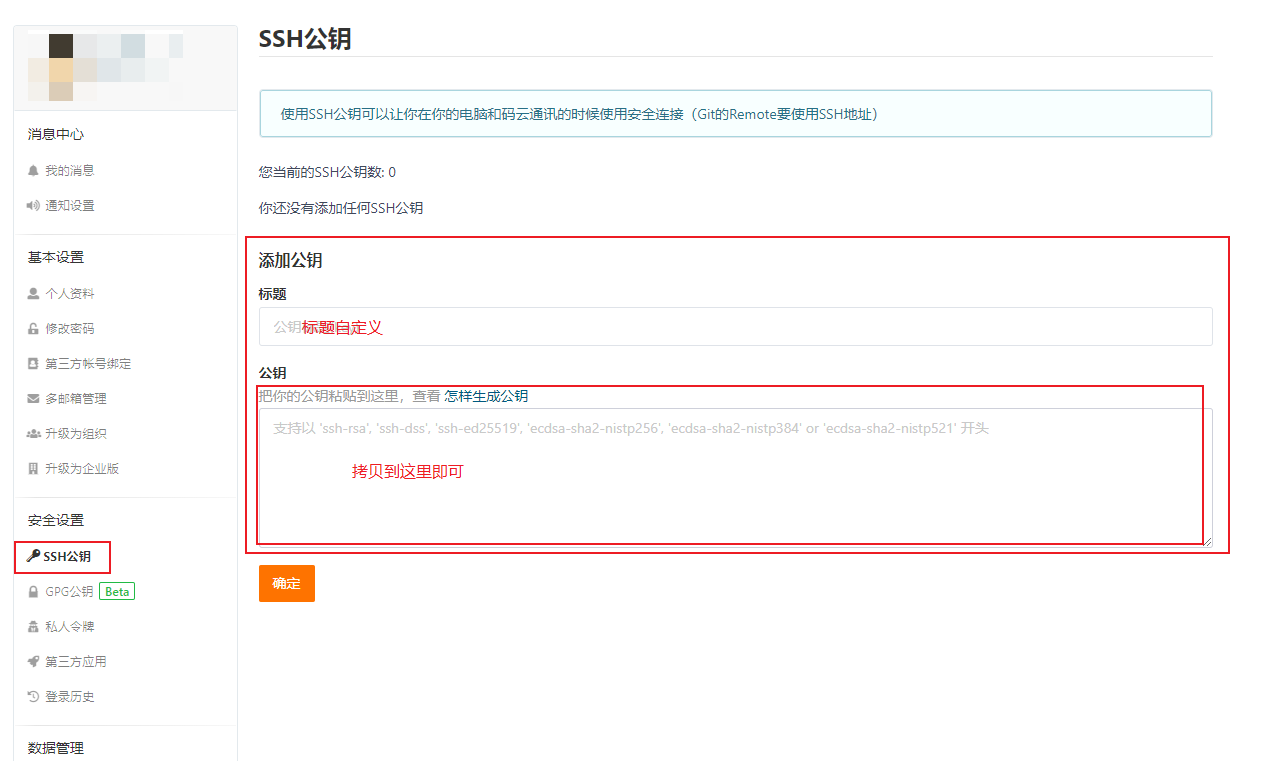
5、打开id_rsa.pub文件,复制里面的所有内容,放到网站里面就行可以:https://gitee.com/
第三步:打开PyCharm,配置Git
File->Setting->搜索Git
1、点击选择Git安装路径
2、选择bin目录下的git.exe
3、点击OK,git配置成功

第四步:下载安装gitee
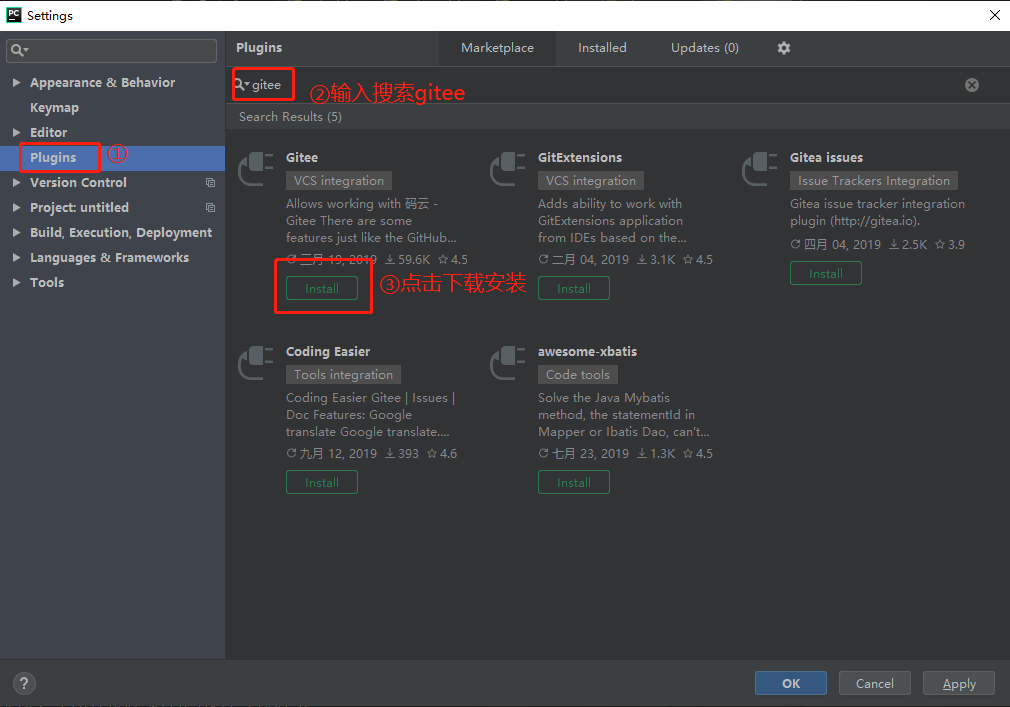
1、在Setting中选择Plugins
2、在Marketplace下搜索框中搜索gitee
3、点击Install进行下载安装
4、安装完后点击Restart IDE
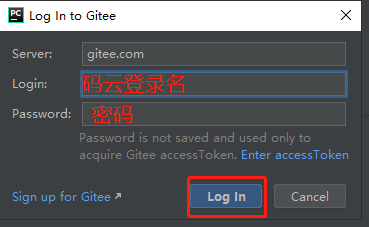
第五步:登陆码云
1、File->Setting->搜索gitee
2、点击Add account
3、输入账号密码进行登陆
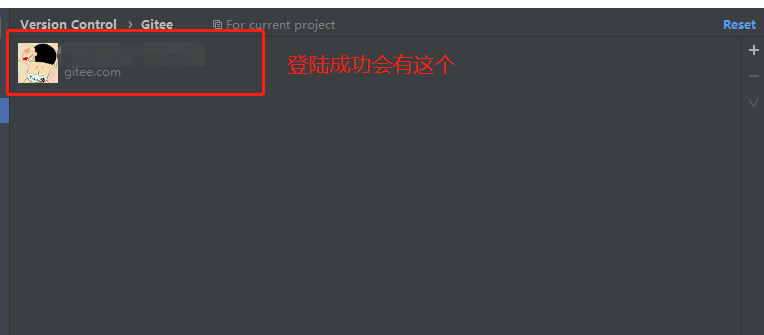
4、登陆成功后,会有登陆信息
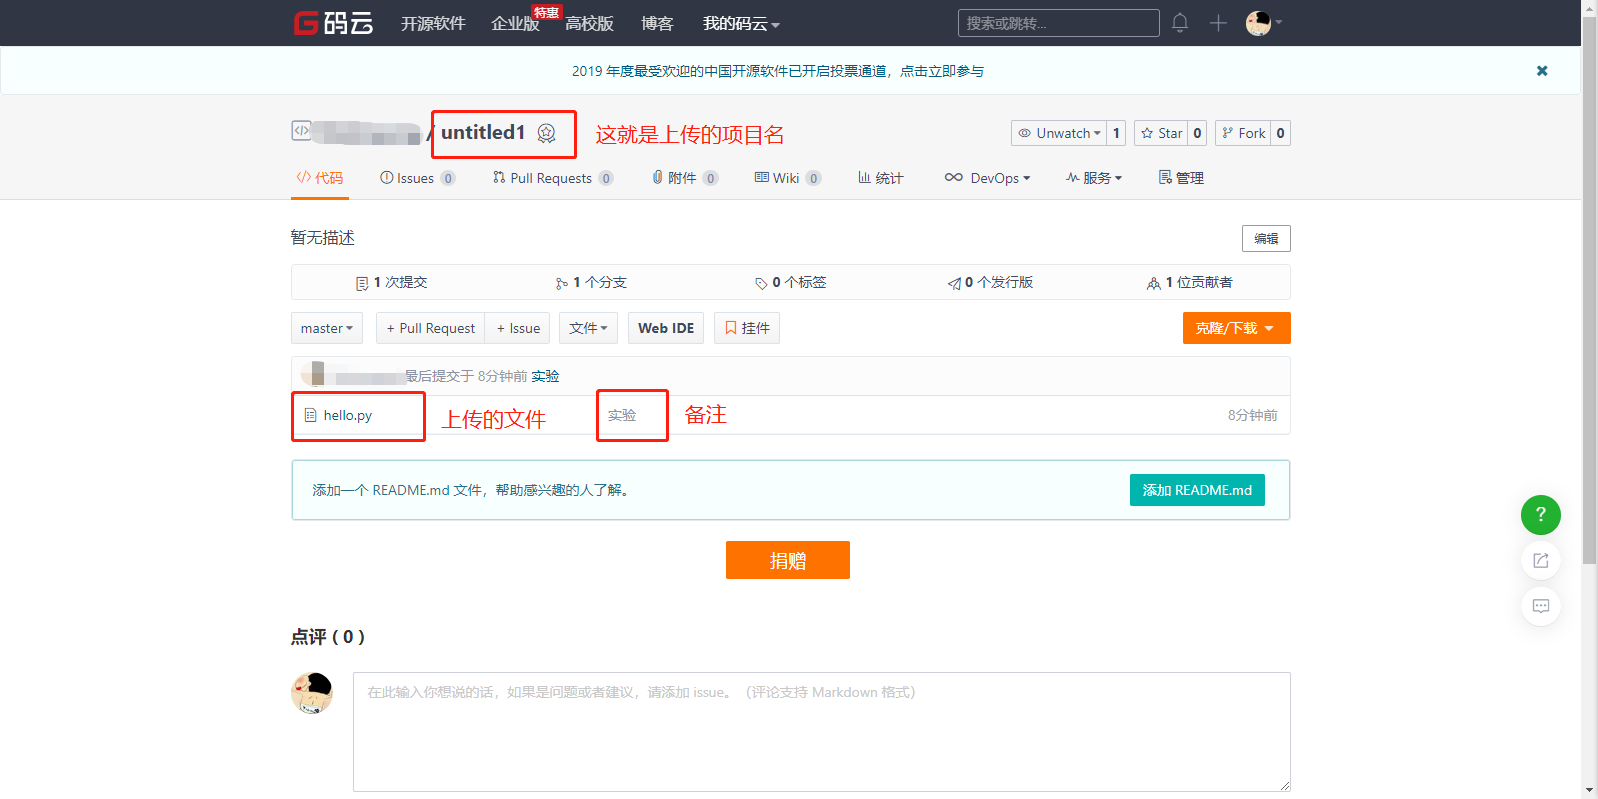
第六步:将本地新项目上传到Gitee上
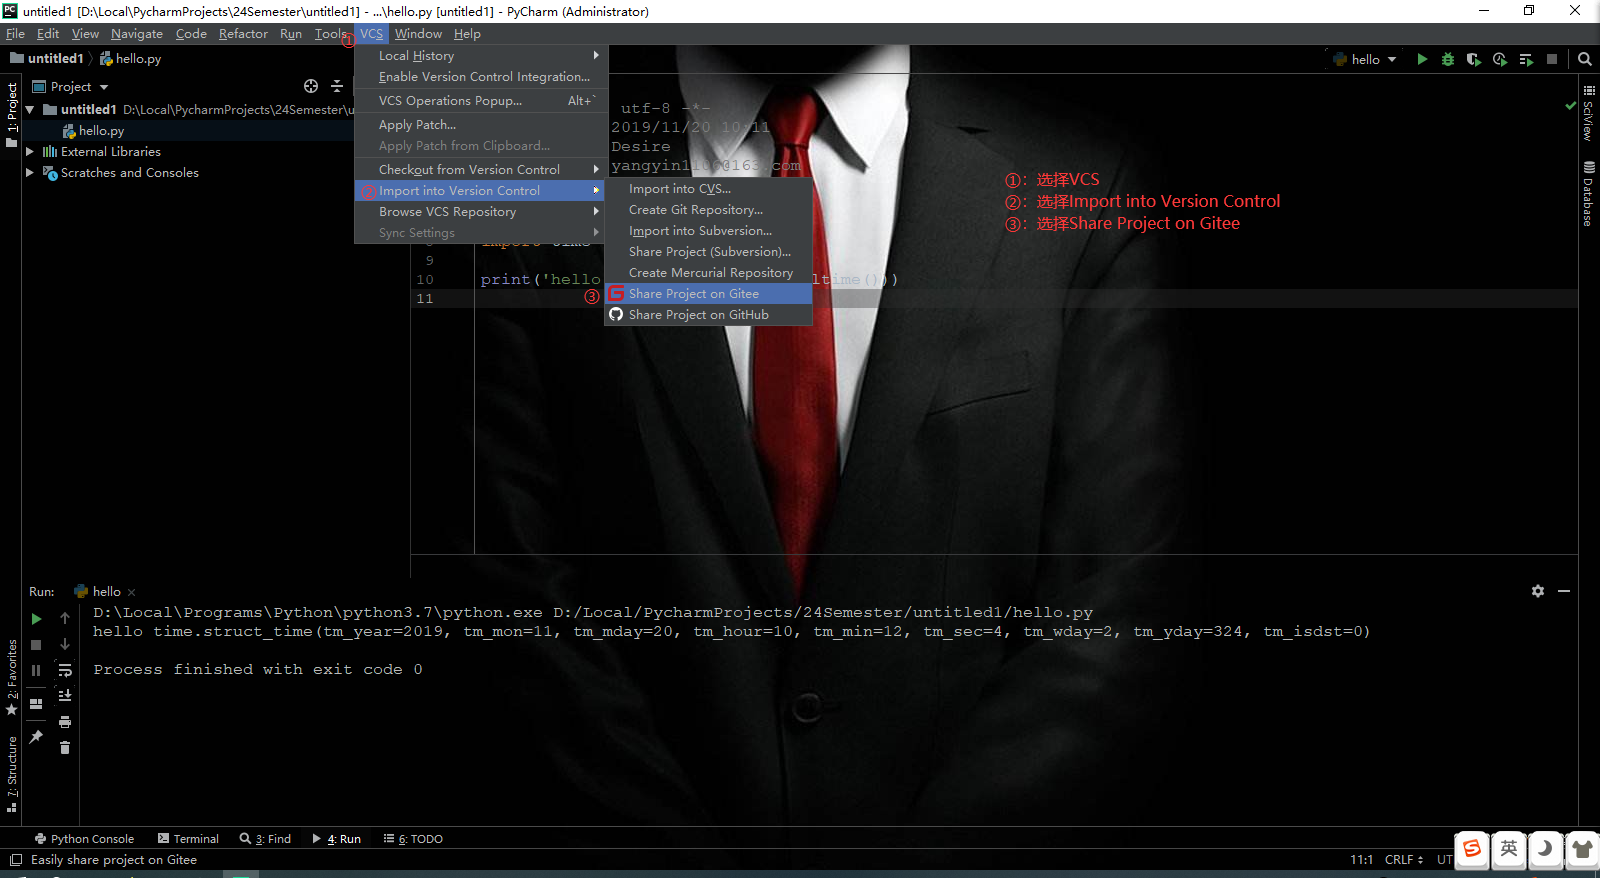
1、选择VCS
2、选择Import inti Version Cintrol
3、选择Share Project on Gitee
4、Repository name上传的项目名(也就是在Gitee上创建的库的名称)
5、Private,选中的话就是私有库,别人不能访问
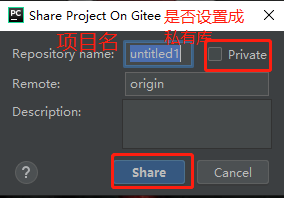
6、点击Share
7、选择你项目中要上传的文件
8、添加备注
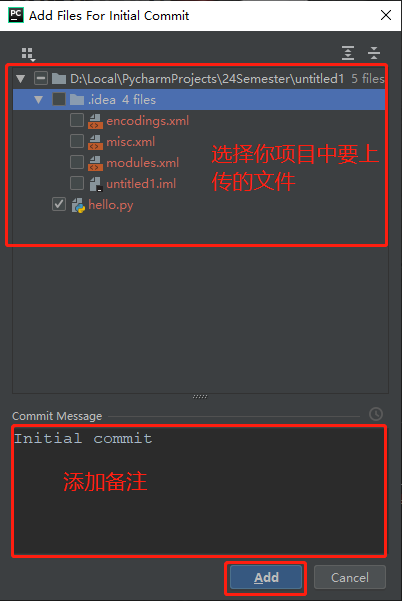
9、点击Add进行添加
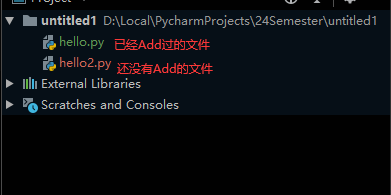
10、Add后项目中文件会出现绿色
11、提交已经Add过的文件
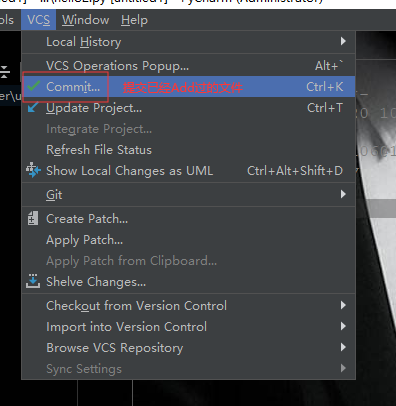
12、选择提交已经Add过的文件
13、Author提交者名称(可以不填)
14、添加提交文件备注(必填的)
15、可以预览提交的文件内容
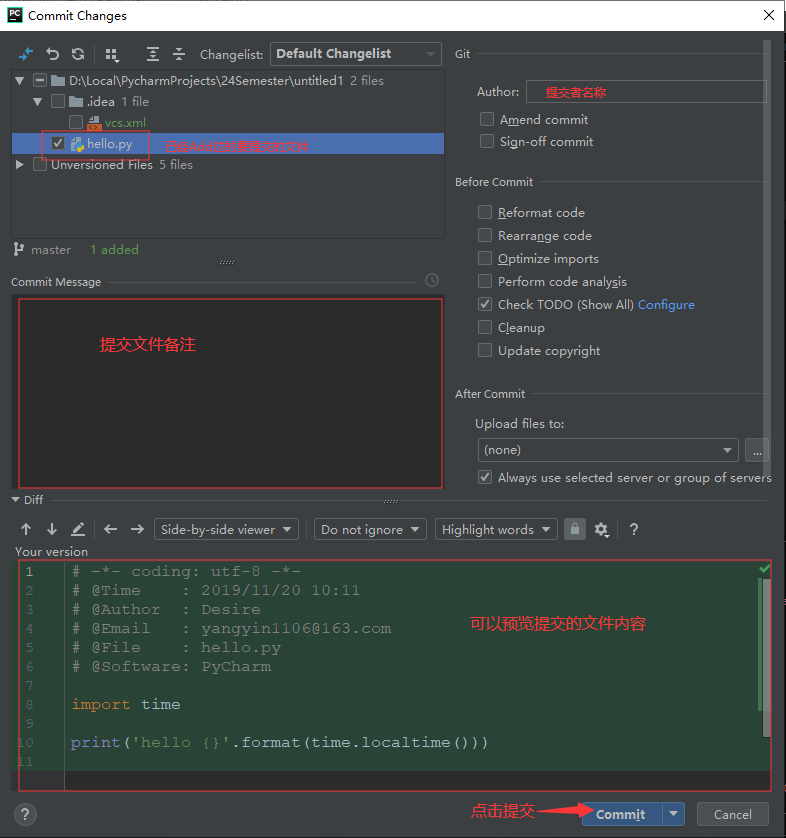
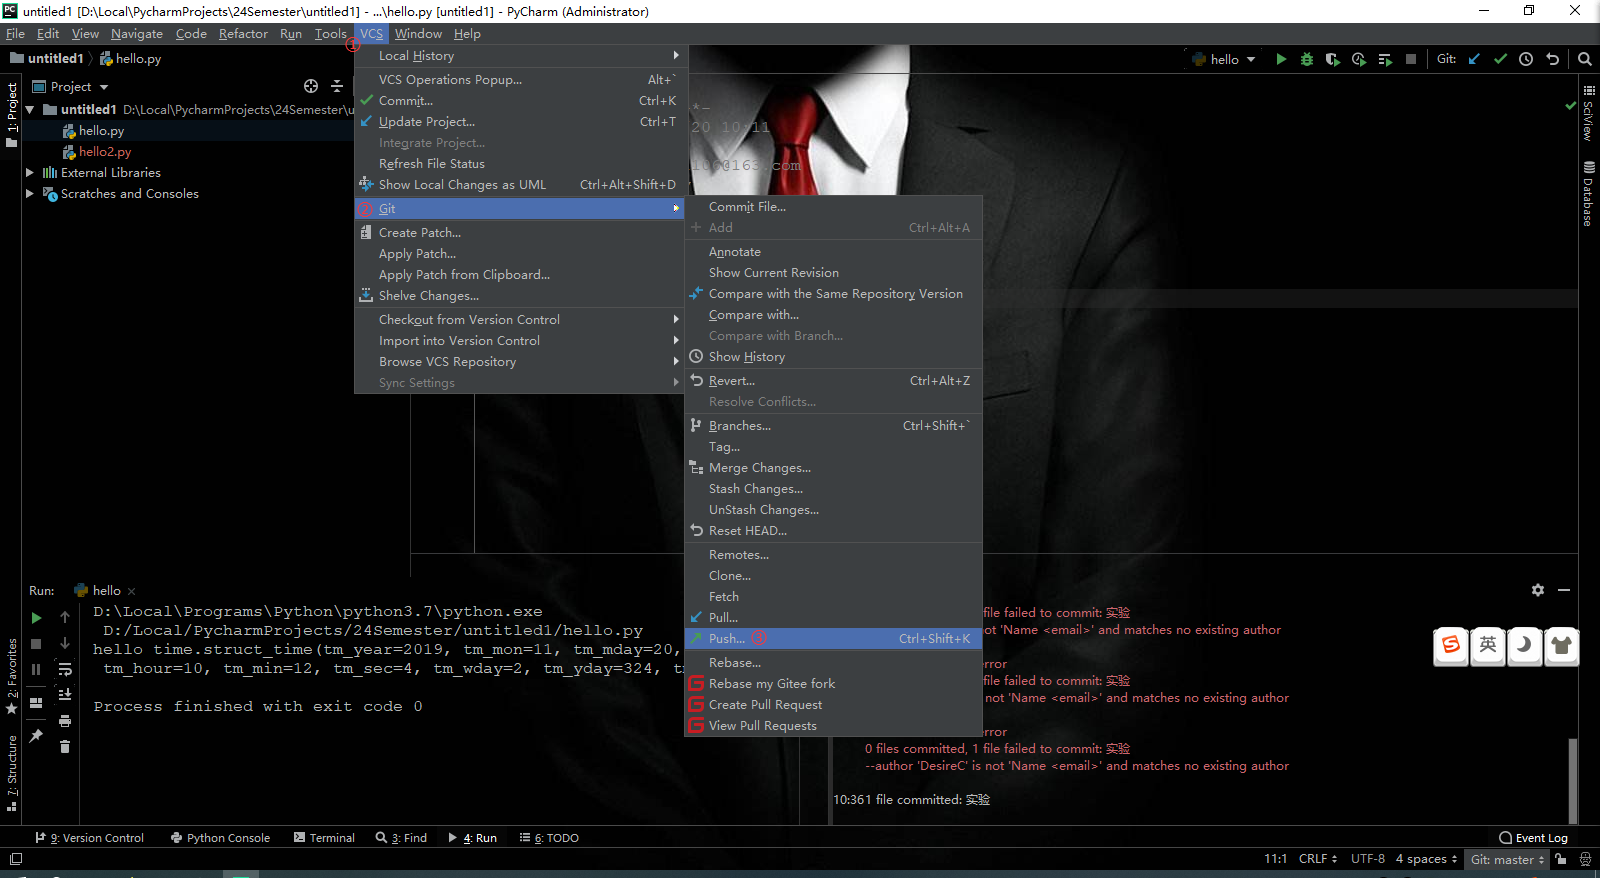
16、commit后要push一下
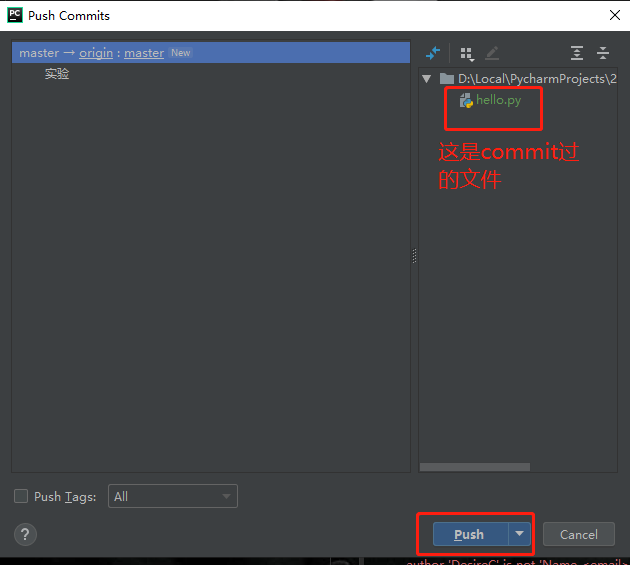
17、可以看到commit过的文件
18、成功后

第七步:登陆Gitee账号查看是否成功