1-前言

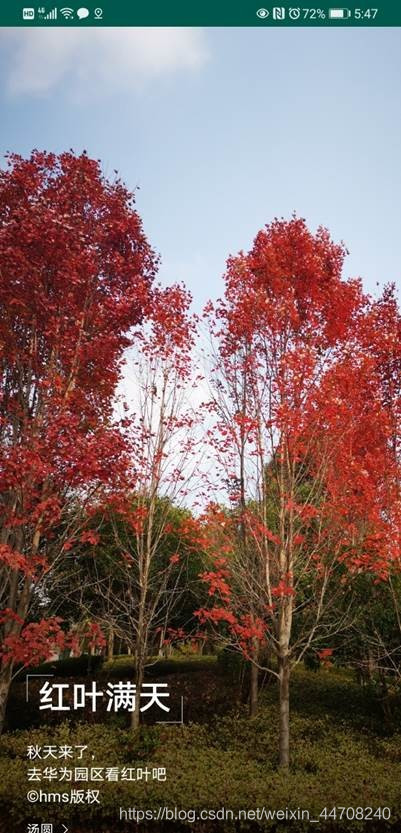
上面这张手机锁屏后精美的图文,是不是看起来很美?
这些锁屏图片是手机自带的。有时候我们爱好摄影的同学自己拍了美美的照片,是不是也想加上图文作为锁屏图片呢?
我们HMS Core提供的图文智能排版能力,就可以实现这个功能,让用户直接在手机上就能体验自己拍摄的精美图片通过图文只能排版制作成精美的杂志锁屏图片。
2-场景
参考当前经典的图片文字排版,HMS Core图文智能排版当前提供了9种文字排版样式,开发者可以使用快速简单地集成这个能力,提供给摄影爱好者以及图文编辑者在摄影图片上添加精致排版过的文字,图文并茂的图片既可以用来记录生活中的经典时刻,也可以用来作为锁屏的图片。
3-集成关键步骤说明和代码
开发准备
1-配置华为Maven仓地址
打开AndroidStudio项目中的build.gradle文件
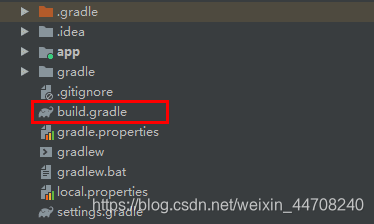
在“buildscript > repositories”和“allprojects > repositories”中增加SDK的Maven仓地址:
buildscript {
    repositories{
      ...
        maven {url 'http://developer.huawei.com/repo/'}
    }
}
allprojects {
    repositories {
       …
         maven { url 'http://developer.huawei.com/repo/'}
    }
}
2-添加编译SDK依赖
打开应用级的“build.gradle”文件

在dependencies中添加图形引擎的SDK包,使用Full-SDK,以及AR Engine的SDK包
dependencies {
….
   implementation "com.huawei.hms:image-vision:1.0.3.301"
   implementation "com.huawei.hms:image-vision-fallback:1.0.3.301"
}
3-在AndroidManifest.xml中添加权限
打开main中的AndroidManifest.xml文件,在<application 前添加相关的使用权限
<!—访问网络和读写存储权限-->
<uses-permission android:name="android.permission.INTERNET"/>
   <uses-permission android:name="android.permission.ACCESS_NETWORK_STATE" />
   <uses-permission android:name="android.permission.ACCESS_WIFI_STATE" />
   <uses-permission android:name="android.permission.READ_EXTERNAL_STORAGE" />
<uses-permission android:name="android.permission.WRITE_EXTERNAL_STORAGE" />
开发步骤
1- Layout
如下是需要输入的内容,用于图文智能展示的文字:
-
title: 文案标题,必填字段,不超过7个中文汉字(总字符数量不超过10个),如果超过字数限制会被强制截断。
-
description: 文案内容,不超过44个中文汉字(总字符数量不超过66个),超过字数限制则进行截断,用‘…’代替
-
copyRight: 图片版权归属的个人/公司名称,建议不超过7个中文汉字(总字符数量不超过10个),超过字数限制则进行截断,用‘…’代替。
-
anchor:“详情”或“查看更多”,建议4个中文汉字(总字符数不超过6个)超过字数限制则进行截断,用‘…’代替。
-
info: info1-info9的排版可以选择其中一个,备注info8为竖板排版,当前仅支持中文版式,不支持其他语言版式;info3为默认兜底版式;若用户输入info8且输入标签、文本描述有非中文语种,返回用户info3版式。
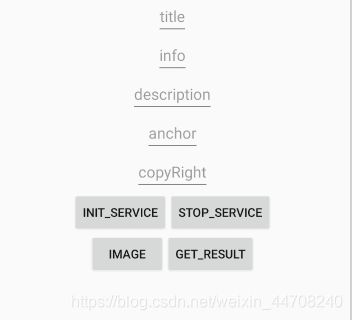
按钮部分功能:
INIT_SERVICE对应服务初始化,
SOTP_SERVICE 停止服务
IMAGE 选择打开手机上的图片
GET_RESULT: 获取展示的排版后图片
2- INIT_SERVICE-服务初始化
服务初始化,调用setVisionCallBack时需要实现ImageVision.VisionCallBack接口,重写其中的onSuccess(int successCode)和onFailure(int errorCode)方法。框架初始化成功后会回调onSuccess方法,在onSuccess方法中,需要再初始化图文智能排版服务。
1.  private void initTag(final Context context) {

2.  // 获取ImageVisionImpl 对象

3.      imageVisionTagAPI = ImageVision.getInstance(this);

4.      imageVisionTagAPI.setVisionCallBack(new ImageVision.VisionCallBack() {

5.          @Override

6.          public void onSuccess(int successCode) {

7.              int initCode = imageVisionTagAPI.init(context, authJson);

8.          }

9.

10.         @Override

11.         public void onFailure(int errorCode) {

12.             LogsUtil.e(TAG, "getImageVisionAPI failure, errorCode = " + errorCode);

13.         }

14.     });

15. }
其中authJson的格式参考如下链接
token为必选值,token的获取方式参考如下链接
1.  /**

2.   * Gets token.

3.   *

4.   * @param context the context

5.   * @param client_id the client id

6.   * @param client_secret the client secret

7.   * @return the token

8.   */

9.  public static String getToken(Context context, String client_id, String client_secret) {

10.     String token = "";

11.     try {

12.         String body = "grant_type=client_credentials&client_id=" + client_id + "&client_secret=" + client_secret;

13.         token = commonHttpsRequest(context, body, context.getResources().getString(R.string.urlToken));

14.         if (token != null && token.contains(" ")) {

15.             token = token.replaceAll(" ", "+");

16.             token = URLEncoder.encode(token, "UTF-8");

17.         }

18.     } catch (UnsupportedEncodingException e) {

19.         LogsUtil.e(TAG, e.getMessage());

20.     }

21.     return token;

22. }
3- Image-打开手机本地图片:
1.  public static void getByAlbum(Activity act) {

2.      Intent getAlbum = new Intent(Intent.ACTION_GET_CONTENT);

3.      String[] mimeTypes = {"image/jpeg", "image/png", "image/webp"};

4.      getAlbum.putExtra(Intent.EXTRA_MIME_TYPES, mimeTypes);

5.      getAlbum.setType("image/*");

6.      getAlbum.addCategory(Intent.CATEGORY_OPENABLE);

7.      act.startActivityForResult(getAlbum, 801);

8.  }
1.  /**

2.       * Process the obtained image.

3.       */

4.      @Override

5.      public void onActivityResult(int requestCode, int resultCode, Intent data) {

6.          super.onActivityResult(requestCode, resultCode, data);

7.          if (data != null) {

8.              if (resultCode == Activity.RESULT_OK) {

9.                  switch (requestCode) {

10.                     case 801:

11.                         try {

12.                             imageBitmap = Utility.getBitmapFromUri(data, this);

13.                             iv.setImageBitmap(imageBitmap);

14.                             break;

15.                         } catch (Exception e) {

16.                             LogsUtil.e(TAG, "Exception: " + e.getMessage());

17.                         }

18.                 }

19.             }

20.         }

21.     }
4- GET_RESULT-获取展示的排版后图片
1- 构建参数对象
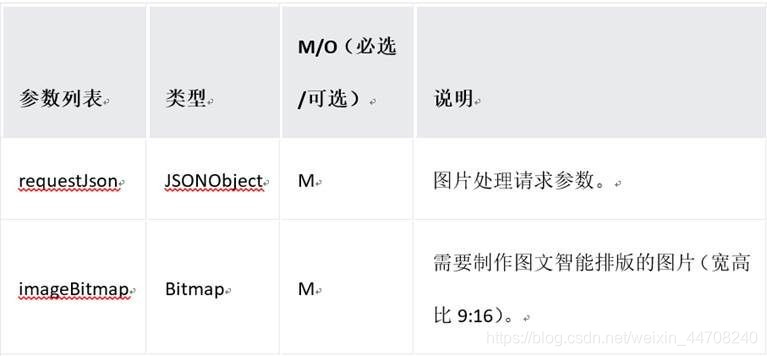
对应requestJson代码:
1.  /*

2.      title: 文案标题

3.      description:文案内容

4.      copyRight:图片版权归属的个人/公司名称

5.      anchor:“详情”或“查看更多”

6.      info: info1-info9的排版可以选择其中一个

7.   */

8.

9.  private void createRequestJson(String title, String description, String copyRight, String anchor, String info) {

10.     try {

11.         JSONObject taskJson = new JSONObject();

12.         taskJson.put("title", title);

13.         taskJson.put("imageUrl", "imageUrl");

14.         taskJson.put("description", description);

15.         taskJson.put("copyRight", copyRight);

16.         taskJson.put("isNeedMask", false);

17.         taskJson.put("anchor", anchor);

18.         JSONArray jsonArray = new JSONArray();

19.         if (info != null && info.length() > 0) {

20.             String[] split = info.split(",");

21.             for (int i = 0; i < split.length; i++) {

22.                 jsonArray.put(split[i]);

23.             }

24.         } else {

25.             jsonArray.put("info8");

26.         }

27.         taskJson.put("styleList", jsonArray);

28.         requestJson.put("requestId", "");

29.         requestJson.put("taskJson", taskJson);

30.         requestJson.put("authJson", authJson);

31.

32.         Log.d(TAG, "createRequestJson: "+requestJson);

33.     } catch (JSONException e) {

34.         LogsUtil.e(TAG, e.getMessage());

35.     }

36. }
2- 展示部分代码
图文智能排版服务需要联网从HMS Core云端获取展示样式,如不联网,则默认反回info3样式
1.  private void layoutAdd(String title, String info, String description, String copyRight, String anchor) {

2.      if (imageBitmap == null) {

3.          return;

4.      }

5.      final Bitmap reBitmap = this.imageBitmap;

6.      new Thread(new Runnable() {

7.          @Override

8.          public void run() {

9.              try {

10.                 token = Utility.getToken(context, client_id, client_secret);

11.                 authJson.put("token", token);

12.                 createRequestJson(title, description, copyRight, anchor, info);

13.                 final ImageLayoutInfo imageLayoutInfo = imageVisionLayoutAPI.analyzeImageLayout(requestJson,  reBitmap);

14.                 runOnUiThread(new Runnable() {

15.                     @Override

16.                     public void run() {

17.                         iv.setImageBitmap(null);

18.                         Bitmap resizebitmap = Bitmap.createScaledBitmap(Utility.cutSmartLayoutImage(reBitmap), width, height, false);

19.                         img_btn.setBackground(new BitmapDrawable(getResources(), resizebitmap));

20.                         setView(imageLayoutInfo);

21.                         viewSaveToImage(show_image_view);

22.                     }

23.                 });

24.             } catch (JSONException e) {

25.                 LogsUtil.e(TAG, "JSONException" + e.getMessage());

26.             }

27.         }

28.     }).start();

29.

30. }
5- SOTP_SERVICE 停止服务
当不再需要图文智能排版效果时,调用该接口停止服务,stopCode为0时,执行成功。
1.  private void stopFilter() {

2.          if (null != imageVisionLayoutAPI) {

3.              int stopCode = imageVisionLayoutAPI.stop();

4.              tv2.setText("stopCode:" + stopCode);

5.              iv.setImageBitmap(null);

6.              imageBitmap = null;

7.              stopCodeState = stopCode;

8.              tv.setText("");

9.              imageVisionLayoutAPI = null;

10.         } else {

11.             tv2.setText("The service has not been enabled.");

12.             stopCodeState = 0;

13.         }

14.     }
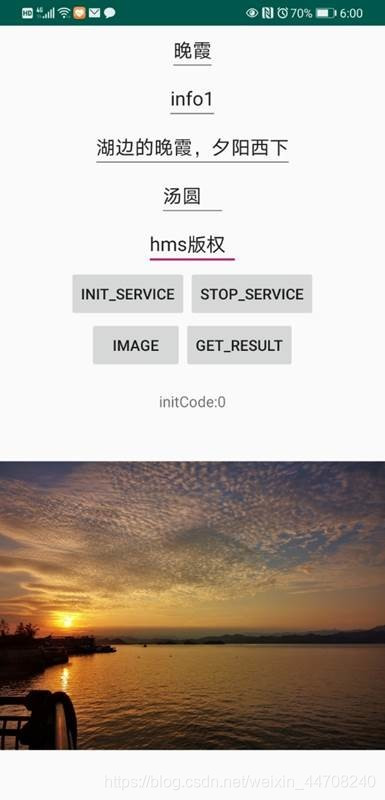
4-效果展示
打开App点击下面的INIT_SERVICE按钮,初始化服务;成功后点击IMAGE按钮选择本地拍摄的图片;然后点击GET_RESULT获取智能图文排版后的精美图片


5-源码
参与开发者讨论请到Reddit社区:https://www.reddit.com/r/HMSCore/
下载demo和示例代码请到Github:https://github.com/HMS-Core
解决集成问题请到Stack Overflow:https://stackoverflow.com/questions/tagged/huawei-mobile-services?tab=Newest
原文链接:https://developer.huawei.com/consumer/cn/forum/topic/0202441824310590439?fid=18
原作者:胡椒