官方原地址:
https://retro.readthedocs.io/en/latest/integration.html#integration-files
============================================
首先结束一下什么叫做游戏融合,这里面给的这个名字虽然感觉不是很恰当但是自己也没有想到什么更好的名字。
retro其实就是把多个ROMs游戏仿真环境融合到一起的一个Python库,也就是通过retro库我们可以调用不同的ROMs游戏仿真器,从而加载并运行多种上世纪的ROMs游戏,这种ROMs游戏在我小时候还是很盛行的,尤其是上世纪90年代的时候小孩子都喜欢玩的黄卡游戏机(经典款:小霸王游戏机、学习机)。使用retro我们可以在PC电脑上运行ROMs游戏的仿真器从而实现在PC上运行ROMs游戏的目的。
retro库是openAI公司制作的,我们使用retro库运行ROMs游戏是为了给机器学习使用的,因此我们需要对不同的ROMs游戏进行一定的定制化处理,比如:从游戏的每个中间状态进行运行,每步交互返回的奖励值,返回游戏是否结束等,这也就是强化学习中的:
observation, reward, done, info = env.step(action) 中的 observation, reward, done, info 信息,其中在retro中我们主要关注的信息是reward,done 和 info。
retro 中的仿真器支持的ROMs游戏文件类型有:

============================================
正像前面说的 retro 为了可以将运行的信息传给机器学习训练使用需要对游戏进行一定的定制化,也就是对observation, reward, done, info = env.step(action) 中的返回信息进行定制化。(还有对游戏的起始状态进行定制化)
没有游戏的定制化文件那么retro无法很好的将游戏信息传给机器学习进行训练,openAI公司对很多的游戏进行过定制化处理,把定制化后的文件加入到了retro库中,我们使用retro库的时候则不需要对这些已经内置好定制化文件的游戏进行定制化处理(当然如果需要可以在这些给出的定制化文件上进行再次加工),由于很多ROMs游戏都是商业公司退出的有版权使用问题,所以openAI只对这些商业游戏提供了定制化文件而不提供ROMs的游戏运行文件,因此安装好retro后我们往往需要再次手动下载ROMs文件导入到retro中,对于这些已经定制好的游戏我们导入后是不太需要手动写定制化文件。
在本人的Ubuntu系统上使用anaconda安装retro后游戏的定制化文件路径:(其中,game 为anaconda下创建的环境名称)
~/anaconda3/envs/baselines/lib/python3.7/site-packages/retro/data
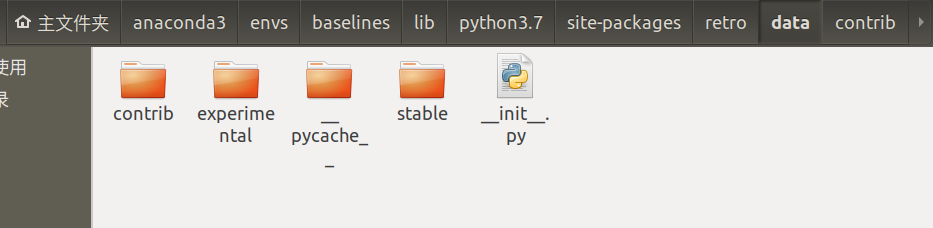
我们这里只打开稳定版的(stable)定制化游戏的文件夹:(打开stable文件夹)
~/anaconda3/envs/baselines/lib/python3.7/site-packages/retro/data/stable
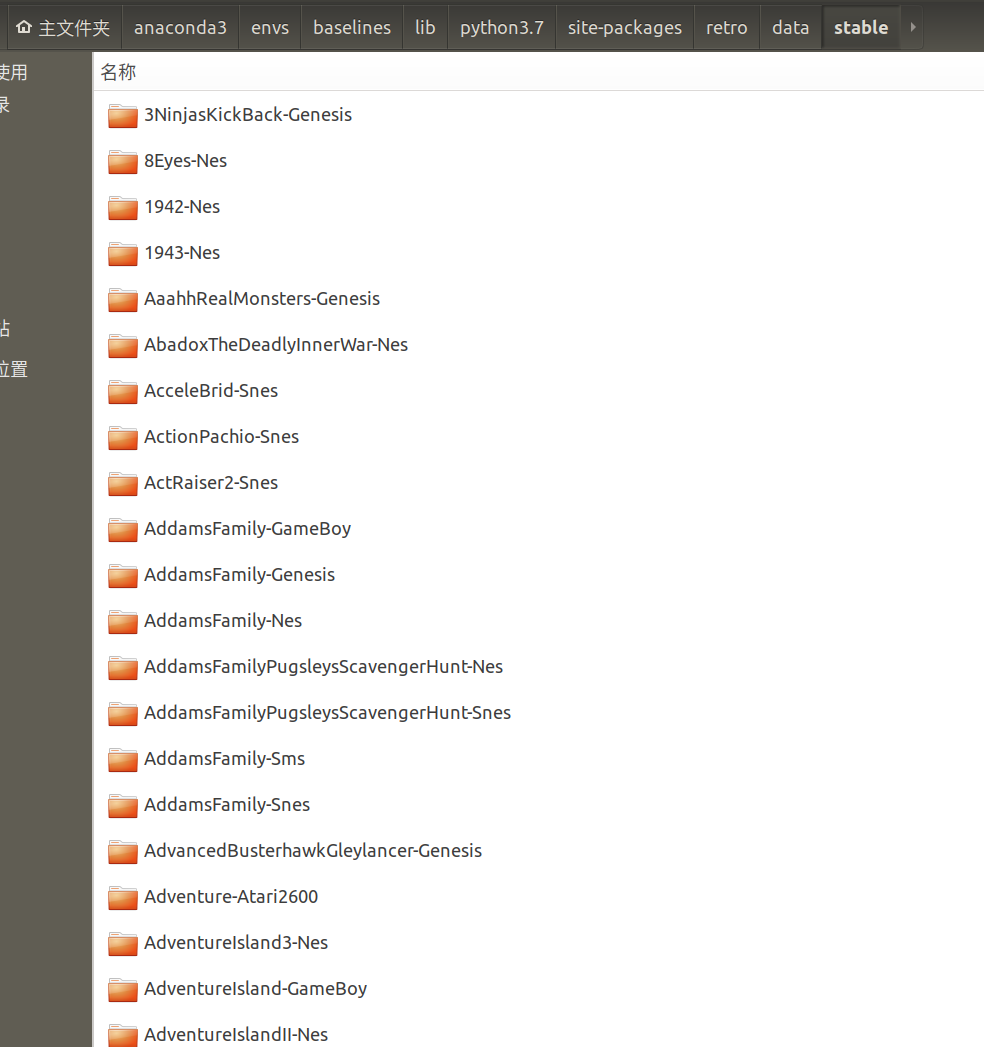
可以看到里面的游戏还是很多的,这些游戏的定制化文件已经由openAI公司提前制作和提供,我们只需要导入这些游戏的ROMs文件即可(如何导入游戏ROMs这里不介绍,可以参看前文)
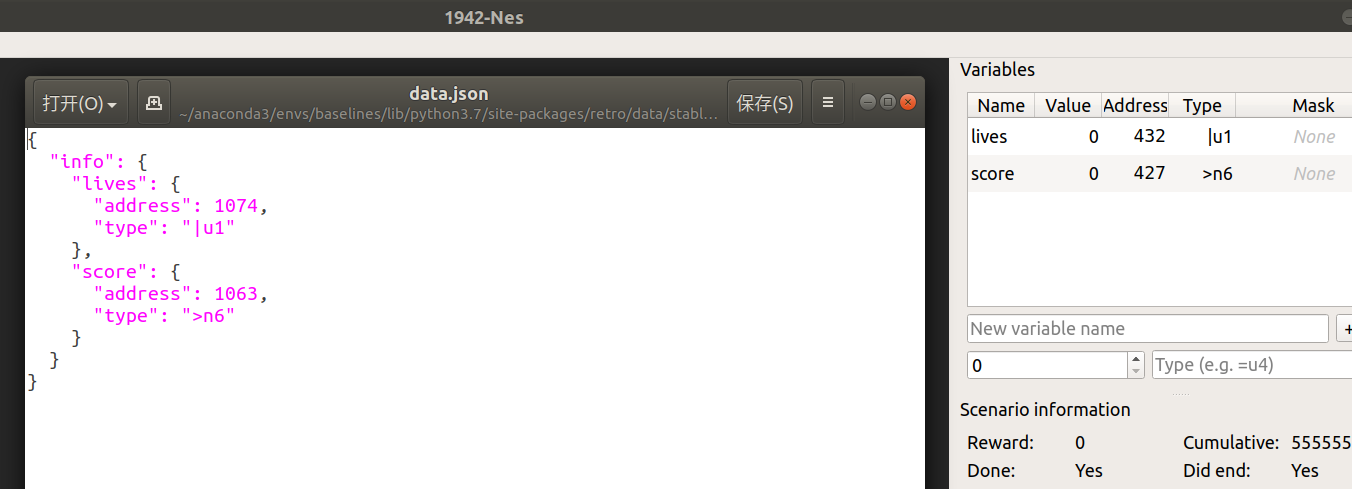
以 1942-NES 游戏为例,打开查看里面的文件:


对于openAI已经融合好的游戏我们只需要导入对应ROMs游戏文件即可,而Game Integration——新游戏融合则是针对还没有被openAI融合的新游戏,我们需要手动编写融合文件,也就是:
变量文件: data.json
起始状态文件: metadata.json
奖励reward的返回信息和游戏是否终止的判断信息文件:scenario.json
另外: rom.sha 为导入的rom.md文件的sha1检验码保持文件,上图中并没有导入rom文件,即rom.md文件未被导入。
script.lua 文件为为游戏编写的额外脚本文件,这里是为了对返回的奖励函数进行进一步处理的,该脚本一般为lua语言编写,这里script.lua 文件的内容:
previous_score = 0

function correct_score ()
  if data.score > previous_score then
    local delta = data.score - previous_score
    previous_score = data.score
    return delta
  else
    return 0
  end
end
scenario.json 文件中内容:
{
  "done": {
    "variables": {
      "lives": {
        "op": "equal",
        "reference": 0
      }
    }
  },
  "reward": {
    "script": "lua:correct_score"
  },
  "scripts": [
    "script.lua"
  ]
}
可以看到scenario.json文件中设置奖励返回reward调用脚本script中的函数,这里指定为脚本 scripts.lua,并且指定为脚本中的 correct_score 函数。
correct_score 函数中data.score变量代表的是此时step操作后原始返回的奖励reward,上面的correct_score函数在每一步step返回的奖励reward都是需要之前的reward进行处理的,如果当前步获得的reward小于历史中reward的最大值则返回奖励值reward=0,如果当前步获得的reward大于历史中reward的最大值则返回奖励值reward=data.score - previous_score,即当前获得的原始reward与历史最大reward的差值作为最终的返回reward。
在给出一个 scenario.json 的例子:(Airstriker-Genesis)
{
  "done": {
    "condition": "all",
    "variables": {
      "gameover": {
        "op": "equal",
        "reference": 1
      },
      "lives": {
        "op": "zero"
      }
    }
  },
  "reward": {
    "variables": {
      "score": {
        "reward": 1.0
      }
    }
  }
}
在游戏 Airstriker-Genesis 中, 返回的done有两个判断条件,只有这两个判断条件全满足才返回true值,一个是 gameover变量为1,一个是lives变量为0。在结束画面出现的时候gameover变量会在某一帧画面时等于数值1,此时可能lives变量还不为0,所以需要同时判断这两个变量。如果只使用lives变量依据是否为0来判断是否结束游戏则可能没有那么精确。
===========================================
对于openAI没有融合的新游戏进行融合我们最主要的工作就是编写定制文件,也就是 data.json, scenario.json, metadata.json , *.state 等文件。
而编写这些文件需要使用retro提供的UI操作界面,由于系统的配套环境限制这里只使用Ubuntu环境作为demo:
linux环境安装retro提供的UI操作界面:
sudo apt-get install capnproto libcapnp-dev libqt5opengl5-dev qtbase5-dev zlib1g-dev
cmake . -DBUILD_UI=ON -UPYLIB_DIRECTORY
make -j$(grep -c ^processor /proc/cpuinfo)
./gym-retro-integration
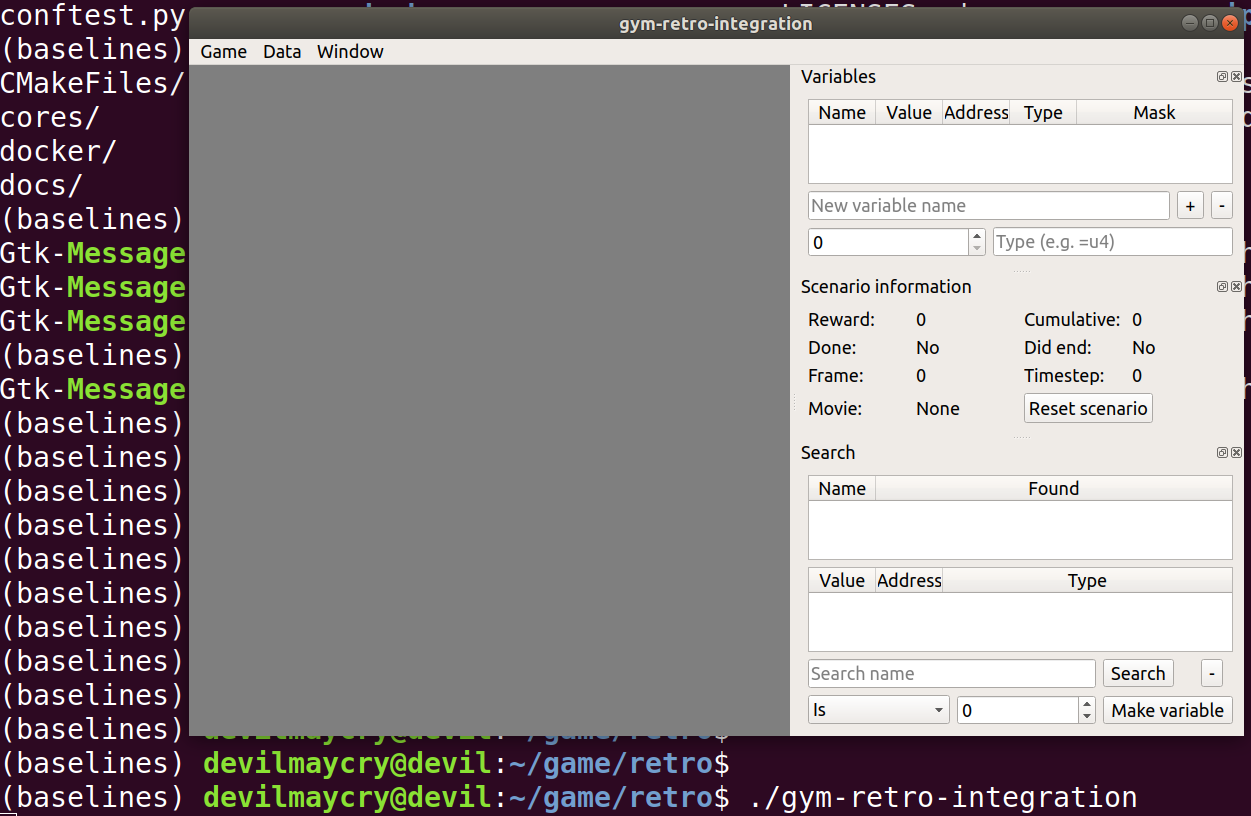
使用integration工具的基本步骤:
=====================================================
Game Integration 的三个工作:
- A starting state
- A reward function
- A done condition
这三个工作最简单的则是制作 staring state ,使用UI Integration工具open游戏的roms文件,手动运行游戏到某个状态,这中间我们需要skip游戏的开始界面,选择界面等对于我们后续训练强化学习是否没有用的部分跳过,进入正式开始的界面后选择save state操作保持此时的游戏状态(快捷键Ctrl+s),然后在metadata.json中将游戏的起始状态指定为保存的这个状态文件,metadata.json文件的编写格式可以以openAI给出的其他游戏的作为模版。
- A reward function
- A done condition
这两个的设置是在scenario.json中进行的,scenario.json文件中的设置需要用到data.json文件中的设置,其中data.json文件中的设置较为直观。
游戏 Airstriker-Genesis 中的data.json文件:
{
  "info": {
    "gameover": {
      "address": 16712294,
      "type": ">u2"
    },
    "lives": {
      "address": 16712282,
      "type": ">u2"
    },
    "score": {
      "address": 16712270,
      "type": ">u4"
    }
  }
}
上面的data.json文件中我们一共设置了三个变量,变量名分别为gameover, lives, score,然后分别给出这三个变量的内存起始地址和变量类型与字节大小、大小端等信息即可。
其中,如何找出那个内存位置是我们所需要的变量以及其字节大小等信息在以后的博文中介绍。
在scenario.json文件中分别处理返回的reward和判断游戏是否结束,其中对reward的处理有下面注意点:
Finding Variables
It’s best to keep a consistent pattern for the different types of variables you might add to a game’s data.json file. Here are some tips:
- It’s pretty common for multiple different variables to group themselves together. When narrowing down the search for a particular variable, look at nearby memory addresses if you suspect you have a similar but incorrect variable (for instance you found the high score variable but are looking for the score variable).
- Score occasionally is stored in individual locations — e.g. if the score displayed is
123400, 1, 2, 3, 4, 0, 0 all will update separately. If the score is broken into multiple variables, make sure you have penalties set for the individual digits (such as BOB-Snes). A number of games will update the score value across multiple frames, in this case you will need a lua script to correct the reward, such as 1942-Nes. - Check for uncommon lengths of 3, 5, etc. Games don’t always store score in nice neat lengths of multiples of 2, and making sure the variable is the appropriate length is key — if you go too short, then no progress over a certain score is tracked, if you go too long, then the score can suddenly jump between levels, etc. If you can’t decide between two possible lengths, the shorter length is the safer bet.
- Score variable doesn’t always include the 0s at the end of the game — while the screen might say
2400, the score variable might only store24. So you will need to multiply by 100 in this case. - It’s very uncommon, but occasionally, scores can be transposed by a value of 1 — e.g., while the screen says
123456, the variable is012345. Some of these scores start at -1 rather than 0. This can be fixed with lua. - It’s very uncommon, but some games track health symbolically rather than with one set #. For example, the starting health bar could be represented by
9999999, which displays as a full health bar, but becomes99999after losing two health units. - In defining a game over variable, look for a binary value that switches between 0 and 1 – 0 when the game is in play, 1 when the game is over. And make sure to test it by playing a few consecutive levels.
Once you’ve found a variable, making sure the address and type are correct is important for avoiding issues later. One of the best ways to do this is to change the value in memory, then change it in the game and make sure it updates correctly.
For instance if you have a variable called “score” and you want to see if it is >d2 or >d4, set the type to >d4 and set the value to the maximum for >d2, 9999, and then increase the score by playing the game. If the score increases by 1, and the value in the memory viewer is 10000 and the value in the game is 10000, then >d4 is correct. If the value in the memory viewer or game is 0 or 9999, then it’s likely that >d2 is the correct type or that the address is wrong. You may also want to check if >d3 is the correct type by changing the score to 999999 and playing for a bit.
You can also check to see if the data type is correct by watching how it increments and decrements in the search window as you play the game. For example, if the value of the variable jumps from 0 to 255, it’s likely that this is a signed value (represented by i) – unsigned values (represented by u) are either positive or zero.
When you search for a variable, different formats at the same location will appear next to each other in the search window. For example, at address 16769105, you might see >u2, >i2, as well as >d2 return as search results. Play the game for a little bit, and you might notice that one of the search results increments/decrements in uneven or unusual ways in relation to the other search results at the same address.
eg: |u1 at 7e094d goes from 144 -> 137, |d1 at 7e094d (same address) decrements from 90 -> 89, it’s probably |d1
If you update the value of a variable but it doesn’t have any effect on the game, it’s likely that you’ve found a copy of the variable, not the correct address. An example would be a lives variable, but setting it to some higher value and then dying in the game reveals that you didn’t actually increase the number of lives. It’s often the case that you have to change the value in the game to get things to update (such as losing a life in the previous example).
Ideally you can find the original since it’s more likely to be correct, so if you can, find a variable that when updated, updates the corresponding value in the game. The most common source of this is a high score variable which will have the same value as the normal score variable, but updating it will have no effect on your score.
========================================================
在scenario.json中可以对仿真器返回的reward进行倍数处理,首先在data.json中定义变量score,然后在score中设置penalty和reward字段,如果仿真器返回的reward为正值则最后返回的reward=仿真器返回的reward*reward字段值(下面例子中reward字段为1.0),最后返回的reward=仿真器返回的reward*1.0。 如果仿真器返回的reward为负值则最后返回的reward=仿真器返回的reward*penalty字段值(下面例子中penalty字段为1.0),最后返回的reward=仿真器返回的reward*1.0。
scenario.json 例子:
  "reward": {
    "variables": {
      "score": {
        "penalty": 1.0,
        "reward": 1.0
      }
  }
}
==========================================
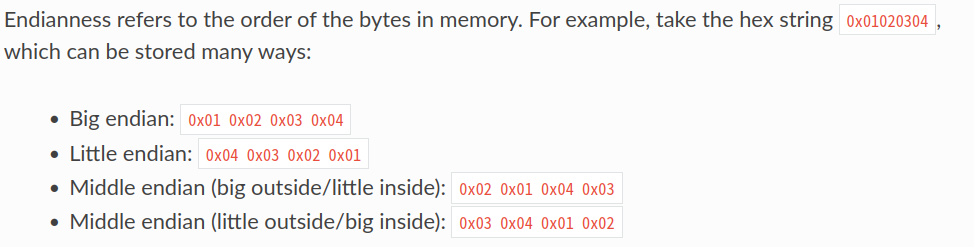
data.json 中变量的地址是使用10进制,而UI Integration中的变量地址是使用16进制,
如UI Integration中变量lives的16进制地址为432,在data.json中对应的10进制地址则为4*(16**2)+3*(16**1)+2*(16**0)=1074 。
=============================================
个人根据game integration过程中最难的步骤就是设定data.json中的变量,因为ROMs游戏最初是在游戏机上运行的,所以ROMs游戏或者是用16进制表示变量也可能是用32进制表示变量,或许是使用大端形式表示变量也可能是使用小端形式表示变量。
而处理不同编码形式的变量是一个比较困难的问题,这个设置是随游戏而定的,不同游戏有不同的设定,有的游戏中用2字节表示一个整数,有的游戏中可能是3个字节表示变量,而我们在X86 PC 电脑上运行这些游戏则需要小心处理这些几十年前运行在各种游戏机上的程序,不然data.json中变量的设置出现问题那么在game integration过程中则可能出现各种意外。
===========================================
使用UI Integration 可以手动更改运行中变量的数值(直接修改游戏运行状态的内存数据),如下图在Airstriker-Genesis中修改lives和score变量的数值为9999,9999。

使用一个定制化的融合游戏:
Using a Custom Integration from Python
import retro
import os

SCRIPT_DIR = os.path.dirname(os.path.abspath(__file__))


def main():
        retro.data.Integrations.add_custom_path(
                os.path.join(SCRIPT_DIR, "custom_integrations")
        )
        print("FakeGame-Nes" in retro.data.list_games(inttype=retro.data.Integrations.ALL))
        env = retro.make("FakeGame-Nes", inttype=retro.data.Integrations.ALL)
        print(env)


if __name__ == "__main__":
        main()
上面代码写为文件 x.py
这里我们演示的目的,把retro中的 游戏 Airstriker-Genesis 文件夹拷贝出来,改名为 FakeGame-Nes ,然后把FakeGame-Nes文件夹放在custom_integrations文件夹之下, 然后将x.py文件与custom_integrations 文件夹放在一个目录下面:

运行x.py文件:
