1、设置ModelAndView.
根据View的名称和 视图解析器跳 转到指定的页面
页面:视图解析器的前缀+view name +视图解析器的后缀
ModelAndView mv = new ModelAndView();
        //封装要显示到视图中的数据
        mv.addObject("msg","hello annotation");
        //视图名
        mv.setViewName("hello");
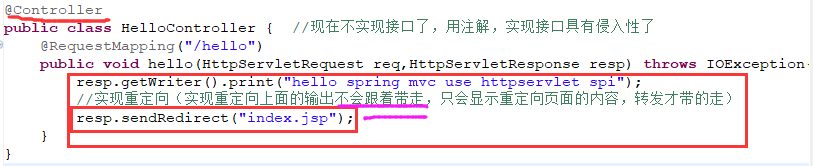
2、通过ServletAPI对象来实现。(不需要视图解析器的配置)
通过HttpServletResponse来进行输出(有两种流:该图插入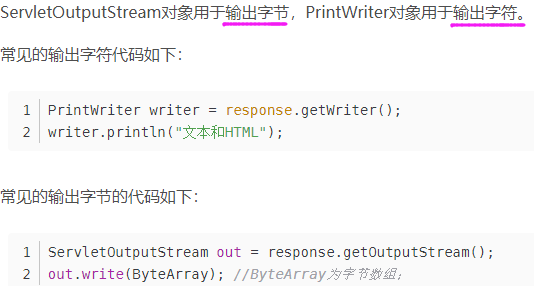
)
<?xml version="1.0" encoding="UTF-8"?>
<beans xmlns="http://www.springframework.org/schema/beans"
    xmlns:xsi="http://www.w3.org/2001/XMLSchema-instance"
    xmlns:p="http://www.springframework.org/schema/p"
    xmlns:context="http://www.springframework.org/schema/context"
    xsi:schemaLocation="
        http://www.springframework.org/schema/beans
        http://www.springframework.org/schema/beans/spring-beans.xsd
        http://www.springframework.org/schema/context
        http://www.springframework.org/schema/context/spring-context.xsd">
    这个位置的视图解析器已近删除了
    <!-- 注解扫描,自动扫描这个包下面的注解 -->
    <context:component-scan base-package="cn.sxt.controller"></context:component-scan>
</beans>

通过HttpServletResponse实现重定向
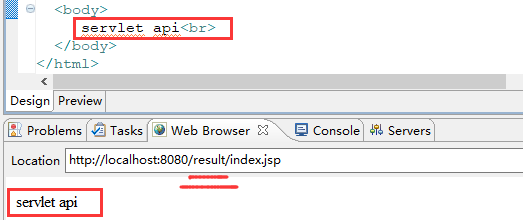
通过HttpServletRequest实现转发
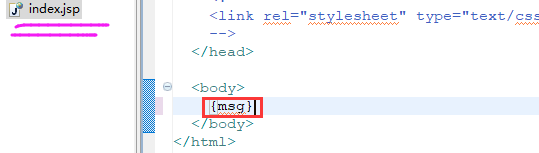 图少了个${msg}
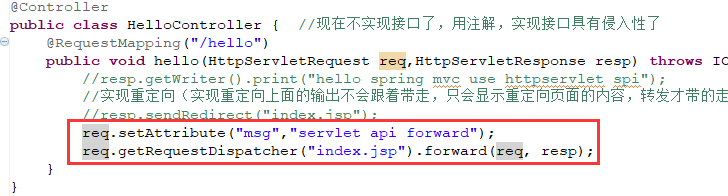
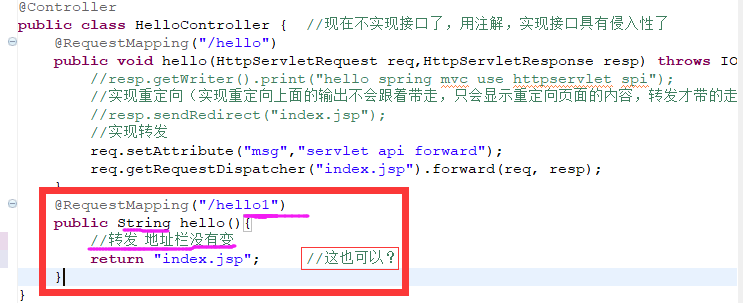
3、通过springmvc来实现转发和重定向----没有视图解析器
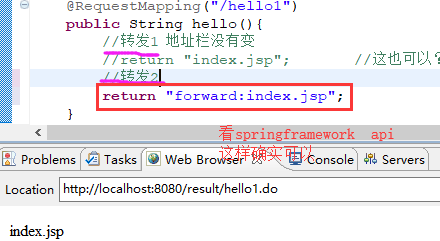
转发的实现1

转发的实现2
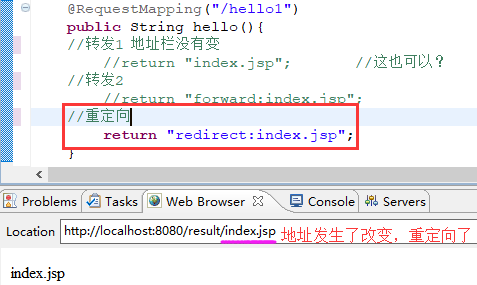
重定向
4、通过springmvc来实现转发和重定向----有视图解析器
转发

重定向:重定向的话实际上根本就不需要视图解析器,即使你有视图解析器(很好理解,重定向重新去请求一个新的东西,转发有东西要显示到前端页面上来,所以需要解析器)
