http://my.oschina.net/xiahuawuyu/blog/81763
这两天学习了下,jquery mobile(以下简称jqm)的开发相关的内容。可能之前有过web的开发基础,相对于我来说学习这个东西感觉挺简单的,很容易上手。Jqm的的语法和jquery其实是一样的,有些不大一样的就是了。网上介绍的也是一大堆。这里我主要是做笔记哈。
使用JQM开发其实很简单,我这里目前是针对于在服务器端开发的,服务器使用的是apache+php,前端其实主要是html5+jquery的写法。
1、首先我们可以到官网去下载http://jquerymobile.com/blog/2012/09/21/jquery-mobile-1-2-0-release-candidate-2/#download query mobile[/url],然后下载完成后,我们可以看到如下的的目录结构
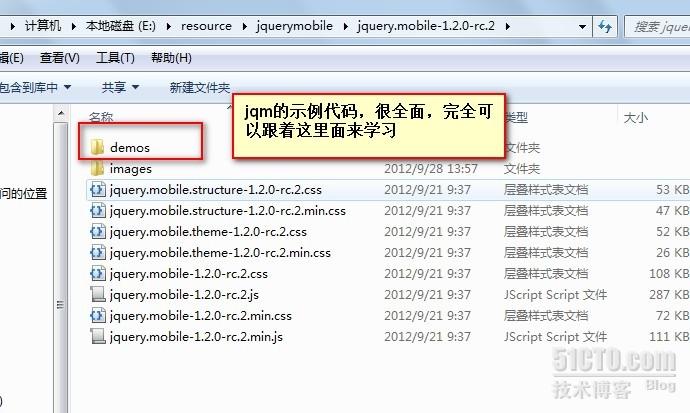
jqm的包里已经包含了demo和核心代码。jqm提供的demo很全面,直接学习它基本就够了。 既然下载好了,我们就可以进行开发了,概念的东西我就不多说了,直接上代码。
2、编写form表单页面。
|
1
2
3
4
5
6
7
8
9
10
11
12
13
14
15
16
17
18
19
20
21
22
23
24
25
26
27
28
29
30
31
32
33
34
35
36
37
38
39
40
41
42
|
<!DOCTYPE html> <html> <head> <meta charset="UTF-8" /> <meta name="viewport" content="width=device-width, initial-scale=1"> <title>表单</title> <!--加载jqm css样式--> <link rel="stylesheet" href="css/jquery.mobile-1.2.0-rc.2.css" /> <!--加载jquery--> <script src="js/jquery.js"></script> <!--加载jquery mobile--> <script src="js/jquery.mobile-1.2.0-rc.2.js"></script> <script src="js/ajax.js"></script> </head> <body> <div data-role="page" data-fullscreen="true"><!--data-fullscreen 设置全屏--> <div data-role="header" data-position="inline"><!--data-position="inline" 设置以流的方式显示--> <a href="index.html" data-icon="delete">Cacel</a> <h1>表单demo</h1> </div><!-- /header --> <div data-role="content"> <form id="ajaxForm"> <div data-role="fieldcontain"> <label for="username">User Name:</label> <input type="text" name="username" id="username" data-mini="true"/> <h3 id="notification"></h3> <button data-theme="b" id="submit" type="submit">Submit</button> </div> </form> </div><!-- /content --> <div data-role="footer" data-position="fixed"> <h4>Page Footer</h4> </div><!-- /footer --></div><!-- /page --> </body> </html> |
3、编写服务器端脚本form.php(这里我使用php)
|
1
2
3
4
|
<?php $username = $_POST['username']; echo "User Name:".$username; ?> |
4、编写ajax脚本ajax.js
|
1
2
3
4
5
6
7
8
9
10
11
12
13
14
15
16
17
18
19
20
21
22
23
24
25
26
|
$(function() { $('#submit').bind('click', function() { var formData = $('#ajaxForm').serialize(); //.serialize() 方法创建以标准 URL 编码表示的文本字符串 $.ajax({ type : "POST", url : "form.php", cache : false, data : formData, success : onSuccess, error : onError }); return false; }); }); function onSuccess(data,status){ data = $.trim(data); //去掉前后空格 $('#notification').text(data); } function onError(data,status){ //进行错误处理 } |
4、创建android的工程,使用webview进行访问。
layout:
|
1
2
3
4
5
6
7
8
9
10
11
|
<RelativeLayout xmlns:android="http://schemas.android.com/apk/res/android" xmlns:tools="http://schemas.android.com/tools" android:layout_width="match_parent" android:layout_height="match_parent" > <WebView android:id="@+id/webview" android:layout_width="fill_parent" android:layout_height="fill_parent" /> </RelativeLayout> |
java代码:
|
1
2
3
4
5
6
7
8
9
10
11
12
13
14
15
16
17
18
19
20
21
22
23
24
25
26
27
28
29
30
31
32
33
34
35
36
37
38
39
40
41
42
43
44
45
46
47
48
49
50
51
52
53
54
55
56
57
58
59
60
61
62
63
64
65
66
67
68
69
70
71
72
73
74
75
76
77
78
79
80
81
82
83
84
85
86
87
88
89
90
91
92
93
94
|
package com.xzw.html; import android.app.Activity; import android.app.ProgressDialog; import android.graphics.Bitmap; import android.os.Bundle; import android.util.Log; import android.view.KeyEvent; import android.view.View; import android.view.Window; import android.webkit.WebChromeClient; import android.webkit.WebView; import android.webkit.WebViewClient; /** * * @author xuzw13@gmail.com * weibo:http://weibo.com/xzw1989 * */public class MainActivity extends Activity { private static final String TAG = "MainActivity"; private WebView webView; @Override public void onCreate(Bundle savedInstanceState) { super.onCreate(savedInstanceState); requestWindowFeature(Window.FEATURE_NO_TITLE); setContentView(R.layout.activity_main); webView = (WebView)findViewById(R.id.webview); webView.getSettings().setSupportZoom(true); webView.getSettings().supportMultipleWindows(); webView.getSettings().setJavaScriptEnabled(true); webView.setScrollBarStyle(View.SCROLLBARS_INSIDE_OVERLAY); webView.loadUrl("http://192.168.1.120/jquerymobile/index.html"); webView.setWebChromeClient(new WebChromeClient(){ @Override public void onProgressChanged(WebView view, int newProgress) { super.onProgressChanged(view, newProgress); } }); webView.setWebViewClient(new MyWebViewClient()); } private class MyWebViewClient extends WebViewClient{ @Override public void onLoadResource(WebView view, String url) { Log.i(TAG, "onLoadResource:" + url); super.onLoadResource(view, url); } @Override public void onReceivedError(WebView view, int errorCode, String description, String failingUrl) { Log.i(TAG, "onReceivedError:" + failingUrl+"
errorcode="+errorCode); super.onReceivedError(view, errorCode, description, failingUrl); } @Override public boolean shouldOverrideUrlLoading(WebView view, String url) { Log.i(TAG, "shouldOverrideUrlLoading:" + url); view.loadUrl(url); return true; } @Override public void onPageStarted(WebView view, String url, Bitmap favicon) { Log.i(TAG, "onPageStarted:" + url); } @Override public void onPageFinished(WebView view, String url) { Log.i(TAG, "onPageFinished:" + url); } }; @Override public boolean onKeyDown(int keyCode, KeyEvent event) { if((keyCode == KeyEvent.KEYCODE_BACK) && webView.canGoBack()){ webView.goBack(); return true; } return super.onKeyDown(keyCode, event); } } 代码就是全部代码了。 |
代码就是全部代码了。
补充下:jquery mobile的官网都是E文的,E文不是很好的童鞋直接学习jquery mobile的开发可能有些概念的东西没有办法很清楚地理解,我在学习的过程中也遇到了这个问题。不过网上也有个中文版的,但是感觉没有E文版的感觉舒服,不过也很不错,大家学习的时候可以两个一起对照。
附上两个地址:
[url= http://jquerymobile.com/demos/1.1.1/ ] http://jquerymobile.com/demos/1.1.1/ [/url]
http://www.jqmapi.com/download.html
欢迎大家一起交流学习!请大家多多指教。