我们用spring boot 快速开发应用程序时,经常会引入很多这样以spring-boot-starter开头的的库,
我就演示下自定义一个这样的库,功能是日志输出到什么地方(控制台、文件还是数据库)
前提是maven已经配置好了,参考 https://my.oschina.net/u/154866/blog/3223749
1 新建maven项目,参考spring官网 https://start.spring.io/,按实际情况填写基本信息和选择要依赖的库

然后点击“GENERATE”按钮, 注意生成前可以点击EXPLORE预览下项目结构
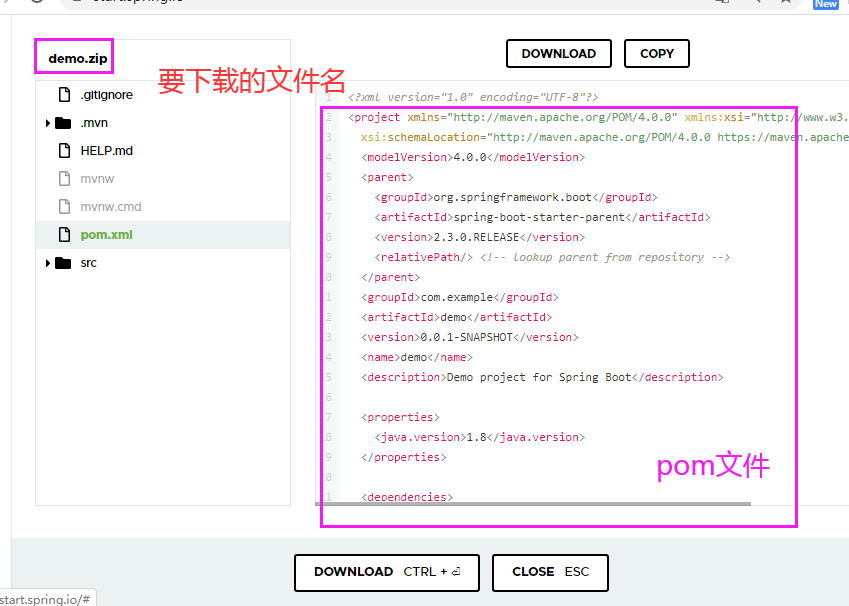
然后把下载后的文件解压后导入到开发工具(比如eclipse)中,很简单,打开eclipse,找到import按钮

出现以下提示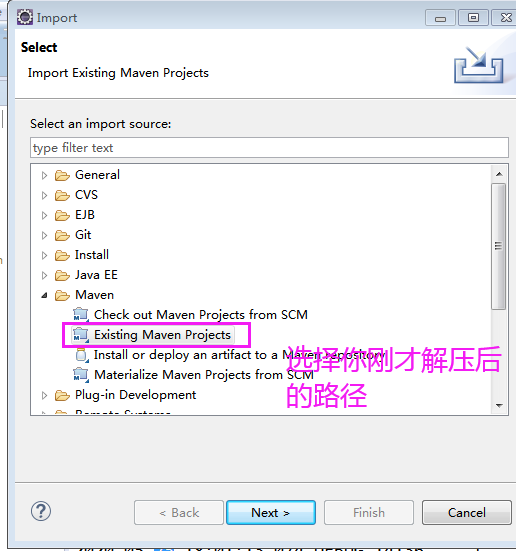
点击next: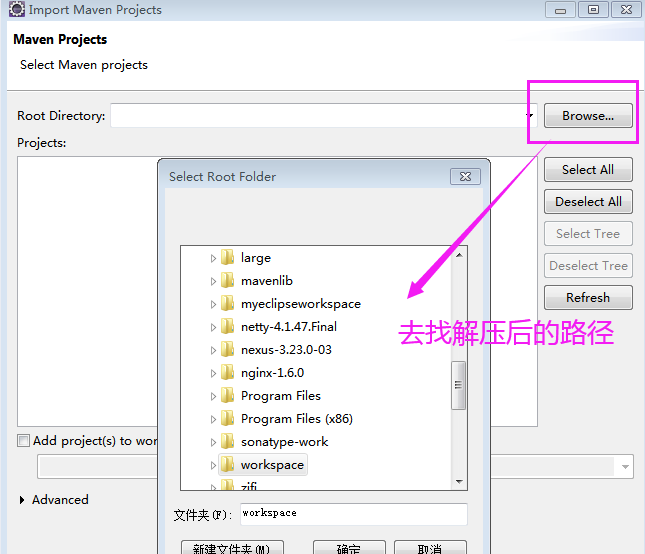
找到路径后点击"确定"按钮,出现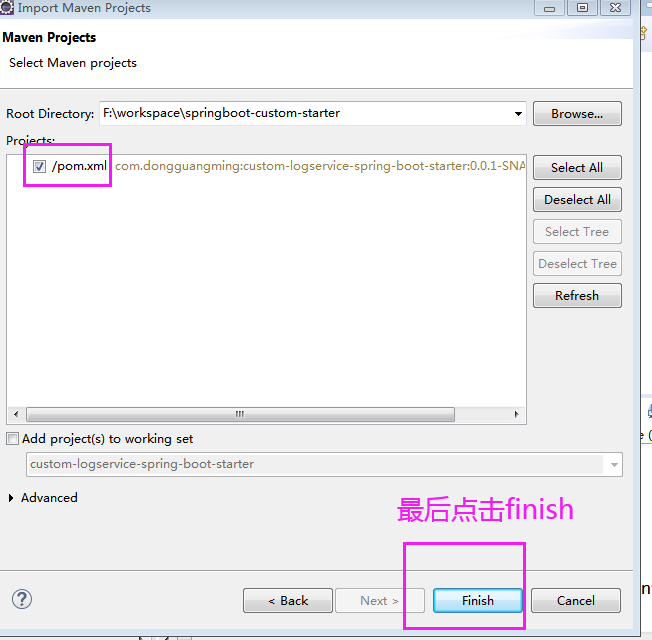
最后点击“finish”完成,即可完成maven项目的导入。
2. 正式进入编码阶段
新建主包名, 比如com.dongguangming, 然后分别建子包:
com.dongguangming.service, com.dongguangming.service.impl,
com.dongguangming.annotation,com.dongguangming.condition,com.dongguangming.autoconfigure
2.1 建日志服务接口
/**
 *
 * @author dgm
 * @describe "日志服务接口"
 */
public interface LogService {

    void print(String message);
}
2.2 实现日志服务接口,分三种实现,控制台、文件、数据库mysql
import com.dongguangming.service.LogService;

/**
 * @author dgm
 * @describe "日志到控制台"
 */
public class StdOutLogServiceImpl implements LogService {

	@Override
	public void print(String message) {
        System.out.println(message);
        System.out.println("写日志到控制台!");
	}
}

/**
 *
 * @author dgm
 * @describe "日志到文件"
 */
public class FileLogServiceImpl implements LogService {

	private static final String FILE_NAME="d://LogService.txt";
	@Override
	public void print(String message) {
		try {
			File file = new File(FILE_NAME);
			FileWriter fw = null;
			// true:表示是追加的标志
			fw = new FileWriter(file, true);
			fw.write(message+"
");
			fw.close();

	        System.out.println(message);
			System.out.println("写日志入文件!");
		} catch (IOException e) {
		}
	}
}

/**
 * @author dgm
 * @describe "写日志入mysql数据库"
 */
public class MysqlLogServiceImpl implements LogService {

	@Override
	public void print(String message) {
        System.out.println(message);
        System.out.println("写日志入数据库");
	}
}
2.3 建日志类型注解
import java.lang.annotation.Retention;
import java.lang.annotation.Target;
import java.lang.annotation.ElementType;
import java.lang.annotation.RetentionPolicy;

import org.springframework.context.annotation.Conditional;

import com.dongguangming.condition.LogServiceTypeCondition;

@Target({ ElementType.TYPE, ElementType.METHOD })
@Retention(RetentionPolicy.RUNTIME)
@Conditional(LogServiceTypeCondition.class)
public @interface LogServiceType
{
	//日志输出到什么地方去(控制台,file还是写到数据库mysql)
    String value() default "stdout";
}
2.4 通过Condition条件判断写日志
import java.util.Map;

import org.springframework.context.annotation.Condition;
import org.springframework.context.annotation.ConditionContext;
import org.springframework.core.type.AnnotatedTypeMetadata;

import com.dongguangming.annotation.LogServiceType;

public class LogServiceTypeCondition implements Condition {

	    @Override
	    public boolean matches(ConditionContext conditionContext,
	    AnnotatedTypeMetadata metadata)
	    {
	        Map<String, Object> attributes = metadata.getAnnotationAttributes(LogServiceType.class.getName());
	        String type = (String) attributes.get("value");
	        System.out.println("value:"+type);
	        String enabledLogType = conditionContext.getEnvironment().getProperty("logType","StdOut");
	        System.out.println("enabledLogType:"+enabledLogType);

	        return (enabledLogType != null && type != null && enabledLogType.equalsIgnoreCase(type));
	    }
}
2.5 创建自动配置类
import org.springframework.boot.autoconfigure.condition.ConditionalOnMissingBean;
import org.springframework.context.annotation.Bean;
import org.springframework.context.annotation.ComponentScan;
import org.springframework.context.annotation.Configuration;

import com.dongguangming.annotation.LogServiceType;
import com.dongguangming.service.LogService;
import com.dongguangming.service.impl.FileLogServiceImpl;
import com.dongguangming.service.impl.MysqlLogServiceImpl;
import com.dongguangming.service.impl.StdOutLogServiceImpl;

@Configuration
@ComponentScan
public class LogServiceAutoConfiguration
{
	@Bean
	@LogServiceType("STDOUT")
	@ConditionalOnMissingBean
    public LogService stdOutLogServiceImpl(){
        return new StdOutLogServiceImpl();
    }

    @Bean
    @LogServiceType("FILE")
    @ConditionalOnMissingBean
    public LogService fileLogServiceImpl(){
        return new FileLogServiceImpl();
    }

    @Bean
    @LogServiceType("MYSQL")
    @ConditionalOnMissingBean
    public LogService mysqlLogServiceImpl(){
        return new MysqlLogServiceImpl();
    }
}
2.6 创建配置性文件
在目录 src/main/resources/下创建约定的配置文件,先建目录 META-INF ,然后在其目录下创建很重要的配置文件 spring.factories ,填入以下内容
org.springframework.boot.autoconfigure.EnableAutoConfiguration=
com.dongguangming.autoconfigure.CustomAutoConfiguration,
com.dongguangming.autoconfigure.LogServiceAutoConfiguration
特别注意,该目录结构是约定好的,目录名必须这样命名,属性配置文件名也必须这样命名
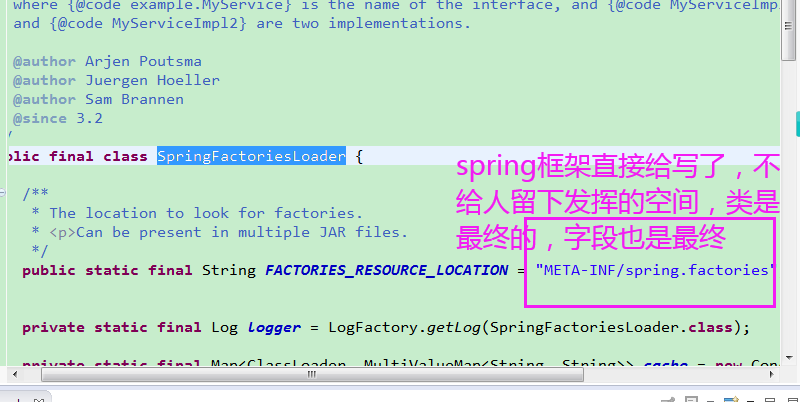
没办法了,spring太强大了,直接给你定好约束了,不让你瞎起名。
2.7 设置日志类型
在项目启动配置文件application.properties中设置日志输出类型,logType=File
然后运行主程序,效果如图示

2.8 打包成jar
用maven构建工具生成jar,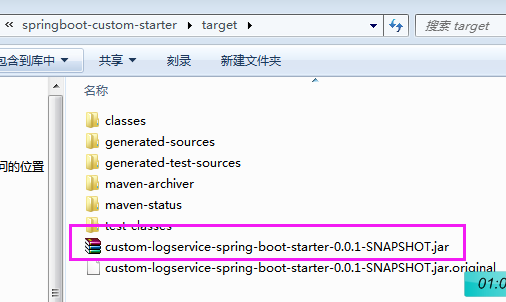
然后把这个jar 安装到maven仓库中
2.9 引用自定义的starter
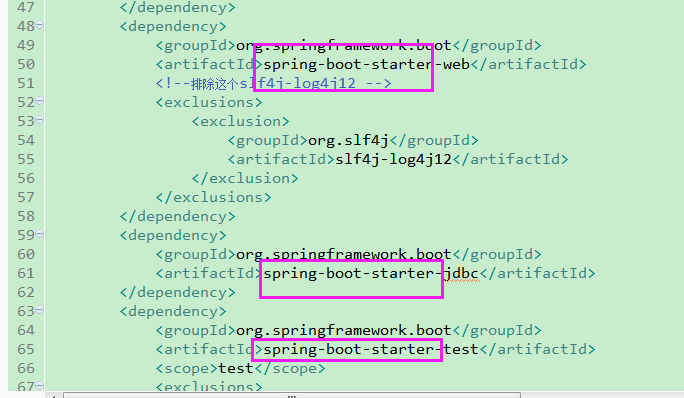
回到自定义项目的pom文件中,查看以下信息
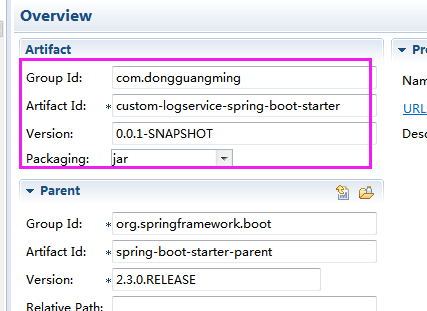
然后新的项目配置依赖就可以引用了,像引用其他第三方starter一样
 <!--官网自带的start,很多-->
 <dependency>
    <groupId>org.springframework.boot</groupId>
    <artifactId>spring-boot-starter-web</artifactId>
</dependency>
<dependency>
    <groupId>org.springframework.boot</groupId>
    <artifactId>spring-boot-starter-tomcat</artifactId>
    <scope>provided</scope>
</dependency>

<!--记得吗,这是我刚才自定义的starter-->
<dependency>
	<groupId>com.dongguangming</groupId>
	<artifactId>custom-logservice-spring-boot-starter</artifactId>
	<version>0.0.1-SNAPSHOT</version>
</dependency>
然后通过配置文件设置日志类型
#注意日志输出类型logtype有三种选择:stdout, file, mysql,任选其一
logType=File
代码中这样使用
@Autowired
LogService logService;

logService.print("自定义日志输出"));
至此一个自定义starter的库就结束了,如果可以,你可以把自定义的starter放置到各大maven公/私服仓库中,这样开发者就能引用你的依赖,不过官网已经写了很多,我只是举个例子,因为发现很多群里人都不清楚starter是做什么的。
附全部代码已上传 https://github.com/dongguangming/springboot-custom-starter
参考:
0. Creating Your Own Auto-configuration
1. How to custom Spring Boot Starter https://medium.com/@alexeynovikov_89393/how-to-write-your-own-spring-boot-starters-566ce5992954