在 android sqlite (上)中主要介绍了 sqlite的基础特性,及其如何利用SQLiteOpenHelper类来完成对sqlite数据靠的操作。
本次,主要将介绍下sqlite的事务、请求服务端,返回Json信息,最后解析入库。
关于事务,一言以概之就是批量操作数据库信息的时候,如果部分操作有异常,则回退之前所有的操作。可以保证本批次操作的一致性和完整性。
首先我们同样创建一个基础操作类来获取SQLiteDatabase


 1 public class DataBaseHelper extends SQLiteOpenHelper {
 2     private final String SQL="create table if not exists t_user(id int primary key,name varchar2(100),password varchar2(100))";
 3     private String tag="DataBaseHelper";
 4
 5     public DataBaseHelper(Context context, String name, CursorFactory factory,
 6             int version) {
 7         super(context, name, factory, version);
 8         // TODO Auto-generated constructor stub
 9     }
10
11     public DataBaseHelper(Context context, String name, int version) {
12         this(context, name, null, version);
13
14     }
15
16     @Override
17     public void onCreate(SQLiteDatabase db) {
18         Log.w(tag, "创建数据库");
19         db.execSQL(SQL);
20
21     }
22
23     @Override
24     public void onUpgrade(SQLiteDatabase db, int oldVersion, int newVersion) {
25
26         Log.w(tag, "更新数据库版本");
27     }
28
29 }
同时创建一张表
create table if not exists t_user(id int primary key,name varchar2(100),password varchar2(100))
现在我们要往上述的表中插入两条记录
1
2 ContentValues values=new ContentValues();
3 values.put("name", "lwx");
4 values.put("password", "123");
5 database.insert("t_user", "name,password", values);
6 database.execSQL("insert into t_user(name,password)value('zy','520')");
7
8
9
其中第二条记录故意将values写成了value.
执行后,发现第一条记录成功插入,而第二条记录不出意料的没有执行成功。
现在我们思考下,加入我们要执行一个操作,创建一个用户,同时给他赋权限。
明显要往用户表和权限表插入信息。因此我们就很有必要保证数据信息的一致性,要么一起成功,要么一起失败。
具体操作,看下面的代码
 1 database.beginTransaction();
 2                 try {
 3                     //设置事务成功 mInnerTransactionIsSuccessful=true 等效于jdbc commit;的封装
 4                     ContentValues values=new ContentValues();
 5                     values.put("name", "lwx");
 6                     values.put("password", "123");
 7                     database.insert("t_user", "name,password", values);
 8                     database.execSQL("insert into t_user(name,password)value('zy','520')");
 9                     database.setTransactionSuccessful();
10
11                 } catch (Exception e) {
12                     Log.w(tag, "插入数据失败,进行回退操作..");
13                 }finally{
14                     database.endTransaction();
15                 }
与之前区别就在于多了
database.beginTransaction();
database.setTransactionSuccessful();
database.endTransaction();
这三句代码,第一句是打开事务,第二句保证我们操作正确执行后,顺利提交操作。最后一句则是关闭事务

关于JSON解析
 1  public  class JsonUtil {
 2         private   String jsonObjStr="{\"password\":cnblogs,\"name\":\"小猪\"}";
 3         public  String getJsonValue(String key){
 4             //http://www.cnblogs.com/tt_mc/archive/2011/01/04/1925327.html
 5
 6             try {
 7                 JSONObject jsonObject=new JSONObject(jsonObjStr);
 8
 9                 //jsonObject.opt("name");//不会爆异常
10                 return (String)jsonObject.get(key);
11             } catch (JSONException e) {
12                 // TODO Auto-generated catch block
13                 e.printStackTrace();
14             }
15             return null;
16
17         }
18     }
将json数据写入数据库
JsonUtil jsonUtil=new JsonUtil();
                ContentValues values=new ContentValues();
                values.put("name", jsonUtil.getJsonValue("name"));
                values.put("password", jsonUtil.getJsonValue("password"));
                database.insert("t_user", "name,password", values);
这里为了方便,并没有指定json的出处。
最后,我们来通过apache的httpClient请求远程服务来获取json数据,最后解析入库
首先,我们定义一个httpUtil类,来完成我们的请求操作
 1 public class HttpUtil {
 2     private String url = "http://10.1.3.121:9003/httpServer/test";
 3     private String requestCode;
 4     private String responseResult;
 5     //需要android.permission.INTERNET
 6
 7
 8     public HttpUtil(String requestCode) {
 9
10         this.requestCode = requestCode;
11     }
12
13     //get方式
14     public String doGet() {
15         url += "?requestCode=" + requestCode;
16         Log.e("HttpRequest", url);
17         HttpGet get = new HttpGet(url);
18
19         HttpClient client = new DefaultHttpClient();
20
21         try {
22             HttpResponse response = client.execute(get);
23             HttpEntity entity = response.getEntity();
24             responseResult = EntityUtils.toString(entity);
25
26         } catch (ClientProtocolException e) {
27             Log.e("HttpRequest", "get请求服务地址出错");
28         } catch (IOException e) {
29             Log.e("HttpRequest", "get请求服务地址出错");
30         }
31         return responseResult;
32
33     }
34
35     public String doPost(){
36         NameValuePair valuePair=new BasicNameValuePair("responseResult", responseResult);
37         List<NameValuePair> parameter=new ArrayList<NameValuePair>();
38         try {
39             HttpEntity httpEntity=    new UrlEncodedFormEntity(parameter);
40             HttpPost httpPost=new HttpPost(url);
41             httpPost.setEntity(httpEntity);
42             HttpClient client=new DefaultHttpClient();
43             HttpResponse response =client.execute(httpPost);
44             HttpEntity entity = response.getEntity();
45             responseResult = EntityUtils.toString(entity);
46
47
48         } catch (UnsupportedEncodingException e) {
49             Log.e("HttpPost", "字符转换出错");
50         } catch (ClientProtocolException e) {
51             Log.e("HttpRequest", "post请求服务地址出错");
52         } catch (IOException e) {
53             Log.e("HttpRequest", "post请求服务地址出错");
54         }
55
56
57         return responseResult;
58     }
59
60
61 }
接着,我们创建一个通过servlet来简单创建一个远程服务
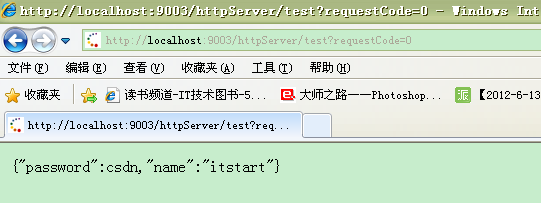
public void doGet(HttpServletRequest request, HttpServletResponse response)
            throws ServletException, IOException {

        doPost(request, response);
    }


    public void doPost(HttpServletRequest request, HttpServletResponse response)
            throws ServletException, IOException {
        String requestCode =request.getParameter("requestCode");
        String jsonObjStr;
        response.setCharacterEncoding("GBK");
        PrintWriter out = response.getWriter();
        if(requestCode.equals("1")){
            jsonObjStr="{\"password\":eoe,\"name\":\"yiyou\"}";

        }else{
            jsonObjStr="{\"password\":csdn,\"name\":\"itstart\"}";
        }
        out.print(jsonObjStr);
        out.flush();
        out.close();
    }
对于之前的JosnUtil类我做了点改动
public JsonUtil(){}
    public JsonUtil(String jsonObjStr){
        this.jsonObjStr=jsonObjStr;
    }
最后是android中activity的处理方式了
baseHelper=new DataBaseHelper(SqliteActivity.this, "user.db", 1);
                database=    baseHelper.getWritableDatabase();
                int ramNum=(int)(Math.random()*1);
                String requestCode[]=new String[]{"1","0"};
                Log.w(tag,     "产生的随机数:"+ramNum);
                HttpUtil httpUtil=new HttpUtil(requestCode[ramNum]);
                String result=httpUtil.doGet();
                JsonUtil jsonUtil2=new JsonUtil(result);
                insertData(jsonUtil2);
insertData方法代码
 1 public void insertData(JsonUtil jsonUtil){
 2         Cursor cursor=null;
 3         ContentValues values=new ContentValues();
 4         values.put("name", jsonUtil.getJsonValue("name"));
 5         values.put("password", jsonUtil.getJsonValue("password"));
 6         database.insert("t_user", "name,password", values);
 7         //database.execSQL("insert into t_user(name,password)values('zy','520')");
 8         // cursor=database.rawQuery("select name from t_user where name=?", new String[]{"zy"});
 9          cursor= database.rawQuery("select name from t_user ", null);
10
11         while(cursor.moveToNext()){
12             if(cursor.moveToLast()!=true)
13                 continue;
14         String name=    cursor.getString(cursor.getColumnIndex("name"));
15         Log.w(tag,     name);
16             Toast.makeText(getApplicationContext(), name, 1).show();
17         }
18
19     }

总结:当我们需要的时候,尽量多结合一些常用的或则自己不熟悉的模块,进行整合。
这样既达到了复习的效果,又可以学习新的知识。:)