vite需要node版本在12以上
1.创建vue项目
- 使用npm
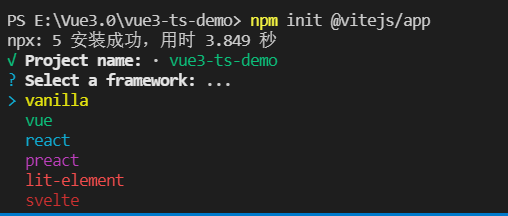
npm init @vitejs/app
- 使用yarn
yarn create @vitejs/app

选择vue

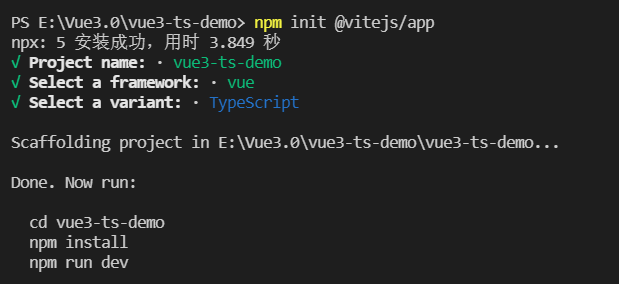
选择ts模板

之后照着执行就ok,这样一个简单的项目就完成了
2.引入vue-router
下载vue-router4
npm install vue-router@next --save
在项目中创建router文件夹,在文件夹下创建router.ts
import { createRouter, RouteRecordRaw , Router, createWebHistory} from 'vue-router'

const routes: Array<RouteRecordRaw> = [
 {
  path: '/home',
  name: 'Home',
  component: () => import('@/views/Home.vue'),
  meta: {
   title: '首页'
  }
 }
]

const router: Router = createRouter({
 history: createWebHistory(),
 routes
})

export default router
在main.ts中引入router
import { createApp } from 'vue'
import App from './App.vue'
import router  from './router/index'

const app = createApp(App)
app.use(router)
app.mount('#app')
将app.vue中内容替换
<template>
  <router-view></router-view>
</template>

<script lang="ts">
import { defineComponent } from 'vue'

export default defineComponent({
  name: 'App'
})
</script>

<style>
#app {
  font-family: Avenir, Helvetica, Arial, sans-serif;
  -webkit-font-smoothing: antialiased;
  -moz-osx-font-smoothing: grayscale;
  text-align: center;
  color: #2c3e50;
  margin-top: 60px;
}
</style>
3.vite.config.ts配置
import { defineConfig } from 'vite'
import vue from '@vitejs/plugin-vue'

import path from 'path'

export default defineConfig({
  plugins: [vue()],
  resolve: {
    alias: {
      '@': path.resolve(__dirname, 'src')
    }
  },
  server: {
    open: true, // 在服务器启动时自动在浏览器中打开应用程序
    //host: 'localhost',  // 指定服务器主机名
    port: 8888, // 指定服务器端口
    proxy: { // 为开发服务器配置自定义代理规则

    }
  }
})
碰到的问题:
__dirname报错: 解决办法
npm install --save-dev @types/node


之后正常启动项目
