一、Sentinel 是什么?
随着微服务的流行,服务和服务之间的稳定性变得越来越重要。Sentinel 以流量为切入点,从流量控制、熔断降级、系统负载保护等多个维度保护服务的稳定性。
Sentinel 具有以下特征:
-
丰富的应用场景:Sentinel 承接了阿里巴巴近 10 年的双十一大促流量的核心场景,例如秒杀(即突发流量控制在系统容量可以承受的范围)、消息削峰填谷、集群流量控制、实时熔断下游不可用应用等。
-
完备的实时监控:Sentinel 同时提供实时的监控功能。您可以在控制台中看到接入应用的单台机器秒级数据,甚至 500 台以下规模的集群的汇总运行情况。
-
广泛的开源生态:Sentinel 提供开箱即用的与其它开源框架/库的整合模块,例如与 Spring Cloud、Dubbo、gRPC 的整合。您只需要引入相应的依赖并进行简单的配置即可快速地接入 Sentinel。
-
完善的 SPI 扩展点:Sentinel 提供简单易用、完善的 SPI 扩展接口。您可以通过实现扩展接口来快速地定制逻辑。例如定制规则管理、适配动态数据源等。
Sentinel 的主要特性:

Sentinel 的开源生态:

二、如何使用Sentinel
我们说的资源,可以是任何东西,服务,服务里的方法,甚至是一段代码。使用Sentinel 来进行资源保护,主要分为两个步骤:
- 定义资源
- 定义规则
先把可能需要保护的资源定义好,之后再配置规则。也可以理解为,只要有了资源,我们就可以在任何时候灵活地定义各种流量控制规则。在编码的时候,只需要考虑这个代码是否需要保护,如果需要保护,就将之定义为一个资源。
对于主流的框架,我们提供适配,只需要按照适配中的说明配置,Sentinel 就会默认定义提供的服务,方法等为资源。
三、示例
3.1、Sentinel编码限流
先来简单的体验下 Sentinel 吧,在你的Maven项目中增加 Sentinel 的依赖:
    <dependency>
    <groupId>com.alibaba.csp</groupId>
    <artifactId>sentinel-core</artifactId>
    <version>1.4.0</version>
    </dependency>
Sentinel中需要限流的称之为资源,对资源进行处理,下面来看最简单的一段代码:
package com.example.demo.service;

import java.util.ArrayList;
import java.util.List;
import java.util.concurrent.TimeUnit;

import com.alibaba.csp.sentinel.Entry;
import com.alibaba.csp.sentinel.SphU;
import com.alibaba.csp.sentinel.slots.block.BlockException;
import com.alibaba.csp.sentinel.slots.block.RuleConstant;
import com.alibaba.csp.sentinel.slots.block.flow.FlowRule;
import com.alibaba.csp.sentinel.slots.block.flow.FlowRuleManager;

public class LimitByCoding {
    public static void main(String[] args) throws InterruptedException {
        initFlowRules();
        long startTime = System.currentTimeMillis();
        for (int i = 0; i < 1000; i++) {
            /* 您的业务逻辑 - 开始 */
            System.out.println("hello world");
        }
        long endTime = System.currentTimeMillis();
        System.out.println(endTime - startTime);
        long startTime2 = System.currentTimeMillis();
        for (int i = 0; i < 1000; i++) {
            Entry entry = null;
            try {
                entry = SphU.entry("HelloWorld");
                /* 您的业务逻辑 - 开始 */
                System.out.println("hello world");
                /* 您的业务逻辑 - 结束 */
            } catch (BlockException e1) {
                /* 流控逻辑处理 - 开始 */
                System.out.println("block!");
                /* 流控逻辑处理 - 结束 */
            } finally {
                if (entry != null) {
                    entry.exit();
                }
            }
        }
        long endTime2 = System.currentTimeMillis();
        System.out.println(endTime2 - startTime2);
    }

    private static void initFlowRules() {
        List<FlowRule> rules = new ArrayList<>();
        FlowRule rule = new FlowRule();
        rule.setResource("HelloWorld");
        rule.setGrade(RuleConstant.FLOW_GRADE_QPS);
        // Set limit QPS to 20.
        rule.setCount(20);
        rules.add(rule);
        FlowRuleManager.loadRules(rules);
    }
}
第一行中初始化限流的规则,创建了一个资源叫 HelloWorld,设置了这个资源的QPS 为 20。
结果:
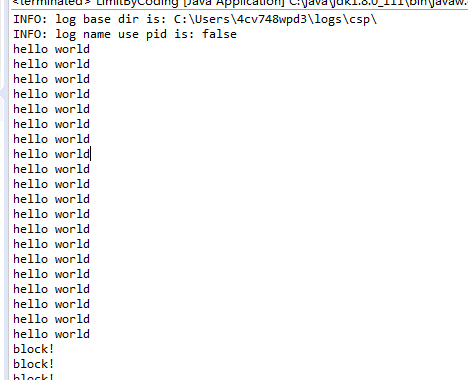
上面的例子中次数为1000次,只输出一句话,不做任何限制,执行完成的时间大概在9毫秒左右。
下面加上限流的逻辑,执行完成的时间基本上就超过91毫秒了,可见限流起了作用。
在业务开始前使用SphU.entry();方法标识开始,结束使用entry.exit();,如果触发了流控逻辑就会抛出BlockException异常让用户自行处理。
代码运行之后,我们可以在日志 ~/logs/csp/${appName}-metrics.log.xxx 里看到下面的输出:
    |--timestamp---|------date time--|-resource-|p |block|s  |e|rt

    1529998904000|2018-06-26 15:41:44|HelloWorld|20|0    |20|0|0

    1529998905000|2018-06-26 15:41:45|HelloWorld|20|5579 |20|0|728

    1529998906000|2018-06-26 15:41:46|HelloWorld|20|15698|20|0|0

    1529998907000|2018-06-26 15:41:47|HelloWorld|20|19262|20|0|0

    1529998908000|2018-06-26 15:41:48|HelloWorld|20|19502|20|0|0

    1529998909000|2018-06-26 15:41:49|HelloWorld|20|18386|20|0|0
-
p:通过的请求,
-
block:被阻止的请求
-
s:成功执行完成的请求个数
-
e:用户自定义的异常
-
rt:平均响应时长。
3.2、Sentinel注解限流
这种做法不好的地方在于每个需要限制的地方都得写代码,从 0.1.1 版本开始,Sentinel 提供了 @SentinelResource 注解的方式,非常方便。
要使用注解来保护资源需要引入下面的Maven依赖:
        <dependency>
            <groupId>com.alibaba.csp</groupId>
            <artifactId>sentinel-annotation-aspectj</artifactId>
            <version>1.4.0</version>
        </dependency>
完整的pom.xml
<?xml version="1.0" encoding="UTF-8"?>
<project xmlns="http://maven.apache.org/POM/4.0.0"
    xmlns:xsi="http://www.w3.org/2001/XMLSchema-instance"
    xsi:schemaLocation="http://maven.apache.org/POM/4.0.0 http://maven.apache.org/xsd/maven-4.0.0.xsd">
    <modelVersion>4.0.0</modelVersion>
    <parent>
        <groupId>org.springframework.boot</groupId>
        <artifactId>spring-boot-starter-parent</artifactId>
        <version>1.5.19.RELEASE</version>
        <relativePath /> <!-- lookup parent from repository -->
    </parent>
    <groupId>com.dxz</groupId>
    <artifactId>LimitDemo</artifactId>
    <version>0.0.1-SNAPSHOT</version>
    <name>LimitDemo</name>
    <description>Demo project for Spring Boot</description>

    <properties>
        <java.version>1.8</java.version>
    </properties>

    <dependencies>
        <dependency>
            <groupId>org.springframework.boot</groupId>
            <artifactId>spring-boot-starter-web</artifactId>
        </dependency>
        <dependency>
            <groupId>org.springframework.boot</groupId>
            <artifactId>spring-boot-starter-tomcat</artifactId>
        </dependency>
        <dependency>
            <groupId>com.alibaba.csp</groupId>
            <artifactId>sentinel-annotation-aspectj</artifactId>
            <version>1.4.0</version>
        </dependency>
        <dependency>
            <groupId>org.springframework</groupId>
            <artifactId>spring-core</artifactId>
            <version>4.3.7.RELEASE</version>
        </dependency>
        <dependency>
            <groupId>org.springframework</groupId>
            <artifactId>spring-beans</artifactId>
            <version>4.3.7.RELEASE</version>
        </dependency>
        <dependency>
            <groupId>org.springframework</groupId>
            <artifactId>spring-context</artifactId>
            <version>4.3.7.RELEASE</version>
        </dependency>
        <dependency>
            <groupId>org.springframework</groupId>
            <artifactId>spring-aop</artifactId>
            <version>4.3.7.RELEASE</version>
        </dependency>
        <dependency>
            <groupId>org.springframework</groupId>
            <artifactId>spring-expression</artifactId>
            <version>4.3.17.RELEASE</version>
        </dependency>
        <dependency>
            <groupId>org.springframework.boot</groupId>
            <artifactId>spring-boot-starter</artifactId>
        </dependency>
        <dependency>
            <artifactId>slf4j-api</artifactId>
            <groupId>org.slf4j</groupId>
            <version>1.7.10</version>
        </dependency>
        <dependency>
            <groupId>ch.qos.logback</groupId>
            <artifactId>logback-classic</artifactId>
            <version>1.2.2</version>
        </dependency>
        <dependency>
            <groupId>org.springframework.boot</groupId>
            <artifactId>spring-boot-starter-test</artifactId>
            <scope>test</scope>
        </dependency>
    </dependencies>

    <build>
        <plugins>
            <plugin>
                <groupId>org.springframework.boot</groupId>
                <artifactId>spring-boot-maven-plugin</artifactId>
            </plugin>
        </plugins>
    </build>

</project>
引入之后我们需要配置SentinelResourceAspect切面让其生效,因为是通过SentinelResourceAspect切面来实现的,我这边以Spring Boot中使用进行配置示列:
package com.example.demo.config;

import org.springframework.context.annotation.Bean;
import org.springframework.context.annotation.Configuration;
import com.alibaba.csp.sentinel.annotation.aspectj.SentinelResourceAspect;

@Configuration
public class AopConfiguration
{
    @Bean
    public SentinelResourceAspect sentinelResourceAspect()
    {
        return new SentinelResourceAspect();
    }

}
然后在需要限制的方法上加SentinelResource注解即可:
package com.example.demo.service;

import org.springframework.stereotype.Component;

import com.alibaba.csp.sentinel.annotation.SentinelResource;
import com.alibaba.csp.sentinel.slots.block.BlockException;
import com.example.demo.ExceptionUtil;

@Component
public class BuzService {

    @SentinelResource(value = "get", blockHandler = "exceptionHandler")
    public String get(String id) {
        return "http://cxytiandi.com";
    }

    @SentinelResource(value = "get2", blockHandler = "handleException", blockHandlerClass = { ExceptionUtil.class })
    public String get2() {
        return "http://cxytiandi.com";
    }

    public String exceptionHandler(String id, BlockException e) {
        e.printStackTrace();
        return "错误发生在" + id;
    }
}
SentinelResource:value
表示资源名,必填项
SentinelResource:blockHandler
处理 BlockException 的方法名,可选项。若未配置,则将 BlockException 直接抛出。
-
blockHandler 函数访问范围需要是 public
-
返回类型需要与原方法相匹配
-
参数类型需要和原方法相匹配并且最后加一个额外的参数,类型为 BlockException
-
blockHandler 函数默认需要和原方法在同一个类中
如果你不想让异常处理方法跟业务方法在同一个类中,可以使用 blockHandlerClass 为对应的类的 Class 对象,注意对应的函数必需为 static 函数,否则无法解析。
业务方法:
    @SentinelResource(value = "get2", blockHandler = "handleException", blockHandlerClass = { ExceptionUtil.class })
    public String get2() {
        return "http://cxytiandi.com";
    }
异常处理类:
package com.example.demo;

import com.alibaba.csp.sentinel.slots.block.BlockException;

public final class ExceptionUtil {
    public static String handleException(BlockException ex) {
        System.err.println("错误发生: " + ex.getClass().getCanonicalName());
        return "error";
    }

}
如何测试?
我们可以在Spring Boot的启动类中定义规则,然后快速访问接口,就可以看出效果啦,或者用压力测试工具ab等。
package com.example.demo;

import java.util.ArrayList;
import java.util.List;

import org.springframework.boot.SpringApplication;
import org.springframework.boot.autoconfigure.SpringBootApplication;

import com.alibaba.csp.sentinel.slots.block.RuleConstant;
import com.alibaba.csp.sentinel.slots.block.flow.FlowRule;
import com.alibaba.csp.sentinel.slots.block.flow.FlowRuleManager;

@SpringBootApplication
public class LimitDemoApplication {

    public static void main(String[] args) {
        initFlowRules();
        SpringApplication.run(LimitDemoApplication.class, args);
    }

    private static void initFlowRules() {
        List<FlowRule> rules = new ArrayList<>();
        FlowRule rule = new FlowRule();
        rule.setResource("get");
        rule.setGrade(RuleConstant.FLOW_GRADE_QPS);
        rule.setCount(1);
        rules.add(rule);

        rule = new FlowRule();
        rule.setResource("get2");
        rule.setGrade(RuleConstant.FLOW_GRADE_QPS);
        rule.setCount(1);
        rules.add(rule);

        FlowRuleManager.loadRules(rules);
    }
}
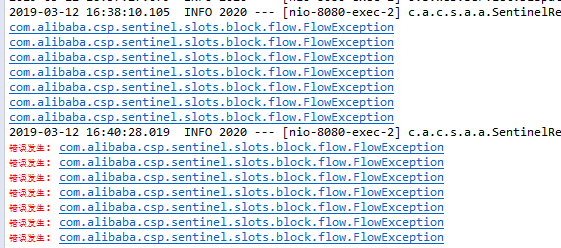
结果:
源码分析
只需要配置了SentinelResourceAspect就可以使用注解,我们来简单的看下SentinelResourceAspect的源码
    @Aspect
    public class SentinelResourceAspect extends AbstractSentinelAspectSupport {
  @Pointcut("@annotation(com.alibaba.csp.sentinel.annotation.SentinelResource)")
    public void sentinelResourceAnnotationPointcut() {

    }


    @Around("sentinelResourceAnnotationPointcut()")
    public Object invokeResourceWithSentinel(ProceedingJoinPoint pjp) throws Throwable {

    // 获取当前访问的方法
    Method originMethod = resolveMethod(pjp);
    // 获取方法上的SentinelResource注解
    SentinelResource annotation = originMethod.getAnnotation(SentinelResource.class);
    if (annotation == null) {
    // Should not go through here.
    throw new IllegalStateException("Wrong state for SentinelResource annotation");
    }

    // 获取资源名
    String resourceName = getResourceName(annotation.value(), originMethod);
    EntryType entryType = annotation.entryType();
    Entry entry = null;
    try {
    entry = SphU.entry(resourceName, entryType, 1, pjp.getArgs());
    Object result = pjp.proceed();
    return result;
    } catch (BlockException ex) {
    // 处理被限制的异常,回调事先配置的异常处理方法
    return handleBlockException(pjp, annotation, ex);
    } catch (Throwable ex) {
    Tracer.trace(ex);
    throw ex;
    } finally {
    if (entry != null) {
    entry.exit();
    }
    }
    }
    }
上面是整个切面的代码,对所有加了SentinelResource注解的方法进去切入。细节代码在AbstractSentinelAspectSupport中,大家自己去看看。