1、安装nginx
下载链接 http://nginx.org/en/download.html
(1)下载,解压
wget http://nginx.org/download/nginx-1.15.8.tar.gz
tar zxf nginx-1.15.8.tar.gz
cd nginx-1.15.8
(2)在编译安装之前先安装需要的依赖库和编译软件安装
yum install gcc gcc-c++ glibc -y
yum install pcre-devel -y
yum install zlib-devel -y
yum install openssl-devel -y
(3)nginx编译参数解析
–prefix #nginx安装目录,默认在/usr/local/nginx
–pid-path #pid问件位置,默认在logs目录
–lock-path #lock问件位置,默认在logs目录
–with-http_ssl_module #开启HTTP SSL模块,以支持HTTPS请求。
–with-http_dav_module #开启WebDAV扩展动作模块,可为文件和目录指定权限
–with-http_flv_module #支持对FLV文件的拖动播放
–with-http_realip_module #支持显示真实来源IP地址
–with-http_gzip_static_module #预压缩文件传前检查,防止文件被重复压缩
–with-http_stub_status_module #取得一些nginx的运行状态
–with-mail #允许POP3/IMAP4/SMTP代理模块
–with-mail_ssl_module #允许POP3/IMAP/SMTP可以使用SSL/TLS
–with-pcre=../pcre-8.11 #注意是未安装的pcre路径
–with-zlib=../zlib-1.2.5 #注意是未安装的zlib路径
–with-debug #允许调试日志
–http-client-body-temp-path #客户端请求临时文件路径
–http-proxy-temp-path #设置http proxy临时文件路径
–http-fastcgi-temp-path #设置http fastcgi临时文件路径
–http-uwsgi-temp-path=/var/tmp/nginx/uwsgi #设置uwsgi 临时文件路径
–http-scgi-temp-path=/var/tmp/nginx/scgi #设置scgi 临时文件路径
(4)编译安装
在linux 上通过yum安装nginx默认使用nobody用户和用户组。 http://www.runoob.com/linux/linux-user-manage.html
# grep '#user' nginx.conf.default
#user bobody;
为了防止黑客猜到这个Web服务的用户,我们需要将其更改成特殊的用户名;有两种方式
(1)在编译的时候可以手动指定用户和组。
(2)将默认的"#user nobody;" 改为如下内容
并在nginx编译安装完成之后,修改nginx.conf
user  nginx   nginx;  //用户    用户组
手动创建nginx属主和nginx属组
1、增加一个新的用户组使用groupadd命令。其格式如下:
groupadd 选项 用户组

可以使用的选项有:
-g GID 指定新用户组的组标识号(GID)。
-o 一般与-g选项同时使用,表示新用户组的GID可以与系统已有用户组的GID相同。

例如:
# groupadd group1
说明:此命令向系统中增加了一个新组group1,新组的组标识号是在当前已有的最大组标识号的基础上加1。

2、添加新的用户账号使用useradd命令,其语法如下:
useradd 选项 用户名

选项参数说明:
-c comment 指定一段注释性描述。
-d 目录 指定用户主目录,如果此目录不存在,则同时使用-m选项,可以创建主目录。
-g 用户组 指定用户所属的用户组。
-G 用户组,用户组 指定用户所属的附加组。
-s Shell文件 指定用户的登录Shell。
-u 用户号 指定用户的用户号,如果同时有-o选项,则可以重复使用其他用户的标识号。
用户名: 指定新账号的登录名。

 例如:
# useradd –d /usr/sam -m sam
说明:此命令创建了一个用户sam,其中-d和-m选项用来为登录名sam产生一个主目录/usr/sam(/usr为默认的用户主目录所在的父目录)。

//添加nginx用户组
groupadd nginx
//添加nginx用户
useradd nginx -g nginx -s /sbin/nologin -M
说明:
-s表示指定用户所用的shell,此处为/sbin/nologin,表示不登录。
-M表示不创建用户主目录。
-g表示指定用户的组名为nginx。
《执行编译》
./configure  --prefix=/opt/local/nginx
--sbin-path=/opt/local/nginx/sbin/nginx
--conf-path=/opt/local/nginx/conf/nginx.conf
--error-log-path=/var/log/nginx/error.log
--http-log-path=/var/log/nginx/access.log
--pid-path=/var/run/nginx/nginx.pid
--lock-path=/var/lock/nginx.lock
--user=nginx
--group=nginx
--with-http_ssl_module
--with-http_stub_status_module
--with-http_gzip_static_module
--http-client-body-temp-path=/var/tmp/nginx/client/
--http-proxy-temp-path=/var/tmp/nginx/proxy/
--http-fastcgi-temp-path=/var/tmp/nginx/fcgi/
--http-uwsgi-temp-path=/var/tmp/nginx/uwsgi
--http-scgi-temp-path=/var/tmp/nginx/scgi
--with-pcre
或 执行时格式这样子
./configure --prefix=/opt/local/nginx --sbin-path=/opt/local/nginx/sbin/nginx --conf-path=/opt/local/nginx/conf/nginx.conf --error-log-path=/var/log/nginx/error.log --http-log-path=/var/log/nginx/access.log --pid-path=/var/run/nginx/nginx.pid --lock-path=/var/lock/nginx.lock --user=nginx --group=nginx --with-http_ssl_module --with-http_stub_status_module --with-http_gzip_static_module --http-client-body-temp-path=/var/tmp/nginx/client/ --http-proxy-temp-path=/var/tmp/nginx/proxy/ --http-fastcgi-temp-path=/var/tmp/nginx/fcgi/ --http-uwsgi-temp-path=/var/tmp/nginx/uwsgi --http-scgi-temp-path=/var/tmp/nginx/scgi --with-pcre
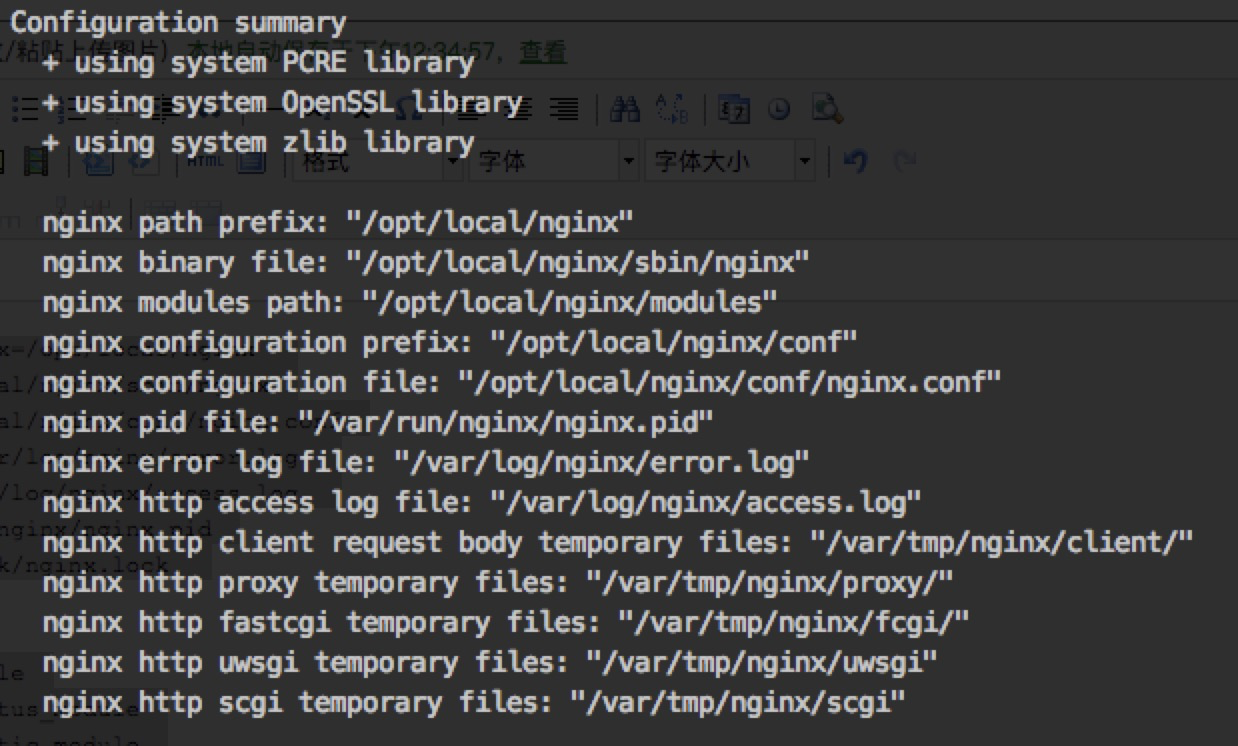
执行完成的样子

最后执行如下
make && make install
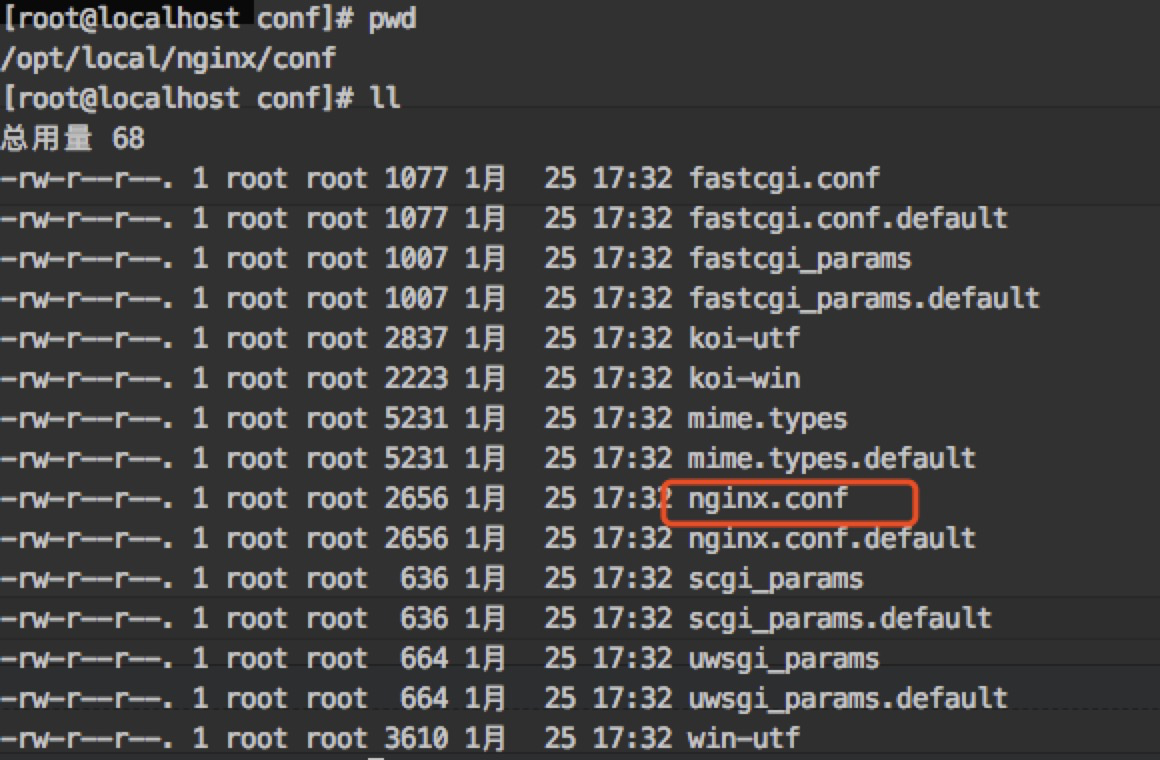
查看如下

(5)修改查看配置

修改启动软连
ln -s /opt/local/nginx/sbin/nginx /usr/bin/
启动nginx
/opt/local/nginx/sbin/nginx
or
nginx -t //已经软连接过了
nginx

如图所示,报错没有找到nginx文件夹,没关系,创建一个即可。再重新启动查看端口号

(6)查看网络状态 http://www.runoob.com/linux/linux-comm-netstat.html
netstat -lntup

到这里nginx的安装就非常完美的告一段落了。
[root@localhost www]# nginx -s reload
nginx: [alert] kill(17615, 1) failed (3: No such process)
当nginx 重启的时候遇到这个问题,意思没有这样的进程,怀疑没有启动nginx
(1)执行命令,定位nginx: whereis nginx
(2)查找配置文件 find / -name nginx.conf
(3)指定配置文件地址/usr/bin/nginx -c /opt/local/nginx/conf/nginx.conf
最后在重启即可:nginx -s reload
[root@localhost conf]# nginx -s reload
nginx: [error] open() "/var/run/nginx/nginx.pid" failed (2: No such file or directory)
2、安装PHP
wget http://cn2.php.net/distributions/php-7.2.8.tar.gz
tar -xzf php-7.2.8.tar.gz
(1)先安装编译依赖的组件
yum -y install gcc gcc-c++ gcc-g77 make libtool autoconf patch unzip automake libxml2 libxml2-devel ncurses ncurses-devel libtool-ltdl-devel libtool-ltdl libmcrypt libmcrypt-devel libpng libpng-devel libjpeg-devel
openssl openssl-devel gd-devel curl curl-devel libxml2 libxml2-devel ncurses ncurses-devel libtool-ltdl-devel libtool-ltdl autoconf automake libaio*
说明:
nginx本身不能处理PHP,它只是个web服务器,当接收到请求后,如果是php请求,则发给php解释器处理,并把结果返回给客户端。
nginx一般是把请求发fastcgi管理进程处理,fascgi管理进程选择cgi子进程处理结果并返回给nginx
(2)什么是PHP-FPM
PHP-FPM是一个PHP FastCGI管理器,是只用于PHP的,可以在 http://php-fpm.org/download下载得到.
PHP-FPM其实是PHP源代码的一个补丁,旨在将FastCGI进程管理整合进PHP包中。必须将它patch到你的PHP源代码中,在编译安装PHP后才可以使用。
新版PHP已经集成php-fpm了,不再是第三方的包了,推荐使用。
PHP-FPM提供了更好的PHP进程管理方式,可以有效控制内存和进程、可以平滑重载PHP配置,比spawn-fcgi具有更多优点,所以被PHP官方收录了。
在./configure的时候带 –enable-fpm参数即可开启PHP-FPM,其它参数都是配置php的,具体选项含义可以查看这里。
(3) 编译安装 (修改对应的配置)
./configure --prefix=/opt/local/php7 --with-curl --with-mysql-sock=/var/tmp/mysql/mysql.sock --with-jpeg-dir --with-freetype-dir --with-gd --with-gettext --with-iconv-dir --with-kerberos --with-libxml-dir --with-mysqli=mysqlnd --with-openssl --with-pcre-regex --with-pdo-mysql=mysqlnd --with-pdo-sqlite --with-pear --with-png-dir --with-xmlrpc --with-xsl --with-zlib --with-pdo-mysql --with-fpm-user=nginx --with-fpm-group=nginx --enable-fpm --enable-bcmath --enable-libxml --enable-inline-optimization --enable-gd-native-ttf --enable-mbregex --enable-mbstring --enable-opcache --enable-pcntl --enable-shmop --enable-soap --enable-sockets --enable-sysvsem --enable-xml --enable-zip --enable-mysqlnd --enable-maintainer-zts
如果编译遇到一个问题:-bash: --with-freetype-dir 没有那个文件或目录
先安装 freetype
yum install freetype
编译时遇到的问题,安装即可,最后在执行上面的编译安装
yum install libcurl-devel
yum -y install libxslt libxslt-devel
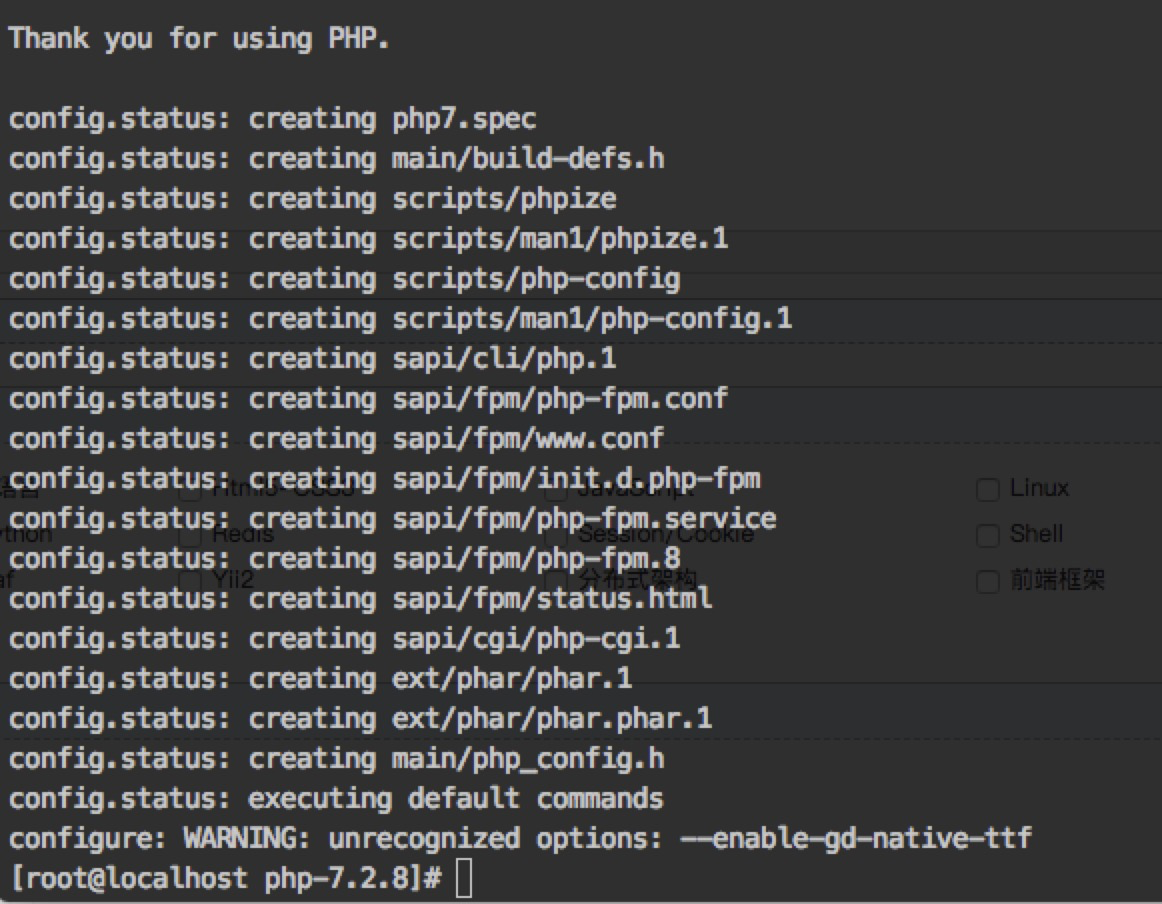
最后的样子

然后执行如下命令
make && make install

以上php就安装好了,接下来进行配置
1).在执行configure的地方执行如下命令
cp php.ini-production /opt/local/php7/etc/php.ini
cd /opt/local/php7/etc/    //查看是否有了 php.ini
2).在接着执行如下命令
cp php-fpm.conf.default php-fpm.conf
3).在进入这个目录 cd php-fpm.d/ 在继续执行如下命令
cp www.conf.default www.conf
4).最后在这个目录 /opt/local/php7/sbin 执行如下命令
./php-fpm
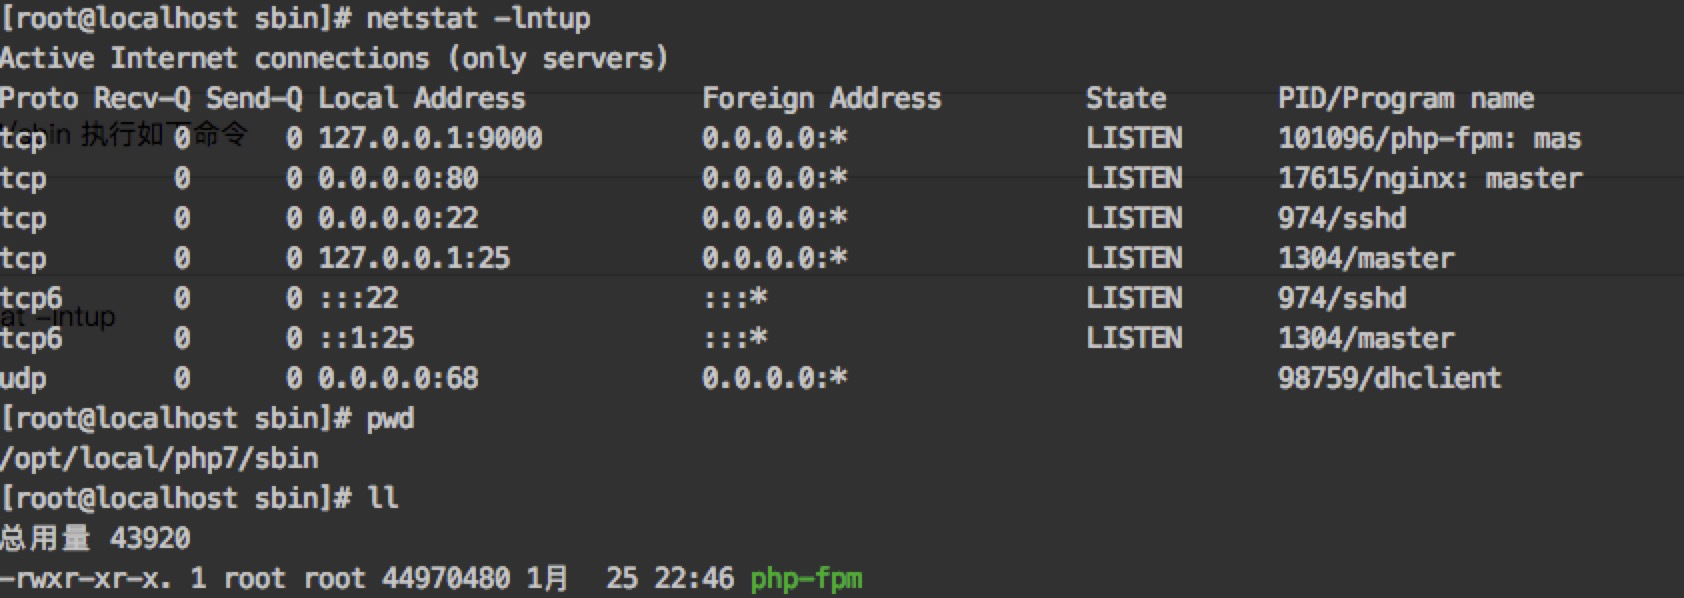
5).查看一下端口号是否启动了 netstat -lntup

由图片可见,php-fpm 已经成功启动了。
设置全局php访问
ln -s /opt/local/php7/bin/php /usr/bin/php
添加永久环境变量,影响所有用户
vim /etc/profile
在文档最后,添加如下命令;说明(sbin 为php-fpm 所在,bin 为php客户端所在)

export PATH = "/opt/local/php7/sbin:/opt/local/php7/bin:$PATH"  保持退出 然后运行 source /etc/profile
具体资源可看这里,环境变量设置

其他说明:
因为没有安装mysql,所以查看/opt/local/php7/lib/php/extensions/no-debug-zts-20170718/下只有opcache.a opcache.so 两个扩展,
而如果安装了mysql则需要确保存在mysqli.so、pdo_mysql.so这两个动态库文件,否则无法与mysql通信成功;
解决重启php-fpm时遇到的一些问题;
[root@localhost /]# service php-fpm start
Redirecting to /bin/systemctl start php-fpm.service
Failed to start php-fpm.service: Unit not found.
上面的问题是说 php-fpm.service: Unit not found
解决思路:因为php-fpm是编译安装的,所以,那个脚本文件不存在。在service的时候会自动访问 init.d/目录下的php-fpm脚本,没有这个脚本就会报那个错误。
所以这个时候需要将编译目录下的这个脚本/root/php-7.2.8/sapi/fpm/init.d.php-fpm cp 到 init.d/的目录,
cp /root/php-7.2.8/sapi/fpm/init.d.php-fpm /etc/init.d/php-fpm 这样就可以执行了,并修改这个文件的可执行权限
解决方案
1)find / -name 'init.d.php-fpm'
/root/php-7.2.8/sapi/fpm/init.d.php-fpm
2)cp /root/php-7.2.8/sapi/fpm/init.d.php-fpm /etc/init.d/php-f
3)chmod a+x /etc/init.d/php-fpm //修改为可执行权限
4)service php-fpm start
又遇到问题了:
Starting php-fpm [26-Jan-2019 05:01:49] ERROR: unable to bind listening socket for address '127.0.0.1:9000': Address already in use (98)
[26-Jan-2019 05:01:49] ERROR: FPM initialization failed
遇到这个问题也是头大,先看一下进程
netstat -lntup | grep 9000
killall php-fpm
5)开启php: service php-fpm start|restart|stop
6) 查看:ps aux | grep php
7) 查看版本: php -v
以上就完成了php-fpm的安装流程和启动流程
6)修改nginx.conf 支持可执行php
略
7)通过浏览器访问虚拟机的ip
1、修改mac的hosts,
2、关闭虚拟机的防火墙,访问即可,参考 https://blog.csdn.net/sshuidajiao/article/details/82594504

3、安装php扩展
curl.so || mysqli.so
1).切换到php源码目录下
root@localhost ext]# pwd
/root/php-7.2.8/ext
[root@localhost ext]# ls
bcmath      curl     exif                ftp      iconv      ldap      oci8     pcre          pdo_oci     phar      reflection  snmp     sqlite3   tidy       xmlrpc     zlib
bz2         date     ext_skel            gd       imap       libxml    odbc     pdo           pdo_odbc    posix     session     soap     standard  tokenizer  xmlwriter
calendar    dba      ext_skel_win32.php  gettext  interbase  mbstring  opcache  pdo_dblib     pdo_pgsql   pspell    shmop       sockets  sysvmsg   wddx       xsl
com_dotnet  dom      fileinfo            gmp      intl       mysqli    openssl  pdo_firebird  pdo_sqlite  readline  simplexml   sodium   sysvsem   xml        zend_test
ctype       enchant  filter              hash     json       mysqlnd   pcntl    pdo_mysql     pgsql       recode    skeleton    spl      sysvshm   xmlreader  zip
[root@localhost ext]#
2).调用Configure生成Makefile文件
/opt/local/php7/bin/phpize
./configure --with-php-config=/opt/local/php7/bin/php-config
3).编译、安装
make && make install
4).配置php.ini 开启curl.so
extension=curl.so 去掉 ";"
5).重启服务
service php-fpm restart
6).查看 php -m 即可
4、安装mysql5.7
1)下载mysql安装包并解压且编译安装
cd 到root目录
说明:由于MySQL5.7必须使用boost.1.59及以上版本,需要安装boost
[root@localhost ~]# wget https://jaist.dl.sourceforge.net/project/boost/boost/1.59.0/boost_1_59_0.tar.gz
[root@localhost ~]# tar -zxvf boost_1_59_0.tar.gz
[root@localhost ~]# cd boost_1_59_0
[root@localhost boost_1_59_0]# ./bootstrap.sh
[root@localhost boost_1_59_0]# ./b2
[root@localhost boost_1_59_0]# ./b2 install
[root@localhost boost_1_59_0]# cd ..
编译安装mysql
[root@localhost ~]# cd mysql-5.7.20
[root@localhost mysql-5.7.20]# cmake -DCMAKE_INSTALL_PREFIX=/opt/local/mysql -DMYSQL_DATADIR=/opt/local/mysql/mydata -DSYSCONFDIR=/opt/local/mysql/conf -DMYSQL_USER=mysql -DWITH_MYISAM_STORAGE_ENGINE=1 -DWITH_INNOBASE_STORAGE_ENGINE=1 -DMYSQL_UNIX_ADDR=/opt/local/mysql/mysql.sock -DMYSQL_TCP_PORT=3306 -DEXTRA_CHARSETS=all -DDEFAULT_CHARSET=utf8 -DDEFAULT_COLLATION=utf8_general_ci -DWITH_DEBUG=0 -DMYSQL_MAINTAINER_MODE=0 -DWITH_SSL:STRING=bundled -DWITH_ZLIB:STRING=bundled -DDOWNLOAD_BOOST=1 -DWITH_BOOST=./boost
[root@localhost mysql-5.7.20]# make && make install    ##耗时比较长

注:
-DCMAKE_INSTALL_PREFIX=/opt/local/mysql 设置安装目录
-DMYSQL_DATADIR=/opt/local/mysql/mydata 设置数据库存放目录
-DMYSQL_UNIX_ADDR=/opt/local/mysql/mysql.sock 设置UNIX socket 目录
-DMYSQL_USER=mysql 设置运行用户
-DDEFAULT_CHARSET=utf8 设置默认字符集,默认latin1
-DEFAULT_COLLATION=utf8_general_ci 设置默认校对规则,默认latin1_general_ci
-DWITH_INNOBASE_STORAGE_ENGINE=1 添加InnoDB引擎支持
-DENABLE_DOWNLOADS=1 自动下载可选文件,比如自动下载谷歌的测试包
-DMYSQL_TCP_PORT=3306 设置服务器监听端口,默认3306
-DSYSCONFDIR=/opt/local/mysql/conf 设置my.cnf所在目录,默认为安装目录
更多参数执行 # cmake . -LH 或者查看官方说明
2) 为了安全,需要创建mysql用户组 和mysql用户来运行mysql
[root@localhost ~]# groupadd mysql
[root@localhost ~]# useradd -r -g mysql -s /bin/false mysql   //不用登录
3)创建用户授权
[root@localhost ~]# useradd -M -s /sbin/nologin mysql
[root@localhost ~]# mkdir -p /opt/local/mysql/mydata
[root@localhost ~]# mkdir -p /opt/local/mysql/conf
[root@localhost ~]# chown -R mysql:mysql /opt/local/mysql
4)将 mysql 的 bin 目录加入环境变量
[root@localhost mysql-5.7.20]# echo "export PATH=$PATH:/opt/local/mysql/bin" >> /etc/profile
[root@localhost mysql-5.7.20]# source /etc/profile
5)修改 /opt/local/mysql/目录的所属组和所属用户
[root@localhost mysql-5.7.20]# chown -R root:mysql /opt/local/mysql/
6) 初始化mysql数据库 会生成一个root用户的密码,需要记住,以后也可以修改
[root@localhost mysql-5.7.20]# mysqld --initialize --user=mysql --basedir=/opt/local/mysql --datadir=/opt/local/mysql/mydata

//上面那句我没有执行,因为它提示我 /opt/local/mysql/data 文件夹不存在,我执行的是下面这句
[root@localhost mysql-5.7.20]# mysqld --initialize --user=mysql
说明:报了一个错误,如下
[root@localhost mysql-5.7.20]# mysqld --initialize --user=mysql --basedir=/opt/local/mysql --datadir=/opt/local/mysql/mydata
2019-02-28T12:21:34.967498Z 0 [ERROR] --initialize specified but the data directory has files in it. Aborting.
2019-02-28T12:21:34.967640Z 0 [ERROR] Aborting
意思是 data 这个目录必须是空,初始化的时候会自动创建data 目录,可以直接删掉它 ,我的目录是 /opt/local/mysql/data
我是怎样错误操作了一波:
但是如果继续执行 mysqld --initialize --user=mysql --basedir=/opt/local/mysql --datadir=/opt/local/mysql/mydata 这句话会提示我 data 文件夹不存在,所以我自己创建了一个文件夹,并且附上了mysql:mysql的权限,执行完没有问题,但是这样自己创建的文件夹并没有用,会报很多错误。
所以还是要直接删掉 data 文件夹,让初始化自己创建目录 ,执行这句即可 mysqld --initialize --user=mysql
7) 由于MySQL5.7 需要自己创建 my.cnf 文件夹, mysql 默认会启动 /etc/my.cnf 这里的文件。但是呢,我可以换一个位置, 自己创建 my.cnf
[root@localhost conf]# pwd
/opt/local/mysql/conf
[root@localhost conf]# ll
总用量 4
-rw-r--r--. 1 root root 259 2月  28 06:57 my.cnf
[root@localhost conf]#
编辑内容如下
[mysqld]
basedir=/opt/local/mysql
datadir=/opt/local/mysql/data
pid-file=/opt/local/mysql/data/mysqld.pid
socket=/opt/local/mysql/mysql.sock
log_error=/opt/local/mysql/data/mysql.err

user=mysql
explicit_defaults_for_timestamp=true
skip-grant-tables
8) 复制启动脚本
[root@localhost conf]# cp /opt/local/mysql/support-files/mysql.server /etc/init.d/mysql
增加权限:chmod +x /etc/init.d/mysql
9) 启动mysql 时报错了
[root@localhost data]# service mysql start
Starting MySQL.. ERROR! The server quit without updating PID file (/opt/local/mysql/data/mysqld.pid).
[root@localhost data]#
查看日志/opt/local/mysql/data/mysql.err
2019-02-28T12:42:35.944689Z 0 [ERROR] Can't start server: Bind on TCP/IP port: Address already in use
2019-02-28T12:42:35.944693Z 0 [ERROR] Do you already have another mysqld server running on port: 3306 ?
端口号被使用了
[root@localhost data]# netstat -anp | grep 3306
tcp6       0      0 :::3306                 :::*                    LISTEN      97682/mysqld
[root@localhost data]#
杀死进程,重新启动
[root@localhost data]# kill -s 9 97682
[root@localhost data]# /opt/local/mysql/bin/mysqld_safe: line 198: 97682 Killed                  nohup /opt/local/mysql/bin/mysqld --basedir=/opt/local/mysql --datadir=/opt/local/mysql/data --plugin-dir=/opt/local/mysql/lib/plugin --user=mysql --log-error=/opt/local/mysql/data/mysql.err --pid-file=/opt/local/mysql/data/mysqld.pid --socket=/opt/local/mysql/mysql.sock < /dev/null > /dev/null 2>&1

[root@localhost data]#
[root@localhost data]# service mysql start
Starting MySQL.. SUCCESS!
[root@localhost data]#
成功进入mysql
[root@localhost data]# mysql
Welcome to the MySQL monitor.  Commands end with ; or g.
Your MySQL connection id is 3
Server version: 5.7.20 Source distribution

Copyright (c) 2000, 2017, Oracle and/or its affiliates. All rights reserved.

Oracle is a registered trademark of Oracle Corporation and/or its
affiliates. Other names may be trademarks of their respective
owners.

Type 'help;' or 'h' for help. Type 'c' to clear the current input statement.

mysql>
到此lnmp安装结束咯~