
项目准备
简介
基于Python+Flask+Echarts打造一个疫情监控系统,涉及技术有:
- Python爬虫
- 使用Python与Mysql数据库交互
- 使用Flask构建Web项目
- 基于Echarts数据可视化展示
- 在linux上部署Web项目及爬虫
项目架构
数据获取(爬虫)>>数据持久化(MySQL)>>flask搭建Web后台>>数据可视化(h5+echarts)
项目环境
-
Python 3.+
-
MySQL
-
PyCharm(Python IDE)
-
Jupyter notebook(Python IDE)
-
Hbuilder(前端IDE,
https://www.dcloud.io/hbuilderx.html) -
Linux主机(后期项目部署)
Jupyter Notebook
Jupyter Notebook(此前被称为IPython notebook)是一个基于网页的用于交互计算的应用程序,在数据可续额领域很受欢迎。
简言之,notebook是以网页的形式打开,可以在code类型单元格中直接编写代码和运行代码,代码的运行结果也会直接在代码块下显示。如在编程过程中需要编写说明文档,可在md类型的单元格中直接编写,便于及时的说明和解释。
安装
pip install notebook
启动
jupyter notebook
修改工作目录
jupyter notebook本身的目录看着难受的话可以自己修改工作目录
1.先在一个喜欢的路径创建一个目录(我这里是C:Users18322Desktop ote)
2.cmd输入jupyter notebook --generate-config

找到这个配置文件(jupyter_notebook_config.py)所在路径,打开它并编辑
搜索找到notebook_dir

将前面注释去掉,在后面配置目录路径
## The directory to use for notebooks and kernels.
c.NotebookApp.notebook_dir = r'C:Users18322Desktop
ote'
3.保存退出,cmd>>jupyter notebook启动看效果OK了么(也可以在创建的../../note目录下新建一个.cmd为后缀的脚本,内容编辑为jupyter notebook,以后点击它就可以快捷启动了)

基本操作
1.新建文件与导入文件
2.单元格分类:code、md
3.命令模式(蓝色边框)与编辑模式(绿色模式)
4.常用快捷键
单元格类型转换:Y、M;
插入单元格:A、B;
进入命令模式:Esc
代码补全:Tab
运行单元格:ctrl/shift/alt+enter
删除单元格:DD
md常用语法
1.标题:使用16个#跟随一个空格表示16级标题
2.无序列表:使用*,-或+后跟随一个空格来表示
3.有序列表:使用数字+点表示
4.换行:使用两个或以上的空行
5.代码:三个反引号
6.分割线:三个星号或三个减号
7.链接:[文字](链接地址)
8.图片:
数据获取
爬虫概述
爬虫,就是给网站发起请求,并从响应中提取需要的数据自动化程序
-
发起请求,获取响应
-
通过http库,对目标站点进行请求。等同于自己打开浏览器,输入网址
-
常用库:urllib、urllib3、requests
-
服务器会返回请求的内容,一般为:HTML、二进制文件(视频、音频)、文档、JSON字符串等
-
-
解析内容
- 寻找自己需要的信息,就是利用正则表达式或者其他库提取目标信息
- 常用库:re、beautifulsoup4
-
保存数据
- 将解析得到的数据持久化到文件或者数据库中
urllib发送请求
这里使用jupyter notebook进行测试
demo
from urllib import request
url="http://www.baidu.com"
res=request.urlopen(url)  #获取响应

print(res.info()) #响应头
print(res.getcode()) #状态码 2xx正常,3xx发生重定向,4xx访问资源问题,5xx服务器内部错误
print(res.geturl()) #返回响应地址

#获取网页html源码
html=res.read()
print(html)
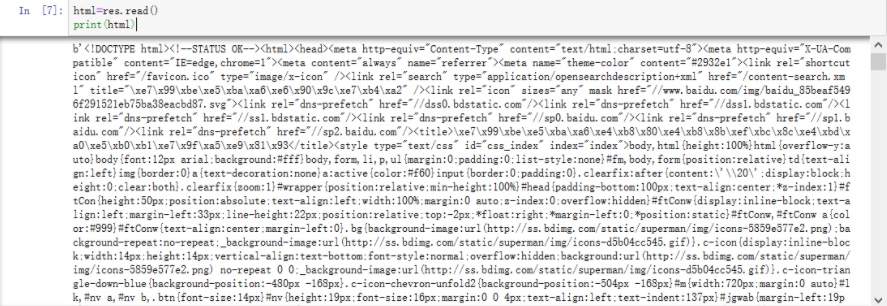
解决不显示中文问题
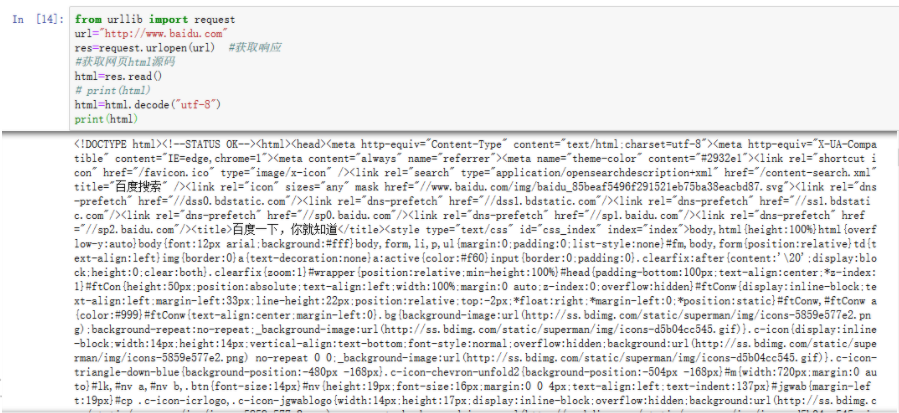
#获取网页html源码
html=res.read()
# print(html)
html=html.decode("utf-8")
print(html)
简单解决网站反爬机制的问题
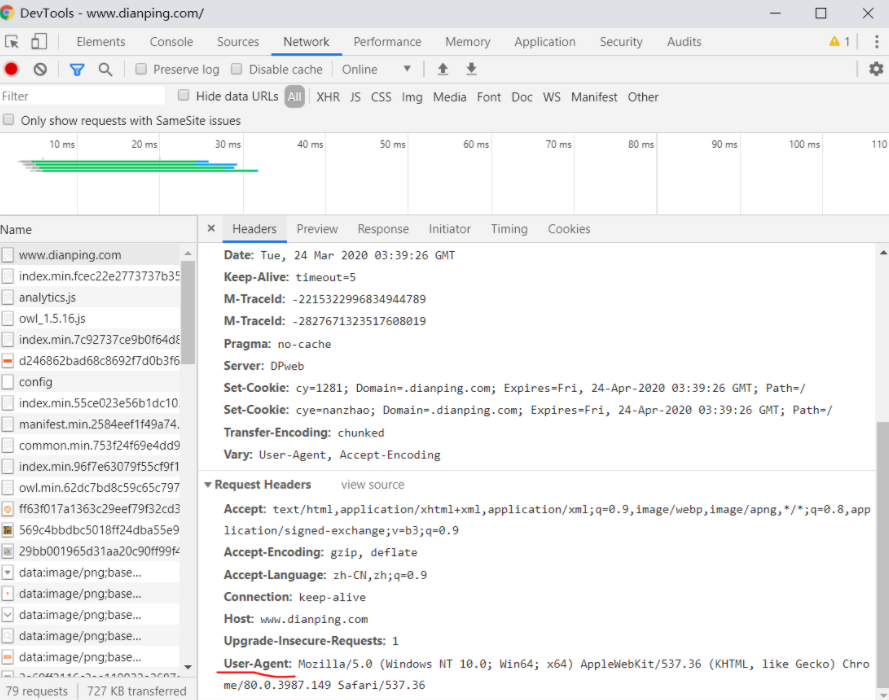
例如我把上面的demo的url换成点评(www.dianping.com)的就会遇到
HTTPError: HTTP Error 403: Forbidden这个错误
我们可以使用浏览器的User-Agent(我这里用的google的)进行伪装:
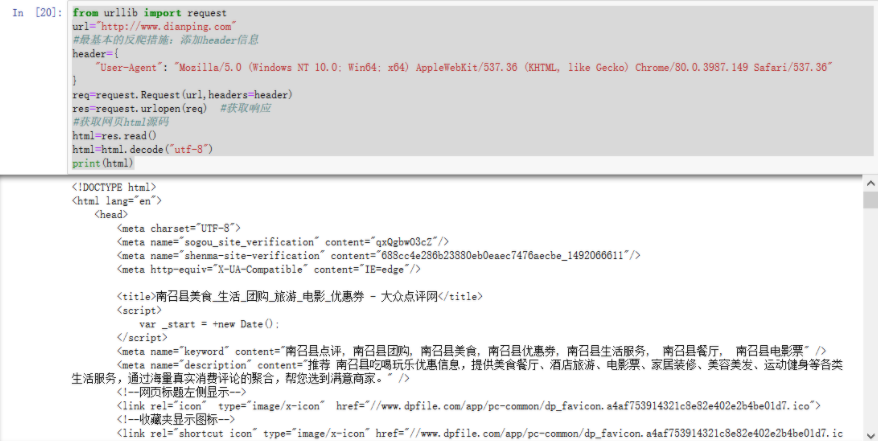
from urllib import request
url="http://www.dianping.com"
#最基本的反爬措施:添加header信息
header={
    "User-Agent": "Mozilla/5.0 (Windows NT 10.0; Win64; x64) AppleWebKit/537.36 (KHTML, like Gecko) Chrome/80.0.3987.149 Safari/537.36"
}
req=request.Request(url,headers=header)
res=request.urlopen(req)  #获取响应
#获取网页html源码
html=res.read()
html=html.decode("utf-8")
print(html)
ConnectionResetError: [WinError 10054]
- 在request后面写入一个关闭的操作,
response.close()
- 设置socket默认的等待时间,在read超时后能自动往下继续跑
socket.setdefaulttimeout(t_default)
- 设置sleep()等待一段时间后继续下面的操作
time.sleep(t)
request发送请求
demo
1.先安装:pip install requests
2.requests.get()
import requests

url="http://www.baidu.com"
res=requests.get(url)

print(res.encoding)
print(res.headers)
#res.headers返回结果里面 如果没有Content-Type encoding=utf-8 否则 如果设置了charset就以设置的为准
print(res.url) 否则就是ISO-8859-1

返回结果:
>>>
ISO-8859-1
{'Cache-Control': 'private, no-cache, no-store, proxy-revalidate, no-transform', 'Connection': 'keep-alive', 'Content-Encoding': 'gzip', 'Content-Type': 'text/html', 'Date': 'Tue, 24 Mar 2020 03:58:05 GMT', 'Last-Modified': 'Mon, 23 Jan 2017 13:27:36 GMT', 'Pragma': 'no-cache', 'Server': 'bfe/1.0.8.18', 'Set-Cookie': 'BDORZ=27315; max-age=86400; domain=.baidu.com; path=/', 'Transfer-Encoding': 'chunked'}
http://www.baidu.com/
查看网页html源码
res.encoding="utf-8" #前面已经看过了是ISO-8859-1,这里转一下否则显示乱码
print(res.text)
解决反爬
同样,这里也把url改成点评
import requests

url="http://www.dianping.com"
res=requests.get(url)

print(res.encoding)
print(res.headers)
print(res.url)
print(res.status_code)    #查看状态码发现很不幸,又是403

返回结果:
>>>
UTF-8
{'Date': 'Tue, 24 Mar 2020 04:10:58 GMT', 'Content-Type': 'text/html;charset=UTF-8', 'Transfer-Encoding': 'chunked', 'Connection': 'keep-alive', 'Keep-Alive': 'timeout=5', 'Vary': 'Accept-Encoding', 'X-Forbid-Reason': '.', 'M-TraceId': '6958868738621748090', 'Content-Language': 'en-US', 'Pragma': 'no-cache', 'Cache-Control': 'no-cache', 'Server': 'DPweb', 'Content-Encoding': 'gzip'}
http://www.dianping.com/
403
解决
import requests

url="http://www.dianping.com"
header={
    "User-Agent": "Mozilla/5.0 (Windows NT 10.0; Win64; x64) AppleWebKit/537.36 (KHTML, like Gecko) Chrome/80.0.3987.149 Safari/537.36"
}
res=requests.get(url,headers=header)

print(res.encoding)
print(res.headers)
print(res.url)
print(res.status_code)    #此时的状态码是200说明可以正常访问了

返回结果:
>>>
UTF-8
{'Date': 'Tue, 24 Mar 2020 04:14:23 GMT', 'Content-Type': 'text/html;charset=UTF-8', 'Transfer-Encoding': 'chunked', 'Connection': 'keep-alive', 'Keep-Alive': 'timeout=5', 'Vary': 'User-Agent, Accept-Encoding', 'M-TraceId': '-4673120569475554214, 1931600023016859584', 'Set-Cookie': 'cy=1281; Domain=.dianping.com; Expires=Fri, 24-Apr-2020 04:14:23 GMT; Path=/, cye=nanzhao; Domain=.dianping.com; Expires=Fri, 24-Apr-2020 04:14:23 GMT; Path=/', 'Content-Language': 'en-US', 'Content-Encoding': 'gzip', 'Pragma': 'no-cache', 'Cache-Control': 'no-cache', 'Server': 'DPweb'}
http://www.dianping.com/
200
然后就可以正常通过print(res.text)查看页面html源码了
beautifulsoup4解析内容
beautifulsoup4将复杂的HTML文档转换成一个树形结构,每个节点都是python对象。
- 安装:
pip install beautifulsoup4 - BeautifulSoup(html)
- 获取节点:find()、find_all()/select()、
- 获取属性:attrs
- 获取文本:text
demo
以四川卫健委官网的一个网页(http://wsjkw.sc.gov.cn/scwsjkw/gzbd/fyzt.shtml)的为例
这里需要使用google浏览器的开发者工具左上角的小箭头
示例:点击该箭头头将鼠标光标放到一处链接上

就会显示光标所在处的标签类型,这个地方是a标签,接下来以该a标签为demo展开降解
from bs4 import BeautifulSoup
import requests

url="http://wsjkw.sc.gov.cn/scwsjkw/gzbd/fyzt.shtml"
res=requests.get(url)
res.encoding="utf-8"
html=res.text
soup=BeautifulSoup(html)
soup.find("h2").text
a=soup.find("a") #获取网页a标签
print(a)
print(a.attrs) #打印标签属性
print(a.attrs["href"]) #打印标签属性中的href的值

返回结果:
>>>
<a href="/scwsjkw/gzbd01/2020/3/24/62ae66867eea419dac169bf6a8684fb8.shtml" target="_blank"><img alt="我省新型冠状病毒肺炎疫情最新情况(3月..." src="/scwsjkw/gzbd01/2020/3/24/62ae66867eea419dac169bf6a8684fb8/images/a799555b325242f6b0b2924c907f09ad.jpg
"/></a>
{'target': '_blank', 'href': '/scwsjkw/gzbd01/2020/3/24/62ae66867eea419dac169bf6a8684fb8.shtml'}
/scwsjkw/gzbd01/2020/3/24/62ae66867eea419dac169bf6a8684fb8.shtml
然后获取该标签属性中的href值拼接新的url
url_new="http://wsjkw.sc.gov.cn"+a.attrs["href"]
res=requests.get(url_new)
res.encoding="utf-8"
BeautifulSoup(res.text)    #获取Html文本
返回结果往下拉,找到我们感兴趣的目标:
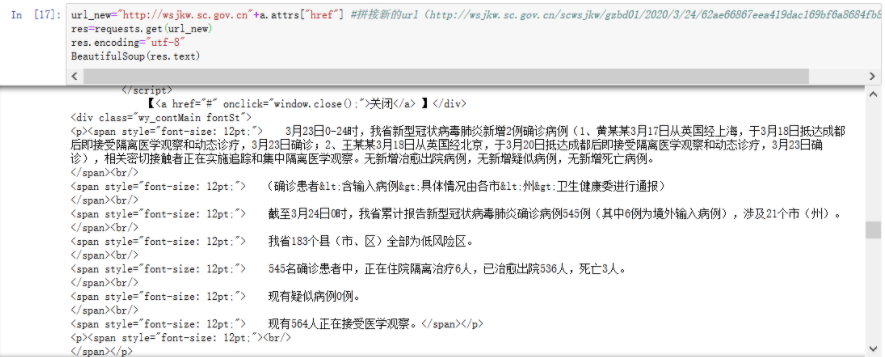
浏览器+开发者工具查看该网页发现该部分是p标签:

所以我们定位p标签,锁定我们需要的信息以便下一步正则分析数据
soup=BeautifulSoup(res.text) context=soup.find("p") print(context) 返回结果: >>> <p><span style="font-size: 12pt;"> 3月23日0-24时,我省新型冠状病毒肺炎新增2例确诊病例(1、黄某某3月17日从英国经上海,于3月18日抵达成都后即接受隔离医学观察和动态诊疗,3月23日确诊;2、王某某3月18日从英国经北京,于3月20日抵达成都后即接受隔离医学观察和动态诊疗,3月23日确诊),相关密切接触者正在实施追踪和集中隔离医学观察。无新增治愈出院病例,无新增疑似病例,无新增死亡病例。 </span><br/> <span style="font-size: 12pt;"> (确诊患者<含输入病例>具体情况由各市<州>卫生健康委进行通报) </span><br/> <span style="font-size: 12pt;"> 截至3月24日0时,我省累计报告新型冠状病毒肺炎确诊病例545例(其中6例为境外输入病例),涉及21个市(州)。 </span><br/> <span style="font-size: 12pt;"> 我省183个县(市、区)全部为低风险区。 </span><br/> <span style="font-size: 12pt;"> 545名确诊患者中,正在住院隔离治疗6人,已治愈出院536人,死亡3人。 </span><br/> <span style="font-size: 12pt;"> 现有疑似病例0例。 </span><br/> <span style="font-size: 12pt;"> 现有564人正在接受医学观察。</span></p>
re解析内容
- re是python自带的正则表达式模块,使用它需要有一定的正则表达式基础
- re.search(regex,str)
- 1.在str中查找满足条件的字符串,匹配不上返回None
- 2.对返回结果可以分组,可在字符串内添加小括号分离数据
- groups()
- group(index):返回指定分组内容
借用上个的demo获取的context
import re
pattern="新增(d+)例确诊病例"
res=re.search(pattern,context)
print(res)

返回结果:
>>>
<_sre.SRE_Match object; span=(25, 33), match='新增2例确诊病例'>

爬取腾讯疫情数据
-
有了爬虫基础后,我们可以自行去全国各地的卫健委网站上爬取数据,不过部分网站反爬虫手段很高明,需要更专业的反爬手段
-
我们也可以去各大平台直接爬取最终数据,比如:

我们可以直接拿来使用
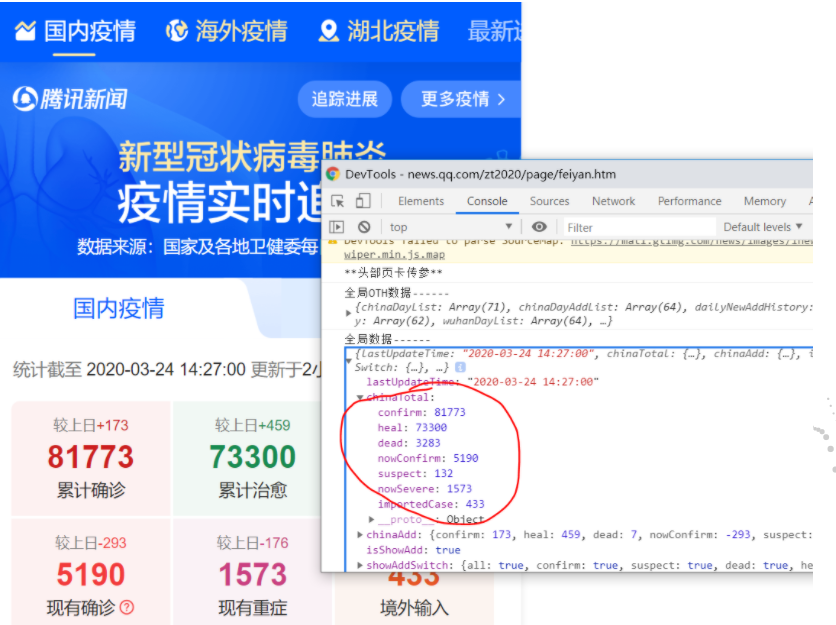
这里有个问题:如果腾讯的大兄弟没有偷懒的话怎么办?
解:打开google Browser开发者工具,network>>js(一般js、json格式的都在这里面)>>找get开头的(一般这种请求的数据都是以get命名开头);
一个一个筛选,找到是这个:

不确定的话你把鼠标放上去看一下:

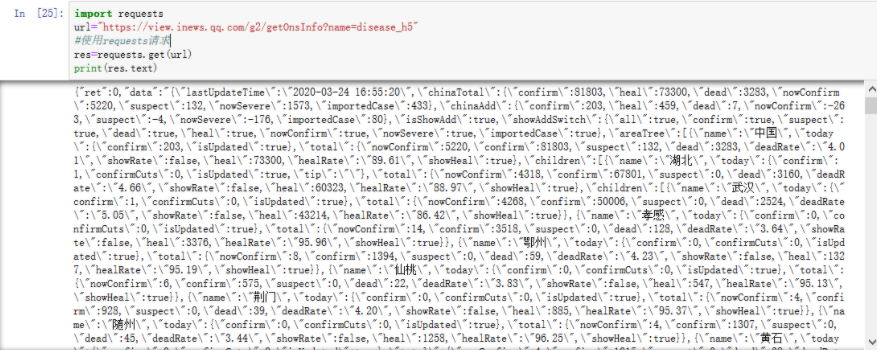
import requests
url="https://view.inews.qq.com/g2/getOnsInfo?name=disease_h5"
#使用requests请求
res=requests.get(url)
print(res.text)
返回的josn格式,我们可以直接使用
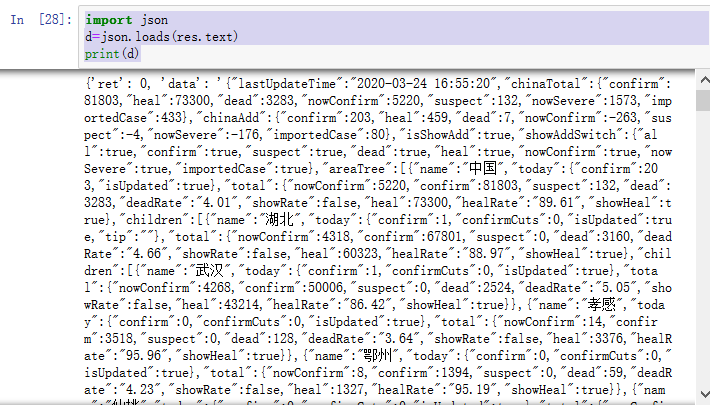
拿到json格式的数据后我们把它转换为字典
import json
d=json.loads(res.text)
print(d)
里面主要两个:ret、data
打印一下data
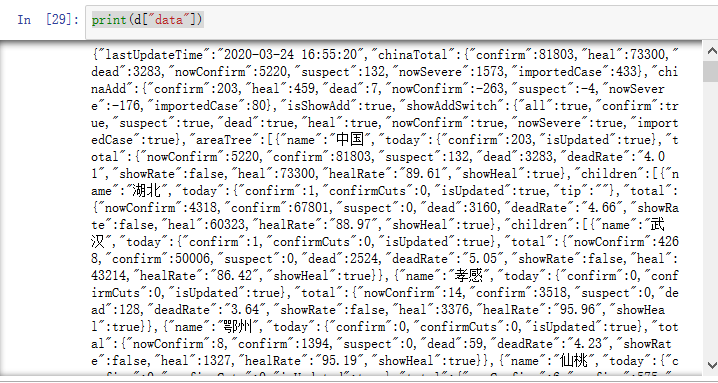
print(d["data"])
看看data的数据类型是什么
print(type(d["data"]))

返回结果:
>>>
<class 'str'>
再用json模块加载data里的数据到新的变量data_all(即str加载成字典格式)
data_all=json.loads(d["data"])
print(type(data_all))

>>>
<class 'dict'>
看一下这个字典格式的data里面有什么
data_all.keys()

>>>
dict_keys(['lastUpdateTime', 'chinaTotal', 'chinaAdd', 'isShowAdd', 'showAddSwitch', 'areaTree', 'chinaDayList', 'chinaDayAddList', 'dailyNewAddHistory', 'dailyHistory', 'wuhanDayList', 'articleList'])
打印一下前几个看看怎么样

拿到数据的完整代码
import pymysql
import time
import json
import traceback  #追踪异常
import requests

def get_tencent_data():
    """
    :return: 返回历史数据和当日详细数据
    """
    url = 'https://view.inews.qq.com/g2/getOnsInfo?name=disease_h5'
    headers = {
        'user-agent': 'Mozilla/5.0 (Windows NT 10.0; Win64; x64) AppleWebKit/537.36 (KHTML, like Gecko) Chrome/79.0.3945.88 Safari/537.36',
    }
    r = requests.get(url, headers)
    res = json.loads(r.text)  # json字符串转字典
    data_all = json.loads(res['data'])

    history = {}  # 历史数据
    for i in data_all["chinaDayList"]:
        ds = "2020." + i["date"]
        tup = time.strptime(ds, "%Y.%m.%d")
        ds = time.strftime("%Y-%m-%d", tup)  # 改变时间格式,不然插入数据库会报错,数据库是datetime类型
        confirm = i["confirm"]
        suspect = i["suspect"]
        heal = i["heal"]
        dead = i["dead"]
        history[ds] = {"confirm": confirm, "suspect": suspect, "heal": heal, "dead": dead}
    for i in data_all["chinaDayAddList"]:
        ds = "2020." + i["date"]
        tup = time.strptime(ds, "%Y.%m.%d")
        ds = time.strftime("%Y-%m-%d", tup)
        confirm = i["confirm"]
        suspect = i["suspect"]
        heal = i["heal"]
        dead = i["dead"]
        history[ds].update({"confirm_add": confirm, "suspect_add": suspect, "heal_add": heal, "dead_add": dead})

    details = []  # 当日详细数据
    update_time = data_all["lastUpdateTime"]
    data_country = data_all["areaTree"]  # list 25个国家
    data_province = data_country[0]["children"]  # 中国各省
    for pro_infos in data_province:
        province = pro_infos["name"]  # 省名
        for city_infos in pro_infos["children"]:
            city = city_infos["name"]
            confirm = city_infos["total"]["confirm"]
            confirm_add = city_infos["today"]["confirm"]
            heal = city_infos["total"]["heal"]
            dead = city_infos["total"]["dead"]
            details.append([update_time, province, city, confirm, confirm_add, heal, dead])
    return history, details
数据存储
创建数据库cov,然后建两张表
-
history 表存储每日总数据
CREATE TABLE `history` (
`ds` datetime NOT NULL COMMENT '日期',
`confirm` int(11) DEFAULT NULL COMMENT '累计确诊',
`confirm_add` int(11) DEFAULT NULL COMMENT '当日新增确诊',
`suspect` int(11) DEFAULT NULL COMMENT '剩余疑似',
`suspect_add` int(11) DEFAULT NULL COMMENT '当日新增疑似',
`heal` int(11) DEFAULT NULL COMMENT '累计治愈',
`heal_add` int(11) DEFAULT NULL COMMENT '当日新增治愈',
`dead` int(11) DEFAULT NULL COMMENT '累计死亡',
`dead_add` int(11) DEFAULT NULL COMMENT '当日新增死亡',
PRIMARY KEY (`ds`) USING BTREE ) ENGINE=InnoDB DEFAULT CHARSET=utf8mb4;
- details 表存储每日详细数据
CREATE TABLE `details` (
`id` int(11) NOT NULL AUTO_INCREMENT,
`update_time` datetime DEFAULT NULL COMMENT '数据最后更新时间',
`province` varchar(50) DEFAULT NULL COMMENT '省',
`city` varchar(50) DEFAULT NULL COMMENT '市',
`confirm` int(11) DEFAULT NULL COMMENT '累计确诊',
`confirm_add` int(11) DEFAULT NULL COMMENT '新增确诊',
`heal` int(11) DEFAULT NULL COMMENT '累计治愈',
`dead` int(11) DEFAULT NULL COMMENT '累计死亡',
PRIMARY KEY (`id`) ) ENGINE=InnoDB DEFAULT CHARSET=utf8mb4;
使用 pymysql 模块与数据库交互
安装: pip install pymysql
① 建立连接 ② 创建游标 ③ 执行操作 ④ 关闭连接
pymysql基础&测试
随便插入一条数据测试一下
-
#pymysql 的简单使用

#建立连接
conn = pymysql.connect(host="127.0.0.1",
                      user="root",
                      password="123456",
                      db="cov")
#创建游标,默认是元组型
cursor = conn.cursor()

sql= "insert into history values(%s,%s,%s,%s,%s,%s,%s,%s,%s)"
cursor.execute(sql,[time.strftime("%Y-%m-%d"),10,1,2,3,4,5,6,7])
conn.commit() #提交事务
# res = cursor.fetchall()
cursor.close()
conn.close()
存储&操作
def get_conn():
    """
    :return: 连接,游标
    """
    # 创建连接
    conn = pymysql.connect(host="127.0.0.1",
                           user="root",
                           password="123456",
                           db="cov",
                           charset="utf8")
    # 创建游标
    cursor = conn.cursor()  # 执行完毕返回的结果集默认以元组显示
    return conn, cursor


def close_conn(conn, cursor):
    if cursor:
        cursor.close()
    if conn:
        conn.close()
def update_details():
    """
    更新 details 表
    :return:
    """
    cursor = None
    conn = None
    try:
        li = get_tencent_data()[1]  #  0 是历史数据字典,1 最新详细数据列表
        conn, cursor = get_conn()
        sql = "insert into details(update_time,province,city,confirm,confirm_add,heal,dead) values(%s,%s,%s,%s,%s,%s,%s)"
        sql_query = 'select %s=(select update_time from details order by id desc limit 1)' #对比当前最大时间戳
        cursor.execute(sql_query,li[0][0])
        if not cursor.fetchone()[0]:
            print(f"{time.asctime()}开始更新最新数据")
            for item in li:
                cursor.execute(sql, item)
            conn.commit()  # 提交事务 update delete insert操作
            print(f"{time.asctime()}更新最新数据完毕")
        else:
            print(f"{time.asctime()}已是最新数据!")
    except:
        traceback.print_exc()
    finally:
        close_conn(conn, cursor)
def insert_history():
    """
        插入历史数据
    :return:
    """
    cursor = None
    conn = None
    try:
        dic = get_tencent_data()[0]  # 0 是历史数据字典,1 最新详细数据列表
        print(f"{time.asctime()}开始插入历史数据")
        conn, cursor = get_conn()
        sql = "insert into history values(%s,%s,%s,%s,%s,%s,%s,%s,%s)"
        for k, v in dic.items():
            # item 格式 {'2020-01-13': {'confirm': 41, 'suspect': 0, 'heal': 0, 'dead': 1}
            cursor.execute(sql, [k, v.get("confirm"), v.get("confirm_add"), v.get("suspect"),
                                 v.get("suspect_add"), v.get("heal"), v.get("heal_add"),
                                 v.get("dead"), v.get("dead_add")])

        conn.commit()  # 提交事务 update delete insert操作
        print(f"{time.asctime()}插入历史数据完毕")
    except:
        traceback.print_exc()
    finally:
        close_conn(conn, cursor)
def update_history():
    """
    更新历史数据
    :return:
    """
    cursor = None
    conn = None
    try:
        dic = get_tencent_data()[0]  #  0 是历史数据字典,1 最新详细数据列表
        print(f"{time.asctime()}开始更新历史数据")
        conn, cursor = get_conn()
        sql = "insert into history values(%s,%s,%s,%s,%s,%s,%s,%s,%s)"
        sql_query = "select confirm from history where ds=%s"
        for k, v in dic.items():
            # item 格式 {'2020-01-13': {'confirm': 41, 'suspect': 0, 'heal': 0, 'dead': 1}
            if not cursor.execute(sql_query, k):
                cursor.execute(sql, [k, v.get("confirm"), v.get("confirm_add"), v.get("suspect"),
                                     v.get("suspect_add"), v.get("heal"), v.get("heal_add"),
                                     v.get("dead"), v.get("dead_add")])
        conn.commit()  # 提交事务 update delete insert操作
        print(f"{time.asctime()}历史数据更新完毕")
    except:
        traceback.print_exc()
    finally:
        close_conn(conn, cursor)
#插入历史数据
insert_history()

>>>
Mon Feb 17 01:43:37 2020开始插入历史数据
Mon Feb 17 01:43:40 2020插入历史数据完毕
爬取百度热搜数据
百度的数据页面使用了动态渲染技术,我们可以用 selenium 来爬取
selenium
-
selenium 是一个用于 web 应用程序测试的工具,直接运行在浏览器中,就像真正的用 户在操作一样
-
安装:
pip install selenium -
安装浏览器(Firefox、Google等)
-
下载对应版本浏览器驱动:http://npm.taobao.org/mirrors/chromedriver/
版本查看方法:例:Google的是 设置>>关于Chrome
找到对应版本下载解压到之前创建的note文件夹
-