一、Bean的Scope
Scope描述的是Spring容器如何新建Bean实例的。Spring的Scope有以下几种,通过@Scope注解来实现。
(1)Singleton:一个Spring容器中只有一个Bean的实例,此为Spring的默认配置,全容器共享一个实例。
(2)Prototype:每次调用新建一个Bean实例。
(3)Request:Web项目中,给每一个 http request 新建一个Bean实例。
(4)Session:Web项目中,给每一个 http session 新建一个Bean实例。
(5)GlobalSession:这个只在portal应用中有用,给每一个 global http session 新建一个Bean实例。
另外,在Spring Batch中还有一个Scope是使用@StepScope,我们将在批处理介绍这个Scope。
接下来简单演示默认的 Singleton 和 Prototype,分别从Spring容器中获取两次Bean,判断Bean的实例是否相等。
1.编写Singleton的Bean。
package com.ecworking.scope;

import org.springframework.stereotype.Service;

@Service //默认为Singleton,相当于@Scope("singleton")。
public class DemoSingletonService {
}
2.编写Prototype的Bean。
package com.ecworking.scope;

import org.springframework.context.annotation.Scope;
import org.springframework.stereotype.Service;

@Service
@Scope("prototype") //声明Scopew为Prototype。
public class DemoPrototypeService {
}
3.配置类。
package com.ecworking.scope;

import org.springframework.context.annotation.ComponentScan;
import org.springframework.context.annotation.Configuration;

@Configuration
@ComponentScan("com.ecworking.scope")
public class ScopeConfig {
}
4.运行。
package com.ecworking.scope;

import org.springframework.context.annotation.AnnotationConfigApplicationContext;

public class Main {
    public static void main(String[] args) {
        AnnotationConfigApplicationContext context = new AnnotationConfigApplicationContext(ScopeConfig.class);

        DemoSingletonService s1 = context.getBean(DemoSingletonService.class);
        DemoSingletonService s2 = context.getBean(DemoSingletonService.class);

        DemoPrototypeService p1 = context.getBean(DemoPrototypeService.class);
        DemoPrototypeService p2 = context.getBean(DemoPrototypeService.class);

        System.out.println("s1与s2是否相等:" + s1.equals(s2));
        System.out.println("p1与p2是否相等:" + p1.equals(p2));

        context.close();
    }
}
运行结果:

二、Spring EL和资源调用
Spring EL-Spring表达式语言,支持在xml和注解中使用表达式,类似于JSP的EL表达式语言。
Spring 开发中经常涉及调用各种资源的情况,包含普通文件、网址、配置文件、系统环境变量等,我们可以使用Spring表达式语言实现资源的注入。
Spring 主要在注解@Value的参数中使用表达式。
本节演示实现以下几种情况:
(1)注入普通字符;
(2)注入操作系统属性;
(3)注入表达式运算结果;
(4)注入其他Bean的属性;
(5)注入文件内容;
(6)注入网址内容;
(7)注入属性文件;
1. 准备,增加commons-io可简化文件相关操作。
本例中使用commons-io将file转换成字符串:
<dependency>
      <groupId>commons-io</groupId>
      <artifactId>commons-io</artifactId>
      <version>2.3</version>
</dependency>
在com.ecworking.el.source包下新建test.txt,内容随意。
在com.ecworking.el.source包下新建test.propertise,内容如下:
book.author = dongyp
book.name = spring boot
2. 需要被注入的Bean。
package com.ecworking.el;

import org.springframework.beans.factory.annotation.Value;
import org.springframework.stereotype.Service;

@Service
public class DemoService {
    @Value("其他类的属性") //此处为注入普通字符串
    private String another;

    public String getAnother() {
        return another;
    }

    public void setAnother(String another) {
        this.another = another;
    }
}
3. 演示类Bean。
package com.ecworking.el;

import org.apache.commons.io.IOUtils;
import org.springframework.beans.factory.annotation.Autowired;
import org.springframework.beans.factory.annotation.Value;
import org.springframework.context.annotation.Bean;
import org.springframework.context.annotation.PropertySource;
import org.springframework.context.support.PropertySourcesPlaceholderConfigurer;
import org.springframework.core.env.Environment;
import org.springframework.core.io.Resource;
import org.springframework.stereotype.Service;

import java.io.IOException;

@Service
@PropertySource("classpath:test.properties")
//注入配置文件需使用@PropertySource指定文件地址,若使用@Value注入,则要配置一个PropertySourcesPlaceholderConfigurer的Bean。注意@Value("${book.name}"),使用的是$而不是#。
//注入 Properties 还可以从 Environment 中获得。
public class DemoElService {
    @Value("I LOVE YOU!") //注入普通字符串
    private String normal;

    @Value("#{systemProperties['os.name']}") //注入操作系统属性
    private String osName;

    @Value("#{T(java.lang.Math).random() * 100.0}") //注入表达式结果
    private String randomNumber;

    @Value("#{demoService.another}") //注入其他Bean属性
    private String fromAnother;

    @Value("classpath:/test.txt") //注入文件资源
    private Resource testFile;

    @Value("http://www.baidu.com") //注入网址资源
    private Resource testUrl;

    @Value("${book.name}") // 注入配置文件
    private String bookName;

    @Autowired // 注入配置文件
    private Environment environment;

    @Bean // 注入配置文件
    public static PropertySourcesPlaceholderConfigurer propertyConfigurer(){
        return new PropertySourcesPlaceholderConfigurer();
    }

    public void outputResource(){
        try {
            System.out.println(normal);
            System.out.println(osName);
            System.out.println(randomNumber);
            System.out.println(fromAnother);
            System.out.println(IOUtils.toString(testFile.getInputStream()));
            System.out.println(IOUtils.toString(testUrl.getInputStream()));
            System.out.println(bookName);
            System.out.println(environment.getProperty("book.author"));
        } catch (IOException e) {
            e.printStackTrace();
        }
    }
}
4.配置类。
package com.ecworking.el;

import org.springframework.context.annotation.ComponentScan;
import org.springframework.context.annotation.Configuration;

@Configuration
@ComponentScan("com.ecworking.el")
public class ElConfig {
}
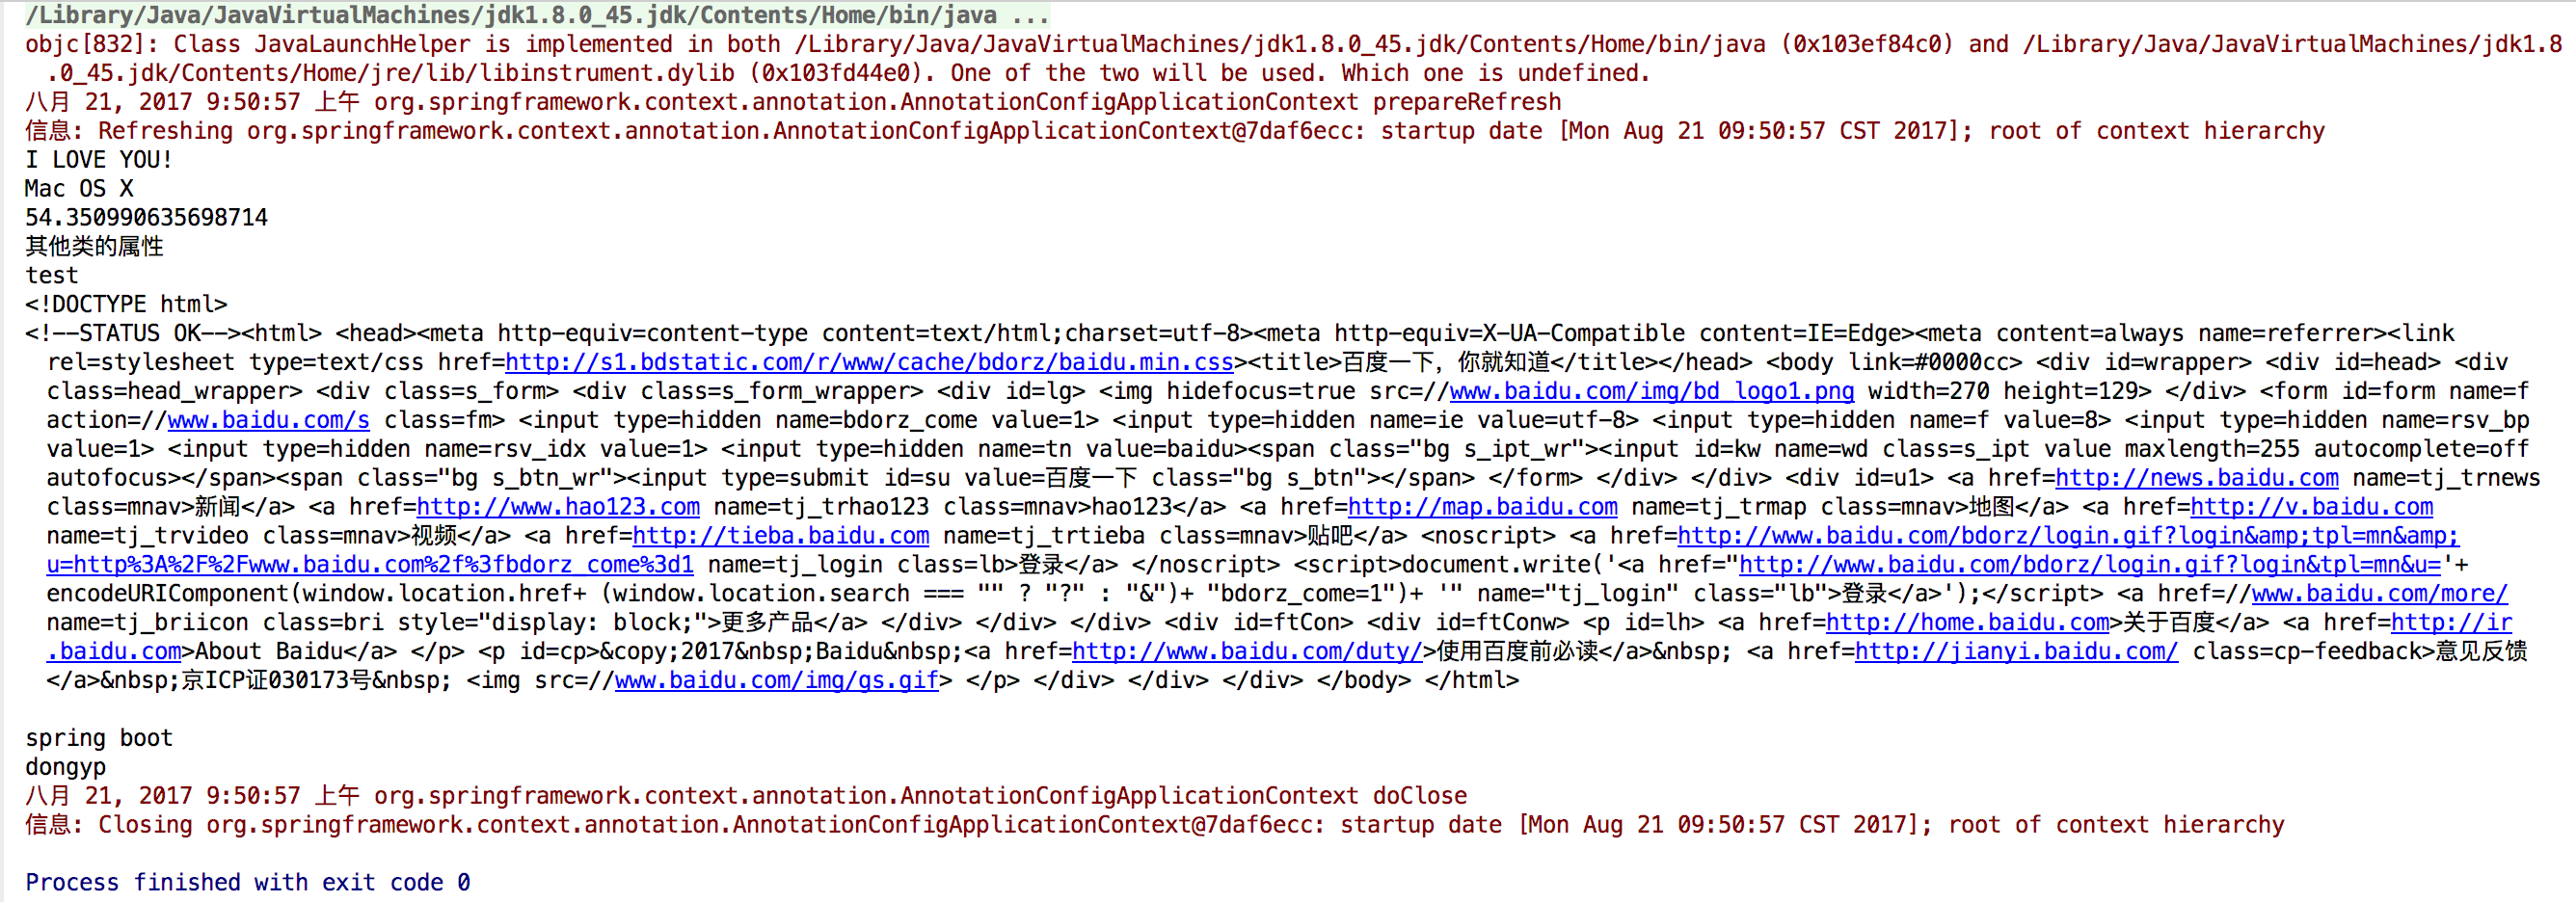
5.运行。
package com.ecworking.el;

import org.springframework.context.annotation.AnnotationConfigApplicationContext;

public class Main {
    public static void main(String[] args) {
        AnnotationConfigApplicationContext context = new AnnotationConfigApplicationContext(ElConfig.class);

        DemoElService demoElService = context.getBean(DemoElService.class);

        demoElService.outputResource();

        context.close();
    }
}
运行结果: