本章节主要讲解的是在虚拟机centOs7版本以上安装mysql5.6版本,亲测可以直接使用,有需要帮助的小伙伴可以加本人QQ2246451792@qq.com!!!!
卸载centOs7自带的mariadb命令:
rpm -qa | grep mariadb
rpm -e --nodeps 文件名
1.新开的云服务器,需要检测系统是否自带安装mysql
# yum list installed | grep mysql2.如果发现有系统自带mysql,果断这么干
# yum -y remove 文件名3.随便在你存放文件的目录下执行,这里解释一下,由于这个mysql的yum源服务器在国外,所以下载速度会比较慢,还好mysql5.6只有79M大,而mysql5.7就有182M了,所以这是我不想安装mysql5.7的原因
# wget http://repo.mysql.com/mysql-community-release-el6-5.noarch.rpm4.接着执行这句,解释一下,这个rpm还不是mysql的安装文件,只是两个yum源文件,执行后,在/etc/yum.repos.d/ 这个目录下多出mysql-community-source.repo和mysql-community.repo
# rpm -ivh mysql-community-release-el6-5.noarch.rpm5.这个时候,可以用yum repolist mysql这个命令查看一下是否已经有mysql可安装文件
#yum repolist all | grep mysql6.安装mysql 服务器命令(一路yes):
# yum install mysql-community-server7.安装成功后
# service mysqld start8.由于mysql刚刚安装完的时候,mysql的root用户的密码默认是空的,所以我们需要及时用mysql的root用户登录(第一次回车键,不用输入密码),并修改密码
# mysql -u root
# use mysql;
# update user set password=PASSWORD('admin123') where user='root';
# flush privileges;
# exit;
9.查看mysql是否自启动,并且设置开启自启动命令
# chkconfig --list | grep mysqld # chkconfig mysqld on10.mysql安全设置(系统会一路问你几个问题,看不懂复制之后翻译,基本上一路yes):
# mysql_secure_installation
以下是讲解授权远程登录,以Navicat工具为主
授权远程访问:
登陆:
[root@localhost ~]# mysql -uroot -p
Enter password:
Welcome to the MySQL monitor. Commands end with ; or g.
Your MySQL connection id is 7
Server version: 5.5.60 MySQL Community Server (GPL) by Remi
Copyright (c) 2000, 2018, Oracle and/or its affiliates. All rights reserved.
Oracle is a registered trademark of Oracle Corporation and/or its
affiliates. Other names may be trademarks of their respective
owners.
Type 'help;' or 'h' for help. Type 'c' to clear the current input statement.
mysql> show databases;
+--------------------+
| Database |
+--------------------+
| information_schema |
| fgf |
| mysql |
| performance_schema |
| test |
+--------------------+
5 rows in set (0.00 sec)
mysql>
使用mysql数据库(真正的数据库,而非数据库软件),将所有数据库的所有表(*.*)的所有权限(all privileges),授予通过任何ip(%)访问的root用户,密码为123456,最后刷新(flush privileges)即可。
mysql> use mysql
Reading table information for completion of table and column names
You can turn off this feature to get a quicker startup with -A
Database changed
mysql> grant all privileges on *.* to 'root'@'%' identified by 'root';
Query OK, 0 rows affected (0.00 sec)
mysql> flush privileges;
Query OK, 0 rows affected (0.00 sec)
mysql>
开放防火墙端口:
先查看防火墙是否开启了3306端口:
|
1
|
firewall-cmd --permanent --query-port=3306/tcp |
打印结果如下:
no
表示没有开放3306端口,那么添加下该端口:
|
1
|
firewall-cmd --permanent --add-port=3306/tcp |
打印结果如下:
success
重新加载防火墙策略:
|
1
|
firewall-cmd --reload |
执行成功后,查看10086端口是否被开启:
|
1
|
firewall-cmd --permanent --query-port=3306/tcp |
打印结果如下:
yes
最后一步配置虚拟机NAT设置(具体流程省略,主要是放行端口号)
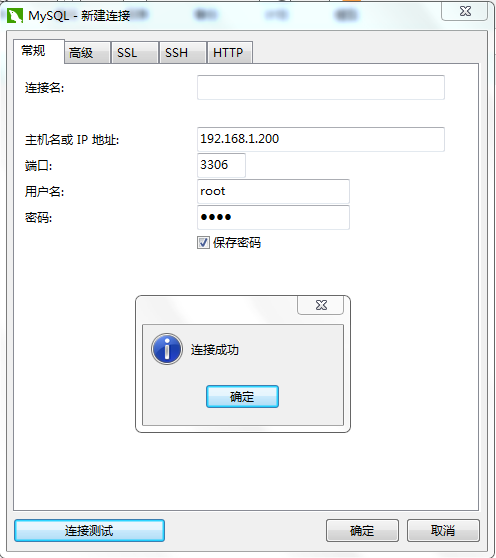
在windows下,我用 navicat测试:
------mysql 相关命令: service mysqld restart ;service mysqld status ;service mysqld start