AppWidget 就是可以放在桌面上的应用程序小组件. 可以在上面显示或操作一些常用的内容. 比传统的图标更加的丰富,绚丽,实用.
使用AppWidget 需要准备如下内容:
1. 一个 定义 这个 AppWidget 元数据的 XML 文档.
我们可以在 res/ 下面创建一个 xml 文件夹. 在里面创建一个 如: myappwidget_info.xml.
内容如下:
1 <?xml version="1.0" encoding="utf-8"?>
2 <appwidget-provider xmlns:android="http://schemas.android.com/apk/res/android"
3     android:minHeight="72dp"
4     android:minWidth="72dp"
5     android:updatePeriodMillis="86400000"
6     android:initialLayout="@layout/widgetprovider_layout"
7     >
8 </appwidget-provider>
解释: minHeight,minWidth 就是这个Widget的Size的最小的值 Android推荐 (单元格数*74)-2,但我想只使用一行的时候,写 72 高,还会是两行.改成小点儿,我改成36 就是一行了~, ** 注意这个大小的值 如果设置得不合理的话,将不能正确的创建 Widget **
android:updatePeriodMillis : 刷新周期(据说已经失效了,默认30分钟更新一下,不确定)
android:initialLayout : 就这个Widget的布局文件.(这个布局文件,我们要在下面创建)
2. 创建Widget的Layout 布局文件,也就是告诉系统, 我们定义的Widget长的是什么样子的.
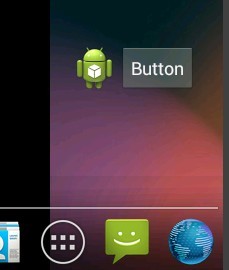
 1 <?xml version="1.0" encoding="utf-8"?>
 2 <RelativeLayout xmlns:android="http://schemas.android.com/apk/res/android"
 3     android:layout_width="match_parent"
 4     android:layout_height="match_parent"
 5     android:orientation="vertical" >
 6
 7     <ImageView
 8         android:id="@+id/imageView1"
 9         android:layout_width="wrap_content"
10         android:layout_height="wrap_content"
11         android:src="@drawable/ic_launcher" />
12
13 <Button
14     android:id="@+id/button1"
15     android:layout_width="wrap_content"
16     android:layout_height="wrap_content"
17     android:layout_alignParentTop="true"
18     android:layout_toRightOf="@+id/imageView1"
19     android:text="Button" />
20
21 </RelativeLayout>
这里,我们使用线性布局,放上一个ImageView 和一个 Button
3. 创建一个 继承自 AppwidgetProvider 的类
 1 package ztc.appwidgettest;
 2
 3 import android.app.PendingIntent;
 4 import android.appwidget.AppWidgetManager;
 5 import android.appwidget.AppWidgetProvider;
 6 import android.content.Context;
 7 import android.content.Intent;
 8 import android.widget.RemoteViews;
 9
10 public class MyAppWidgetProvider extends AppWidgetProvider {
11     @Override
12     public void onDeleted(Context context, int[] appWidgetIds) {
13         // TODO Auto-generated method stub
14         super.onDeleted(context, appWidgetIds);
15     }
16
17     @Override
18     public void onDisabled(Context context) {
19         // TODO Auto-generated method stub
20         super.onDisabled(context);
21     }
22
23     @Override
24     public void onEnabled(Context context) {
25         // TODO Auto-generated method stub
26         super.onEnabled(context);
27     }
28
29     @Override
30     public void onReceive(Context context, Intent intent) {
31         // TODO Auto-generated method stub
32         super.onReceive(context, intent);
33     }
34
35     @Override
36     public void onUpdate(Context context, AppWidgetManager appWidgetManager,int[] appWidgetIds) {
37         // TODO Auto-generated method stub
38         super.onUpdate(context, appWidgetManager, appWidgetIds);
39
40         // 创建Intent
41         Intent intent = new Intent();
42         intent.setClass(context, MainActivity.class);
43         // 创建 PendingIntent
44         PendingIntent pIntent = PendingIntent.getActivity(context, 0, intent, 0);
45         // 创建 RmoteViews
46         RemoteViews view = new RemoteViews(context.getPackageName(),R.layout.widgetprovider_layout);
47         // 设置Widget中Button被按下的事件
       // ***  这是定义 RemoteViews 中控件事件的方法, 就是当它被点击时去执行一个 PendingIntent.  ***

48         view.setOnClickPendingIntent(R.id.button1, pIntent);
49
50         for (int i = 0; i < appWidgetIds.length; i++) {
51             // 使用 appWidget管理者,更新Widget
52             appWidgetManager.updateAppWidget(appWidgetIds[i], view);
53         }
// 可以不使用循环.直接将这个 appWidgetIds数据传入即可. 使用 appWidget管理者,更新Widget
// appWidgetManager.updateAppWidget(appWidgetIds, view);
54     }
55 }
这里我们只实现的它的onUpdate 方法
4. 要在我们的 Manifest 的 application 标签中注册一个 receiver
1         <receiver android:name="MyAppWidgetProvider">
2             <intent-filter>
3                 <action android:name="android.appwidget.action.APPWIDGET_UPDATE" />
4             </intent-filter>
5
6             <meta-data
7                 android:name="android.appwidget.provider"
8                 android:resource="@xml/widgetprovider_info" />
9         </receiver>
这里为什么 receiver 呢? 因为Widget其实相当于一个 广播接收器, 它使用 onReceive() 方法,来处理接收到的Intent.
OK 完成了 上面4个步骤, 就会成功的创建了我们自己的Widget了~
这里. 再写些 在Receive中更新内容时 需要的一些知识 :
1. 因为 AppWidget 与我们的程序不在一个进程中. 所以更新操作也需要使用 RemoteViews
// 比如: 更新 AppWidget上一个 TextView中的内容 : remoteViews.setTextViewText(R.id.textview1,"xxx");
1             // 更新 RemoteViews
2             RemoteViews view = new RemoteViews(context.getPackageName(),R.layout.widget_layout);
3             // 更新 TextView 中的内容
4             view.setTextViewText(R.id.textView1, "Receive Broadcast");
2. 更新AppWidget 需要使用 AppWidgetManager
1             // 得一个用来一个用来更新的 AppWidget的管理者
2             AppWidgetManager manager = AppWidgetManager.getInstance(context);
3.AppWidgetManager 需要通过 ComponentName 知道你要更新 哪种 AppWidget,
1             // AppWidgetManager 需要通过 ComponentName 知道你想更新哪种 AppWidget
2             ComponentName componentName = new ComponentName(context,MyAppWidgetProvider.class);
4. 使用 AppWidgetManager 更新
1 manager.updateAppWidget(componentName, view);
效果如下: