将依赖注入到 Spring MVC 控制器时需要用到 @Autowired 和 @Service 注解。
@Autowired 注解属于 org.springframework.beans.factory. annotation 包,可以对类成员变量、方法及构造函数进行标注,完成自动装配的工作。
@Service 注解属于 org.springframework.stereotype 包,会将标注类自动注册到 Spring 容器中。
在配置文件中需要添加 <component-scan/> 元素来扫描依赖基本包。
 User 实体类如下。
新建 net.biancheng.service 包,创建 UserService 接口,代码如下。
创建 UserServiceImpl 类,实现 UserService 接口,代码如下。
在 UserService 上添加 @Autowired 注解会使 UserService 的一个实例被注入到 UserController 实例中。
User 实体类如下。
新建 net.biancheng.service 包,创建 UserService 接口,代码如下。
创建 UserServiceImpl 类,实现 UserService 接口,代码如下。
在 UserService 上添加 @Autowired 注解会使 UserService 的一个实例被注入到 UserController 实例中。
springmvc-servlet.xml 代码如下。
web.xml 代码如下。
index.jsp 文件内容如下。
login.jsp 文件内容如下。
register.jsp 文件内容如下。
运行结果如下。
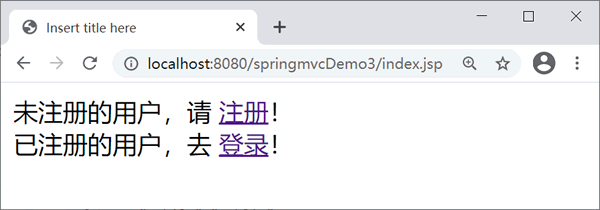
index.jsp页面
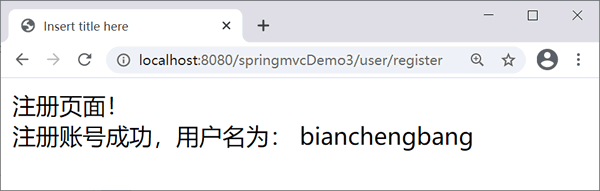
register.jsp页面
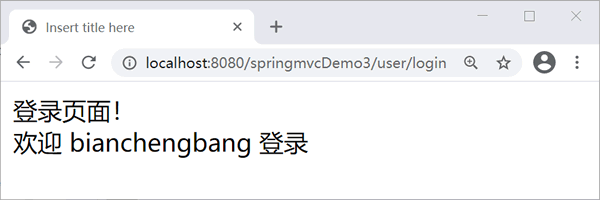
login.jsp页面
@Autowired 注解属于 org.springframework.beans.factory. annotation 包,可以对类成员变量、方法及构造函数进行标注,完成自动装配的工作。
@Service 注解属于 org.springframework.stereotype 包,会将标注类自动注册到 Spring 容器中。
在配置文件中需要添加 <component-scan/> 元素来扫描依赖基本包。
<context:component-scan base-package="net.biancheng.service"/>
示例
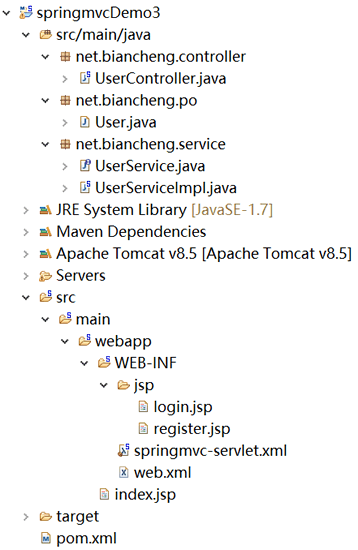
下面新建 Web 应用 springmvcDemo3 进一步说明 Spring MVC 如何应用依赖注入。应用目录结构如下。package net.biancheng.po;
public class User {
private String name;
private String pwd;
/*省略setter和getter方法*/
}
package net.biancheng.service;

import net.biancheng.po.User;

public interface UserService {
    boolean login(User user);

    boolean register(User user);
}
package net.biancheng.service;

import org.springframework.stereotype.Service;

import net.biancheng.po.User;

@Service
public class UserServiceImpl implements UserService {

    @Override
    public boolean login(User user) {
        if ("bianchengbang".equals(user.getName()) && "123456".equals(user.getPwd())) {
            return true;
        }
        return false;
    }

    @Override
    public boolean register(User user) {
        if ("bianchengbang".equals(user.getName()) && "123456".equals(user.getPwd())) {
            return true;
        }
        return false;
    }
}
新建 net.biancheng.controller 包,创建 UserController 类,代码如下。注意:为了使类能被 Spring 扫描到,必须为其标注 @Service。
package net.biancheng.controller;

import org.springframework.beans.factory.annotation.Autowired;
import org.springframework.stereotype.Controller;
import org.springframework.ui.Model;
import org.springframework.web.bind.annotation.RequestMapping;

import net.biancheng.po.User;
import net.biancheng.service.UserService;

@Controller
@RequestMapping("/user")
public class UserController {

    @Autowired
    private UserService userService;

    @RequestMapping("/login")
    public String getLogin(Model model) {
        User us = new User();
        us.setName("bianchengbang");
        userService.login(us);
        model.addAttribute("user", us);
        return "login";
    }

    @RequestMapping("/register")
    public String getRegister(Model model) {
        User us = new User();
        us.setName("bianchengbang");
        userService.login(us);
        model.addAttribute("user", us);
        return "register";
    }
}
springmvc-servlet.xml 代码如下。
<?xml version="1.0" encoding="UTF-8"?>
<beans xmlns="http://www.springframework.org/schema/beans"
    xmlns:xsi="http://www.w3.org/2001/XMLSchema-instance"
    xmlns:mvc="http://www.springframework.org/schema/mvc"
    xmlns:p="http://www.springframework.org/schema/p"
    xmlns:context="http://www.springframework.org/schema/context"
    xsi:schemaLocation="
        http://www.springframework.org/schema/beans
        http://www.springframework.org/schema/beans/spring-beans.xsd
        http://www.springframework.org/schema/context
        http://www.springframework.org/schema/context/spring-context.xsd
        http://www.springframework.org/schema/mvc
        http://www.springframework.org/schema/mvc/spring-mvc.xsd">
    <context:component-scan
        base-package="net.biancheng" />
    <mvc:annotation-driven />

    <bean id="viewResolver"
        class="org.springframework.web.servlet.view.InternalResourceViewResolver">
        <!--前缀 -->
        <property name="prefix" value="/WEB-INF/jsp/" />
        <!--后缀 -->
        <property name="suffix" value=".jsp" />
    </bean>
</beans>
<?xml version="1.0" encoding="UTF-8"?>
<web-app xmlns:xsi="http://www.w3.org/2001/XMLSchema-instance"
    xmlns="http://java.sun.com/xml/ns/javaee"
    xmlns:web="http://java.sun.com/xml/ns/javaee/web-app_2_5.xsd"
    xsi:schemaLocation="http://java.sun.com/xml/ns/javaee http://java.sun.com/xml/ns/javaee/web-app_3_0.xsd"
    version="3.0">
    <display-name>springMVC</display-name>

    <!-- 部署 DispatcherServlet -->
    <servlet>
        <servlet-name>springmvc</servlet-name>
        <servlet-class>org.springframework.web.servlet.DispatcherServlet</servlet-class>
        <init-param>
            <param-name>contextConfigLocation</param-name>
            <param-value>/WEB-INF/springmvc-servlet.xml</param-value>
        </init-param>
        <!-- 表示容器再启动时立即加载servlet -->
        <load-on-startup>1</load-on-startup>
    </servlet>
    <servlet-mapping>
        <servlet-name>springmvc</servlet-name>
        <!-- 处理所有URL -->
        <url-pattern>/</url-pattern>
    </servlet-mapping>
</web-app>
<%@ page language="java" contentType="text/html; charset=UTF-8"
    pageEncoding="UTF-8"%>
<!DOCTYPE html PUBLIC "-//W3C//DTD HTML 4.01 Transitional//EN" "http://www.w3.org/TR/html4/loose.dtd">
<html>
<head>
<meta http-equiv="Content-Type" content="text/html; charset=UTF-8">
<title>Insert title here</title>
</head>
<body>
    未注册的用户,请
    <a href="${pageContext.request.contextPath }/user/register"> 注册</a>!
    <br /> 已注册的用户,去
    <a href="${pageContext.request.contextPath }/user/login"> 登录</a>!
</body>
</html>
<%@ page language="java" contentType="text/html; charset=UTF-8"
pageEncoding="UTF-8"%>
<!DOCTYPE html PUBLIC "-//W3C//DTD HTML 4.01 Transitional//EN" "http://www.w3.org/TR/html4/loose.dtd">
<html>
<head>
<meta http-equiv="Content-Type" content="text/html; charset=UTF-8">
<title>Insert title here</title>
</head>
<body>
    登录页面! 欢迎 ${user.name} 登录
</body>
</html>
<%@ page language="java" contentType="text/html; charset=UTF-8"
         pageEncoding="UTF-8" %>
<!DOCTYPE html PUBLIC "-//W3C//DTD HTML 4.01 Transitional//EN" "http://www.w3.org/TR/html4/loose.dtd">
<html>
<head>
    <meta http-equiv="Content-Type" content="text/html; charset=UTF-8">
    <title>Insert title here</title>
</head>
<body>
    注册页面!
    注册账号成功,用户名为: ${user.name }
</body>
</html>
index.jsp页面
register.jsp页面
login.jsp页面