CentOS 7.6 安装 Apache Tomcat 8.5
安装Java
yum -y install java-1.8.0-openjdk.x86_64 java-1.8.0-openjdk-devel.x86_64

java -version

updatedb

locate jre
Before we configure the JAVA_HOME environment, we need to know where the Java directory is. Check the Java directory with the command below:
sudo update-alternatives --config java
There is 1 program that provides 'java'.

  Selection    Command
-----------------------------------------------
*+ 1           java-1.8.0-openjdk.x86_64 (/usr/lib/jvm/java-1.8.0-openjdk-1.8.0.302.b08-0.el7_9.x86_64/jre/bin/java)
Java directory = "/usr/lib/jvm/java-1.8.0-openjdk-1.8.0.302.b08-0.el7_9.x86_64/jre"
Then edit the environment file with vim:
vim /etc/environment
Add the JAVA_HOME environment variable by adding the configuration below:
JAVA_HOME="/usr/lib/jvm/java-1.8.0-openjdk-1.8.0.302.b08-0.el7_9.x86_64/jre"
Save the /etc/environment file and exit vim.
Next, edit the .bash_profile file and add the JAVA_HOME variable as well:
vim ~/.bash_profile
At the end of the file, paste the configuration below:
export JAVA_HOME=/usr/lib/jvm/java-1.8.0-openjdk-1.8.0.302.b08-0.el7_9.x86_64/jre
export PATH=$JAVA_HOME/bin:$PATH
Save the file, then reload the bash_profile file.
source ~/.bash_profile
Make sure there is no error, Finally check the JAVA_HOME environment variable:
echo $JAVA_HOME
安装 tomcat
Create a user and group named tomcat:
groupadd tomcat
useradd -s /bin/false -g tomcat -d /opt/tomcat tomcat
Next, go to the /opt directory and download tomcat with the wget command:
cd /opt/
wget https://dlcdn.apache.org/tomcat/tomcat-8/v8.5.70/bin/apache-tomcat-8.5.70.tar.gz
Extract Tomcat and move all the files and directories that are in the 'apache-tomcat-8.5.6' directory to the 'tomcat' directory.
tar -xzvf apache-tomcat-8.5.70.tar.gz
mv apache-tomcat-8.5.70/* tomcat/
Now change the owner of the tomcat directory to the tomcat user and group.
chown -hR tomcat:tomcat tomcat
Go to the tomcat/bin directory and run the command 'startup.sh' to test Apache Tomcat:
cd /opt/tomcat/bin/
./startup.sh
Tomcat is using port 8080 now, check the open port on the server with the netstat command.
netstat -plntu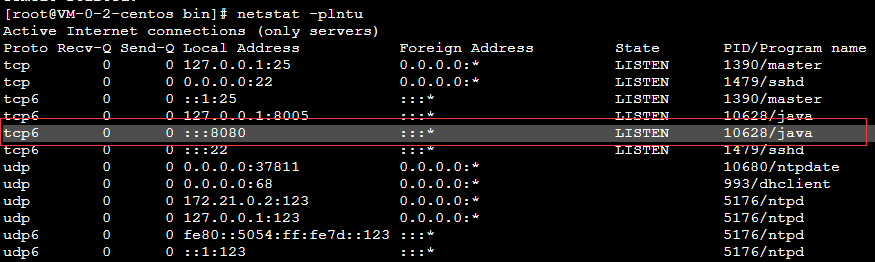
Or visit the server IP address with port 8080 - with a web browser. You will see the Apache Tomcat default page.
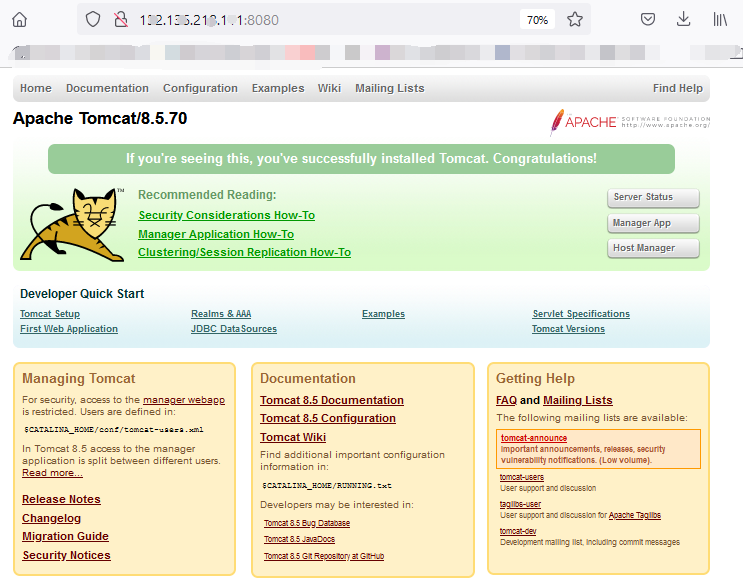
默认显示的网页是 tomcat安装目录里面的 /webapps/ROOT/index.jsp
修改默认端口
tomcat默认的端口号是8080,可以通过配置把端口号修改成80
grep 8080 /opt/tomcat/conf/server.xml
Define a non-SSL/TLS HTTP/1.1 Connector on port 8080
<Connector port="8080" protocol="HTTP/1.1"
port="8080" protocol="HTTP/1.1"
vi /opt/tomcat/conf/server.xml
<Connector port="80" protocol="HTTP/1.1"
connectionTimeout="20000"
redirectPort="8443" />
[root@VM-0-2-centos bin]# pwd
/opt/tomcat/bin
[root@VM-0-2-centos bin]# ./shutdown.sh
[root@VM-0-2-centos bin]# ./startup.sh
Tomcat配置Web默认页面
修改配置文件server.xml(在conf目录下)
<Host name="172.18.0.5" appBase="webapps" unpackWARs="true" autoDeploy="true"><Context path="" docBase="C:apache-tomcat-9.0.0.M22webappsROOT"/>