- 一,Broker服务端入口(NettyServer端)
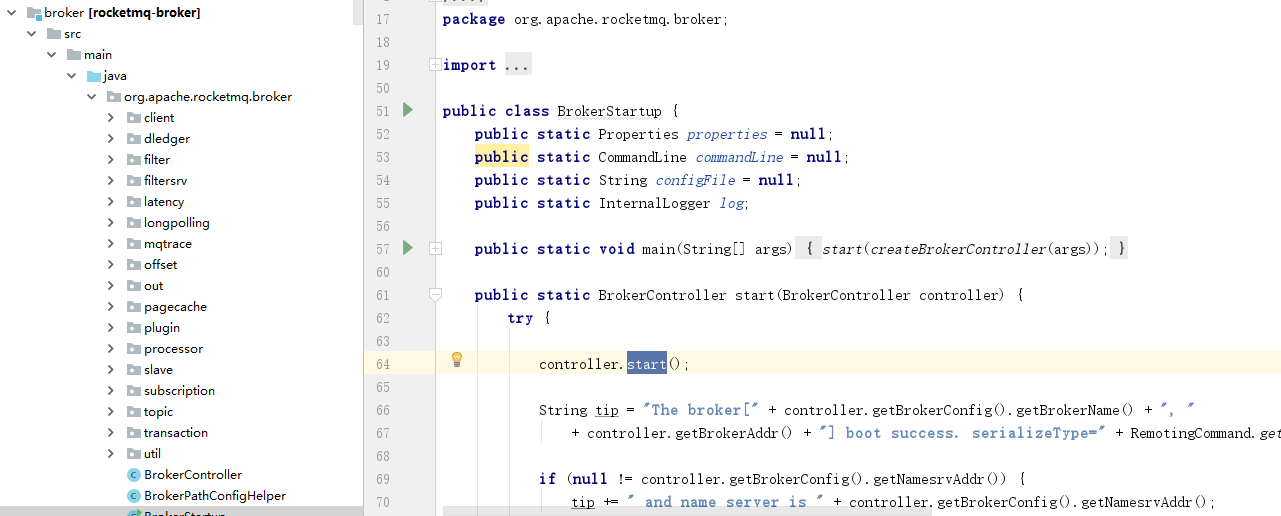
首先RocketMq网络通信采用的Netty通信。服务端主要集中在Broker中。我们先看一下Broker的启动类BrokerStartup

显然具体逻辑是在start方法里面,下面是实现:
 public void start() throws Exception {
        if (this.messageStore != null) {
            this.messageStore.start();
        }

        if (this.remotingServer != null) {
            this.remotingServer.start();
        }

        if (this.fastRemotingServer != null) {
            this.fastRemotingServer.start();
        }

        if (this.fileWatchService != null) {
            this.fileWatchService.start();
        }

        if (this.brokerOuterAPI != null) {
            this.brokerOuterAPI.start();
        }

        if (this.pullRequestHoldService != null) {
            this.pullRequestHoldService.start();
        }

        if (this.clientHousekeepingService != null) {
            this.clientHousekeepingService.start();
        }

        if (this.filterServerManager != null) {
            this.filterServerManager.start();
        }

        if (!messageStoreConfig.isEnableDLegerCommitLog()) {
            startProcessorByHa(messageStoreConfig.getBrokerRole());
            handleSlaveSynchronize(messageStoreConfig.getBrokerRole());
        }


        this.registerBrokerAll(true, false, true);

        this.scheduledExecutorService.scheduleAtFixedRate(new Runnable() {

            @Override
            public void run() {
                try {
                    BrokerController.this.registerBrokerAll(true, false, brokerConfig.isForceRegister());
                } catch (Throwable e) {
                    log.error("registerBrokerAll Exception", e);
                }
            }
        }, 1000 * 10, Math.max(10000, Math.min(brokerConfig.getRegisterNameServerPeriod(), 60000)), TimeUnit.MILLISECONDS);

        if (this.brokerStatsManager != null) {
            this.brokerStatsManager.start();
        }

        if (this.brokerFastFailure != null) {
            this.brokerFastFailure.start();
        }


    }
可以从名字大致猜出接收远程消息是remotingServer.start(),点进去观察一下其具体实现:

这里看到我们熟悉的面孔ServerBootStrap, 那么可以明确一点,我们要知道的具体通信协议实现,必定是写在一个handler里面的:
.childHandler(new ChannelInitializer<SocketChannel>() {
                    @Override
                    public void initChannel(SocketChannel ch) throws Exception {
                        ch.pipeline()
                            .addLast(defaultEventExecutorGroup, HANDSHAKE_HANDLER_NAME,
                                new HandshakeHandler(TlsSystemConfig.tlsMode))
                            .addLast(defaultEventExecutorGroup,
                                new NettyEncoder(),
                                new NettyDecoder(),
                                new IdleStateHandler(0, 0, nettyServerConfig.getServerChannelMaxIdleTimeSeconds()),
                                new NettyConnectManageHandler(),
                                new NettyServerHandler()
                            );
                    }
从这些handler中,由名字可以猜测,通信消息的解析发生在NettyServerHandler,进入NettyServerHandler:

由上图可知,它本身就是一个读消息的Handler, 可以看到的是接收的消息体是RemotingCommand。这个类必然就是整个RocketMq的通信协议。
点进去看一下:

大致上看由code、Header、body以及一些metedata组成。其实所有的Rpc调用框架基本上都是这个设计思路。所有的请求必须继承自某一个父类。
不过现在的微服务体系似乎没有这样子做,可能是出于不同的服务需求多样性考虑,但是没有统一的请求头着实怪异,后续有时间看一下这方面的设计考虑。
至此,Rpc的Netty调用链基本结束。
- 二,RocketMq 通信编码
由一的部分成功定位到了接收消息的入口,本章着重讲解其解析消息的细节实现。
rocketMq通信协议Netty采用的是面向字节流的报文设计。在发送端,前4个字节存储整个报文长度,紧接着4个字节存储头信息,然后紧接着发送body字节流。源码如下:
 public ByteBuffer encodeHeader(final int bodyLength) {
        // 定义头4个字节储存整个报文长度
        int length = 4;

        // 计算头部长度
        byte[] headerData;
        headerData = this.headerEncode();
        length += headerData.length;

        // 计算body长度
        length += bodyLength;

     // 头部信息:整体报文长度信息(4个字节) + 头部数据(length-bodyLehth)
        ByteBuffer result = ByteBuffer.allocate(4 + length - bodyLength);

        // 第一个4字节: 存放报文整体长度信息,从这里我们可以看到meaasge的消息长度是有限制的
        result.putInt(length);

        // 第二个4字节: 第一个字节存放的是序列化类型,有Java或者RocketMq类型。后三个字节存放的是头部数据长度
        result.put(markProtocolType(headerData.length, serializeTypeCurrentRPC));

        // 写入头部数据
        result.put(headerData);

        result.flip();

        return result;
    }
通过对编码部分源码学习,一般对字节的操作喜欢用位运算符,比如要整型的第三个字节,int >>>0xff & 0xff 即可。下面是rocketMq解析的部分示例代码:
   public static SerializeType getProtocolType(int source) {
        return SerializeType.valueOf((byte) ((source >> 24) & 0xFF));
    }
待续。。。。。。