参考:
5.github:
如果第一次接触,直接看我给的参考即可,看过了之后,我把我觉得ok的重点总结在了下面
-----------------------------------------------------笔记--------------------------------------------------
博客一:(一个简单例程+makefile)

#include <stdio.h>
#include <stdlib.h>

#include <iostream> // std::cout
#include <thread>   // std::thread

void thread_task() {
    std::cout << "hello thread" << std::endl;
}

/*
 * ===  FUNCTION  =========================================================
 *         Name:  main
 *  Description:  program entry routine.
 * ========================================================================
 */
int main(int argc, const char *argv[])
{
    std::thread t(thread_task);
    t.join();

    return EXIT_SUCCESS;
}  /* ----------  end of function main  ---------- */

all:Thread

CC=g++
CPPFLAGS=-Wall -std=c++11 -ggdb
LDFLAGS=-pthread

Thread:Thread.o
    $(CC) $(LDFLAGS) -o $@ $^

Thread.o:Thread.cc
    $(CC) $(CPPFLAGS) -o $@ -c $^


.PHONY:
    clean

clean:
    rm Thread.o Thread
博客二:(算是cplusplus官网给的.join()例子的扩充,挺好的)(也有其他函数的官网链接)

#include <stdio.h>
#include <stdlib.h>

#include <chrono>    // std::chrono::seconds
#include <iostream>  // std::cout
#include <thread>    // std::thread, std::this_thread::sleep_for

void thread_task(int n) {
    std::this_thread::sleep_for(std::chrono::seconds(n));
    std::cout << "hello thread "
        << std::this_thread::get_id()
        << " paused " << n << " seconds" << std::endl;
}

/*
 * ===  FUNCTION  =========================================================
 *         Name:  main
 *  Description:  program entry routine.
 * ========================================================================
 */
int main(int argc, const char *argv[])
{
    std::thread threads[5];
    std::cout << "Spawning 5 threads...
";
    for (int i = 0; i < 5; i++) {
        threads[i] = std::thread(thread_task, i + 1);
    }
    std::cout << "Done spawning threads! Now wait for them to join
";
    for (auto& t: threads) {
        t.join();
    }
    std::cout << "All threads joined.
";

    return EXIT_SUCCESS;
}  /* ----------  end of function main  ---------- */
结果是隔一秒打印一行
其他成员函数
- 获取线程 ID。
- 检查线程是否可被 join。
- Join 线程。
- Detach 线程
- Swap 线程 。
- 返回 native handle。
- 检测硬件并发特性。
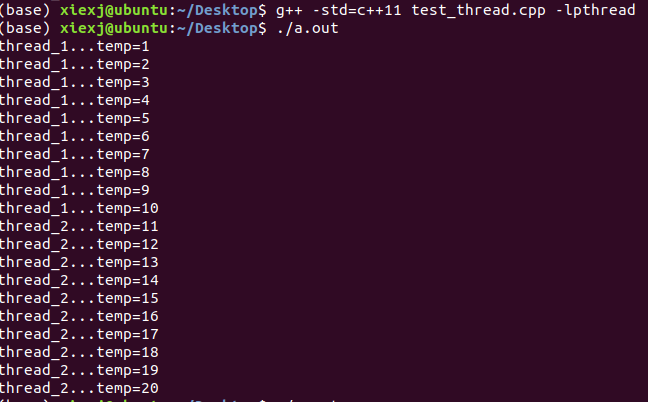
博客三:(有一个使用互斥量的例子,介绍了volatile关键字)
如果该线程是在同一类的某一成员函数当中被构造,则直接用this关键字代替即可。
这里使用this指针代替实例化对象的地址

#include<iostream>
#include<thread>
#include<mutex>

std::mutex mut;

class A{

public:

    volatile int temp;

    A(){
        temp=0;
    }

    void fun(int num){

        int count=10;
        while(count>0){

            mut.lock();
            temp++;
            std::cout<<"thread_"<<num<<"...temp="<<temp<<std::endl;
            mut.unlock();

            count--;
        }
    }

    void thread_run(){
            std::thread t1(&A::fun,this,1);

            std::thread t2(&A::fun,this,2);

            t1.join();
            t2.join();
    }
};

int main(){

    A a;

    a.thread_run();
}

参考五:(hardware_concurrency)
检测硬件并发特性,返回当前平台的线程实现所支持的线程并发数目,但返回值仅仅只作为系统提示(hint)。
#include <iostream>
  #include <thread>

  int main() {
      unsigned int n = std::thread::hardware_concurrency();
      std::cout << n << " concurrent threads are supported.
";
  }
![]()
虚拟机设置为2核,支持两个线程并发

