MFGTool是飞思卡尔提供的烧写工具,使用起来非常方便。但是,在使用MFGTool有几点是需要注意的,否则就会在烧写过程中遇到一些问题:
1、在使用MFGTool前,文件cfg.ini 和 UICfg.ini是必须要在同一个文件夹下,同时这两个文件一定要配置正确。
UICfg.ini用来配置每次同时可以烧写开发板的个数:
[UICfg]
PortMgrDlg=1
cfg.ini用来配置芯片类型和板子信息以及烧写内容存储方式:
[profiles]
chip = MX6DL Linux Update -----------芯片为i.mx6dl
[platform]
board = SabreSD ------------板子型号
[LIST]
name = i.MX6DL-ubuntu-SabreSD-SD ---------------烧写内容及存储方式
cfg.ini一定要根据你的板子和要烧写到哪里来设置,设置的信息和你使用的板子要匹配。
2、ucl2.xml
MFGTool烧写过程是完全按照ucl2.xml进行的。具体ucl2.xml的内容你可以到MFGTool-Dir/Profiles/MX6DL Linux Update/OS Firmware下查看。ucl2.xml中的烧写命令为linux命令(文档Manufacturing Tool V2 Quick Start Guide中有介绍)这里不再详述。
3、boot mode方式要正确
在烧写前要设置板子为下载模式,才可以进行烧写。
总结一下使用MFGTool烧写过程如下:
1)配置cfg.ini和UICfg.ini文件
2)设置boot mode为download模式
3)用OTG-USB线连接开发板和PC机
4)打开终端,并运行MfgTool2.exe
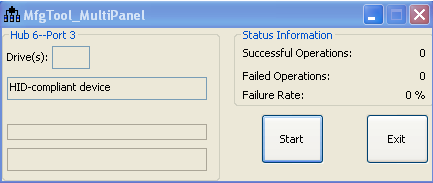
5)给开发板上电,出现如下HID-compliant device,点击Start开始下载。
1、在使用MFGTool前,文件cfg.ini 和 UICfg.ini是必须要在同一个文件夹下,同时这两个文件一定要配置正确。
UICfg.ini用来配置每次同时可以烧写开发板的个数:
[UICfg]
PortMgrDlg=1
cfg.ini用来配置芯片类型和板子信息以及烧写内容存储方式:
[profiles]
chip = MX6DL Linux Update -----------芯片为i.mx6dl
[platform]
board = SabreSD ------------板子型号
[LIST]
name = i.MX6DL-ubuntu-SabreSD-SD ---------------烧写内容及存储方式
cfg.ini一定要根据你的板子和要烧写到哪里来设置,设置的信息和你使用的板子要匹配。
2、ucl2.xml
MFGTool烧写过程是完全按照ucl2.xml进行的。具体ucl2.xml的内容你可以到MFGTool-Dir/Profiles/MX6DL Linux Update/OS Firmware下查看。ucl2.xml中的烧写命令为linux命令(文档Manufacturing Tool V2 Quick Start Guide中有介绍)这里不再详述。
3、boot mode方式要正确
在烧写前要设置板子为下载模式,才可以进行烧写。
总结一下使用MFGTool烧写过程如下:
1)配置cfg.ini和UICfg.ini文件
2)设置boot mode为download模式
3)用OTG-USB线连接开发板和PC机
4)打开终端,并运行MfgTool2.exe
5)给开发板上电,出现如下HID-compliant device,点击Start开始下载。
4、如何使用MFGTool烧写image到你自己设计的板子上?
编译生成板子上需要跑的U-boot、uImage和文件系统rootfs(具体操作查看你参考设计的板子的User Guider中有详细的步骤和介绍)
Sending U-Boot
write U-Boot to sd card
Sending kernel uImage
write kernel image to sd card………….
Sending and writting rootfs
根据ucl2.xml文件中的内容来创建你自己设计板子的烧写过程,只要修改原有的U-Boot 和 kernel就够了。
以下时ucl2.xml文件:
<CFG>
<STATE name="BootStrap" dev="MX6Q" vid="15A2" pid="0054"/><STATE name="Updater" dev="MSC" vid="066F" pid="37FF"/>
<STATE name="Updater" dev="MSC" vid="066F" pid="37FF"/>
</CFG>
//全局变量
//ucl2.xml将烧录过程分成两个阶段:BootStrap和Updater
//dev、vid和pid:分别对应两个阶段的设备名、设备对应连接的USB vid和pid号
//针对imx6系列,在 BootStrap阶段,有效的设备名只有MX6Q、MX6D、MX6SL。在Updater阶段,有效的设备名只有MSC
</CFG>
//全局变量
//ucl2.xml将烧录过程分成两个阶段:BootStrap和Updater
//dev、vid和pid:分别对应两个阶段的设备名、设备对应连接的USB vid和pid号
//针对imx6系列,在 BootStrap阶段,有效的设备名只有MX6Q、MX6D、MX6SL。在Updater阶段,有效的设备名只有MSC
<LIST name="Android-Marsboard-eMMC" desc="Choose eMMC as media">
//根据cfg.ini 文件中定义的name 选择(ucl2.xml中LIST name要与cfg.ini文件中定义的name相对应)
<CMD state="BootStrap" type="boot" body="BootStrap" file="u-boot.bin">Loading U-boot</CMD>
//下载当前目录的u-boot.bin 文件到RAM
<CMD state="BootStrap" type="load" file="uImage" address="0x10800000" loadSection="OTH" setSection="OTH" HasFlashHeader="FALSE">Loading Kernel.</CMD>
//下载当前目录的uImage文件到RAM的0x10800000地址处
<CMD state="BootStrap" type="load" file="initramfs.cpio.gz.uboot" address="0x10C00000" loadSection="OTH" setSection="OTH" HasFlashHeader="FALSE">Loading Initramfs.</CMD>
//下载当前目录的initramfs.cpio.gz.uboot文件到内存的0x10C00000地址处
<CMD state="BootStrap" type="jump"> Jumping to OS image. </CMD>
//通知内嵌ROM代码跳转到内存中的镜像执行
<CMD state="Updater" type="push" body="$ flash_eraseall /dev/mtd0">Erasing Boot partition</CMD>
//擦除信息mtd0
<CMD state="Updater" type="push" body="send" file="files/android/u-boot.bin">Sending U-Boot</CMD>
//将files/android/u-boot.bin文件发送到目标机
<CMD state="Updater" type="push" body="$ dd if=$FILE of=/dev/mtd0 bs=512">write U-Boot to SPI-NOR</CMD>
//烧写将$FILE下载到/dev/mtd0位置,bs=512,指定读/写的blocks大小为512bytes
<CMD state="Updater" type="push" body="$ flash_eraseall /dev/mtd1">Clear Params</CMD>
//擦除信息mtd1
<CMD state="Updater" type="push" body="send" file="mksdcard-android.sh.tar">Sending partition shell</CMD>
//将files/android/u-boot.bin文件发送到目标机
//将当前目录的mksdcard-android.sh.tar 分区脚本文件,发送到目标机
<CMD state="Updater" type="push" body="$ tar xf $FILE "> Partitioning...</CMD>
//解压脚本文件
<CMD state="Updater" type="push" body="$ sh mksdcard-android.sh /dev/mmcblk0"> Partitioning...</CMD>
//执行脚本文件
<CMD state="Updater" type="push" body="$ ls -l /dev/mmc* ">Formatting sd partition</CMD>
//从下面开始烧录内核、文件系统
<CMD state="Updater" type="push" body="send" file="files/android/boot.img">Sending kernel uImage</CMD>
//将files/android/boot.img 发送到目标机
<CMD state="Updater" type="push" body="$ dd if=$FILE of=/dev/mmcblk0p1">write boot.img</CMD>
<CMD state="Updater" type="push" body="frf">flush the memory.</CMD>
//刷新,等待数据传送完成
<CMD state="Updater" type="push" body="$ mkfs.ext4 -b 4096 -m 0 /dev/mmcblk0p4">Formatting data partition</CMD>
<CMD state="Updater" type="push" body="send" file="mk-encryptable-data-android.sh.tar">Sending data partition shell</CMD>
<CMD state="Updater" type="push" body="$ tar xf $FILE ">Extracting data partition shell</CMD>
<CMD state="Updater" type="push" body="$ sh mk-encryptable-data-android.sh /dev/mmcblk0 /dev/mmcblk0p4">Making data encryptable</CMD>
<CMD state="Updater" type="push" body="$ mkfs.ext4 /dev/mmcblk0p5">Formatting system partition</CMD>
<CMD state="Updater" type="push" body="$ mkfs.ext4 /dev/mmcblk0p6">Formatting cache partition</CMD>
<CMD state="Updater" type="push" body="frf">flush the memory.</CMD>
<CMD state="Updater" type="push" body="$ mkfs.ext4 /dev/mmcblk0p7">Formatting device partition</CMD>
<CMD state="Updater" type="push" body="pipe dd of=/dev/mmcblk0p5 bs=512" file="files/android/system.img">Sending and writting system.img</CMD>
//利用pipe 传输大数据
<CMD state="Updater" type="push" body="frf">flush the memory.</CMD>
//执行flush刷新操作,等到数据传输完毕