今天学了MVVM模式,这里贴一下具体步骤。
MVVM其实就是:Model 、view、viewmodel三个的简称,就像MVC一样。
model就是模型。view就是视图。viewmodel就是和view进行绑定的。
首先建立一个MainWindow。
然后建立相应的文件夹:一个ViewModels,一个views,一个Models。在viewmodels里面有一个基础的通知类:NotifycationObject,这个类继承自INotifyPropertyChanged,然后实现它就可以了。这个类是通知的基础类,当事件执行时,会将相应的值显示在绑定的控件上。
/// <summary>
    /// 通知基类。如果RaisePropertyChanged被调用,databinding就会调用PropertyChanged事件,将propertyName的值显示在界面
    /// </summary>
    class NotifycationObject : INotifyPropertyChanged
    {
        public event PropertyChangedEventHandler PropertyChanged;
        public void RaisePropertyChanged(string propertyName)
        {
            if (PropertyChanged!=null)
            {
                PropertyChanged.Invoke(this,new PropertyChangedEventArgs(propertyName));
            }
        }
    }
然后我们需要建立一个Commands文件夹,里面有一个基础的委托命令类:DelegateCommand。
class DelegateCommand : ICommand
    {
        public event EventHandler CanExecuteChanged;

        public bool CanExecute(object parameter)
        {
            if (CanExecuteFunc == null)
            {
                return true;
            }
            return this.CanExecuteFunc(parameter);
        }

        public void Execute(object parameter)
        {
            if (ExecuteAction == null)
            {
                return;
            }
            this.ExecuteAction(parameter);
        }
        public Action<object> ExecuteAction { get; set; }
        public Func<object, bool> CanExecuteFunc { get; set; }
    }
然后我们需要在ViewModel里面建一个与Window相应的ViewModel类。此类时需要绑定界面的控件的。viewmodel需要继承
NotifycationObject
 class MainWindowViewModel : NotifycationObject
    {
        private double input1;

        public double Input1
        {
            get { return input1; }
            set
            {
                input1 = value;
                this.RaisePropertyChanged("Input1");
            }
        }
        private double input2;

        public double Input2
        {
            get { return input2; }
            set
            {
                input2 = value;
                this.RaisePropertyChanged("Input2");
            }
        }

        private double result;

        public double Result
        {
            get { return result; }
            set
            {
                result = value;
                this.RaisePropertyChanged("Result");
            }
        }


        public DelegateCommand AddCommand { get; set; }
        /// <summary>
        /// 当result被赋值之后,会调用属性的set器。然后会调用RaisePropertyChanged的事件,而调用此事件之后,会将result显示在界面上
        /// </summary>
        /// <param name="obj"></param>
        private void Add(object obj)
        {
            this.Result = input1 + input2;
        }

        public MainWindowViewModel()
        {
            this.AddCommand = new DelegateCommand();
            this.AddCommand.ExecuteAction = new Action<object>(Add);
        }

    }
其中:Input1、Input2、Result等3属性是需要绑定在界面的三个textbox上的。而AddCommand是需要绑定在按钮上的。AddCommand是需要传递给基础委托命令类DelegateCommand的ExecuteAction的委托的,以此来绑定方法。
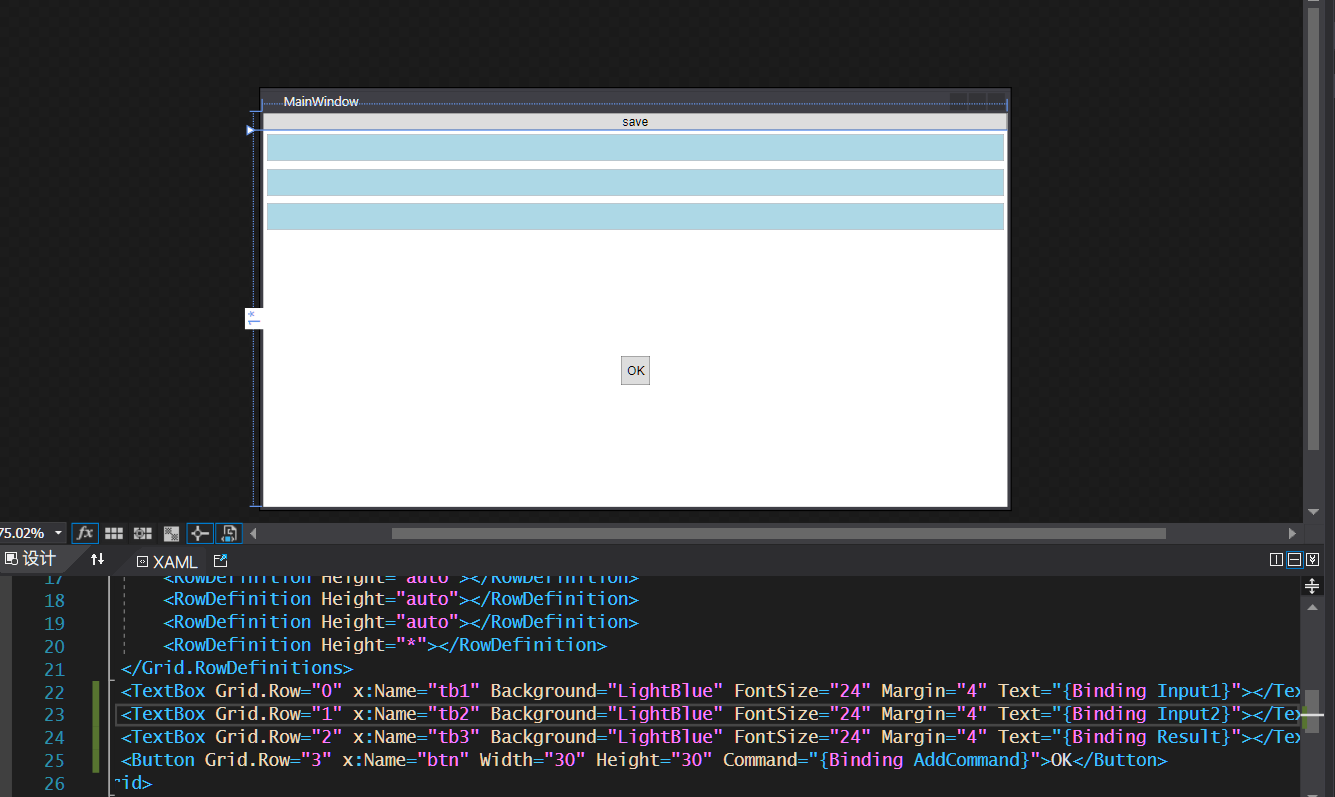
接下来就是绑定属性到控件上了。

如图所示。
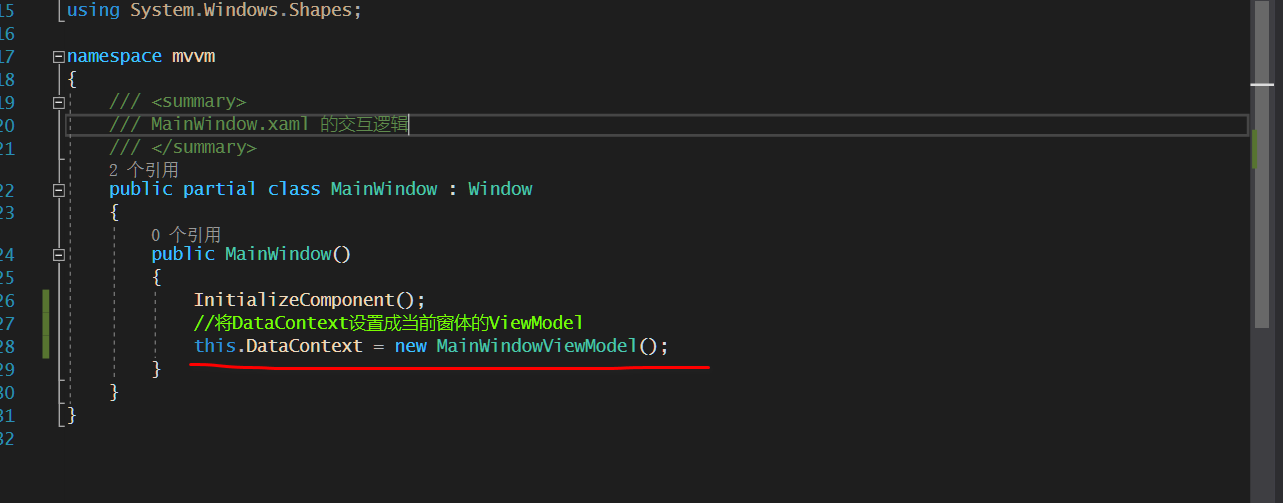
最后就是将当前window的datacontext绑定viewmodel了,不然会找不到绑定的命令或者属性。
好了,一个简单的MVVM就完成了。
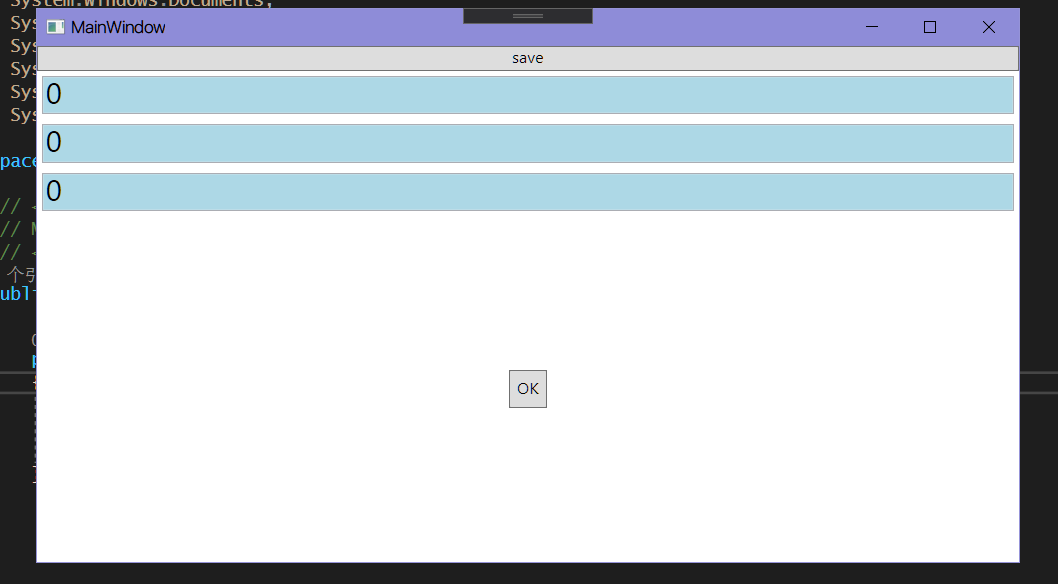
看看运行的结果
这是初始运行界面:只有默认值

点击OK后:
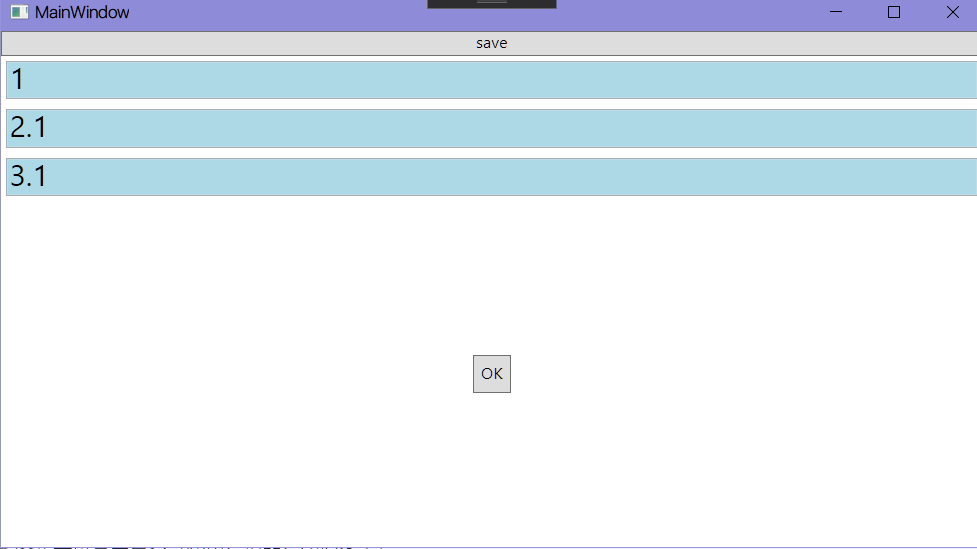
。注意:我们这里是没有给按钮添加事件的,只给它了绑定的命令。这样的好处就是当界面变化,我们可以改动最少的代码。比如如果客户让你将textbox改成silder,你也不用再去添加事件啥的了,只需要改下绑定的属性即可