微软提供了一些针对IdentityServer4的项目模板,在命令行中输入” dotnet new -i IdentityServer4.Templates“即可安装,安装好后可以看到当前已安装的项目模板,其中有一个"is4empty",其实就是一个asp.net core 应用装了IdentityServer4包。在命令行中输入:dotnet new is4empty -n Projectname 就会根据这个模板生成一个新项目。下图是我的项目,一个api客户端(idsapi或者jwtdemo)、一个mvc客户端(那个client),一个identityserver4服务端(idstest),其中Api客户端是受保护的Api资源,Mvc客户端是第三方客户端,用于访问被保护的Api客户端,可以看成是任意后端程序。

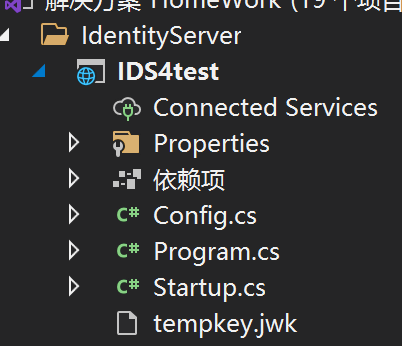
2:idstest:内部结构
直接贴代码:
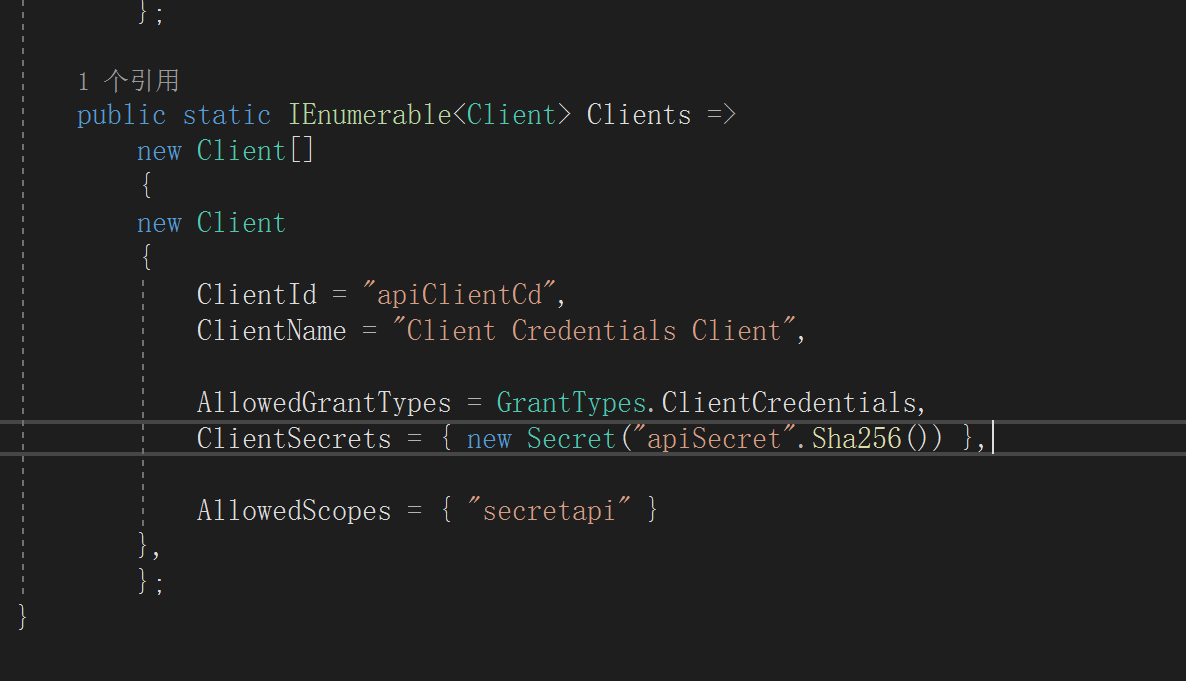
Config.cs
 public static class Config
    {
        public static IEnumerable<IdentityResource> IdentityResources =>
            new IdentityResource[]
            {
            new IdentityResources.OpenId(),
            new IdentityResources.Profile(),
            };

        public static IEnumerable<ApiScope> ApiScopes =>
            new ApiScope[]
            {
            new ApiScope("secretapi"),
                //new ApiScope("scope2"),
            };

        public static IEnumerable<ApiResource> ApiResources =>
            new ApiResource[]
            {
            new ApiResource("secretapi","Secret Api")
            {
                //!!!重要  请注意 在ApiSource里面一定要添加这个,不然永远是401
                Scopes = { "secretapi" }
            },
                //new ApiResource("api2","#api2")
                //{
                //    //!!!重要
                //    Scopes = { "scope2"}
                //},
            };

        public static IEnumerable<Client> Clients =>
            new Client[]
            {
            new Client
            {
                ClientId = "apiClientCd",
                ClientName = "Client Credentials Client",

                AllowedGrantTypes = GrantTypes.ClientCredentials,
                ClientSecrets = { new Secret("apiSecret".Sha256()) },

                AllowedScopes = { "secretapi" }
            },
            };
    }
StartUp.cs
public void ConfigureServices(IServiceCollection services)
        {
            // uncomment, if you want to add an MVC-based UI
            //services.AddControllersWithViews();

            var builder = services.AddIdentityServer(options =>
            {
                // see https://identityserver4.readthedocs.io/en/latest/topics/resources.html
                options.EmitStaticAudienceClaim = true;
            });
            //.AddInMemoryIdentityResources(Config.IdentityResources)
            //.AddInMemoryApiScopes(Config.ApiScopes)
            //.AddInMemoryApiResources(Config.GetApis())
            //.AddInMemoryClients(Config.GetClients());

            // in-memory, code config
            builder.AddInMemoryIdentityResources(Config.IdentityResources);
            builder.AddInMemoryApiScopes(Config.ApiScopes);
            //添加API资源
            builder.AddInMemoryApiResources(Config.ApiResources);
            builder.AddInMemoryClients(Config.Clients);

            // not recommended for production - you need to store your key material somewhere secure
            builder.AddDeveloperSigningCredential();
        }
然后在添加中间件:app.UseIdentityServer();
2:idsapi
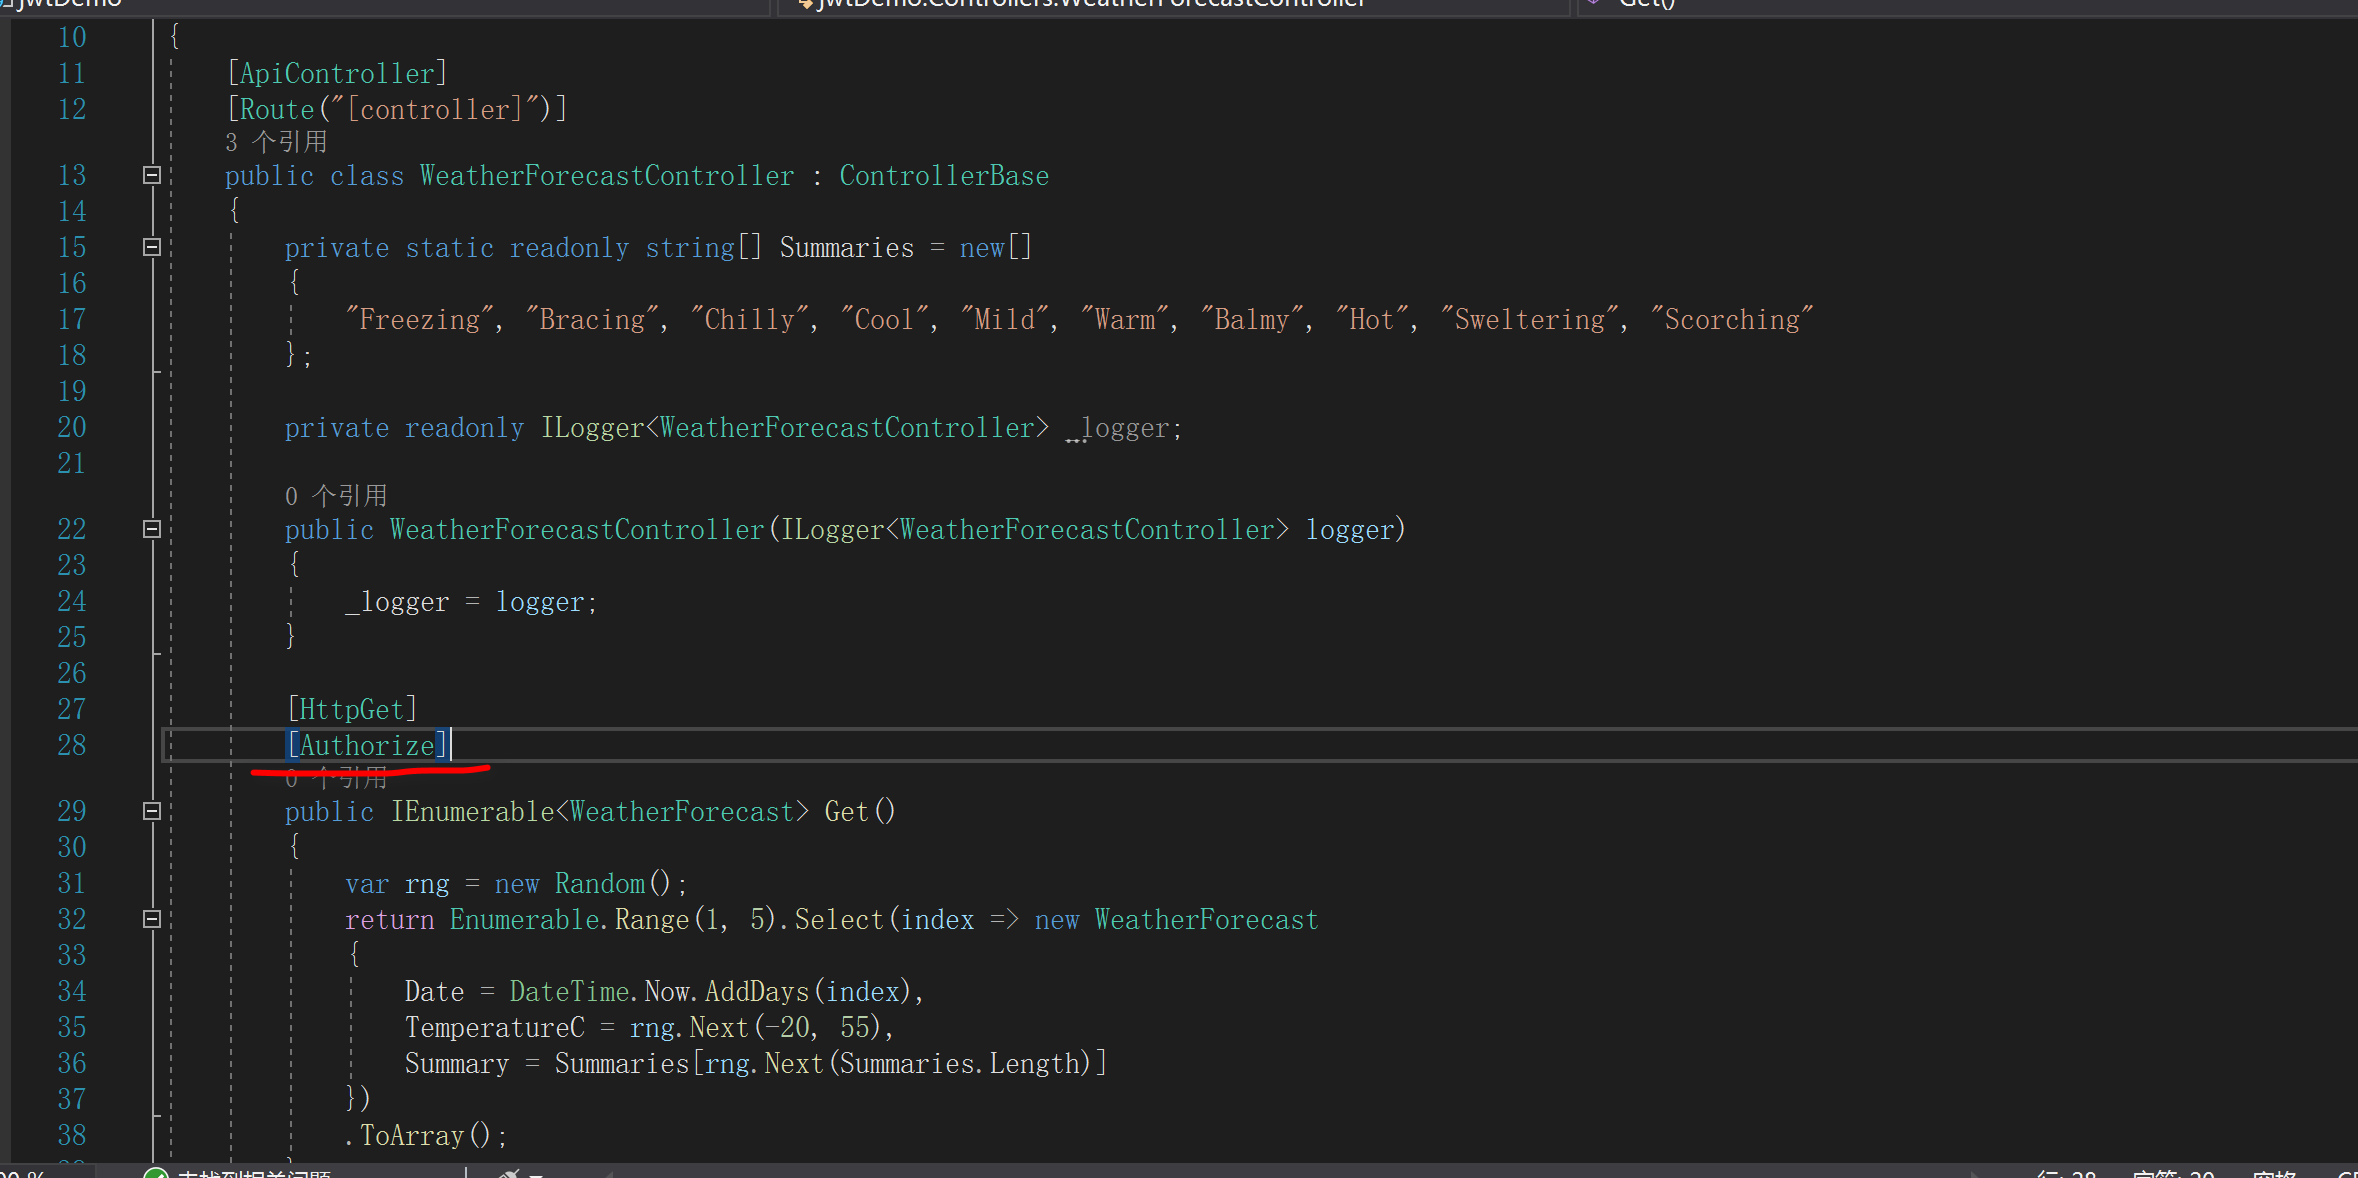
这个就是受保护的api资源。
首先定义一个api
我是直接使用的自带的api,然后加了一个特性:Authorize
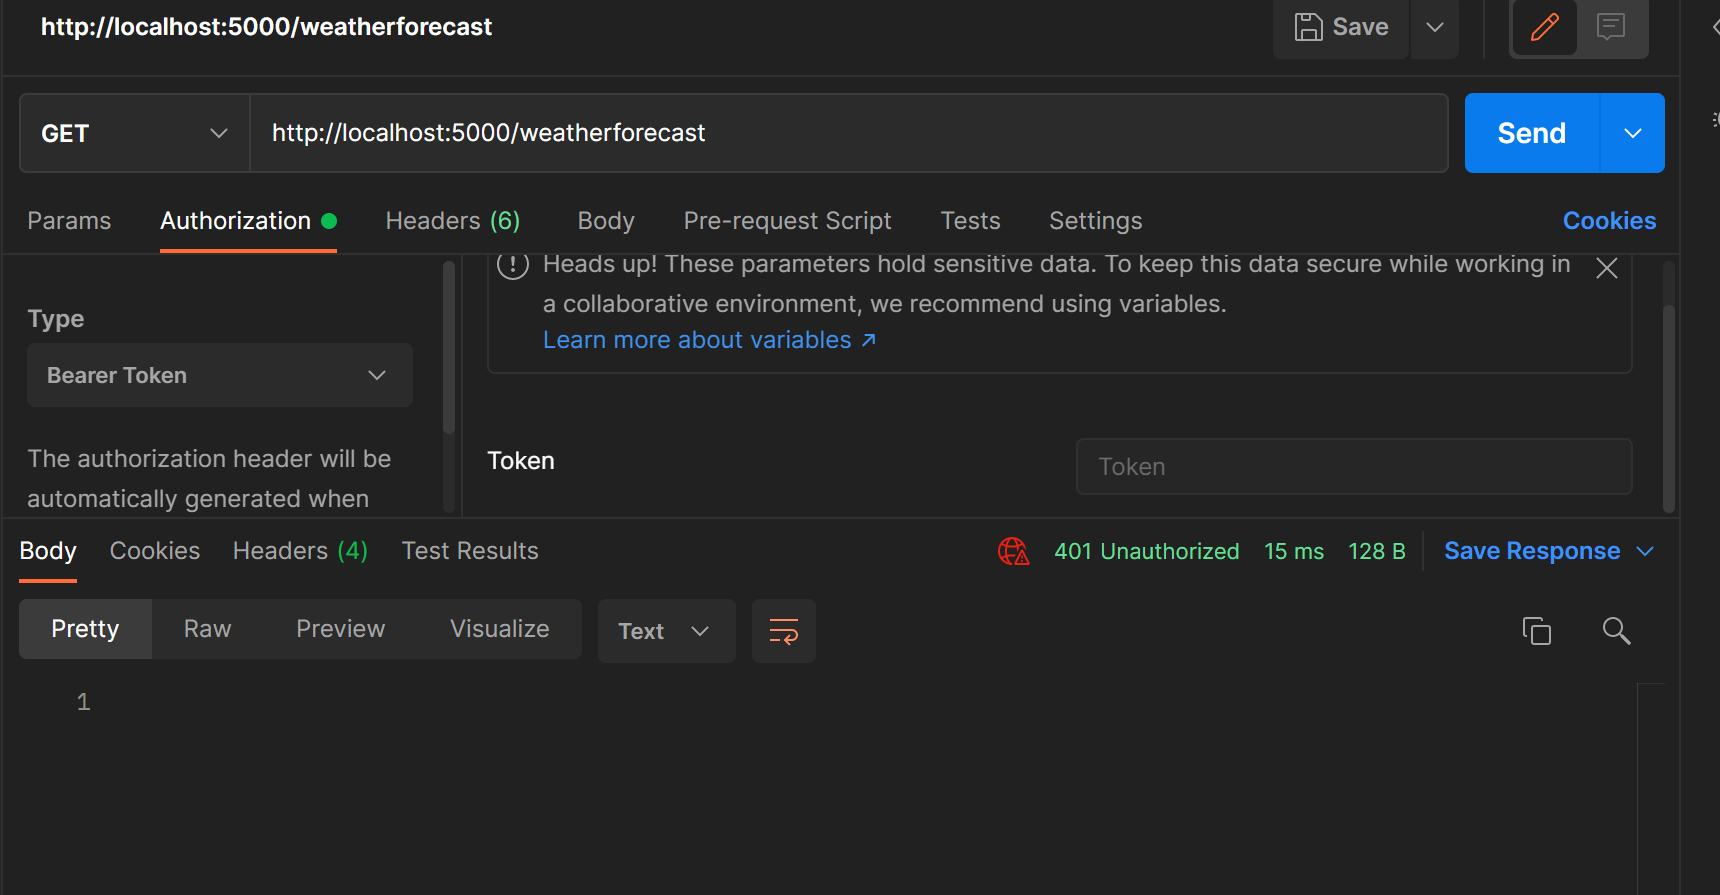
这个时候用postman访问就会出现401
这个时候启动idtest,拿到token,这里使用的是客户端模式。
如图
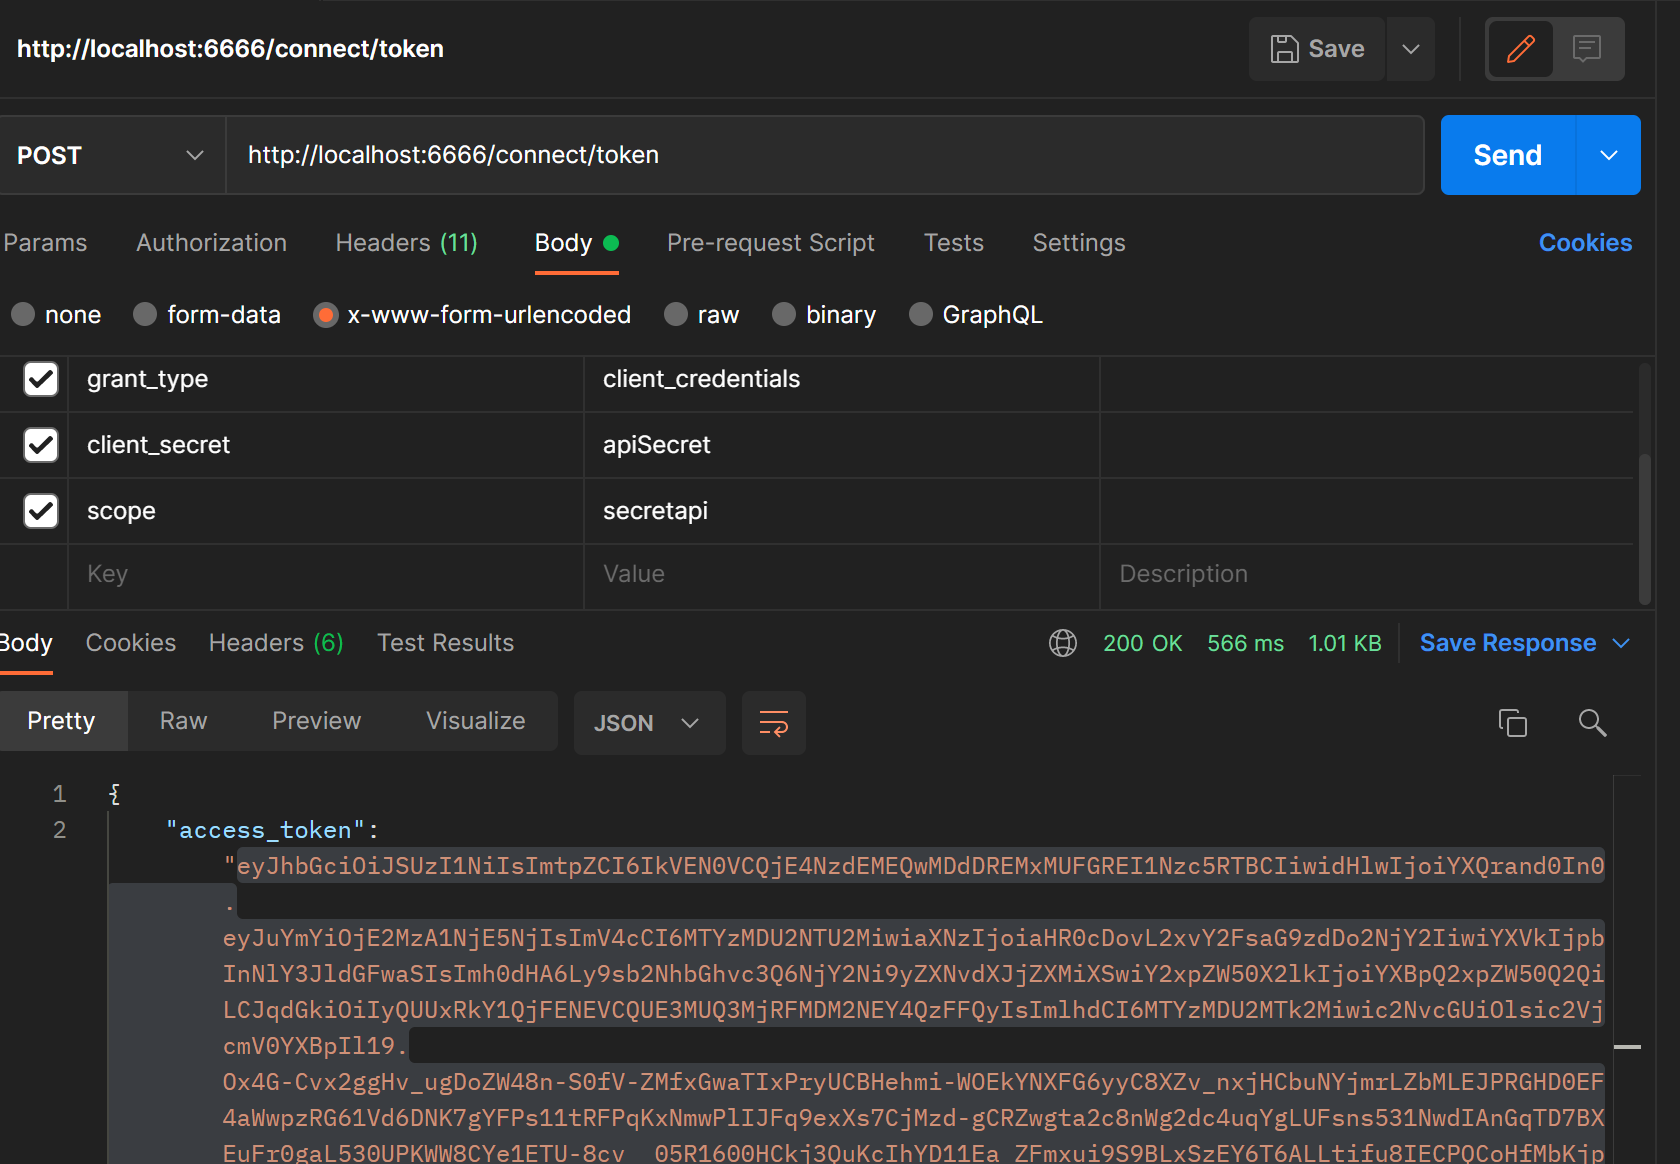
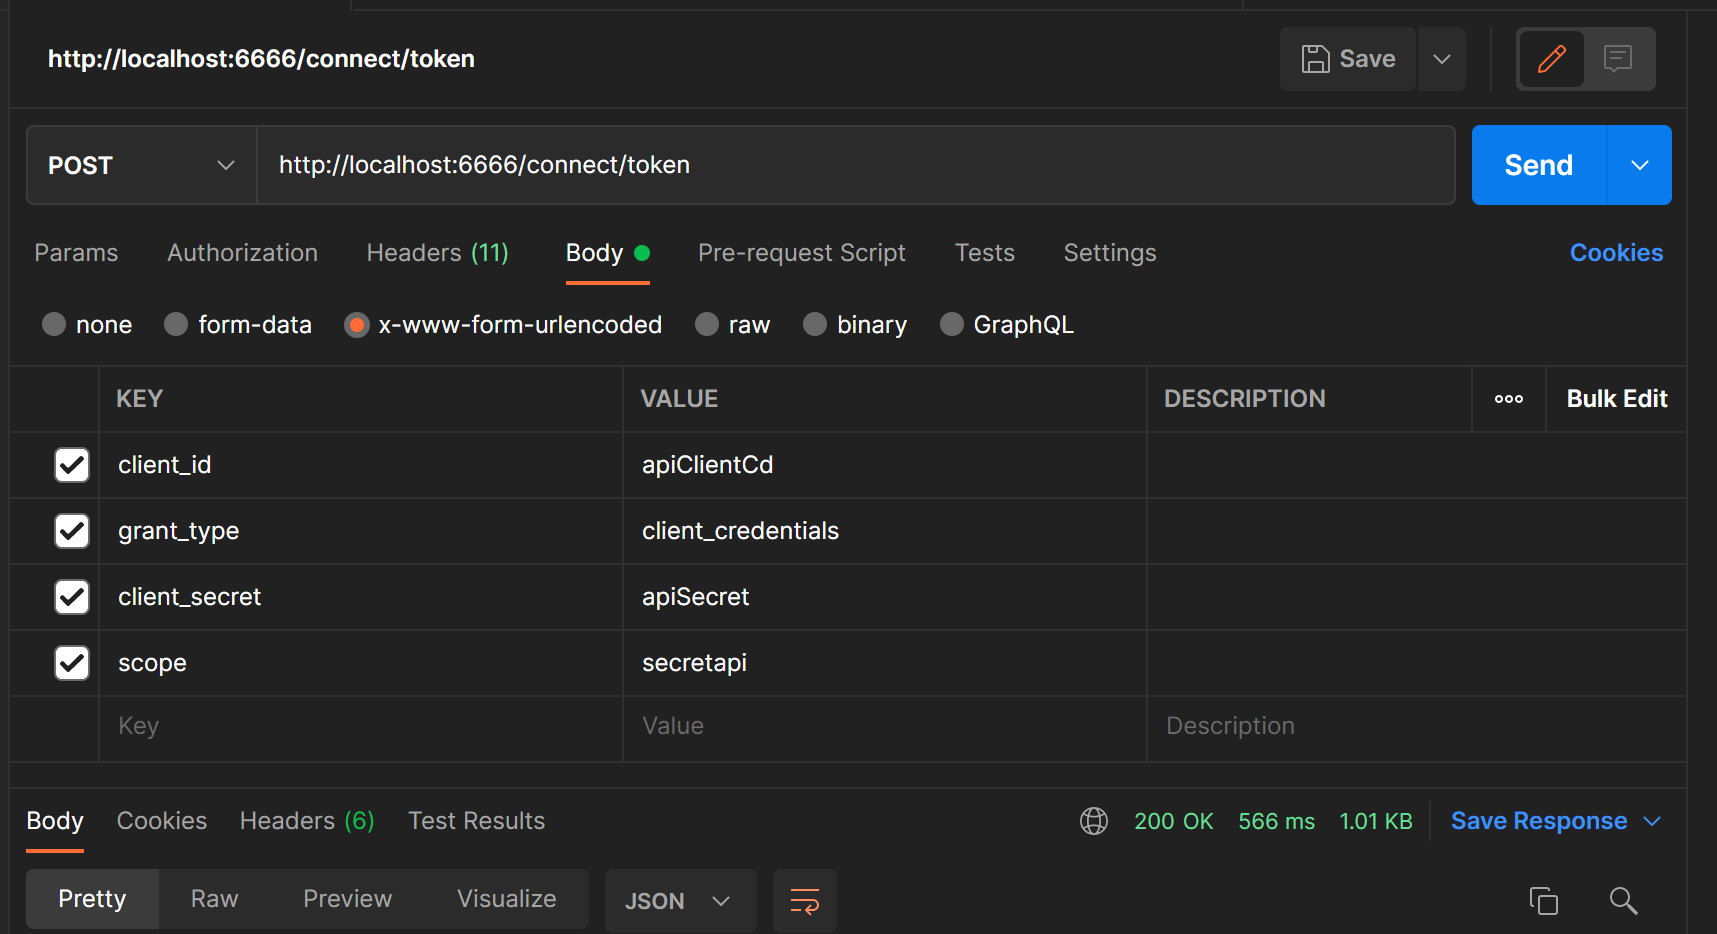
里面的值与配置相同。
在这里拿到token 之后还需要在API项目里面添加如下代码
 services.AddMvc().SetCompatibilityVersion(CompatibilityVersion.Version_3_0);
            services.AddAuthentication("Bearer").AddIdentityServerAuthentication(r =>
            {
                //认证地址
                r.Authority = "http://localhost:6666";
                //权限标识
                r.ApiName = "secretapi";
                //是否必需HTTPS
                r.RequireHttpsMetadata = false;
            });
添加中间件:
app.UseAuthentication();
app.UseAuthorization();
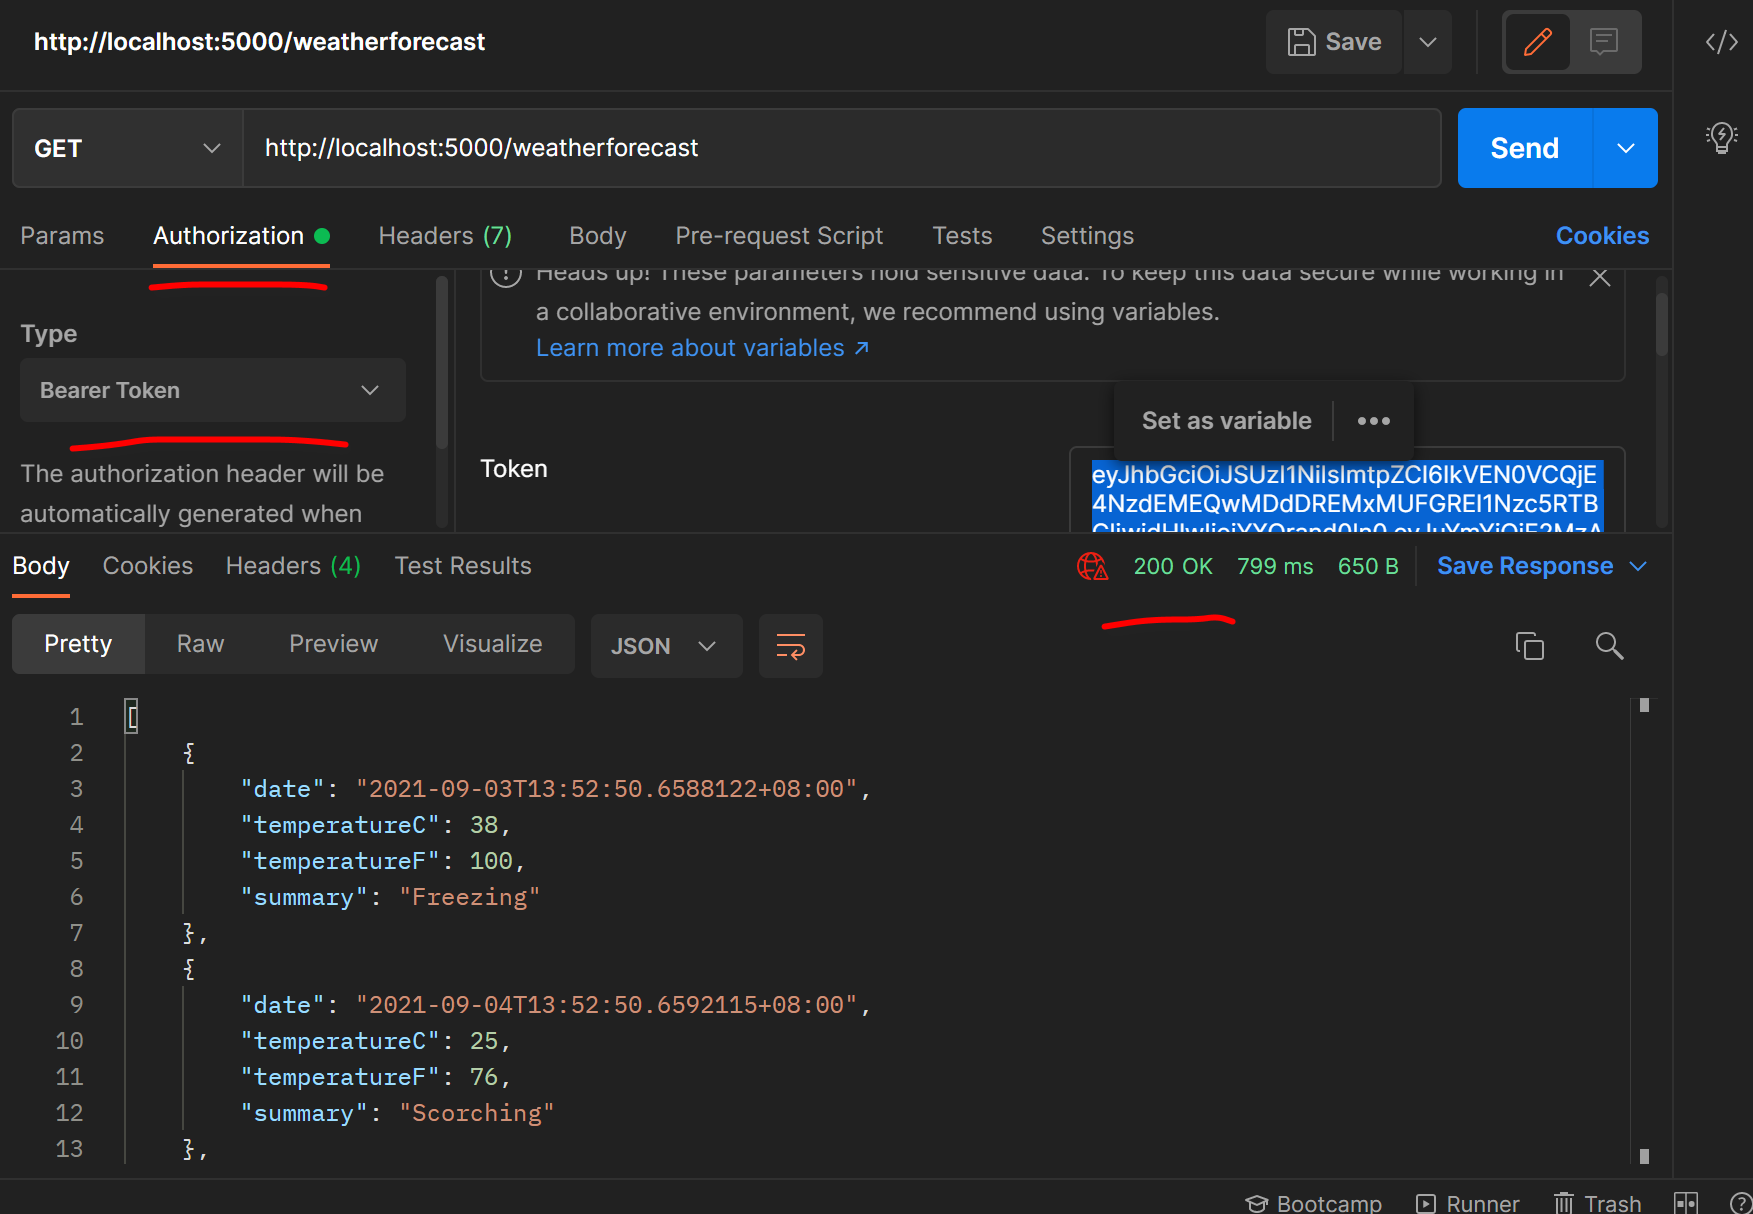
将token复制过去再访问就可成功:
踩坑:在ApiSource里面一定要添加Scope,不然会不成功
原文参考:https://www.cnblogs.com/liujiabing/p/11460486.html