1、新建.netCore webapi项目

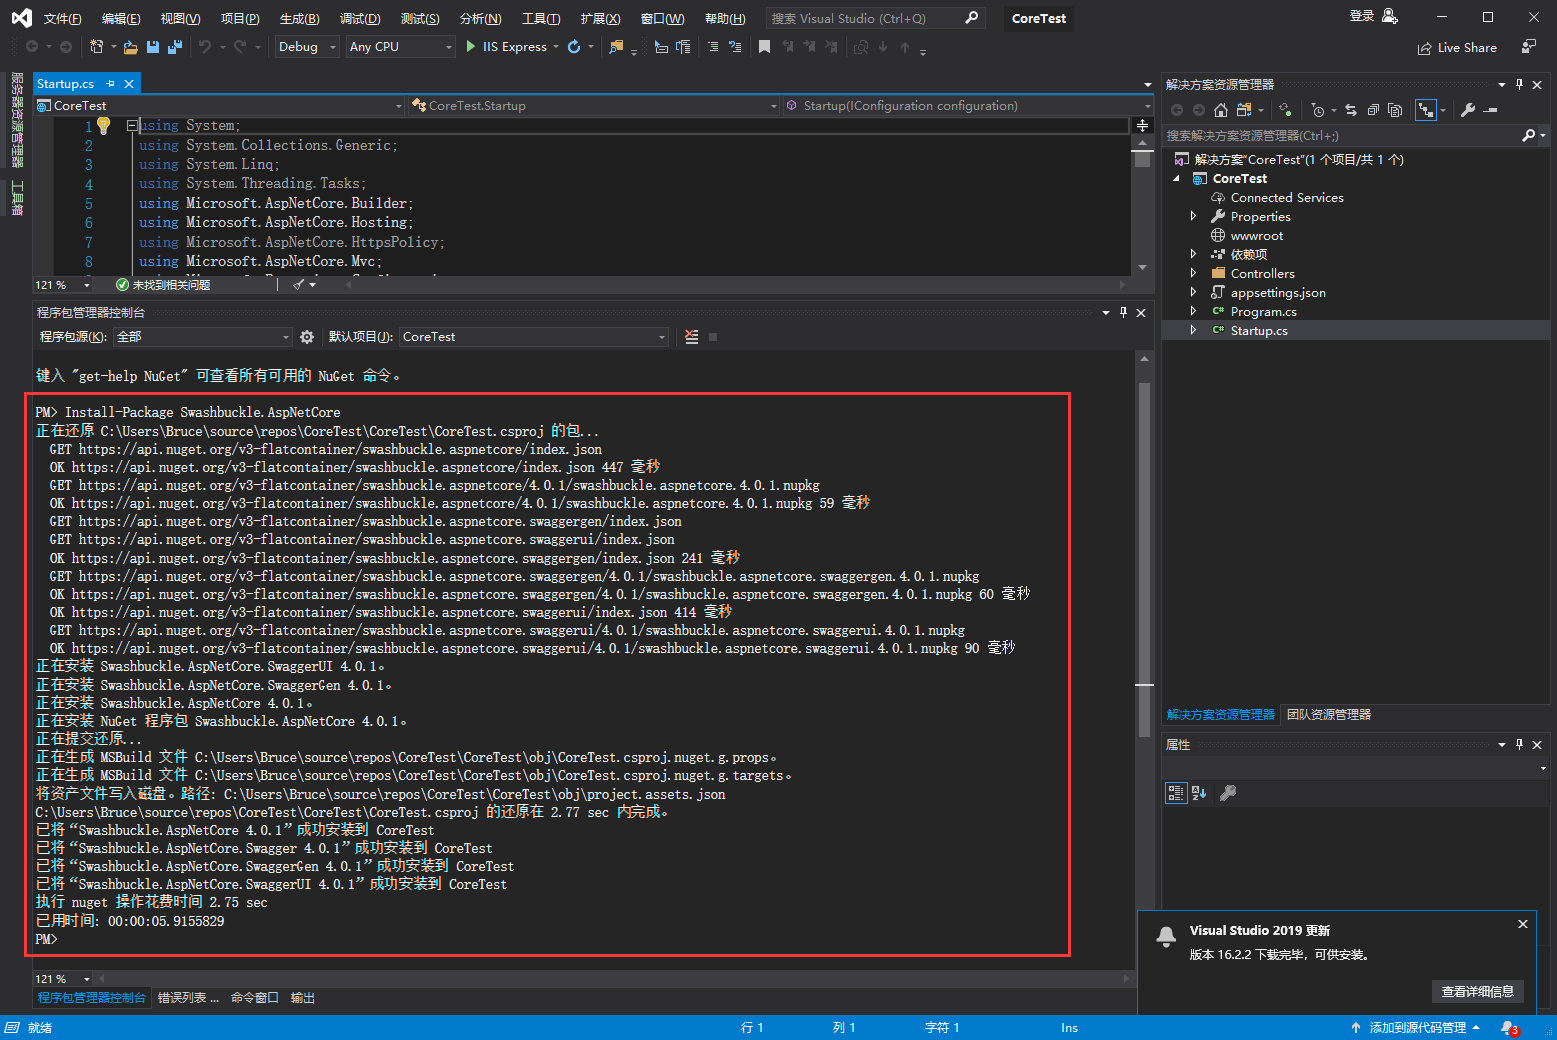
2、安装swagger ,通过 Package Manager 控制台:Install-Package Swashbuckle.AspNetCore
3、修改Startup.cs
using System;
using System.Collections.Generic;
using System.Linq;
using System.Threading.Tasks;
using Microsoft.AspNetCore.Builder;
using Microsoft.AspNetCore.Hosting;
using Microsoft.AspNetCore.HttpsPolicy;
using Microsoft.AspNetCore.Mvc;
using Microsoft.Extensions.Configuration;
using Microsoft.Extensions.DependencyInjection;
using Microsoft.Extensions.Logging;
using Microsoft.Extensions.Options;

namespace CoreTest
{
    public class Startup
    {
        public Startup(IConfiguration configuration)
        {
            Configuration = configuration;
        }
        public IConfiguration Configuration { get; }
        // This method gets called by the runtime. Use this method to add services to the container.
        public void ConfigureServices(IServiceCollection services)
        {
            services.AddMvc().SetCompatibilityVersion(CompatibilityVersion.Version_2_1);

            //1、注册服务Swagger
            services.AddSwaggerGen(options =>
            {
                options.SwaggerDoc("v1", new Swashbuckle.AspNetCore.Swagger.Info
                {
                    Version = "v1",
                    Title = "My API",
                    Description = "by JiaJia"
                });
            });
        }
        // This method gets called by the runtime. Use this method to configure the HTTP request pipeline.
        public void Configure(IApplicationBuilder app, IHostingEnvironment env)
        {
            if (env.IsDevelopment())
            {
                app.UseDeveloperExceptionPage();
            }
            else
            {
                app.UseHsts();
            }
            app.UseHttpsRedirection();
            app.UseMvc();

            //2、添加到管道
            #if DEBUG
            app.UseSwagger();
            app.UseSwaggerUI(c =>
            {
                c.SwaggerEndpoint("/swagger/v1/swagger.json", "My API V1");
                // c.DocExpansion(DocExpansion.None);
            });
            #endif
        }
    }
}
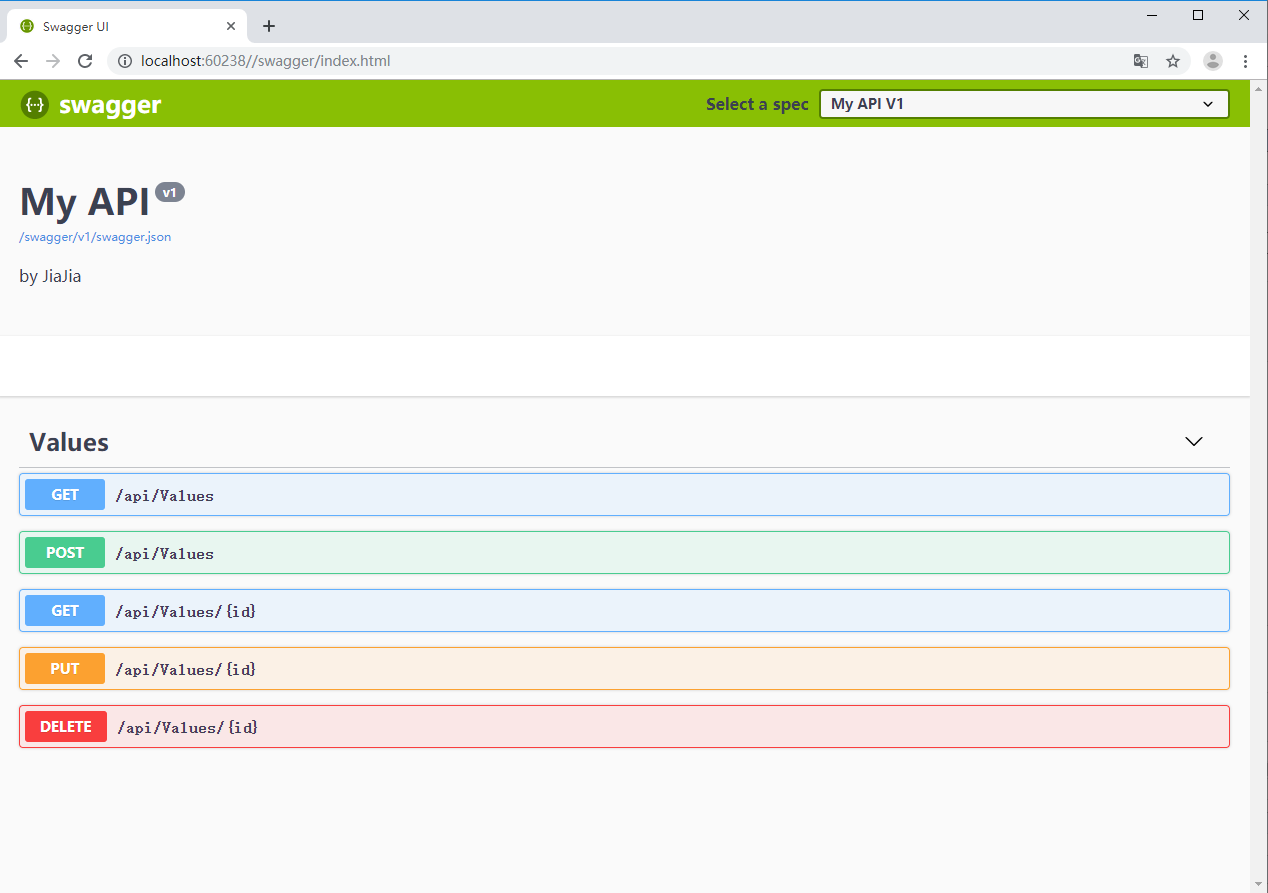
4、访问 Swagger UI 地址
http://localhost:60238/swagger/index.html
5、添加备注
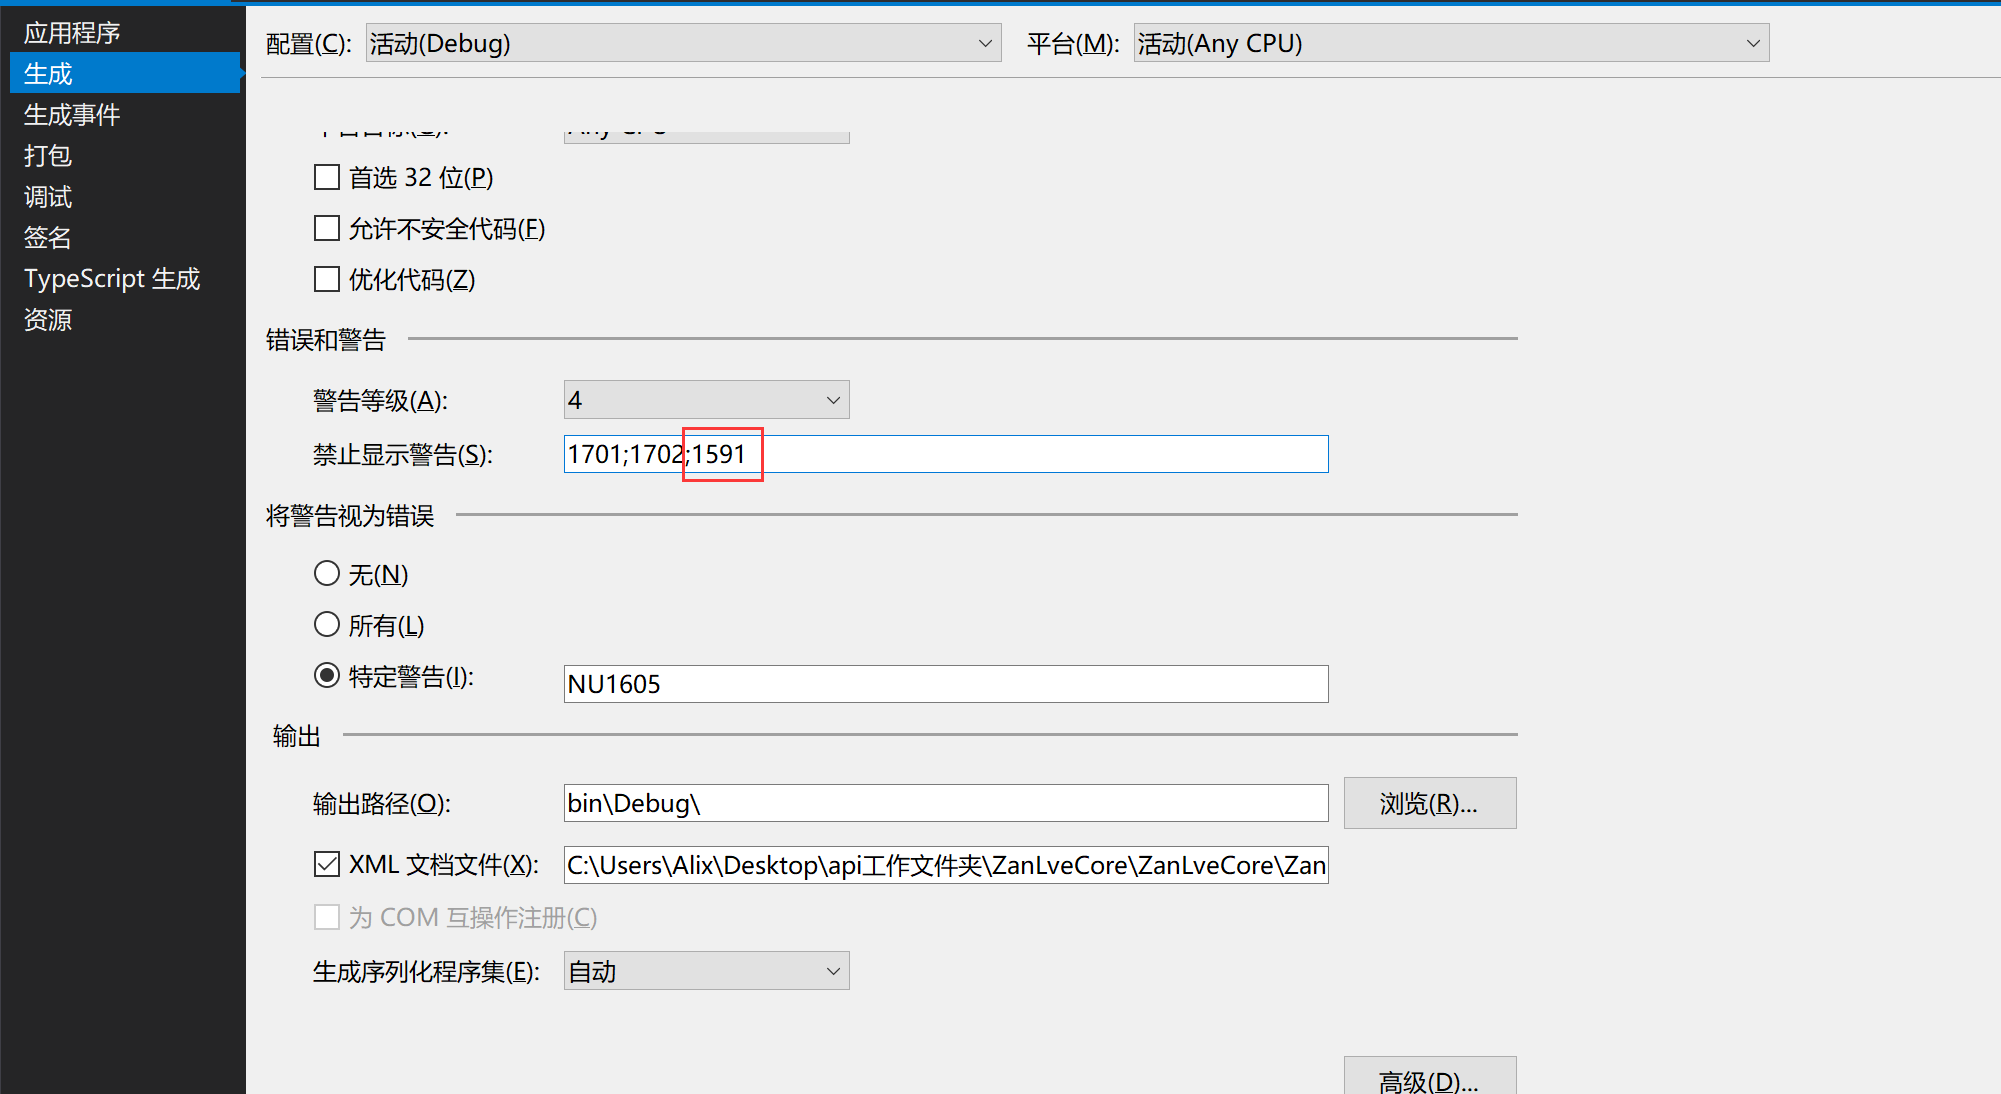
1、在项目属性的 生成 => 输出 中勾选 XML文档文件。

2、在 Start.cs => ConfigureServices 方法中的 AddSwaggerGen 处增加 IncludeXmlComments 处理。
//1、注册服务Swagger
services.AddSwaggerGen(options =>
{
    options.SwaggerDoc("v1", new Swashbuckle.AspNetCore.Swagger.Info
    {
        Version = "v1",
        Title = "My API",
        Description = "by JiaJia"
    });
    //在 Start.cs => ConfigureServices 方法中的 AddSwaggerGen 处增加 IncludeXmlComments 处理。
    options.IncludeXmlComments(string.Format("{0}/CoreTest.xml",
    AppDomain.CurrentDomain.BaseDirectory));

    /*或者这种添加方式//为 Swagger JSON and UI设置xml文档注释路径
    var basePath = Path.GetDirectoryName(typeof(Program).Assembly.Location);//获取应用程序所在目录(绝对,不受工作目录影响,建议采用此方法获取路径)
    var xmlPath = Path.Combine(basePath, "CoreTest.xml");//和项目名对应
    options.IncludeXmlComments(xmlPath);*/
});
3、控制器对Action添加注释信息
/// <summary>
/// 根据ID获取用户信息
/// </summary>
/// <param name="id">用户ID</param>
/// <returns>用户信息</returns>
[HttpGet("{id}")]
public ActionResult<string> Get(int id)
{
    return "user info";
}
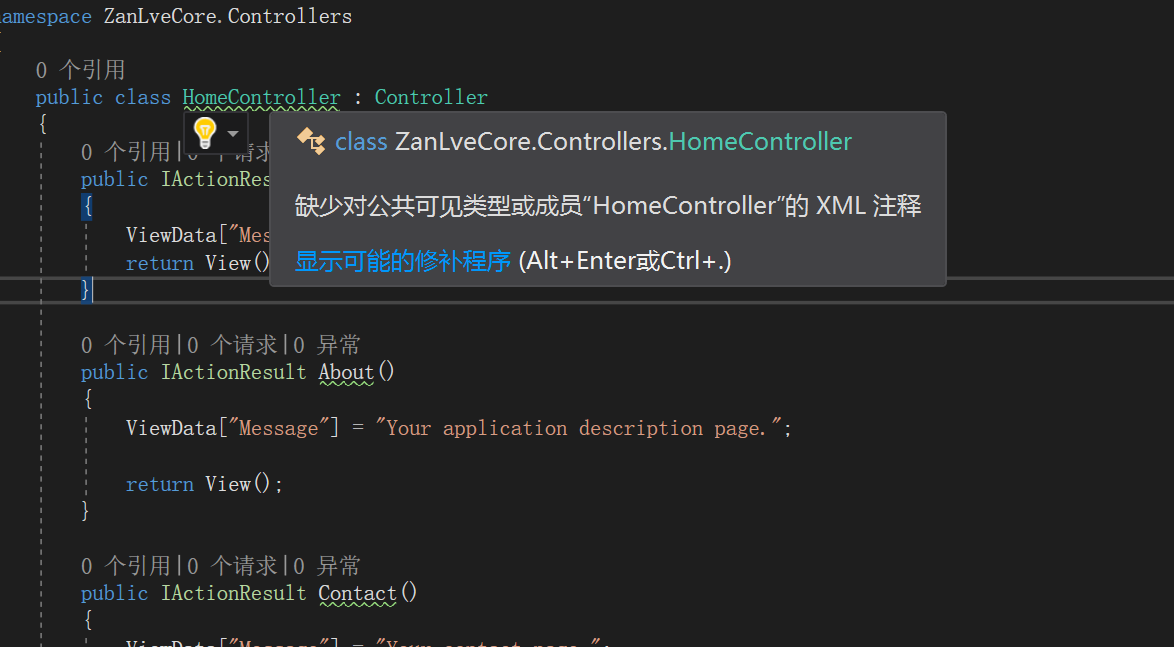
运行报错:

原因:生成的xml文件,路径不对,导致的/swagger/v1/swagger.json提示报错。
解决方案:(指定输出路径默认空白,需要填写:binDebug),而且默认的(CoreTest.xml)xml文件,与Startup的文件必须对应。

最终效果:

4、不想每一个方法都这么加注释,可以这么配置(对当前项目进行配置,可以忽略警告,记得在后边加上分号 ;1591):
即
二、接口执行时间分析——MiniProfiler
搭建MiniProfiler
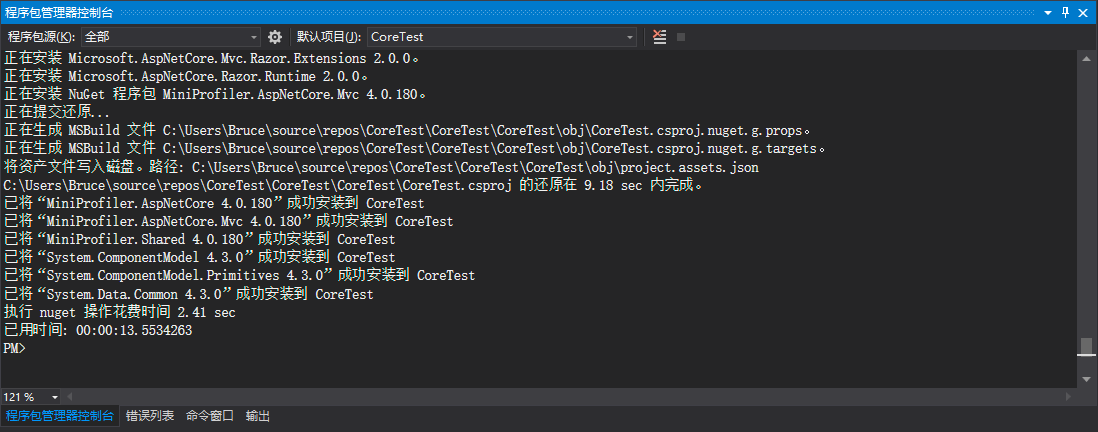
1、引入nuget包:
Install-Package MiniProfiler.AspNetCore.Mvc
2、然后,在startup.cs 中配置服务ConfigureServices:

//注册服务MiniProfiler
services.AddMiniProfiler(options =>
{
    options.RouteBasePath = "/profiler";//注意这个路径要和下边 index.html 脚本配置中的一致,
    (options.Storage as MemoryCacheStorage).CacheDuration = TimeSpan.FromMinutes(10);
});
3、最后,调用下中间件即可:

//调用MiniProfiler中间件
app.UseMiniProfiler();
当前这个时候还不能使用,我们还需要在 Swagger 中进行配置,以便它能在 swagger 中使用。
在 Swagger 中配置 MiniProfiler
上边我们在配置中已经启动了服务,接下来就需要设置如何在 swagger 中展示了,这个时候我们就需要自定义我们的swagger主页了,以前我们是用的默认的index.html,现在咱们需要自定义一个:
从官网 Github 上,下载最新的 index.html:https://github.com/swagger-api/swagger-ui/blob/master/dist/index.html
<!-- HTML for static distribution bundle build -->
<!DOCTYPE html>
<html lang="en">
<head>
    <meta charset="UTF-8">
    <title>%(DocumentTitle)</title>
    <meta name="viewport" content="width=device-width, initial-scale=1.0">
    <link href="https://fonts.googleapis.com/css?family=Open+Sans:400,700|Source+Code+Pro:300,600|Titillium+Web:400,600,700" rel="stylesheet">
    <link rel="stylesheet" type="text/css" href="./swagger-ui.css">
    <link rel="icon" type="image/png" href="./favicon-32x32.png" sizes="32x32" />
    <link rel="icon" type="image/png" href="./favicon-16x16.png" sizes="16x16" />
    <style>


        html {
            box-sizing: border-box;
            overflow: -moz-scrollbars-vertical;
            overflow-y: scroll;
        }

        *,
        *:before,
        *:after {
            box-sizing: inherit;
        }

        body {
            margin: 0;
            background: #fafafa;
        }
    </style>
    %(HeadContent)
</head>
<body>
    <svg xmlns="http://www.w3.org/2000/svg" xmlns:xlink="http://www.w3.org/1999/xlink" style="position:absolute;0;height:0">
        <defs>
            <symbol viewBox="0 0 20 20" id="unlocked">
                <path d="M15.8 8H14V5.6C14 2.703 12.665 1 10 1 7.334 1 6 2.703 6 5.6V6h2v-.801C8 3.754 8.797 3 10 3c1.203 0 2 .754 2 2.199V8H4c-.553 0-1 .646-1 1.199V17c0 .549.428 1.139.951 1.307l1.197.387C5.672 18.861 6.55 19 7.1 19h5.8c.549 0 1.428-.139 1.951-.307l1.196-.387c.524-.167.953-.757.953-1.306V9.199C17 8.646 16.352 8 15.8 8z"></path>
            </symbol>
            <symbol viewBox="0 0 20 20" id="locked">
                <path d="M15.8 8H14V5.6C14 2.703 12.665 1 10 1 7.334 1 6 2.703 6 5.6V8H4c-.553 0-1 .646-1 1.199V17c0 .549.428 1.139.951 1.307l1.197.387C5.672 18.861 6.55 19 7.1 19h5.8c.549 0 1.428-.139 1.951-.307l1.196-.387c.524-.167.953-.757.953-1.306V9.199C17 8.646 16.352 8 15.8 8zM12 8H8V5.199C8 3.754 8.797 3 10 3c1.203 0 2 .754 2 2.199V8z" />
            </symbol>
            <symbol viewBox="0 0 20 20" id="close">
                <path d="M14.348 14.849c-.469.469-1.229.469-1.697 0L10 11.819l-2.651 3.029c-.469.469-1.229.469-1.697 0-.469-.469-.469-1.229 0-1.697l2.758-3.15-2.759-3.152c-.469-.469-.469-1.228 0-1.697.469-.469 1.228-.469 1.697 0L10 8.183l2.651-3.031c.469-.469 1.228-.469 1.697 0 .469.469.469 1.229 0 1.697l-2.758 3.152 2.758 3.15c.469.469.469 1.229 0 1.698z" />
            </symbol>
            <symbol viewBox="0 0 20 20" id="large-arrow">
                <path d="M13.25 10L6.109 2.58c-.268-.27-.268-.707 0-.979.268-.27.701-.27.969 0l7.83 7.908c.268.271.268.709 0 .979l-7.83 7.908c-.268.271-.701.27-.969 0-.268-.269-.268-.707 0-.979L13.25 10z" />
            </symbol>
            <symbol viewBox="0 0 20 20" id="large-arrow-down">
                <path d="M17.418 6.109c.272-.268.709-.268.979 0s.271.701 0 .969l-7.908 7.83c-.27.268-.707.268-.979 0l-7.908-7.83c-.27-.268-.27-.701 0-.969.271-.268.709-.268.979 0L10 13.25l7.418-7.141z" />
            </symbol>

            <symbol viewBox="0 0 24 24" id="jump-to">
                <path d="M19 7v4H5.83l3.58-3.59L8 6l-6 6 6 6 1.41-1.41L5.83 13H21V7z" />
            </symbol>
            <symbol viewBox="0 0 24 24" id="expand">
                <path d="M10 18h4v-2h-4v2zM3 6v2h18V6H3zm3 7h12v-2H6v2z" />
            </symbol>
        </defs>
    </svg>
    <div id="swagger-ui"></div>
    <!-- Workaround for https://github.com/swagger-api/swagger-editor/issues/1371 -->
    <script>
        if (window.navigator.userAgent.indexOf("Edge") > -1) {
            console.log("Removing native Edge fetch in favor of swagger-ui's polyfill")
            window.fetch = undefined;
        }
    </script>
    <script src="./swagger-ui-bundle.js"></script>
    <script src="./swagger-ui-standalone-preset.js"></script>
    <script>
        window.onload = function () {
            var configObject = JSON.parse('%(ConfigObject)');
            var oauthConfigObject = JSON.parse('%(OAuthConfigObject)');

            // Apply mandatory parameters
            configObject.dom_id = "#swagger-ui";
            configObject.presets = [SwaggerUIBundle.presets.apis, SwaggerUIStandalonePreset];
            configObject.layout = "StandaloneLayout";

            // If oauth2RedirectUrl isn't specified, use the built-in default
            if (!configObject.hasOwnProperty("oauth2RedirectUrl"))
                configObject.oauth2RedirectUrl = window.location.href.replace("index.html", "oauth2-redirect.html");

            // Build a system
            const ui = SwaggerUIBundle(configObject);

            // Apply OAuth config
            ui.initOAuth(oauthConfigObject);
        }
    </script>
</body>
</html>
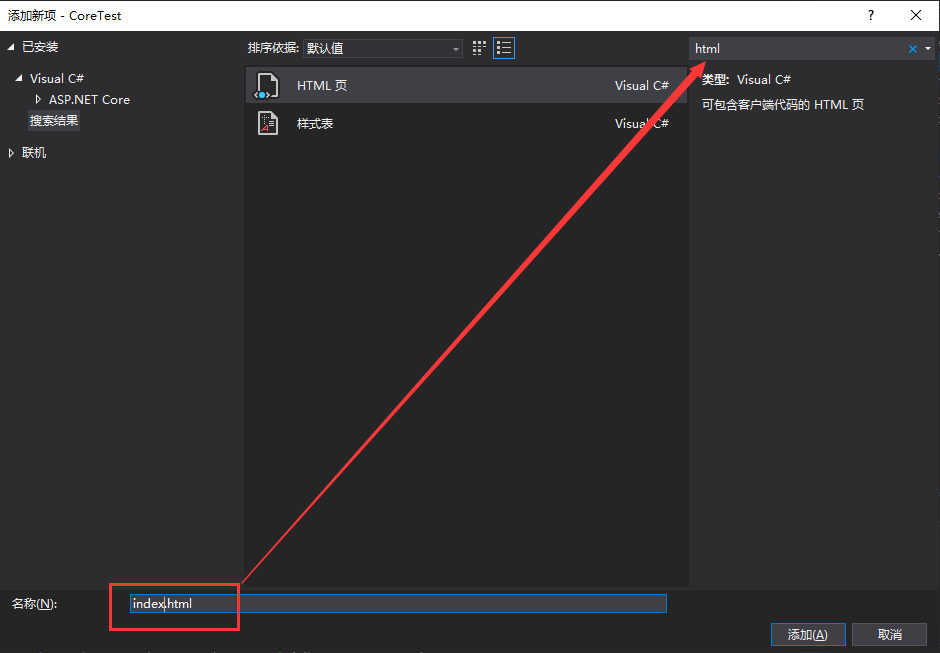
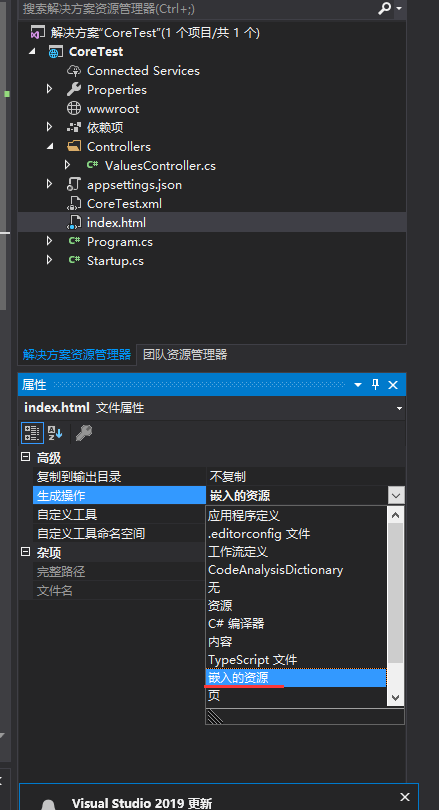
然后添加到项目中,我是放到了根路径了:
要把这个文件设置成嵌入资源的类型:
接下来,在 Index.html 文件中,增加配置脚本(我是在顶部写的,Head应该也可以):
<script async="async" id="mini-profiler" src="/profiler/includes.min.js?v=4.0.138+gcc91adf599"
        data-version="4.0.138+gcc91adf599" data-path="/profiler/"
        data-current-id="4ec7c742-49d4-4eaf-8281-3c1e0efa748a" data-ids="" data-position="Left"
        data-authorized="true" data-max-traces="15" data-toggle-shortcut="Alt+P"
        data-trivial-milliseconds="2.0" data-ignored-duplicate-execute-types="Open,OpenAsync,Close,CloseAsync">
</script>
具体的参数请自行研究吧,基本都能看懂,比如版本,
/profiler的路径,position的位置显示(我是左边),
authorized的是否权限,
max-traces最多显示多少条(15)等等。
完整index.html文件内容
<script async="async" id="mini-profiler" src="/profiler/includes.min.js?v=4.0.138+gcc91adf599"
        data-version="4.0.138+gcc91adf599" data-path="/profiler/"
        data-current-id="4ec7c742-49d4-4eaf-8281-3c1e0efa748a" data-ids="" data-position="Left"
        data-authorized="true" data-max-traces="15" data-toggle-shortcut="Alt+P"
        data-trivial-milliseconds="2.0" data-ignored-duplicate-execute-types="Open,OpenAsync,Close,CloseAsync">
</script>

<!-- HTML for static distribution bundle build -->
<!DOCTYPE html>
<html lang="en">
<head>
    <meta charset="UTF-8">
    <title>%(DocumentTitle)</title>
    <meta name="viewport" content="width=device-width, initial-scale=1.0">
    <link href="https://fonts.googleapis.com/css?family=Open+Sans:400,700|Source+Code+Pro:300,600|Titillium+Web:400,600,700" rel="stylesheet">
    <link rel="stylesheet" type="text/css" href="./swagger-ui.css">
    <link rel="icon" type="image/png" href="./favicon-32x32.png" sizes="32x32" />
    <link rel="icon" type="image/png" href="./favicon-16x16.png" sizes="16x16" />
    <style>


        html {
            box-sizing: border-box;
            overflow: -moz-scrollbars-vertical;
            overflow-y: scroll;
        }

        *,
        *:before,
        *:after {
            box-sizing: inherit;
        }

        body {
            margin: 0;
            background: #fafafa;
        }
    </style>
    %(HeadContent)
</head>
<body>
    <svg xmlns="http://www.w3.org/2000/svg" xmlns:xlink="http://www.w3.org/1999/xlink" style="position:absolute;0;height:0">
        <defs>
            <symbol viewBox="0 0 20 20" id="unlocked">
                <path d="M15.8 8H14V5.6C14 2.703 12.665 1 10 1 7.334 1 6 2.703 6 5.6V6h2v-.801C8 3.754 8.797 3 10 3c1.203 0 2 .754 2 2.199V8H4c-.553 0-1 .646-1 1.199V17c0 .549.428 1.139.951 1.307l1.197.387C5.672 18.861 6.55 19 7.1 19h5.8c.549 0 1.428-.139 1.951-.307l1.196-.387c.524-.167.953-.757.953-1.306V9.199C17 8.646 16.352 8 15.8 8z"></path>
            </symbol>
            <symbol viewBox="0 0 20 20" id="locked">
                <path d="M15.8 8H14V5.6C14 2.703 12.665 1 10 1 7.334 1 6 2.703 6 5.6V8H4c-.553 0-1 .646-1 1.199V17c0 .549.428 1.139.951 1.307l1.197.387C5.672 18.861 6.55 19 7.1 19h5.8c.549 0 1.428-.139 1.951-.307l1.196-.387c.524-.167.953-.757.953-1.306V9.199C17 8.646 16.352 8 15.8 8zM12 8H8V5.199C8 3.754 8.797 3 10 3c1.203 0 2 .754 2 2.199V8z" />
            </symbol>
            <symbol viewBox="0 0 20 20" id="close">
                <path d="M14.348 14.849c-.469.469-1.229.469-1.697 0L10 11.819l-2.651 3.029c-.469.469-1.229.469-1.697 0-.469-.469-.469-1.229 0-1.697l2.758-3.15-2.759-3.152c-.469-.469-.469-1.228 0-1.697.469-.469 1.228-.469 1.697 0L10 8.183l2.651-3.031c.469-.469 1.228-.469 1.697 0 .469.469.469 1.229 0 1.697l-2.758 3.152 2.758 3.15c.469.469.469 1.229 0 1.698z" />
            </symbol>
            <symbol viewBox="0 0 20 20" id="large-arrow">
                <path d="M13.25 10L6.109 2.58c-.268-.27-.268-.707 0-.979.268-.27.701-.27.969 0l7.83 7.908c.268.271.268.709 0 .979l-7.83 7.908c-.268.271-.701.27-.969 0-.268-.269-.268-.707 0-.979L13.25 10z" />
            </symbol>
            <symbol viewBox="0 0 20 20" id="large-arrow-down">
                <path d="M17.418 6.109c.272-.268.709-.268.979 0s.271.701 0 .969l-7.908 7.83c-.27.268-.707.268-.979 0l-7.908-7.83c-.27-.268-.27-.701 0-.969.271-.268.709-.268.979 0L10 13.25l7.418-7.141z" />
            </symbol>

            <symbol viewBox="0 0 24 24" id="jump-to">
                <path d="M19 7v4H5.83l3.58-3.59L8 6l-6 6 6 6 1.41-1.41L5.83 13H21V7z" />
            </symbol>
            <symbol viewBox="0 0 24 24" id="expand">
                <path d="M10 18h4v-2h-4v2zM3 6v2h18V6H3zm3 7h12v-2H6v2z" />
            </symbol>
        </defs>
    </svg>
    <div id="swagger-ui"></div>
    <!-- Workaround for https://github.com/swagger-api/swagger-editor/issues/1371 -->
    <script>
        if (window.navigator.userAgent.indexOf("Edge") > -1) {
            console.log("Removing native Edge fetch in favor of swagger-ui's polyfill")
            window.fetch = undefined;
        }
    </script>
    <script src="./swagger-ui-bundle.js"></script>
    <script src="./swagger-ui-standalone-preset.js"></script>
    <script>
        window.onload = function () {
            var configObject = JSON.parse('%(ConfigObject)');
            var oauthConfigObject = JSON.parse('%(OAuthConfigObject)');

            // Apply mandatory parameters
            configObject.dom_id = "#swagger-ui";
            configObject.presets = [SwaggerUIBundle.presets.apis, SwaggerUIStandalonePreset];
            configObject.layout = "StandaloneLayout";

            // If oauth2RedirectUrl isn't specified, use the built-in default
            if (!configObject.hasOwnProperty("oauth2RedirectUrl"))
                configObject.oauth2RedirectUrl = window.location.href.replace("index.html", "oauth2-redirect.html");

            // Build a system
            const ui = SwaggerUIBundle(configObject);

            // Apply OAuth config
            ui.initOAuth(oauthConfigObject);
        }
    </script>
</body>
</html>
然后我们修改下中间件去调用我们这个 index.html 页面:
app.UseSwaggerUI(c =>
{
    c.SwaggerEndpoint("/swagger/v1/swagger.json", "My API V1");
    // 将swagger首页,设置成我们自定义的页面,记得这个字符串的写法:解决方案名.index.html
    c.IndexStream = () => GetType().GetTypeInfo().Assembly.GetManifestResourceStream("CoreTest.index.html");
});
最后,记得一定要配置了使用静态资源文件的中间件:
app.UseStaticFiles();
完整的Startup.cs文件
using System;
using System.Collections.Generic;
using System.Linq;
using System.Reflection;
using System.Threading.Tasks;
using Microsoft.AspNetCore.Builder;
using Microsoft.AspNetCore.Hosting;
using Microsoft.AspNetCore.Mvc;
using Microsoft.Extensions.Configuration;
using Microsoft.Extensions.DependencyInjection;
using Microsoft.Extensions.Logging;
using Microsoft.Extensions.Options;
using StackExchange.Profiling.Storage;

namespace CoreTest
{
    public class Startup
    {
        public Startup(IConfiguration configuration)
        {
            Configuration = configuration;
        }
        public IConfiguration Configuration { get; }
        // This method gets called by the runtime. Use this method to add services to the container.
        public void ConfigureServices(IServiceCollection services)
        {
            services.AddMvc().SetCompatibilityVersion(CompatibilityVersion.Version_2_1);
            //1、注册服务Swagger
            services.AddSwaggerGen(options =>
            {
                options.SwaggerDoc("v1", new Swashbuckle.AspNetCore.Swagger.Info
                {
                    Version = "v1",
                    Title = "My API",
                    Description = "by JiaJia"
                });
                options.IncludeXmlComments(string.Format("{0}/CoreTest.xml", AppDomain.CurrentDomain.BaseDirectory));
            });
            //注册服务MiniProfiler
            services.AddMiniProfiler(options =>
            {
                options.RouteBasePath = "/profiler";//注意这个路径要和下边 index.html 脚本配置中的一致,
                (options.Storage as MemoryCacheStorage).CacheDuration = TimeSpan.FromMinutes(10);
            });
        }

        // This method gets called by the runtime. Use this method to configure the HTTP request pipeline.
        public void Configure(IApplicationBuilder app, IHostingEnvironment env)
        {
            if (env.IsDevelopment())
            {
                app.UseDeveloperExceptionPage();
            }
            //2、Swagger添加到管道
#if DEBUG
            app.UseSwagger();
            app.UseSwaggerUI(c =>
            {
                c.SwaggerEndpoint("/swagger/v1/swagger.json", "My API V1");
                // 将swagger首页,设置成我们自定义的页面,记得这个字符串的写法:解决方案名.index.html
                c.IndexStream = () => GetType().GetTypeInfo().Assembly.GetManifestResourceStream("CoreTest.index.html");
            });
#endif
            //2、MiniProfiler添加到管道
            app.UseMiniProfiler();

            app.UseMvc();
        }
    }
}
控制器代码
        /// <summary>
        /// 根据ID获取用户信息
        /// </summary>
        /// <param name="id">用户ID</param>
        /// <returns>用户信息</returns>
        [HttpGet("{id}")]
        public ActionResult<IEnumerable<string>> Get()
        {
            string url1 = string.Empty;
            string url2 = string.Empty;
            using (MiniProfiler.Current.Step("Get方法"))
            {
                using (MiniProfiler.Current.Step("准备数据"))
                {
                    using (MiniProfiler.Current.CustomTiming("SQL", "SELECT * FROM Config"))
                    {
                        // 模拟一个SQL查询
                        Thread.Sleep(500);

                        url1 = "https://www.baidu.com";
                        url2 = "https://www.sina.com.cn/";
                    }
                }


                using (MiniProfiler.Current.Step("使用从数据库中查询的数据,进行Http请求"))
                {
                    using (MiniProfiler.Current.CustomTiming("HTTP", "GET " + url1))
                    {
                        var client = new WebClient();
                        var reply = client.DownloadString(url1);
                    }

                    using (MiniProfiler.Current.CustomTiming("HTTP", "GET " + url2))
                    {
                        var client = new WebClient();
                        var reply = client.DownloadString(url2);
                    }
                }
            }
            return new string[] { "value1", "value2" };
        }
现在已经配置好了 MiniProfiler 和 Swagger了,运行页面左上角

是不是感觉挺好的!这样的时间都有了,然后还记得上边配置的 /profiler 么,我们点击 share 就能看到了,这里不细说了,大家自己玩一玩。现在有一个问题就是,我总不能每一个 api 接口都这么写吧,多麻烦呀!机智如你,这个时候 AOP 日志记录又派上用场了!