实现构造函数完整继承
javascript这门语言中,在ES6以前没有类的概念,依靠的是构造函数来模拟类
function Person (name, age) {
    this.name = name
    this.age = age
    _whoAmi = '我是Person构造函数'
    console.log(_whoAmi)    // '我是Person构造函数'
}
Person.prototype.printInfo = function () {
    console.log(this.name)
    console.log(this.age)
}

var fitz = new Person('Fitz', 21)   // '我是Person构造函数' fitz实例对象
注意构造函数与普通函数没有任何不同,能够像普通函数一样直接调用
function Person (name, age) {
    this.name = name
    this.age = age
    _whoAmi = '我是Person构造函数'
    console.log(_whoAmi)    // '我是Person构造函数'
}
Person.prototype.printInfo = function () {
    console.log(this.name)
    console.log(this.age)
}

Person()    // '我是Person构造函数'
那抛开ES6的类,在本篇我们就来研究构造函数是如何去模拟类的继承
构造函数继承父类的方法是通过原型链
我们通过对上面例子的改变,来进行演示
// Person构造函数模拟父类
function Person(name, age, gender) {
    this.name = name
    this.age = age
    this.gender = gender
}
Person.prototype.printInfo = function () {
    console.log(`名字: ${this.name}`)
    console.log(`年龄: ${this.age}`)
    console.log(`性别: ${this.gender}`)
}

// Student构造函数模拟子类
function Student (major) {
    this.major = major
}
Student.prototype.printMajor = function () {
    console.log(`我的专业是: ${this.major}`)
}


var fitz = new Student('E-Commerce')
console.log(fitz)

根据类中继承的概念,子类的实例是能够调用父类中的方法的
于是,fitz.printInfo()就是我们的目标之一
很明显现在无论是fitz实例本身,还是其构造函数的原型对象等原型链上的对象,都没有这个方法,所以现在fitz.printInfo()会是报错的结果

那我们如何让这个实例能够"看到"父类上的printInfo方法呢? 相信不少人应该能想到用原型链这个概念
javascript正是靠原型链的概念来实现构造函数间的继承,不懂原型链的同学,请速速去看我写的原型链的文章总结,保证你能够懂
我们先抛开怎么通过原型链让 实例fitz "看到" printInfo(),不要想太多先!
而是通过常常被拉出来鞭尸的toString()方法,来启发大家,我们都知道所有的函数, 字符串, 数值, 对象都能够调用toString()方法,究其原因就是因为原型链
console.log(fitz.toString())    // '[object Object]'
console.log(Student.toString())
/*
    function Student (major) {
        this.major = major
    }
*/
console.log((1).toString()) // '1'
我就拿console.log(fitz.toString())来画图解释一下凭什么实例fitz能够调用object.prototype上的toString()方法
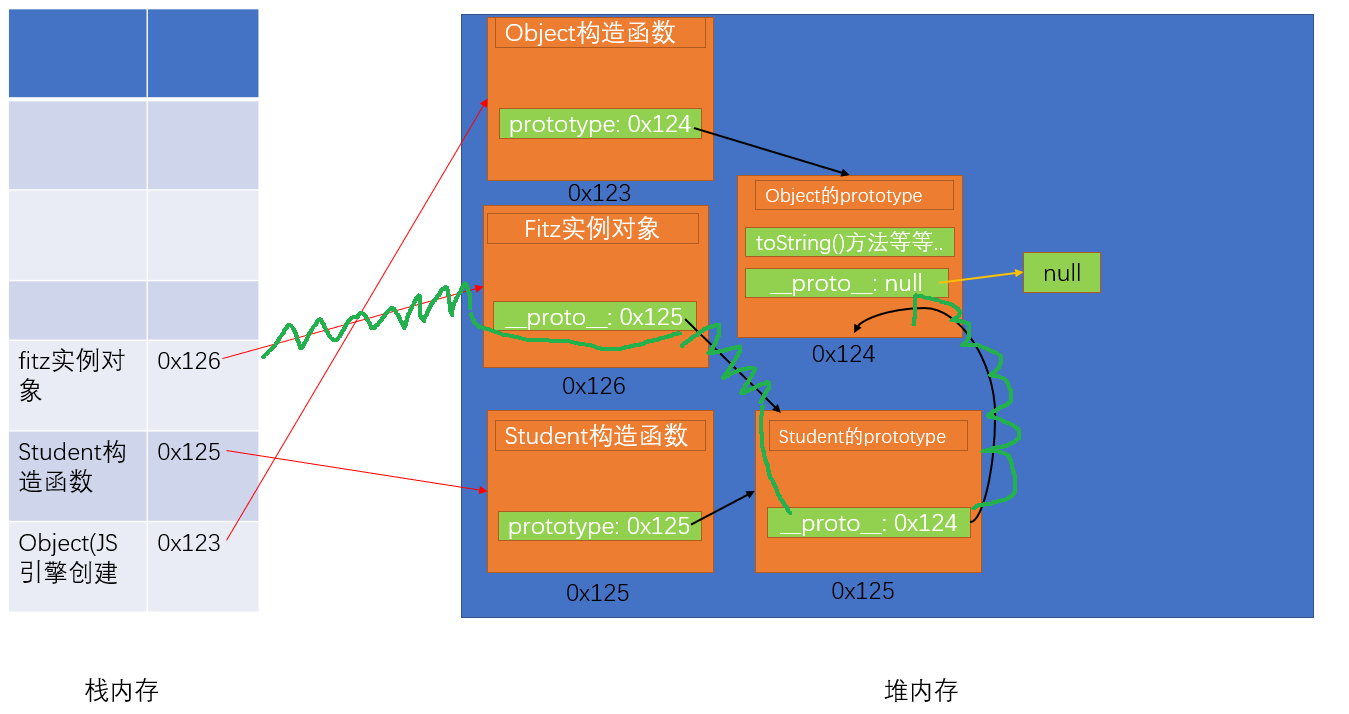
图中可以看到,fitz通过绿色波浪线的原型链能够到达Object.prototype,从而能够访问到toString()方法
那么思路,也是重点就来了: Student.prototype既然是通过__proto__来到达object.prototype的说明Student.prototype至少是某某的实例,这里当然就是object.prototype的
其实这些知识在我原型与原型链的笔记都有很详细的说明,这里重复只是为了更好理解当前的问题,让知识白痴化罢了
所以重点就是: 让构造函数(子类)的原型对象成为父类的实例,就能实现构造函数模拟类的继承,然后继承类的方法
还是通过代码好理解
// Person构造函数模拟父类
function Person(name, age, gender) {
    this.name = name
    this.age = age
    this.gender = gender
}
Person.prototype.printInfo = function () {
    console.log(`名字: ${this.name}`)
    console.log(`年龄: ${this.age}`)
    console.log(`性别: ${this.gender}`)
}

// Student构造函数模拟子类
function Student (major) {
    this.major = major
}

// ======关键:   让构造函数(子类)的原型对象成为父类的实例=========
Student.prototype = new Person()

Student.prototype.printMajor = function () {
    console.log(`我的专业是: ${this.major}`)
}


var fitz = new Student('E-Commerce')
console.log(fitz)
fitz.printInfo()
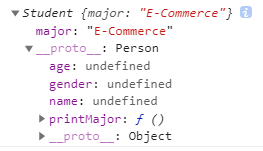
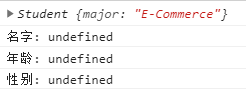
对于为什么输出的结果是undefined我们先不管,我们用图来表示一下现在的状况,从而让读者你们能够更加明白现在是怎样一个状态
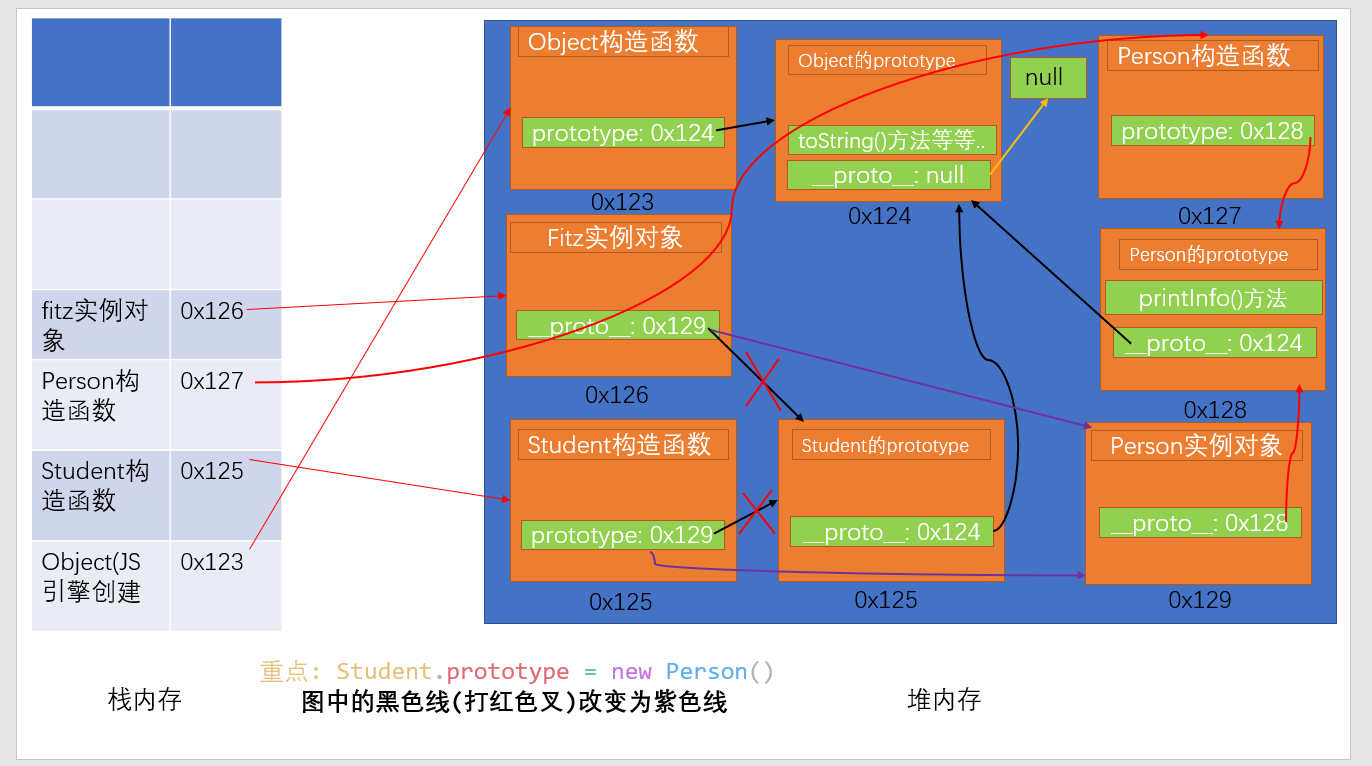
波浪绿色线就是完整的原型链,解释了为什么实例fitz能调用printInfo()方法

还有一个需要完善的点,就是这个容易被人遗忘的constructor属性,我们都知道构造函数的constructor属性指向这个构造函数本身
function Car (brand) {
    this.brand = brand
}
console.log(Car.prototype.constructor === Car)  // true
但是在我们实现继承后,我们Student构造函数的constructor属性却是不正确的
console.log(Student.prototype)  // Person的实例
console.log(Student.prototype.constructor)  // Person构造函数
乍一看,为什么Student.prototype.constructor指向的是Person构造函数呢?
因为,此时Student.prototype原型对象是Person的实例,而Person实例是没有constructor属性的,所以当我们访问这个属性的时候,会一直沿着Person实例的原型链找到Person.prototype原型对象上的constructor属性,那当然是指向Person构造函数咯
讲了这么多,其实一条语句就能修正这个错误
// 在原型对象上添加constructor指向自身的构造函数
Student.prototype.constructor = Student
到这就完整解决子类继承父类方法,还附上了详细的解释。
那现在剩下的问题就是解决为什么输出的结果是undefined,这说明实例对象上根本没有这些属性,那我们怎么让子类继承父类的属性呢? 这就是下面篇章介绍的东西了
父类使用显式绑定实现子类的继承父类属性
在JavaScript中,我相信绝大部分的人都不知道,这样调用函数/方法其实只是这门语言的语法糖
obj.method()
其在底层真正的调用,是我们神奇的三剑客(其中一种)
method.call(obj)
method.apply(obj)
method.bind(obj)()
三剑客的应用
function test (str) {
    this.str = str
}
var obj = {}

var example = new test('i am inside in example')
console.log(example)    // test{str: 'i am inside in example'}

test('i am in global')
console.log(str)        // 'i am in global'
console.log(window.str) // 'i am in global'

// 显式改变this指向,子类继承父类实例属性的原理
test.call(obj, 'i am in obj')
console.log(obj)    // {str: 'i am in obj'}
这三剑客的除了是底层中调用函数的真正语句,在实际应用中,其还能显式的为函数指定上下文对象this,子类的继承父类的属性运用的就是上面这个原理
// Person构造函数模拟父类
function Person(name, age, gender) {
    this.name = name
    this.age = age
    this.gender = gender
}
Person.prototype.printInfo = function () {
    console.log(`名字: ${this.name}`)
    console.log(`年龄: ${this.age}`)
    console.log(`性别: ${this.gender}`)
}

// Student构造函数模拟子类
function Student(name, age, gender, major) {
    // 子类的继承父类的属性
    Person.call(this, name, age, gender)

    this.major = major
}

// 让构造函数(子类)的原型对象成为父类的实例
Student.prototype = new Person()
// 在原型对象上添加constructor指向自身的构造函数
Student.prototype.constructor = Student

Student.prototype.printMajor = function () {
    console.log(`我的专业是: ${this.major}`)
}


var fitz = new Student('Fitz', 21, 'male', 'E-Commerce')
console.log(fitz)
fitz.printInfo()
