用过springboot的自动配置会觉得非常方便,我们完全可以自己写一个starter pom,这样不仅可以有自动配置功能,而且具有更通用的的耦合度低的配置,
- 新建一个starter的maven项目,以idea为例。
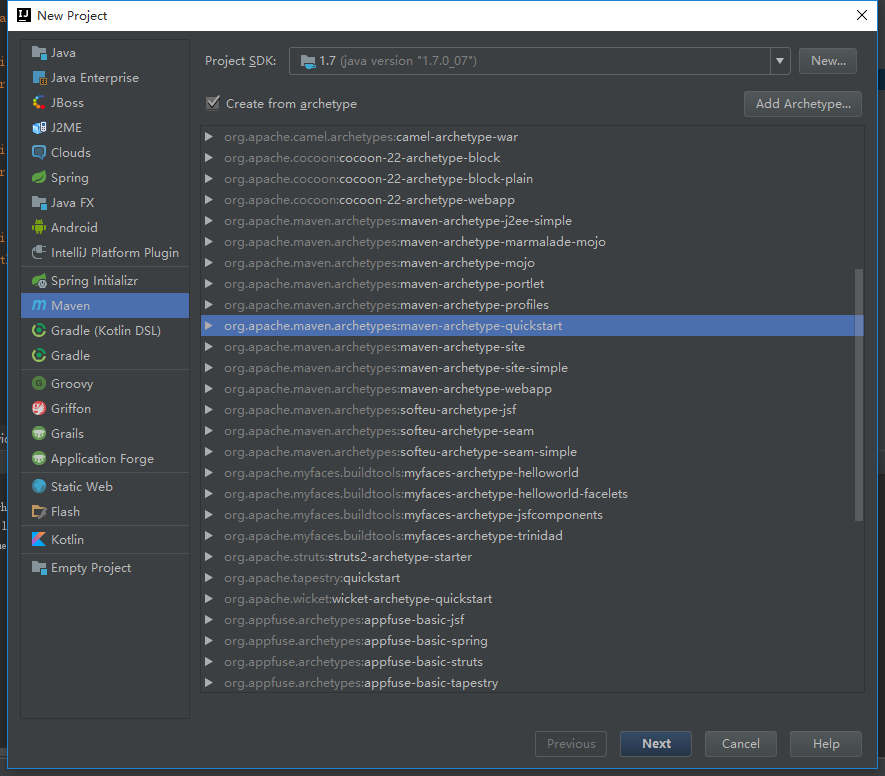
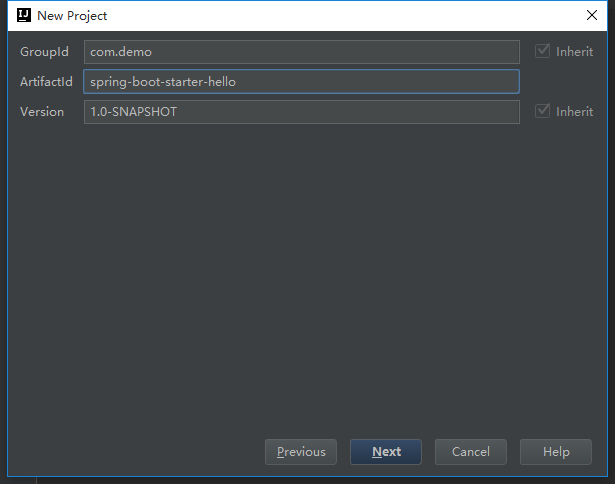
然后next-填好项目名字和路径finish。建好项目。
在pom.xml中加入springboot的自动配置依赖,代码如下
<project xmlns="http://maven.apache.org/POM/4.0.0" xmlns:xsi="http://www.w3.org/2001/XMLSchema-instance"
  xsi:schemaLocation="http://maven.apache.org/POM/4.0.0 http://maven.apache.org/xsd/maven-4.0.0.xsd">
  <modelVersion>4.0.0</modelVersion>

  <groupId>com.demo</groupId>
  <artifactId>spring-boot-starter-hello</artifactId>
  <version>1.0-SNAPSHOT</version>
  <packaging>jar</packaging>

  <name>spring-boot-starter-hello</name>
  <url>http://maven.apache.org</url>

  <properties>
    <project.build.sourceEncoding>UTF-8</project.build.sourceEncoding>
  </properties>

  <dependencies>
    <dependency>
      <groupId>org.springframework.boot</groupId>
      <artifactId>spring-boot-autoconfigure</artifactId>
      <version>1.5.2.RELEASE</version>
    </dependency>
    <dependency>
      <groupId>junit</groupId>
      <artifactId>junit</artifactId>
      <version>3.8.1</version>
      <scope>test</scope>
    </dependency>
  </dependencies>
</project>
- 属性配置类,代码如下:
@ConfigurationProperties(prefix = "hello")
public class HelloServiceProperties {
    private static final String MSG = "world";

    private String msg = MSG;

    public String getMsg() {
        return msg;
    }

    public void setMsg(String msg) {
        this.msg = msg;
    }
}
这里的配置类是类型安全的属性获取。在application.properties 中通过hello.msg=world。
- 判断依据类,代码如下:
public class HelloService {
    private String msg;

    public String sayHello() {
        return "hello " + msg;
    }

    public String getMsg() {
        return msg;
    }

    public void setMsg(String msg) {
        this.msg = msg;
    }
}
要根据这个类类判断是否创建这个类的bean,这个类可以是第三方类库的类。
- 自动配置类
@Configuration
@EnableConfigurationProperties(HelloServiceProperties.class)
@ConditionalOnClass(HelloService.class)
@ConditionalOnProperty(prefix = "hello",value = "enabled",matchIfMissing = true)
public class HelloServiceAutoConfiguration {
    @Autowired
    private HelloServiceProperties helloServiceProperties;
    @Bean
    @ConditionalOnMissingBean(HelloService.class)
    public HelloService helloService(){
        HelloService helloService = new HelloService();
        helloService.setMsg(helloServiceProperties.getMsg());
        return helloService;
    }
}
代码解释:
根据HelloServiceProperties提供的参数,并通过@ConditionalOnClass判断HelloService这个类在类路径是否存在,且当容器中没有这个bean的情况下自动配置这个bean。
- 注册配置,若想自动配置生效,需要注册自动配置类,在src/main/resources下创建META-INF/spring.factories,结构如下图所示:

在spring.factories中填写如下内容注册:
org.springframework.boot.autoconfigure.EnableAutoConfiguration=
com.demo.HelloServiceAutoConfiguration
若有多个配置用“,”隔开,“”是为了换行后能读到属性。
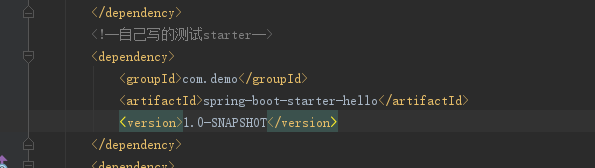
- 使用stater。我们可以将spring-boot-starter-hello 通过“mvn install”安装到本地库或者发布的maven私服使用。
mvn install:install-file -Dfile=jar包的位置 -DgroupId=groupId -DartifactId=artifactId -Dversion=version -Dpackaging=jar
新建springboot项目,并将我们的starter作为依赖,代码如下:
测试代码如下:
@Controller
public class IndexController {

    @Autowired
    HelloService helloService;

    @RequestMapping("/starter")
    public @ResponseBody String sayHello(){
        return helloService.sayHello();
    }
}
在代码中直接注入HelloService的bean,但在项目中,我们没有配置这个bean。这个是通过自动配置完成的。
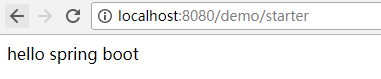
访问后效果如下:

然后在application.properties中配置
hello.msg= spring boot
再次访问效果如下:
在application.properties中配置debug=true,可以看到自动配置的报告。