一,建立新的插头页.
1,新建一个chat页.(Copy from LoginPage)
<local:BasePage x:Class="Fasetto.Word.ChatPage" x:TypeArguments="local:LoginViewModel"
      xmlns="http://schemas.microsoft.com/winfx/2006/xaml/presentation"
      xmlns:x="http://schemas.microsoft.com/winfx/2006/xaml"
      xmlns:mc="http://schemas.openxmlformats.org/markup-compatibility/2006"
      xmlns:d="http://schemas.microsoft.com/expression/blend/2008"
      xmlns:local="clr-namespace:Fasetto.Word"
      mc:Ignorable="d"
      d:DesignHeight="700" d:DesignWidth="700"
      Title="ChatPage"
      x:Name="chatPage">

    <Border >

    </Border>

</local:BasePage>
2,更改ChatPage类
 public partial class ChatPage : BasePage<LoginViewModel>
    {
        public ChatPage()
        {
            InitializeComponent();

        }


    }
3,选择登录的页为ChatPage类
public ApplicationPage CurrentPage { get; set; } = ApplicationPage.Chat;
4,更改选择器
public class ApplicationPageValueConverter : BaseValueConverter<ApplicationPageValueConverter>
    {
        public override object Convert(object value, Type targetType, object parameter, CultureInfo culture)
        {
            switch((ApplicationPage)value)
            {
                case ApplicationPage.Login:
                    return new LogoPage();
//Add ChatPage
                case ApplicationPage.Chat:
                    return new ChatPage();

                default:
                    //Debugger.Break();
                    return null;
            }
        }

        public override object ConvertBack(object value, Type targetType, object parameter, CultureInfo culture)
        {
            throw new NotImplementedException();
        }
    }
6 更改MainWindow的最大尺寸和最小尺寸.
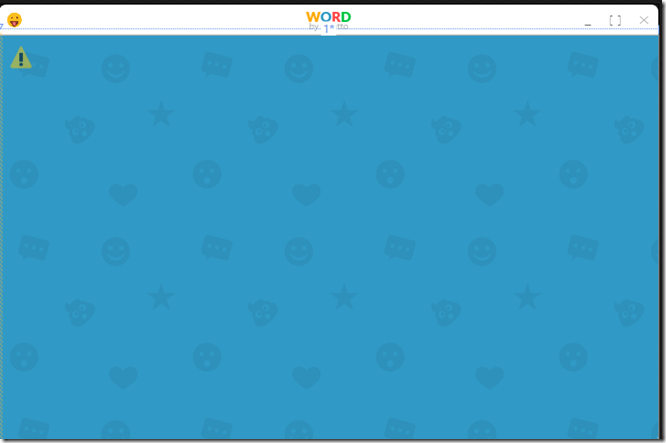
5,此时,显示CHat的空界面
6,进行Main Window的Xaml改造
<Border Background="{StaticResource WordBlueBrush}">
        <Grid>
            <Grid.Background>
                <ImageBrush ImageSource="/Images/Background/emoji-background.png" TileMode="Tile" Viewport="0 0 500 500" ViewportUnits="Absolute"/>
            </Grid.Background>

            <Grid.ColumnDefinitions>
                <ColumnDefinition Width="300" />
                <ColumnDefinition Width="*" />
            </Grid.ColumnDefinitions>

            <!--the chat page-->
            <Frame Grid.Column="1" x:Name="MainFrame"   Content="{Binding CurrentPage,Converter={local:ApplicationPageValueConverter}}" />

            <!--SideMenuControl-->
            <local:SidemenuControl >
                <Button Content="Test"/>
            </local:SidemenuControl>

        </Grid>
    </Border>
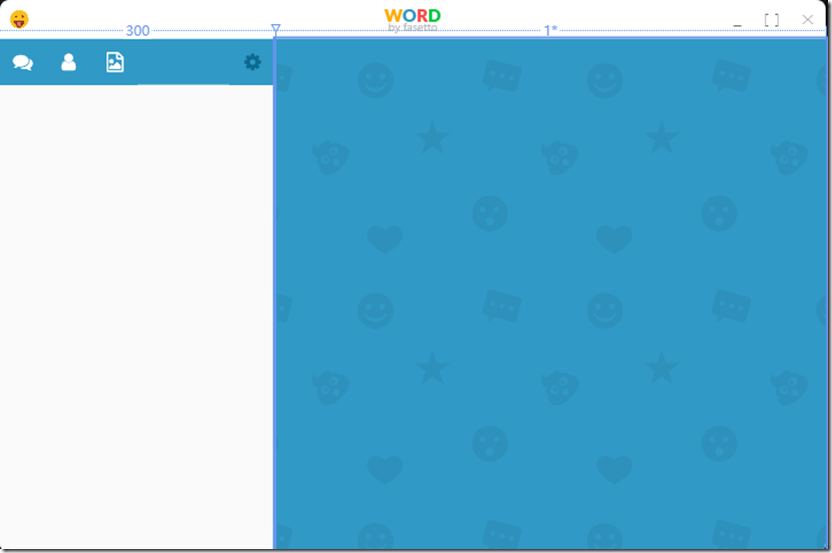
- 将页面分割成两个部分,1个部分宽度为300,一个享受剩下的空间.
- Frame的空间是右边的,左边300留给今天的内容.
二,创建SideMenuControl---UseControl
<UserControl x:Class="Fasetto.Word.SidemenuControl"
             xmlns="http://schemas.microsoft.com/winfx/2006/xaml/presentation"
             xmlns:x="http://schemas.microsoft.com/winfx/2006/xaml"
             xmlns:mc="http://schemas.openxmlformats.org/markup-compatibility/2006"
             xmlns:d="http://schemas.microsoft.com/expression/blend/2008"
             xmlns:local="clr-namespace:Fasetto.Word"
             mc:Ignorable="d"
             d:DesignHeight="300" d:DesignWidth="300">
    <UserControl.Template>
        <ControlTemplate TargetType="UserControl">
            <!--the Meum -->
            <Border Background="{StaticResource BackgroundVeryLightBrush}">

                <Grid>
                    <Grid.RowDefinitions>
                        <RowDefinition Height="auto" />
                        <RowDefinition Height="*" />
                    </Grid.RowDefinitions>

                    <!--the top menu-->
                    <Grid Background="{StaticResource WordBlueBrush}" Height="50">
                        <Grid.ColumnDefinitions>
                            <ColumnDefinition Width="Auto"/>
                            <ColumnDefinition Width="*"/>
                            <ColumnDefinition Width="Auto"/>
                        </Grid.ColumnDefinitions>

                        <!--Left icons of 3-->
                        <StackPanel Orientation="Horizontal" Grid.Column="0">
                            <Button Style="{StaticResource IconButton}" Content="{StaticResource FontAwesomeChatIcon}"/>
                            <Button Style="{StaticResource IconButton}" Content="{StaticResource FontAwesomeUserIcon}"/>
                            <Button Style="{StaticResource IconButton}" Content="{StaticResource FontAwesomePictureIcon}"/>
                        </StackPanel>

                        <StackPanel Orientation="Horizontal" Grid.Column="2">
                            <Button Foreground="{StaticResource  WordDarkBlueBrush}" Style="{StaticResource IconButton}" Content="{StaticResource FontAwesomeCogIcon}"/>
                        </StackPanel>
                    </Grid>
                    <ContentPresenter Grid.Row="1" />


                </Grid>

            </Border>

        </ControlTemplate>
    </UserControl.Template>


</UserControl>
1,将空间分割为上下两部分,上面部分高50.
2,将最上面部分分割成3部分.第一和第三部分用来放IconButton,第二部分留白.
3,新建IconButtonStyle
<Style x:Key="IconButton" TargetType="{x:Type Button}" BasedOn="{StaticResource BaseStyle}">

        <Setter Property="Background" Value="{StaticResource WordBlueBrush}" />
        <Setter Property="Foreground" Value="{StaticResource ForegroundLightBrush}" />
        <Setter Property="BorderThickness" Value="0" />
        <Setter Property="FontSize" Value="{StaticResource FontSizeXXLarge}" />
        <Setter Property="FontFamily" Value="{StaticResource FontAwesome}" />
        <Setter Property="Padding" Value="20" />
        <Setter Property="Margin" Value="0" />
        <Setter Property="Width" Value="{Binding ActualHeight, RelativeSource={RelativeSource Self}}" />
        <Setter Property="HorizontalContentAlignment" Value="Stretch" />
        <Setter Property="VerticalContentAlignment" Value="Stretch" />
        <Setter Property="Template">
            <Setter.Value>
                <ControlTemplate TargetType="{x:Type ButtonBase}">

                        <Border x:Name="border"
                            BorderBrush="{TemplateBinding BorderBrush}"
                            BorderThickness="{TemplateBinding BorderThickness}"
                            Background="{TemplateBinding Background}"
                            SnapsToDevicePixels="True">
                            <Grid>
                                <!--use view box avoid not show total icon-->
                            <Viewbox>
                                <TextBlock Text="{TemplateBinding Content}"
                                   Focusable="False"
                                   FontFamily="{TemplateBinding FontFamily}"
                                   FontSize="{TemplateBinding FontSize}"
                                   HorizontalAlignment="{TemplateBinding HorizontalContentAlignment}"
                                   Margin="{TemplateBinding Padding}"
                                   SnapsToDevicePixels="{TemplateBinding SnapsToDevicePixels}"
                                   VerticalAlignment="{TemplateBinding VerticalContentAlignment}"

                                           />
                            </Viewbox>

                            </Grid>
                        </Border>


                    <ControlTemplate.Triggers>
                        <EventTrigger RoutedEvent="MouseEnter">
                            <BeginStoryboard>
                                <Storyboard>
                                    <ColorAnimation To="{StaticResource WordLightBlue}" Duration="0:0:0.3" Storyboard.TargetName="border" Storyboard.TargetProperty="Background.Color" />
                                </Storyboard>
                            </BeginStoryboard>
                        </EventTrigger>
                        <EventTrigger RoutedEvent="MouseLeave">
                            <BeginStoryboard>
                                <Storyboard>
                                    <ColorAnimation From="{StaticResource WordLightBlue}" Duration="0:0:0.3" Storyboard.TargetName="border" Storyboard.TargetProperty="Background.Color" />
                                </Storyboard>
                            </BeginStoryboard>
                        </EventTrigger>
                        <Trigger Property="IsEnabled" Value="False">
                            <Setter Property="Background" TargetName="border" Value="{StaticResource ForegroundDarkBrush}"/>
                        </Trigger>
                    </ControlTemplate.Triggers>
                </ControlTemplate>
            </Setter.Value>
        </Setter>
    </Style>
- 设置FontFamily为FontAwesome,并且在资源中添加该Font
- 设置宽度=高度
- <Setter Property="Width" Value="{Binding ActualHeight, RelativeSource={RelativeSource Self}}" />
- 设置颜色WordBlue,在鼠标上去时变成WordLightBlue.
- 对于TextBlock,包围ViewBox,以使文字自动缩小.
4,新建String资源---4个图标
<system:String x:Key="FontAwesomeChatIcon"></system:String>
<system:String x:Key="FontAwesomeUserIcon"></system:String>
<system:String x:Key="FontAwesomePictureIcon"></system:String>
<system:String x:Key="FontAwesomeCogIcon"></system:String>
5,建立今天的图标

