注:本示例为本地mac系统模拟
摘要:搭建集群服务器,本机只能在docker环境中,搭建多个nginx服务器
1,参考上篇文章(docker基本使用-nginx),在docker创建多个nginx端口服务
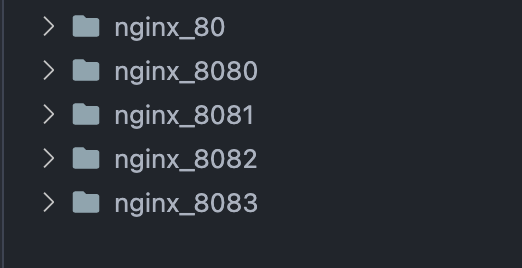
创建多个nginx端口服务后,如下目录:
搭建完成后,执行查看容器命令:
docker ps

一共4台nginx服务器,已经搭建成功
2,查看4台服务器对应的ip信息
a,查看NETWORK ID
docker network ls

b,根据NETWORK ID查询IP信息
docker network inspect d0f35ccacdd0
[
    {
        "Name": "bridge",
        "Id": "d0f35ccacdd0a1c73c4e7dc73cbf458ad16740a04d5ba51812b91ca9027aa446",
        "Created": "2021-11-09T02:22:11.901924425Z",
        "Scope": "local",
        "Driver": "bridge",
        "EnableIPv6": false,
        "IPAM": {
            "Driver": "default",
            "Options": null,
            "Config": [
                {
                    "Subnet": "172.17.0.0/16",
                    "Gateway": "172.17.0.1"
                }
            ]
        },
        "Internal": false,
        "Attachable": false,
        "Ingress": false,
        "ConfigFrom": {
            "Network": ""
        },
        "ConfigOnly": false,
        "Containers": {
            "5138a79b12f47592825998bf548308859620691494d7a364a81a851bfa2b423a": {
                "Name": "nginx_8083",
                "EndpointID": "7b06b6009895935cc797a49ab403a48c04f56486b9090d5eb91082673074bdae",
                "MacAddress": "02:42:ac:11:00:03",
                "IPv4Address": "172.17.0.3/16",
                "IPv6Address": ""
            },
            "513cf995c16af1370c1d05377d84570c11ceaac3debb7173c56eebb2466cf282": {
                "Name": "nginx_8080",
                "EndpointID": "9b318352df6492bfbeb204324486d1c18840386fa586afae7a8dccc6321b82f3",
                "MacAddress": "02:42:ac:11:00:02",
                "IPv4Address": "172.17.0.2/16",
                "IPv6Address": ""
            },
            "88044c0a8ce1c5a3137723926a5ce66d70495be0849c325570e4b3f355e2641f": {
                "Name": "nginx_8081",
                "EndpointID": "e21584d95636a0716fb6527b1e1e1dd7b4621797017f4d8f16da6d868224c038",
                "MacAddress": "02:42:ac:11:00:05",
                "IPv4Address": "172.17.0.5/16",
                "IPv6Address": ""
            },
            "e0a71215e93e1c321bf372642cd1c9adcc884bf9e11927a33607ad6a3634ce29": {
                "Name": "nginx_8082",
                "EndpointID": "d73b04ffd66d0c40a94758c62988fff81a133aae384b20bc6f6f1d30d69bd965",
                "MacAddress": "02:42:ac:11:00:04",
                "IPv4Address": "172.17.0.4/16",
                "IPv6Address": ""
            }
        },
        "Options": {
            "com.docker.network.bridge.default_bridge": "true",
            "com.docker.network.bridge.enable_icc": "true",
            "com.docker.network.bridge.enable_ip_masquerade": "true",
            "com.docker.network.bridge.host_binding_ipv4": "0.0.0.0",
            "com.docker.network.bridge.name": "docker0",
            "com.docker.network.driver.mtu": "1500"
        },
        "Labels": {}
    }
]
c,根据如上结果,可以获取每个nginx的IP,供下面配置负载使用
3,此处选择8080端口服务器,为主服务器,向其他几台服务器分发
前往配置8080nginx服务器的default.conf
目录:/Users/whao/Libraries/nginx_8080/conf/conf.d/default.conf 如下:
upstream myserver {
    server 172.17.0.5;#nginx_8081
    server 172.17.0.3;#nginx_8083
    server 172.17.0.4;#nginx_8082
}
server {
    listen       80;
    server_name  172.17.0.2;#nginx_8080 主服务器

    #access_log  /var/log/nginx/host.access.log  main;

    location / {
        proxy_pass http://myserver;
        proxy_set_header Host $host;
        proxy_set_header X-Real-IP $remote_addr;
        proxy_set_header X-Forwarded-For $proxy_add_x_forwarded_for;
    }

    #error_page  404              /404.html;

    # redirect server error pages to the static page /50x.html
    #
    error_page   500 502 503 504  /50x.html;
    location = /50x.html {
        root   /usr/share/nginx/html;
    }

    # proxy the PHP scripts to Apache listening on 127.0.0.1:80
    #
    #location ~ \.php$ {
    #    proxy_pass   http://127.0.0.1;
    #}

    # pass the PHP scripts to FastCGI server listening on 127.0.0.1:9000
    #
    #location ~ \.php$ {
    #    root           html;
    #    fastcgi_pass   127.0.0.1:9000;
    #    fastcgi_index  index.php;
    #    fastcgi_param  SCRIPT_FILENAME  /scripts$fastcgi_script_name;
    #    include        fastcgi_params;
    #}

    # deny access to .htaccess files, if Apache's document root
    # concurs with nginx's one
    #
    #location ~ /\.ht {
    #    deny  all;
    #}
}
4,在每台nginx服务器html目录下,增加一个index.html文件,区别不同的请求
5,修改完配置文件,重启nginx即可
[root@localhost ~]# docker exec -it nginx_8080 bash
root@72aacbe3c63a:/# service nginx restart
6,访问http://localhost:8080/index.html
多次刷新浏览器请求,会看到随机访问的这几台服务器的index.html