软件版本
Hadoop版本号:hadoop-2.6.0-cdh5.7.0;
VMWare版本号:VMware 9或10
Linux系统:CentOS 6.4-6.5 或Ubuntu版本号:ubuntu-14.04.1-desktop-i386
Jdk版本号:Jdk1.7.0._79
后三项对版本要求不严格,如果使用Hbase1.0.0版本,需要JDK1.8以上版本
安装教程
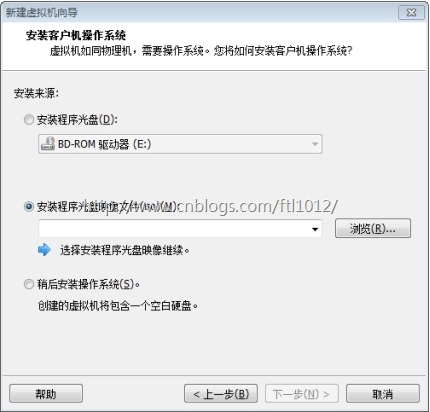
1、VMWare安装教程
VMWare虚拟机是个软件,安装后可用来创建虚拟机,在虚拟机上再安装系统,在这个虚拟系统上再安装应用软件,所有应用就像操作一台真正的电脑,
请直接到VMWare官方网站下载相关软件 http://www.vmware.com/cn/products/workstation/workstation-evaluation
以上链接如果因为官方网站变动发生变化,可以直接在搜索引擎中搜索VMWare来查找其下载地址,建议不要在非官方网站下载。
安装试用版后有30天的试用期。
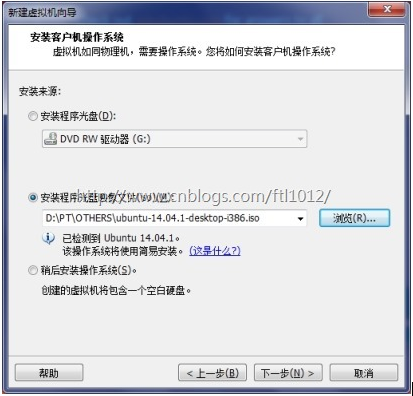
2、Ubuntu安装教程
打开VMWare点击创建新的虚拟机
选择典型

点击浏览
选择ubuntu

暂时只建两个虚拟机,注意分别给两个虚拟机起名为Ubuntu1和Ubuntu2;也可以按照自己的习惯取名,但是后续的许多配置文件要相应更改,会带来一些麻烦。
密码也请记牢,后面会经常使用。
3、安装VMWare-Tools

Ubuntu中会显示有光盘插入了光驱

双击打开光盘将光盘中VMwareTools-9.6.1-1378637.tar.gz复制到桌面,复制方法类似windows系统操作。
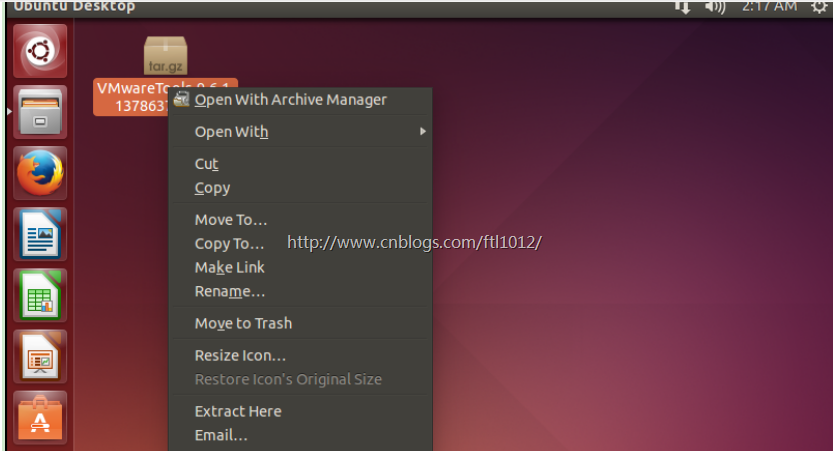
点击Extract Here
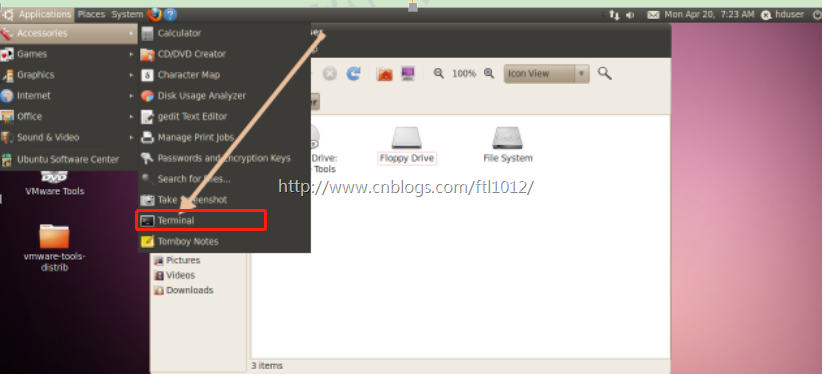
从菜单打开Ubuntu的控制终端
cd Desktop/vmware-tools-distrib/
sudo ./vmware-install.pl
输入root密码,一路回车,重启系统
注意1: ubuntu安装后, root 用户默认是被锁定了的,不允许登录,也不允许“ su” 到 root 。
允许 su 到 root
非常简单,下面是设置的方法:

注意2:ubuntu安装后要更新软件源:
cd /etc/apt
sudo apt-get update
安装各种软件比较方便
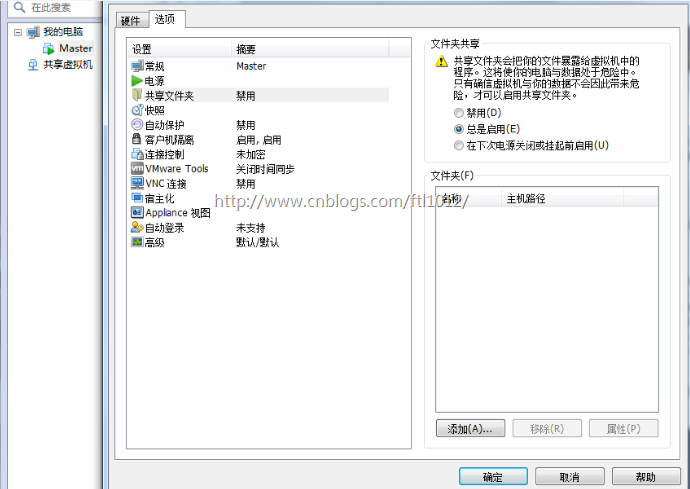
4、共享文件夹的创建
宿主机与虚拟机共享文件夹的创建
1)点击虚拟机->设置,点击选项->共享文件夹,选择总是启用,点击添加按钮
2)点击下一步

3)选择共享文件夹路径(此路径为本地文件路径),点击下一步

4)选择启用该共享,点击完成

5)点击确定
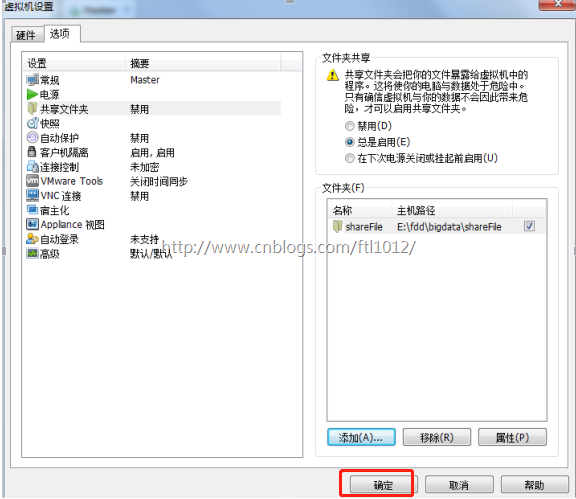
6)则可以在如图所示文件夹下寻找共享文件夹

5、用户创建
创建hadoop用户组: sudo addgroup hadoop
创建hduser用户:sudo adduser -ingroup hadoop hduser
注意这里为hduser用户设置同主用户相同的密码
为hadoop用户添加权限:sudo gedit /etc/sudoers,在root ALL=(ALL) ALL下添加
hduser ALL=(ALL) ALL。
设置好后重启机器:sudo reboot
切换到hduser用户登录;
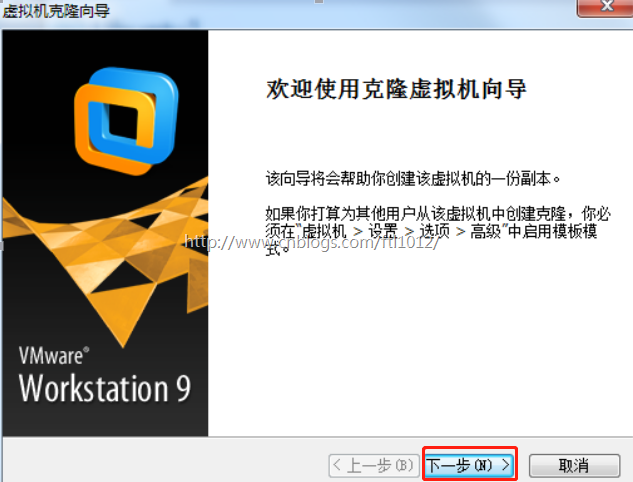
6、克隆Ubuntu
通过克隆的方法安装Ubnutu
1)在安装好的ubnutu上右键单机,选择管理->克隆
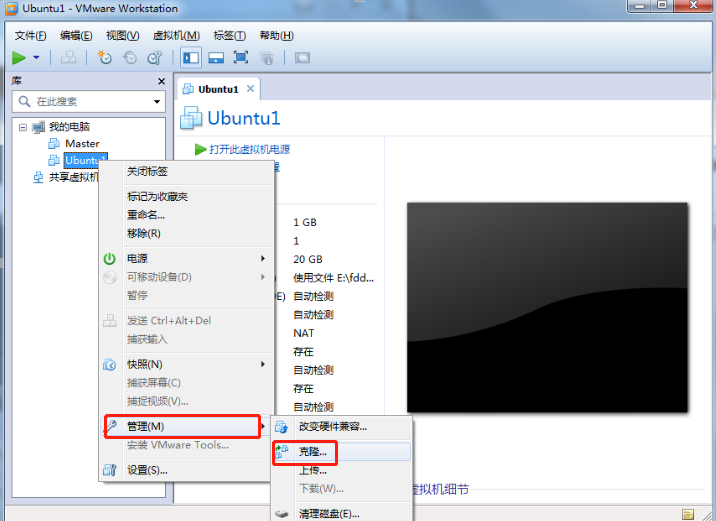
2)点击下一步
3)选择虚拟机的当前状态,点击下一步

4)选择创建一个完整克隆,点击下一步

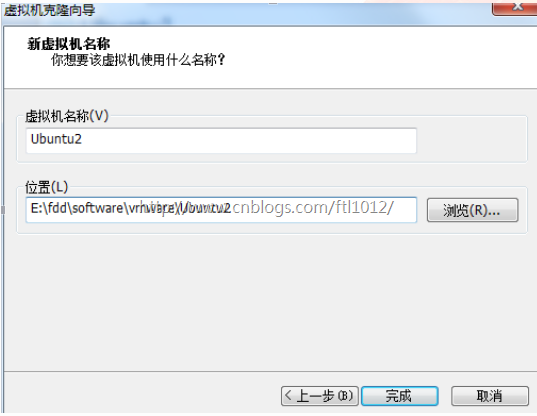
5)填写新虚拟机的名称和安装位置,点击完成
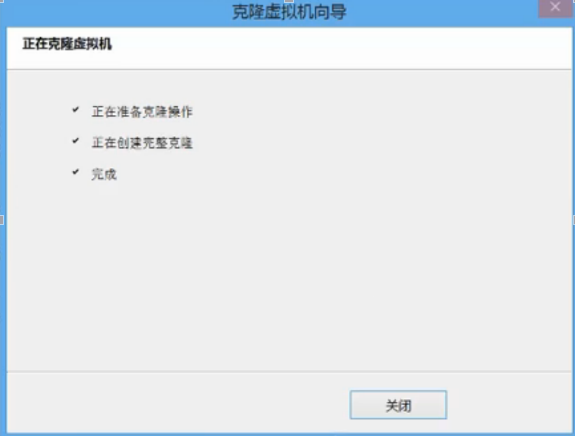
6)点击关闭,完成克隆
7、主机配置
Hadoop集群中包括2个节点:1个Master,2个Salve,其中虚拟机Ubuntu1既做Master,也做Slave;虚拟机Ubuntu2只做Slave。
配置hostname:Ubuntu下修改机器名称: sudo gedit /etc/hostname ,改为Ubuntu1;修改成功后用重启命令:hostname,查看当前主机名是否设置成功;
此时可以用虚拟机克隆的方式再复制一个。(先关机 vmware 菜单--虚拟机-管理--克隆)
注意:修改克隆的主机名为Ubuntu2。
配置hosts文件:查看Ubuntu1和Ubuntu2的ip:ifconfig;
打开hosts文件:sudo gedit /etc/hosts,添加如下内容:
192.168.xxx.xxx Ubuntu1
192.168.xxx.xxx Ubuntu2
注意这里的ip地址需要学员根据自己的电脑的ip设置。
在Ubuntu1上执行命令:ping Ubuntu2,若能ping通,则说明执行正确。
8、SSH无密码验证配置
安装ssh服务器,默认安装了ssh客户端:sudo apt-get install openssh-server;
在Ubuntu1上生成公钥和秘钥:ssh-keygen -t rsa -P "" ;
查看路径 /home/hduser/.ssh文件里是否有id_rsa和id_rsa.pub;
将公钥赋给authorized_keys:cat $HOME/.ssh/id_rsa.pub >> $HOME/.ssh/authorized_keys;无密码登录:ssh localhost;
无密码登陆到Ubuntu2,在Ubuntu1上执行:ssh-copy-id Ubuntu2,查看Ubuntu2的/home/hduser/.ssh文件里是否有authorized_keys;
在Ubuntu1上执行命令:ssh Ubuntu2,首次登陆需要输入密码,再次登陆则无需密码;
若要使Ubuntu2无密码登录Ubuntu1,则在Ubutu2上执行上述相同操作即可。
注:若无密码登录设置不成功,则很有可能是文件夹/文件权限问题,修改文件夹/文件权限即可。sudo chmod 777 “文件夹” 即可。
注意:
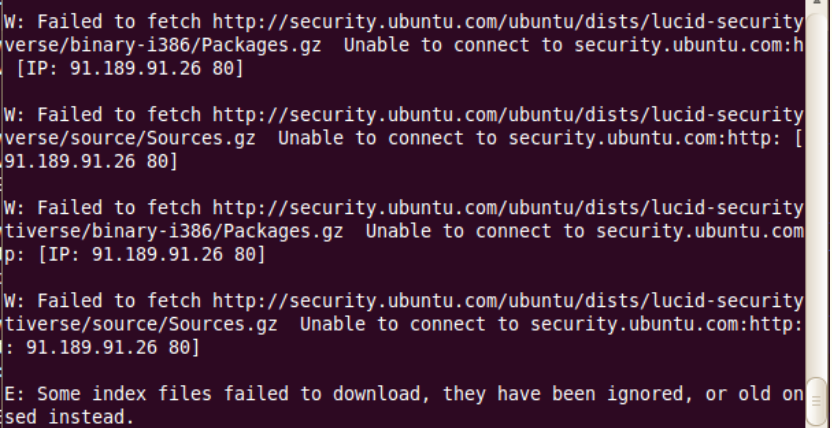
在执行命令sudo apt-get install openssh-server时,可能出现如下错误:
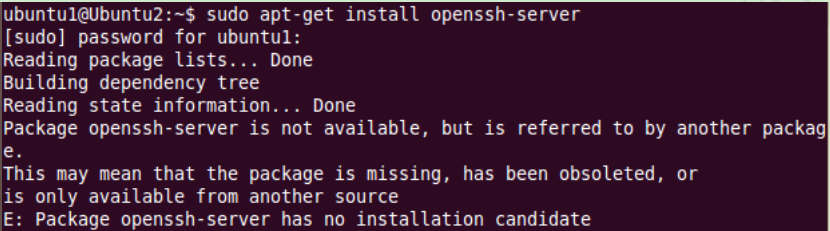
这个问题的原因是ubuntu的/etc/apt/source.list中的源比较旧了,需要更新一下。
更新方法:执行命令sudo apt-get -y update
更新完毕之后,在使用sudo apt-get install openssh-server就没有问题了。
当执行命令sudo apt-get -y update时有报如下错:

9、Java环境配置
获取opt文件夹权限:sudo chmod 777 /opt
将java压缩包放在/opt/,root模式执行sudo ./jdk-6u45-linux-i586.bin
配置jdk的环境变量:sudo gedit /etc/profile,将一下内容复制进去并保存
# java
export JAVA_HOME=/opt/jdk1.6.0_45
export JRE_HOME=$JAVA_HOME/jre
export CLASSPATH=$JAVA_HOME/lib:$JRE_HOME/lib:$CLASSPATH
export PATH=$JAVA_HOME/bin:$JRE_HOME/bin:$PATH
执行命令,使配置生效:source /etc/profile;
执行命令:java -version,若出现java版本号,则说明安装成功。
10. hadoop全分布式集群安装
10.1 安装
将hadoop压缩包hadoop-2.6.0.tar.gz放在/home/hduser目录下,并解压缩到本地,重命名为hadoop;配置hadoop环境变量,执行:sudo gedit /etc/profile,将以下复制到profile内:
#hadoop
export HADOOP_HOME=/home/hduser/hadoop
export PATH=$HADOOP_HOME/bin:$PATH
执行:source /etc/profile
注意:Ubuntu1、ubuntu2都要配置以上步骤;
10.2 配置
主要涉及的配置文件有7个:都在/hadoop/etc/hadoop文件夹下,可以用gedit命令对其进行编辑
(1)进去hadoop配置文件目录
cd /home/hduser/hadoop/etc/hadoop/

(2)配置hadoop-env.sh文件-->修改JAVA_HOME
gedit hadoop-env.sh
添加如下内容
# The java implementation to use.
export JAVA_HOME=/opt/jdk1.6.0_45
(3)配置yarn-env.sh 文件-->>修改JAVA_HOME
添加如下内容
# some Java parameters
export JAVA_HOME=/opt/jdk1.6.0_45
(4)配置slaves文件-->>增加slave节点
(删除原来的localhost)
添加如下内容
Ubuntu1
Ubuntu2
(5)配置core-site.xml文件-->>增加hadoop核心配置
(hdfs文件端口是9000、file:/home/hduser/hadoop/tmp)
添加如下内容
<configuration>
 <property>
  <name>fs.defaultFS</name>
  <value>hdfs://Ubuntu1:9000</value>
 </property>
 <property>
  <name>io.file.buffer.size</name>
  <value>131072</value>
 </property>
 <property>
  <name>hadoop.tmp.dir</name>
  <value>file:/home/hduser/hadoop/tmp</value>
  <description>Abasefor other temporary directories.</description>
 </property>
<property>
 <name>hadoop.native.lib</name>
  <value>true</value>
  <description>Should native hadoop libraries, if present, be used.</description>
</property>
</configuration>
(6)配置 hdfs-site.xml文件-->>增加hdfs配置信息
(namenode、datanode端口和目录位置)
<configuration>
 <property>
  <name>dfs.namenode.secondary.http-address</name>
  <value>Ubuntu1:9001</value>
 </property>

  <property>
   <name>dfs.namenode.name.dir</name>
   <value>file:/home/hduser/hadoop/dfs/name</value>
 </property>

 <property>
  <name>dfs.datanode.data.dir</name>
  <value> file:/home/hduser/hadoop/dfs/data</value>
  </property>

 <property>
  <name>dfs.replication</name>
  <value>2</value>
 </property>

 <property>
  <name>dfs.webhdfs.enabled</name>
  <value>true</value>
 </property>
</configuration>
(7)配置 mapred-site.xml文件-->>增加mapreduce配置
(使用yarn框架、jobhistory使用地址以及web地址)
<configuration>
  <property>
   <name>mapreduce.framework.name</name>
   <value>yarn</value>
 </property>
 <property>
  <name>mapreduce.jobhistory.address</name>
  <value>Ubuntu1:10020</value>
 </property>
 <property>
  <name>mapreduce.jobhistory.webapp.address</name>
  <value> Ubuntu1:19888</value>
 </property>
</configuration>
(8)配置 yarn-site.xml文件-->>增加yarn功能
<configuration>
  <property>
   <name>yarn.nodemanager.aux-services</name>
   <value>mapreduce_shuffle</value>
  </property>
  <property>
   <name>yarn.nodemanager.aux-services.mapreduce.shuffle.class</name>
   <value>org.apache.hadoop.mapred.ShuffleHandler</value>
  </property>
  <property>
   <name>yarn.resourcemanager.address</name>
   <value>Ubuntu1:8032</value>
  </property>
  <property>
   <name>yarn.resourcemanager.scheduler.address</name>
   <value>Ubuntu1:8030</value>
  </property>
  <property>
   <name>yarn.resourcemanager.resource-tracker.address</name>
   <value>Ubuntu1:8035</value>
  </property>
  <property>
   <name>yarn.resourcemanager.admin.address</name>
   <value>Ubuntu1:8033</value>
  </property>
  <property>
   <name>yarn.resourcemanager.webapp.address</name>
   <value>Ubuntu1:8088</value>
  </property>
</configuration>
(9)将配置好的Ubuntu1中/hadoop/etc/hadoop文件夹复制到到Ubuntu2对应位置(删除Ubuntu2原来的文件夹/hadoop/etc/hadoop)
scp -r /home/hduser/hadoop/etc/hadoop/ hduser@Ubuntu2:/home/hduser/hadoop/etc/
10.3 验证
下面验证Hadoop配置是否正确:
(1)格式化namenode:
hduser@Ubuntu1:~$ cd hadoop
hduser@Ubuntu1:~/hadoop$ ./bin/hdfs namenode -format
hduser@Ubuntu2:~$ cd hadoop
hduser@Ubuntu2:~/hadoop$ ./bin/hdfs namenode -format
注意:上面只要出现“successfully formatted”就表示成功了。
(2)启动hdfs:
hduser@Ubuntu1:~/hadoop$ ./sbin/start-dfs.sh
15/04/27 04:18:45 WARN util.NativeCodeLoader: Unable to load native-hadoop library for your platform... using builtin-java classes where applicable
Starting namenodes on [Ubuntu1]
Ubuntu1: starting namenode, logging to /home/hduser/hadoop/logs/hadoop-hduser-namenode-Ubuntu1.out
Ubuntu1: starting datanode, logging to /home/hduser/hadoop/logs/hadoop-hduser-datanode-Ubuntu1.out
Ubuntu2: starting datanode, logging to /home/hduser/hadoop/logs/hadoop-hduser-datanode-Ubuntu2.out
Starting secondary namenodes [Ubuntu1]
Ubuntu1: starting secondarynamenode, logging to /home/hduser/hadoop/logs/hadoop-hduser-secondarynamenode-Ubuntu1.out
15/04/27 04:19:07 WARN util.NativeCodeLoader: Unable to load native-hadoop library for your platform... using builtin-java classes where applicable
查看java进程(Java Virtual Machine Process Status Tool)
hduser@Ubuntu1:~/hadoop$ jps
8008 NameNode
8443 Jps
8158 DataNode
8314 SecondaryNameNode
(3)停止hdfs:
hduser@Ubuntu1:~/hadoop$ ./sbin/stop-dfs.sh
Stopping namenodes on [Ubuntu1]
Ubuntu1: stopping namenode
Ubuntu1: stopping datanode
Ubuntu2: stopping datanode
Stopping secondary namenodes [Ubuntu1]
Ubuntu1: stopping secondarynamenode
查看java进程
hduser@Ubuntu1:~/hadoop$ jps
8850 Jps
(4)启动yarn:
hduser@Ubuntu1:~/hadoop$ ./sbin/start-yarn.sh
starting yarn daemons
starting resourcemanager, logging to /home/hduser/hadoop/logs/yarn-hduser-resourcemanager-Ubuntu1.out
Ubuntu2: starting nodemanager, logging to /home/hduser/hadoop/logs/yarn-hduser-nodemanager-Ubuntu2.out
Ubuntu1: starting nodemanager, logging to /home/hduser/hadoop/logs/yarn-hduser-nodemanager-Ubuntu1.out
查看java进程
hduser@Ubuntu1:~/hadoop$ jps
8911 ResourceManager
9247 Jps
9034 NodeManager
(5)停止yarn:
hduser@Ubuntu1:~/hadoop$  ./sbin/stop-yarn.sh
stopping yarn daemons
stopping resourcemanager
Ubuntu1: stopping nodemanager
Ubuntu2: stopping nodemanager
no proxyserver to stop
查看java进程
hduser@Ubuntu1:~/hadoop$ jps
9542 Jps
(6)查看集群状态:
首先启动集群:./sbin/start-dfs.sh
hduser@Ubuntu1:~/hadoop$ ./bin/hdfs dfsadmin -report
Configured Capacity: 39891361792 (37.15 GB)
Present Capacity: 28707627008 (26.74 GB)
DFS Remaining: 28707569664 (26.74 GB)
DFS Used: 57344 (56 KB)
DFS Used%: 0.00%
Under replicated blocks: 0
Blocks with corrupt replicas: 0
Missing blocks: 0

-------------------------------------------------
Live datanodes (2):

Name: 192.168.159.132:50010 (Ubuntu2)
Hostname: Ubuntu2
Decommission Status : Normal
Configured Capacity: 19945680896 (18.58 GB)
DFS Used: 28672 (28 KB)
Non DFS Used: 5575745536 (5.19 GB)
DFS Remaining: 14369906688 (13.38 GB)
DFS Used%: 0.00%
DFS Remaining%: 72.05%
Configured Cache Capacity: 0 (0 B)
Cache Used: 0 (0 B)
Cache Remaining: 0 (0 B)
Cache Used%: 100.00%
Cache Remaining%: 0.00%
Xceivers: 1
Last contact: Mon Apr 27 04:26:09 PDT 2015

Name: 192.168.159.131:50010 (Ubuntu1)
Hostname: Ubuntu1
Decommission Status : Normal
Configured Capacity: 19945680896 (18.58 GB)
DFS Used: 28672 (28 KB)
Non DFS Used: 5607989248 (5.22 GB)
DFS Remaining: 14337662976 (13.35 GB)
DFS Used%: 0.00%
DFS Remaining%: 71.88%
Configured Cache Capacity: 0 (0 B)
Cache Used: 0 (0 B)
Cache Remaining: 0 (0 B)
Cache Used%: 100.00%
Cache Remaining%: 0.00%
Xceivers: 1
Last contact: Mon Apr 27 04:26:08 PDT 2015
(7)查看hdfs:http://Ubuntu1:50070/

三、运行wordcount程序
(1)创建 file目录
hduser@Ubuntu1:~$ mkdir file
(2)在file创建file1.txt、file2.txt并写内容(在图形界面)
分别填写如下内容
file1.txt输入内容:Hello world hi HADOOP
file2.txt输入内容:Hello hadoop hi CHINA
创建后查看:
hduser@Ubuntu1:~ /hadoop $ cat file/file1.txt
Hello world hi HADOOP
hduser@Ubuntu1:~ /hadoop $ cat file/file2.txt
Hello hadoop hi CHINA
(3)在hdfs创建/input2目录
hduser@Ubuntu1:~/hadoop$ ./bin/hadoop fs -mkdir /input2
(4)将file1.txt、file2.txt文件copy到hdfs /input2目录
hduser@Ubuntu1:~/hadoop$ ./bin/hadoop fs -put file/file*.txt /input2
(5)查看hdfs上是否有file1.txt、file2.txt文件
hduser@Ubuntu1:~/hadoop$ bin/hadoop fs -ls /input2/
Found 2 items
-rw-r--r--   2 hduser supergroup         21 2015-04-27 05:54 /input2/file1.txt
-rw-r--r--   2 hduser supergroup         24 2015-04-27 05:54 /input2/file2.txt
(6)执行wordcount程序
先启动hdfs和yarn
hduser@Ubuntu1:~/hadoop$ ./bin/hadoop jar share/hadoop/mapreduce/hadoop-mapreduce-examples-2.6.0.jar wordcount /input2/ /output2/wordcount1

15/04/27 05:57:17 WARN util.NativeCodeLoader: Unable to load native-hadoop library for your platform... using builtin-java classes where applicable
15/04/27 05:57:17 INFO client.RMProxy: Connecting to ResourceManager at Ubuntu1/192.168.159.131:8032
15/04/27 05:57:19 INFO input.FileInputFormat: Total input paths to process : 2
15/04/27 05:57:19 INFO mapreduce.JobSubmitter: number of splits:2
15/04/27 05:57:19 INFO mapreduce.JobSubmitter: Submitting tokens for job: job_1430138907536_0001
15/04/27 05:57:20 INFO impl.YarnClientImpl: Submitted application application_1430138907536_0001
15/04/27 05:57:20 INFO mapreduce.Job: The url to track the job: http://Ubuntu1:8088/proxy/application_1430138907536_0001/
15/04/27 05:57:20 INFO mapreduce.Job: Running job: job_1430138907536_0001
15/04/27 05:57:32 INFO mapreduce.Job: Job job_1430138907536_0001 running in uber mode : false
15/04/27 05:57:32 INFO mapreduce.Job:  map 0% reduce 0%
15/04/27 05:57:43 INFO mapreduce.Job:  map 100% reduce 0%
15/04/27 05:57:58 INFO mapreduce.Job:  map 100% reduce 100%
15/04/27 05:57:59 INFO mapreduce.Job: Job job_1430138907536_0001 completed successfully
15/04/27 05:57:59 INFO mapreduce.Job: Counters: 49
File System Counters
FILE: Number of bytes read=84
FILE: Number of bytes written=317849
FILE: Number of read operations=0
FILE: Number of large read operations=0
FILE: Number of write operations=0
HDFS: Number of bytes read=247
HDFS: Number of bytes written=37
HDFS: Number of read operations=9
HDFS: Number of large read operations=0
HDFS: Number of write operations=2
Job Counters
Launched map tasks=2
Launched reduce tasks=1
Data-local map tasks=2
Total time spent by all maps in occupied slots (ms)=16813
Total time spent by all reduces in occupied slots (ms)=12443
Total time spent by all map tasks (ms)=16813
Total time spent by all reduce tasks (ms)=12443
Total vcore-seconds taken by all map tasks=16813
Total vcore-seconds taken by all reduce tasks=12443
Total megabyte-seconds taken by all map tasks=17216512
Total megabyte-seconds taken by all reduce tasks=12741632
Map-Reduce Framework
Map input records=2
Map output records=8
Map output bytes=75
Map output materialized bytes=90
Input split bytes=202Combine input records=8
Combine output records=7
Reduce input groups=5
Reduce shuffle bytes=90
Reduce input records=7
Reduce output records=5
pilled Records=14
Shuffled Maps =2
Failed Shuffles=0
Merged Map outputs=2
GC time elapsed (ms)=622
CPU time spent (ms)=2000
Physical memory (bytes) snapshot=390164480
Virtual memory (bytes) snapshot=1179254784
Total committed heap usage (bytes)=257892352
Shuffle Errors
BAD_ID=0
CONNECTION=0
IO_ERROR=0
WRONG_LENGTH=0
WRONG_MAP=0
WRONG_REDUCE=0
File Input Format Counters
Bytes Read=45
File Output Format Counters
Bytes Written=37
(7)查看运行结果
hduser@Ubuntu1:~/hadoop$ ./bin/hdfs dfs -cat /output2/wordcount1/*
CHINA 1
Hello 2
hadoop 2
hi    2
world 1
——————————————
显示出以上结果,表明您已经成功安装了Hadoop!