前面几篇文章演示的是比较原始的创建JNI项目的方法,旨在了解JNI项目构建原理!
但是构建项目效率很低,开发,调试都存在很大的效率低下问题。
本篇文章将演示利用Android Studio快速构建JNI项目。本篇文章要点:
a、利用Android Studio快速构建JNI项目
b、添加日志打印
c、Android Studio调试C/C++代码
d、JNI动态注册
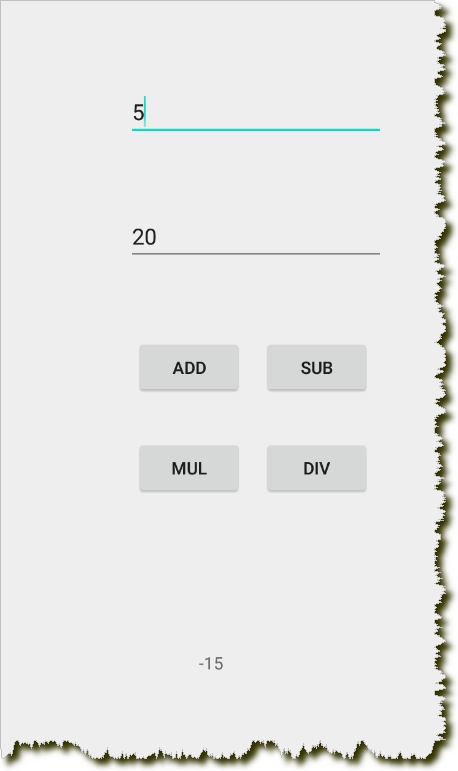
e、简易计算器实现。
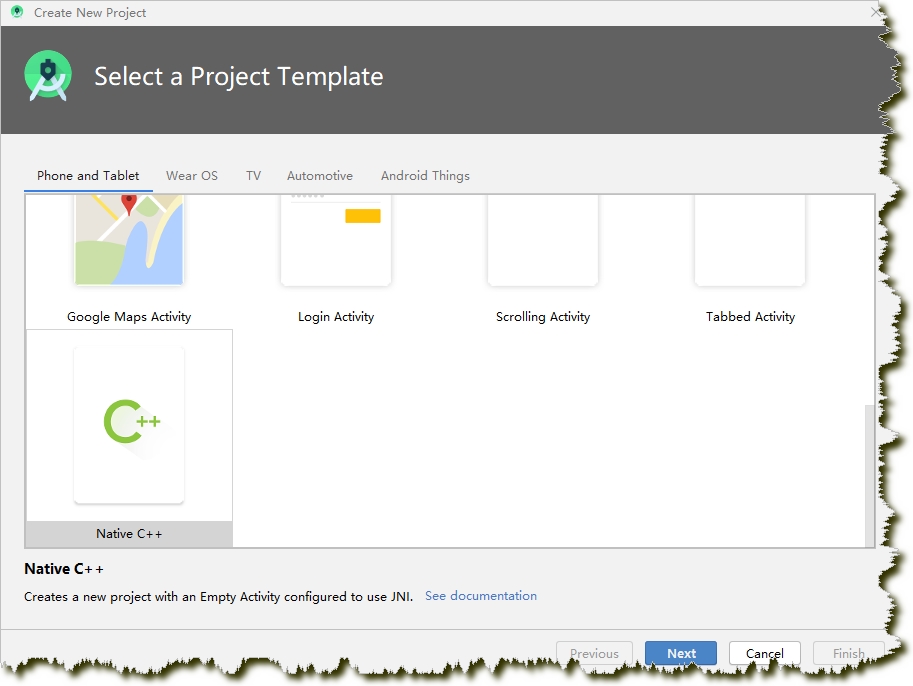
1.打开Android Studio新建Project,选中Native c++选项,此选项可以帮助开发人员快速创建JNI项目,免去手动配置等麻烦问题。
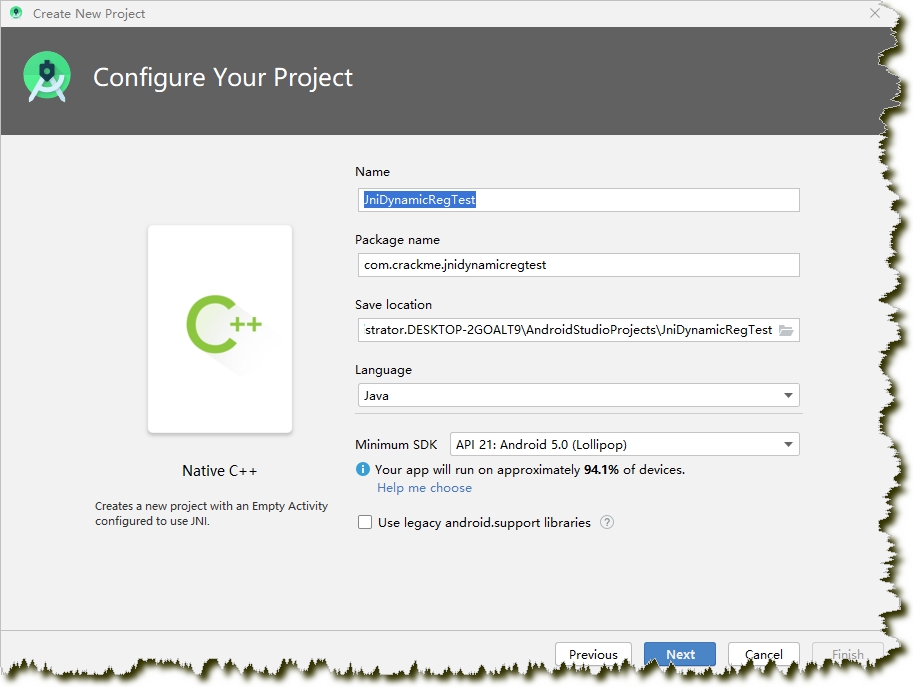
2.项目取名为JniDynamicRegTest,点击Next
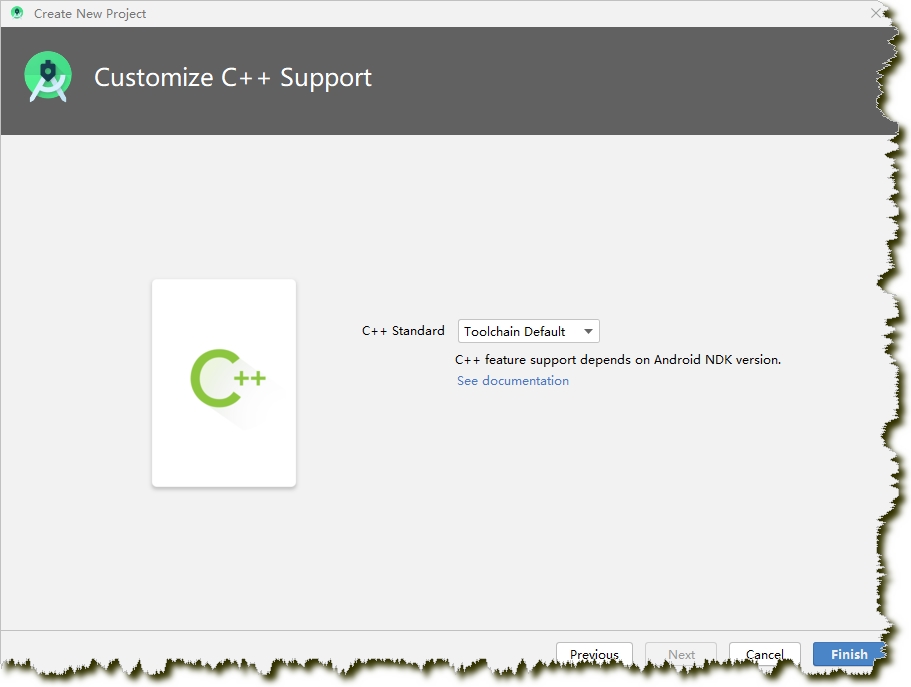
3.使用默认C++标准,点击Finish
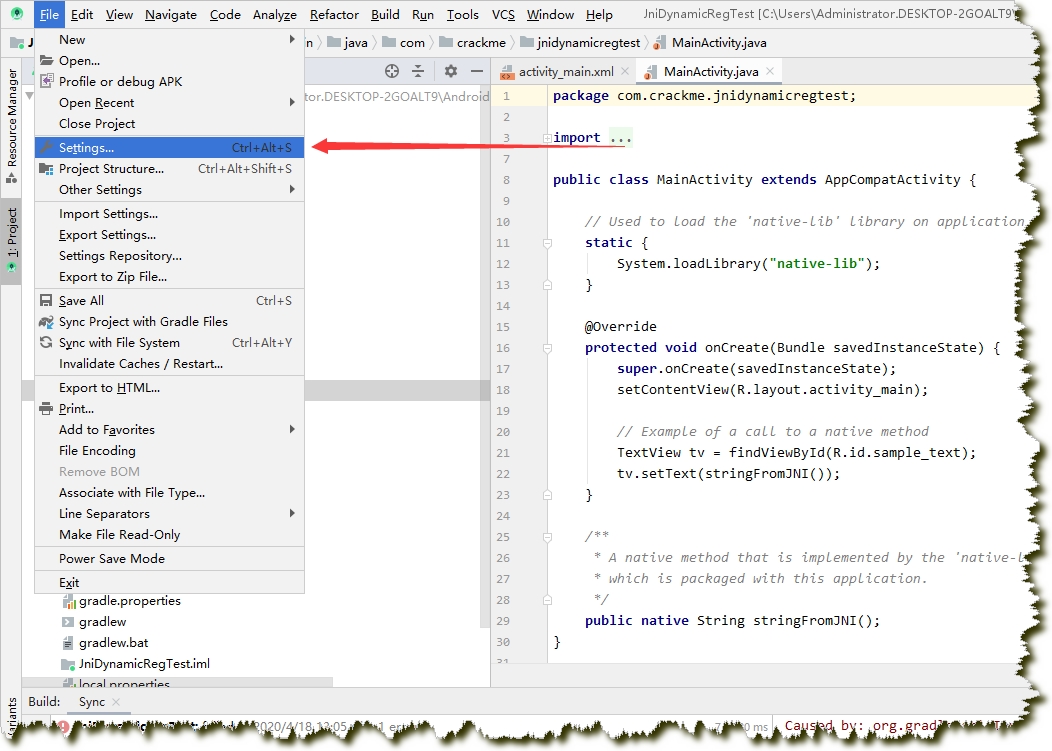
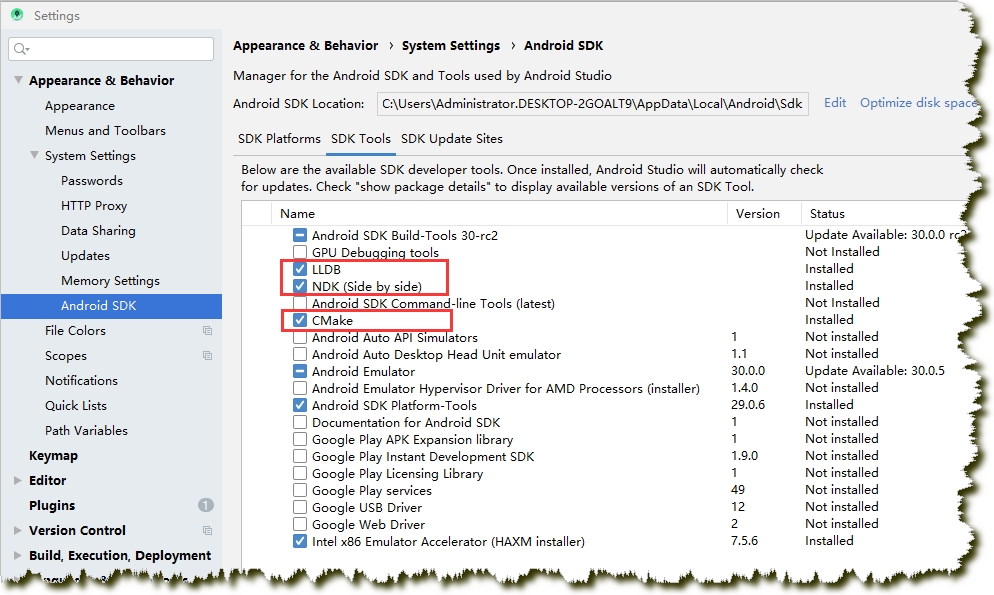
4.File->Settings->Android SDK->SDK Tools选项下,安装LLDB,NDK,CMake
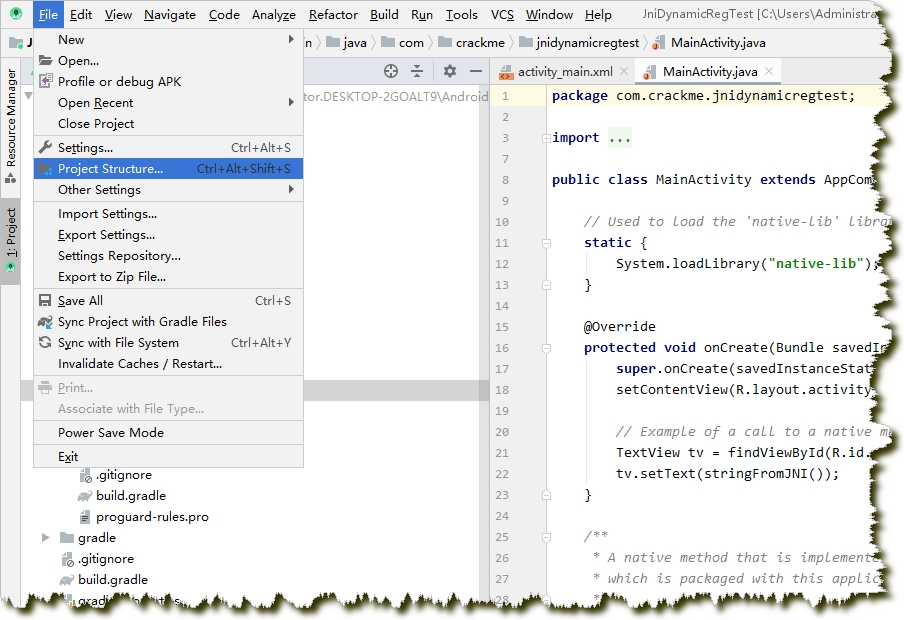
5.File->Project Structure->SDK Location->Android NDK Location ,选择Default xxxx选项,从而配置完成NDK

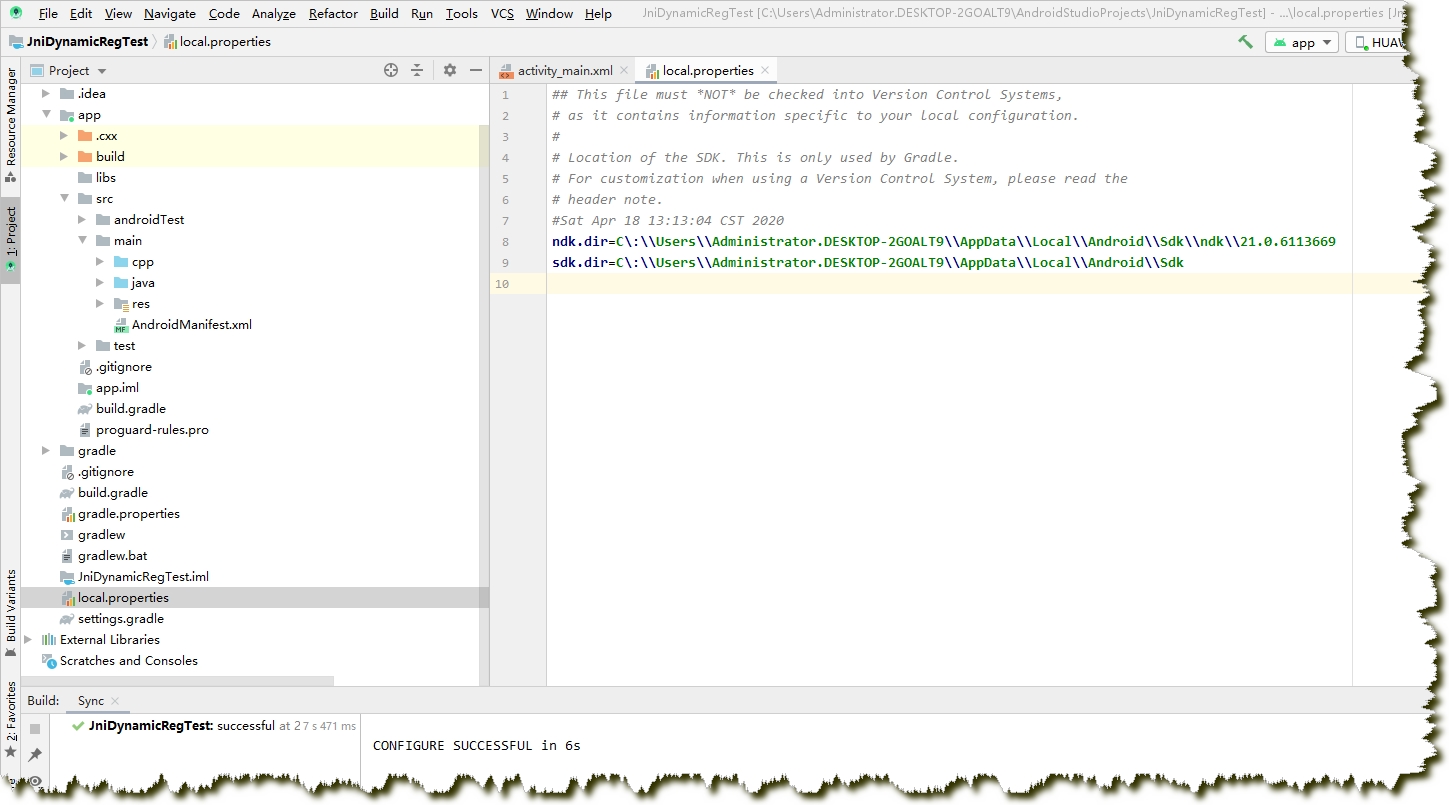
6.为了验证上一步是否配置成功,需要来到local.properties,如果同时出现ndk.dir=xxx sdk.dir=xxx 证明配置成功
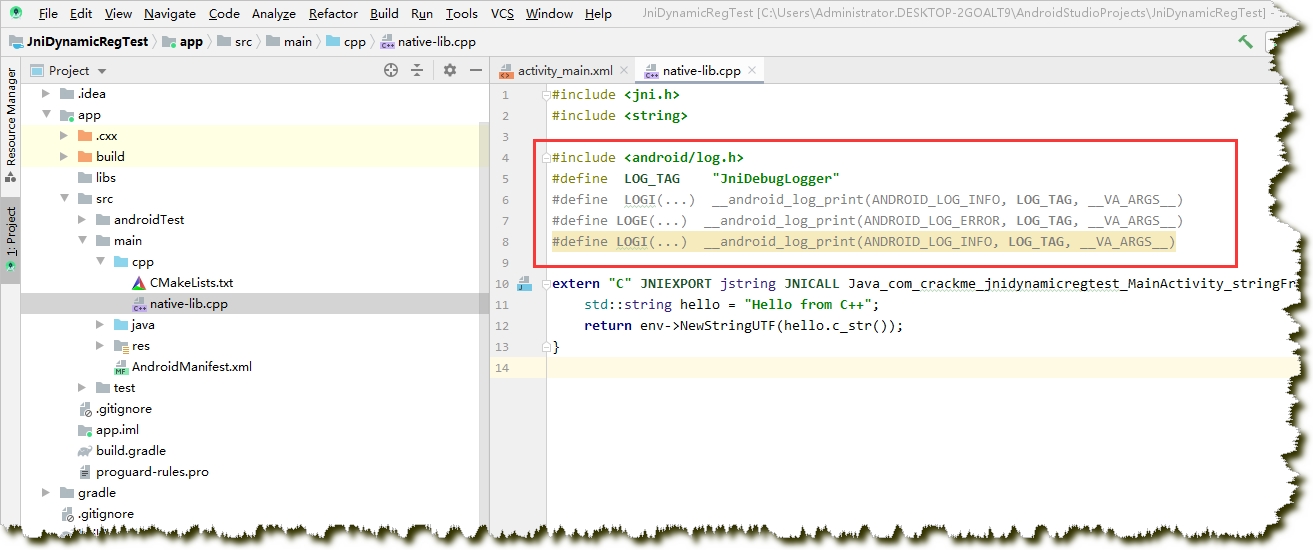
7.此时如果我们对native-lib.cpp进行编辑,可以看到出现了智能提示。就代表我们的环境配置没有问题了。

8.接下来我们添加日志打印输出,将下面代码添加到cpp文件头部,使用的时候直接调用就行,比如:LOGI("我是输出的日志信息");
#include <android/log.h>
#define LOG_TAG    "JniDebugLogger"
#define LOGI(...)  __android_log_print(ANDROID_LOG_INFO, LOG_TAG, __VA_ARGS__)
#define LOGE(...)  __android_log_print(ANDROID_LOG_ERROR, LOG_TAG, __VA_ARGS__)
#define LOGI(...)  __android_log_print(ANDROID_LOG_INFO, LOG_TAG, __VA_ARGS__)
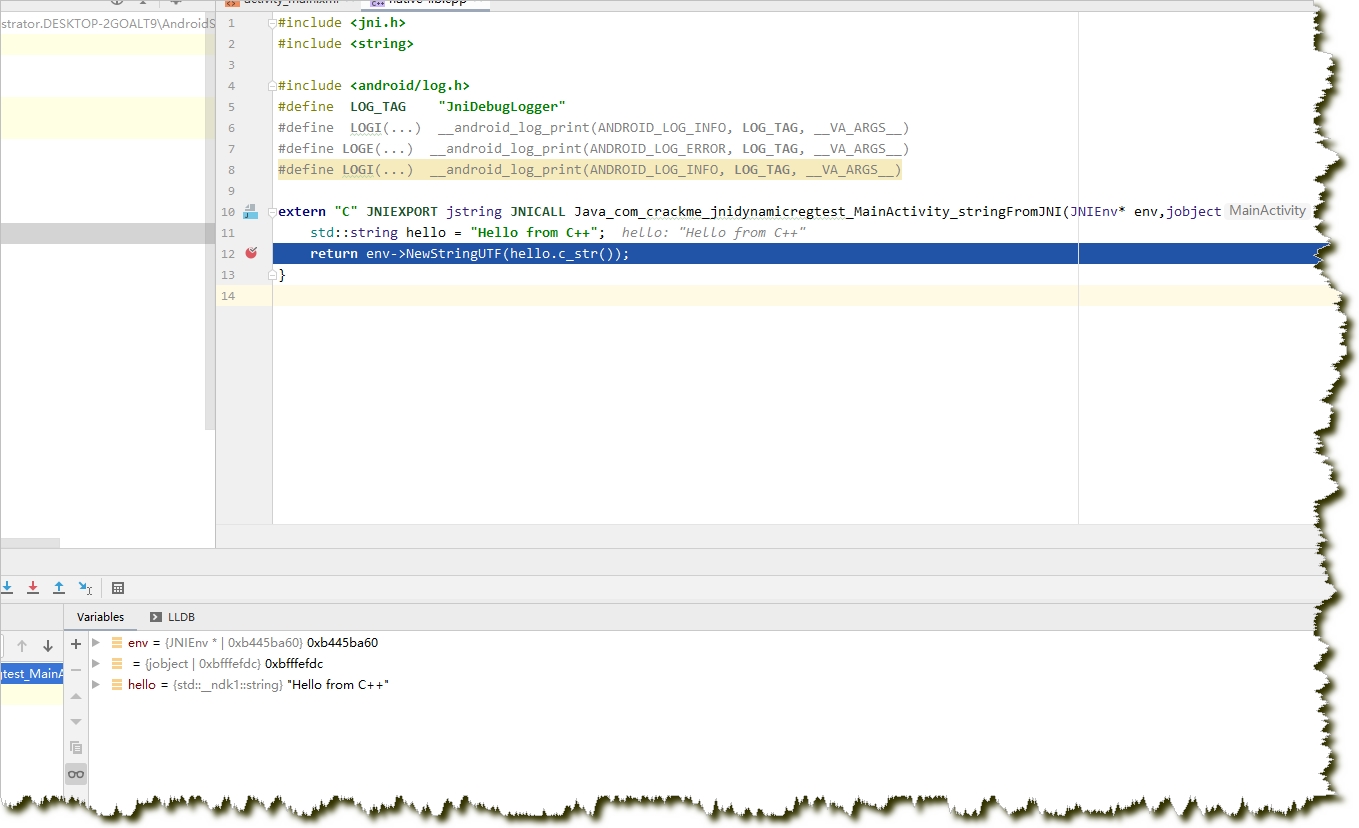
9.接下来我们在C/C++代码下断点,并点击Debug图标。看是否能正确断下。

10.注意,当出现如下界面时,千万别点击,只需要什么都不做,等几秒钟,断点断下就行。

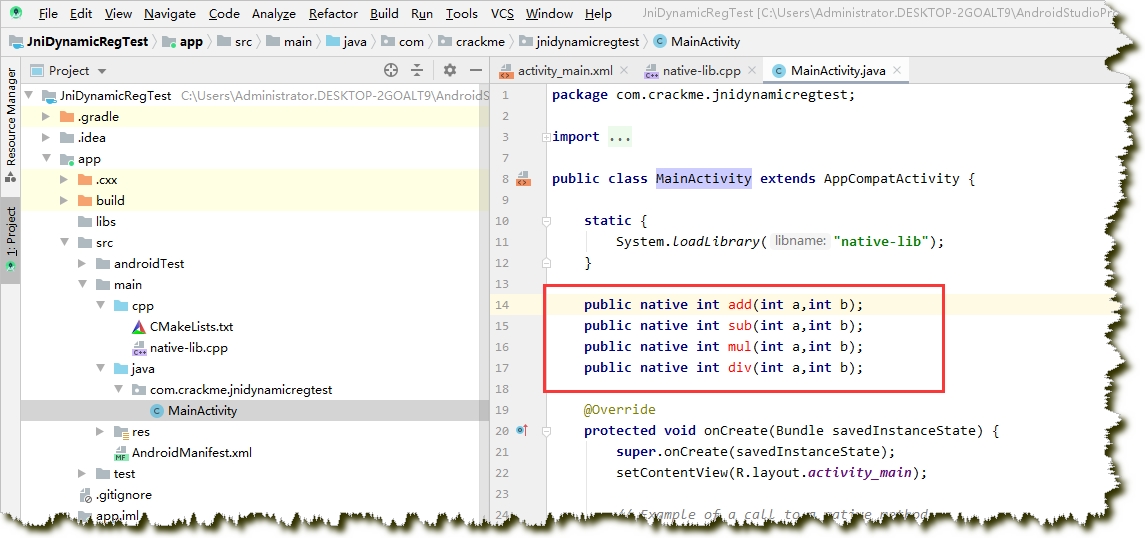
11.接下来我们在MainActivity中定义4个Native方法,分别为 add sub mul div
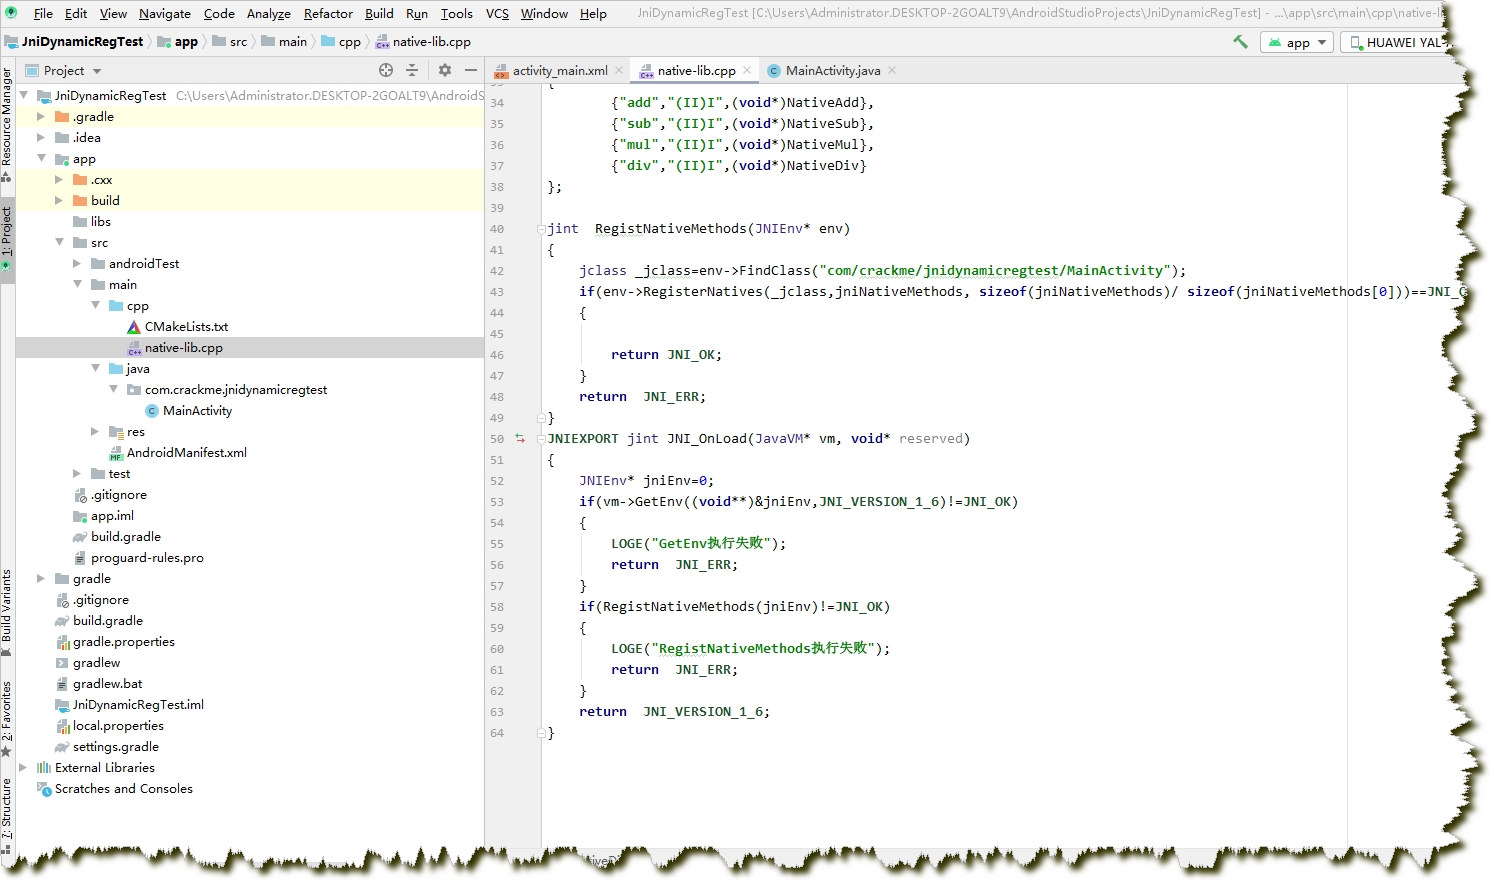
12.在native-lib.cpp里实现MainActivity的方法,native-lib.cpp源码如下
#include <jni.h>
#include <string>

#include <android/log.h>
#define  LOG_TAG    "JniDebugLogger"
#define  LOGI(...)  __android_log_print(ANDROID_LOG_INFO, LOG_TAG, __VA_ARGS__)
#define LOGE(...)  __android_log_print(ANDROID_LOG_ERROR, LOG_TAG, __VA_ARGS__)
#define LOGI(...)  __android_log_print(ANDROID_LOG_INFO, LOG_TAG, __VA_ARGS__)

extern "C" JNIEXPORT jstring JNICALL Java_com_crackme_jnidynamicregtest_MainActivity_stringFromJNI(JNIEnv* env,jobject /* this */) {
    std::string hello = "Hello from C++";
    return env->NewStringUTF(hello.c_str());
}

jint NativeAdd(JNIEnv* env,jobject  obj,jint a,jint b)
{
    return a+b;
}

jint NativeSub(JNIEnv* env,jobject  obj,jint a,jint b)
{
    return a-b;
}
jint NativeMul(JNIEnv* env,jobject  obj,jint a,jint b)
{
    return a*b;
}
jint NativeDiv(JNIEnv* env,jobject  obj,jint a,jint b)
{
    return a/b;
}
JNINativeMethod jniNativeMethods[]
{
        {"add","(II)I",(void*)NativeAdd},
        {"sub","(II)I",(void*)NativeSub},
        {"mul","(II)I",(void*)NativeMul},
        {"div","(II)I",(void*)NativeDiv}
};

jint  RegistNativeMethods(JNIEnv* env)
{
    jclass _jclass=env->FindClass("com/crackme/jnidynamicregtest/MainActivity");
    if(env->RegisterNatives(_jclass,jniNativeMethods, sizeof(jniNativeMethods)/ sizeof(jniNativeMethods[0]))==JNI_OK)
    {

        return JNI_OK;
    }
    return  JNI_ERR;
}
JNIEXPORT jint JNI_OnLoad(JavaVM* vm, void* reserved)
{
    JNIEnv* jniEnv=0;
    if(vm->GetEnv((void**)&jniEnv,JNI_VERSION_1_6)!=JNI_OK)
    {
        LOGE("GetEnv执行失败");
        return  JNI_ERR;
    }
    if(RegistNativeMethods(jniEnv)!=JNI_OK)
    {
        LOGE("RegistNativeMethods执行失败");
        return  JNI_ERR;
    }
    return  JNI_VERSION_1_6;
}
13.在MainActivity里添加测试代码,运行测试

14.运行测试Native层没有问题,接下来添加Java层代码并在界面增加控件,实现简单的计算器。MainActivity代码如下
package com.crackme.jnidynamicregtest;

import androidx.appcompat.app.AppCompatActivity;

import android.os.Bundle;
import android.view.View;
import android.widget.Button;
import android.widget.EditText;
import android.widget.TextView;

public class MainActivity extends AppCompatActivity {

    static {
        System.loadLibrary("native-lib");
    }

    public native int add(int a,int b);
    public native int sub(int a,int b);
    public native int mul(int a,int b);
    public native int div(int a,int b);

    @Override
    protected void onCreate(Bundle savedInstanceState) {
        super.onCreate(savedInstanceState);
        setContentView(R.layout.activity_main);
        // Example of a call to a native method

        Button btnAdd=(Button)findViewById(R.id.btnAdd);
        Button btnSub=(Button)findViewById(R.id.btnSub);
        Button btnMul=(Button)findViewById(R.id.btnMul);
        Button btnDiv=(Button)findViewById(R.id.btnDiv);
        View.OnClickListener ocl=  new View.OnClickListener() {
            @Override
            public void onClick(View v) {
                EditText editTextA=(EditText)findViewById(R.id.editTextA);
                int nA=Integer.parseInt(editTextA.getText().toString());
                EditText editTextB=(EditText)findViewById(R.id.editTextB);
                int nB=Integer.parseInt(editTextB.getText().toString());
                TextView tv = findViewById(R.id.sample_text);
                    switch (v.getId())
                    {
                        case R.id.btnAdd:
                            tv.setText(""+add(nA,nB));
                            break;
                        case R.id.btnSub:
                            tv.setText(""+sub(nA,nB));
                            break;
                        case R.id.btnMul:
                            tv.setText(""+mul(nA,nB));
                            break;
                        case R.id.btnDiv:
                            tv.setText(""+div(nA,nB));
                            break;
                    }
            }
        };
        btnAdd.setOnClickListener(ocl);
        btnSub.setOnClickListener(ocl);
        btnMul.setOnClickListener(ocl);
        btnDiv.setOnClickListener(ocl);


    }

    /**
     * A native method that is implemented by the 'native-lib' native library,
     * which is packaged with this application.
     */
    public native String stringFromJNI();
}
15.activity_main.xml代码如下
<?xml version="1.0" encoding="utf-8"?>
<androidx.constraintlayout.widget.ConstraintLayout xmlns:android="http://schemas.android.com/apk/res/android"
    xmlns:app="http://schemas.android.com/apk/res-auto"
    xmlns:tools="http://schemas.android.com/tools"
    android:layout_width="match_parent"
    android:layout_height="match_parent"
    tools:context=".MainActivity">

    <EditText
        android:id="@+id/editTextB"
        android:layout_width="wrap_content"
        android:layout_height="wrap_content"
        android:layout_marginTop="56dp"
        android:autofillHints=""
        android:ems="10"
        android:inputType="textPersonName"
        android:text="@string/ediB"
        app:layout_constraintStart_toStartOf="@+id/editTextA"
        app:layout_constraintTop_toBottomOf="@+id/editTextA" />

    <TextView
        android:id="@+id/sample_text"
        android:layout_width="92dp"
        android:layout_height="23dp"
        android:text="Hello World!"
        app:layout_constraintBottom_toBottomOf="parent"
        app:layout_constraintHorizontal_bias="0.498"
        app:layout_constraintLeft_toLeftOf="parent"
        app:layout_constraintRight_toRightOf="parent"
        app:layout_constraintTop_toTopOf="parent"
        app:layout_constraintVertical_bias="0.795" />

    <EditText
        android:id="@+id/editTextA"
        android:layout_width="wrap_content"
        android:layout_height="wrap_content"
        android:layout_marginTop="91dp"
        android:autofillHints=""
        android:ems="10"
        android:inputType="textPersonName"
        android:text="@string/ediA"
        app:layout_constraintEnd_toEndOf="parent"
        app:layout_constraintStart_toStartOf="parent"
        app:layout_constraintTop_toTopOf="parent" />

    <Button
        android:id="@+id/btnAdd"
        android:layout_width="wrap_content"
        android:layout_height="wrap_content"
        android:layout_marginEnd="16dp"
        android:text="@string/add"
        app:layout_constraintBaseline_toBaselineOf="@+id/btnSub"
        app:layout_constraintEnd_toStartOf="@+id/btnSub"
        app:layout_constraintHorizontal_chainStyle="packed"
        app:layout_constraintStart_toStartOf="parent" />

    <Button
        android:id="@+id/btnSub"
        android:layout_width="wrap_content"
        android:layout_height="wrap_content"
        android:layout_marginTop="60dp"
        android:layout_marginEnd="5dp"
        android:text="@string/sub"
        app:layout_constraintEnd_toEndOf="parent"
        app:layout_constraintStart_toEndOf="@+id/btnAdd"
        app:layout_constraintTop_toBottomOf="@+id/editTextB" />

    <Button
        android:id="@+id/btnDiv"
        android:layout_width="wrap_content"
        android:layout_height="wrap_content"
        android:layout_marginTop="34dp"
        android:layout_marginEnd="5dp"
        android:text="@string/div"
        app:layout_constraintEnd_toEndOf="parent"
        app:layout_constraintStart_toEndOf="@+id/btnMul"
        app:layout_constraintTop_toBottomOf="@+id/btnSub" />

    <Button
        android:id="@+id/btnMul"
        android:layout_width="wrap_content"
        android:layout_height="wrap_content"
        android:layout_marginEnd="16dp"
        android:text="@string/mul"
        app:layout_constraintBaseline_toBaselineOf="@+id/btnDiv"
        app:layout_constraintEnd_toStartOf="@+id/btnDiv"
        app:layout_constraintHorizontal_chainStyle="packed"
        app:layout_constraintStart_toStartOf="parent" />

</androidx.constraintlayout.widget.ConstraintLayout>

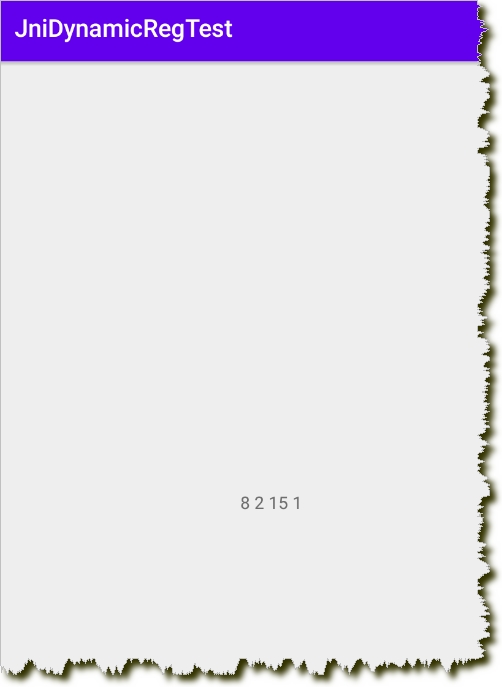
16.测试运行
源文件下载:
链接:https://pan.baidu.com/s/1KZrjlLP9OiThZdT-MYeJbA
提取码:qiol