概述
本文主要讲的是如何使用Java Bean来配置Spring,而不是用xml来配置Spring。
本文主要是代码,需要注意的都在注释里面。
Java配置Spring
 1 package com.wisely.highlight_spring4.ch1.javaconfig;
 2
 3 /**
 4  * 最终被调用的类
 5  */
 6 public class FunctionService {
 7     public String sayHello(String word){
 8         return "Hello " + word +" !";
 9     }
10 }
 1 package com.wisely.highlight_spring4.ch1.javaconfig;
 2
 3 /**
 4  * 调用类
 5  */
 6 public class UseFunctionService {
 7     //这里也可以使用@Autowired将FunctionService的实体bean注入到UseFunctionService中,
 8     //让UseFunctionService具备将FunctionService的实体bean注入到UseFunctionService中的功能
 9     //@Autowired
10     FunctionService functionService;
11
12     public void setFunctionService(FunctionService functionService) {
13         this.functionService = functionService;
14     }
15
16     public String SayHello(String word){
17         return functionService.sayHello(word);
18     }
19 }
 1 package com.wisely.highlight_spring4.ch1.javaconfig;
 2
 3 import org.springframework.context.annotation.Bean;
 4 import org.springframework.context.annotation.Configuration;
 5
 6 /**
 7  * 配置类,代替xml配置
 8  */
 9 //声明当前类是一个配置类
10 @Configuration
11 //自动扫描包名下所有使用@Service/@Component/@Repository和@Controller的类,并注册为Bean
12 //@ComponentScan("com.wisely.highlight_spring4.ch1")
13 public class JavaConfig {
14     /**
15      * 声明当前方法的返回值是一个bean,bean的名称是方法名
16      * @return bean
17      */
18     @Bean
19     public FunctionService functionService(){
20         return new FunctionService();
21     }
22
23     @Bean
24     public UseFunctionService useFunctionService(){
25         UseFunctionService useFunctionService = new UseFunctionService();
26         //注入FunctionService的时候直接调用functionService
27         useFunctionService.setFunctionService(functionService()); //3
28         return useFunctionService;
29
30     }
31     /**
32      * 也可以将bean作为方法参数传入,spring会自动注入
33      */
34 //    @Bean
35 //    public UseFunctionService useFunctionService(FunctionService functionService){//4
36 //        UseFunctionService useFunctionService = new UseFunctionService();
37 //        useFunctionService.setFunctionService(functionService);
38 //        return useFunctionService;
39 //    }
40 }
 1 package com.wisely.highlight_spring4.ch1.javaconfig;
 2
 3 import org.springframework.context.annotation.AnnotationConfigApplicationContext;
 4
 5 /**
 6  * 程序入口
 7  */
 8 public class Main {
 9     public static void main(String[] args) {
10         //使用AnnotationConfigApplicationContext作为容器,
11         //接受输入一个配置类作为参数
12         AnnotationConfigApplicationContext context =
13                 new AnnotationConfigApplicationContext(JavaConfig.class);
14         //获得声明配置的UseFunctionService的Bean
15         UseFunctionService useFunctionService = context.getBean(UseFunctionService.class);
16         //调用输出方法
17         System.out.println(useFunctionService.SayHello("java config"));
18         context.close();
19     }
20 }
最终效果如下所示

Java配置AOP
 1 package com.wisely.highlight_spring4.ch1.aop;
 2
 3 import java.lang.annotation.Documented;
 4 import java.lang.annotation.ElementType;
 5 import java.lang.annotation.Retention;
 6 import java.lang.annotation.RetentionPolicy;
 7 import java.lang.annotation.Target;
 8
 9 /**
10  * 拦截规则的注解
11  */
12 @Target(ElementType.METHOD)
13 @Retention(RetentionPolicy.RUNTIME)
14 @Documented
15 public @interface Action {
16     //注解参数
17     String name();
18 }
 1 package com.wisely.highlight_spring4.ch1.aop;
 2
 3 import org.springframework.stereotype.Service;
 4
 5 /**
 6  * 使用注解的被拦截类
 7  */
 8 @Service
 9 public class DemoAnnotationService {
10     @Action(name="注解式拦截的add操作")
11     public void add(){}
12 }
 1 package com.wisely.highlight_spring4.ch1.aop;
 2
 3 import org.springframework.stereotype.Service;
 4
 5 /**
 6  * 使用方法规则被拦截类
 7  */
 8 @Service
 9 public class DemoMethodService {
10     public void add(){}
11 }
 1 package com.wisely.highlight_spring4.ch1.aop;
 2
 3 import org.aspectj.lang.JoinPoint;
 4 import org.aspectj.lang.annotation.After;
 5 import org.aspectj.lang.annotation.Aspect;
 6 import org.aspectj.lang.annotation.Before;
 7 import org.aspectj.lang.annotation.Pointcut;
 8 import org.aspectj.lang.reflect.MethodSignature;
 9 import org.springframework.stereotype.Component;
10
11 import java.lang.reflect.Method;
12
13 /**
14  * 配置切面
15  */
16 @Aspect //声明切面
17 @Component //让切面成为spring容器管理的bean
18 public class LogAspect {
19     //声明切点,拦截Action
20     @Pointcut("@annotation(com.wisely.highlight_spring4.ch1.aop.Action)")
21     public void annotationPointCut() {
22     }
23
24     //声明建言,并使用@Pointcut定义的切点annotationPointCut()
25     @After("annotationPointCut()")
26     public void after(JoinPoint joinPoint) {
27         MethodSignature signature = (MethodSignature) joinPoint.getSignature();
28         Method method = signature.getMethod();
29         Action action = method.getAnnotation(Action.class);
30         //通过反射获可得注解上的name属性,然后做日志记录相关的操作
31         System.out.println("注解式拦截 " + action.name());
32     }
33
34     //声明建言,直接使用拦截规则作为参数
35     @Before("execution(* com.wisely.highlight_spring4.ch1.aop.DemoMethodService.*(..))")
36     public void before(JoinPoint joinPoint) {
37         MethodSignature signature = (MethodSignature) joinPoint.getSignature();
38         Method method = signature.getMethod();
39         System.out.println("方法规则式拦截," + method.getName());
40     }
41 }
 1 package com.wisely.highlight_spring4.ch1.aop;
 2
 3 import org.springframework.context.annotation.ComponentScan;
 4 import org.springframework.context.annotation.Configuration;
 5 import org.springframework.context.annotation.EnableAspectJAutoProxy;
 6
 7 /**
 8  * Spring配置类,因为程序中使用了诸如@Service之类的配置,所以这里不用写其他配置
 9  * 只需要使用@ComponentScan扫描一下就可以了
10  */
11 @Configuration
12 //扫描注解,注册bean
13 @ComponentScan("com.wisely.highlight_spring4.ch1.aop")
14 //开启spring对AspectJ的支持
15 @EnableAspectJAutoProxy //1
16 public class AopConfig {
17
18 }
 1 package com.wisely.highlight_spring4.ch1.aop;
 2
 3 import org.springframework.context.annotation.AnnotationConfigApplicationContext;
 4
 5 /**
 6  * 程序入口
 7  */
 8 public class Main {
 9     public static void main(String[] args) {
10          AnnotationConfigApplicationContext context =
11                     new AnnotationConfigApplicationContext(AopConfig.class);
12          DemoAnnotationService demoAnnotationService = context.getBean(DemoAnnotationService.class);
13          DemoMethodService demoMethodService = context.getBean(DemoMethodService.class);
14          demoAnnotationService.add();
15          demoMethodService.add();
16          context.close();
17     }
18 }
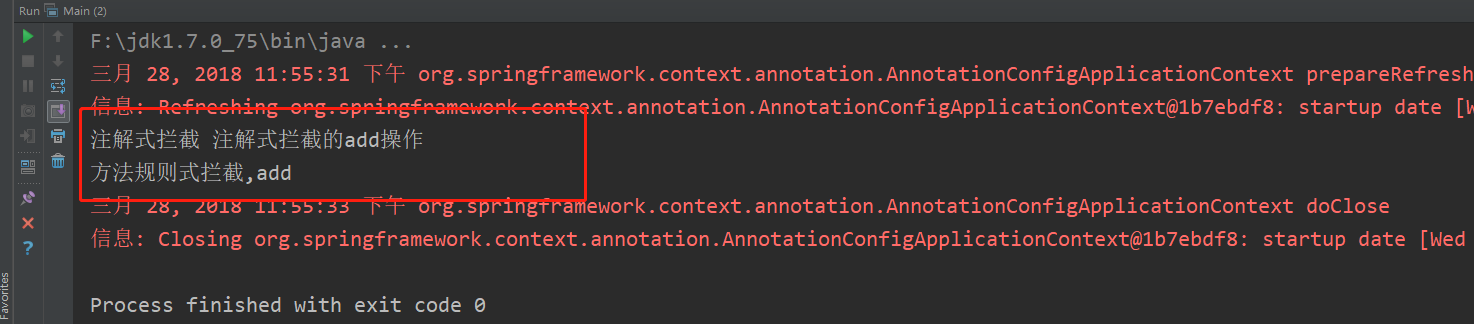
最终效果如下所示