Spring Boot静态资源和文件上传
写在前面
从零开始的Spring Boot(2、在Spring Boot中整合Servlet、Filter、Listener的方式)
https://www.cnblogs.com/gaolight/p/13121984.html
从零开始的Spring Boot(4、Spring Boot整合JSP和Freemarker)
https://www.cnblogs.com/gaolight/p/13132021.html
一、访问静态资源
(一)、SpringBoot访问静态资源
在SpringBoot项目中没有我们之前常规web开发的WebContent(WebApp),它只有src目录。在src/main/resources下面有两个文件夹, static和templates。SpringBoot默认在static目录中存放静态页面,而templates中放动态页面。
1. static 目录
Spring Boot通过classpath/static 目录访问静态资源。注意存放静态资源的目录名称必须是static。
2. templates 目录
在Spring Boot中不推荐使用jsp作为视图层技术,而是默认使用Thymeleaf来做动态页
面。Templates 目录这是存放Thymeleaf的页面。
(二)、静态资源存放其他位置
SpringBoot访问静态资源的位置(依次访问)
classpath:/META - INF/resources/
classpath:/resoupces/
classpath:/static/
classpath:/public/
(三)、自定义静态资源位置
将静态资源放在xx目录下,在application.properties中增加配置:
spring.resources.static-location=classpath:/xx/
二、文件上传
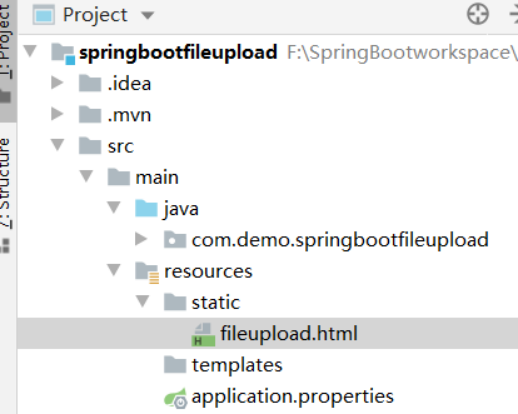
1.如图,在static下创建fileupload.html文件,修改代码;

<!DOCTYPE html>
<html lang="en">
<head>
<meta charset="UTF-8">
<title>Title</title>
</head>
<body>
<form action="/fileUploadController" method="post" enctype="multipart/form-data">
<input type="file" name="file"/>
<input type="submit" value="OKOK"/>
</form>
</body>
</html>
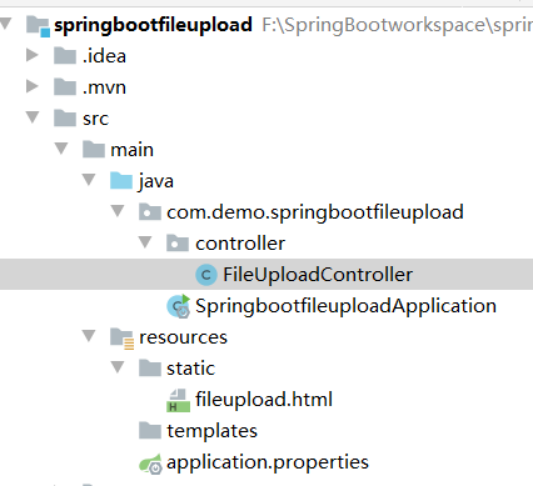
2.如图,在包controller(新建)下新建FileUploadController类,修改代码;

package com.demo.springbootfileupload.controller;
import org.springframework.web.bind.annotation.PostMapping;
import org.springframework.web.bind.annotation.RestController;
import org.springframework.web.multipart.MultipartFile;
import java.io.File;
import java.io.IOException;
@RestController
public class FileUploadController {
@PostMapping("/fileUploadController")//@ PostMapping用于处理请求方法的POST类型等
public String fileUpload(MultipartFile file) throws IOException {
System.out.println(file.getOriginalFilename());
file.transferTo(new File("D:/"+file.getOriginalFilename()));
return "OK";
}
}
3.运行启动类,在浏览器中输入http://localhost:8080/fileupload.html
点击选择文件,我这里选择一张图片,点击”OKOK”,上传成功,将文件上传到本地的D盘下。


