第一步: 创建一个SpringBoot应用
第二步: 创建一个实体,用来存储数据,在src/main/java/com/example/first下创建包entity , 在entity下创建Person.java文件
package com.example.first.entity;
public class Person {
    private String name;
    private int age;

  //seter , getter,toString方法
}
第三步: 创建resource, 在src/main/java/com/example/first下创建包resource, resource下创建PersonResource.java
package com.example.first.resource;

import com.example.first.entity.Person;
import org.springframework.stereotype.Controller;
import org.springframework.ui.ModelMap;
import org.springframework.web.bind.annotation.RequestMapping;
import org.springframework.web.bind.annotation.RequestMethod;
import org.springframework.web.bind.annotation.RequestParam;

@Controller
@RequestMapping("/person")
public class PersonResource {

    @RequestMapping(value = "/show",method = RequestMethod.GET)  /**请求地址: localhost:8080/person/show?name=zhang&age=23 请求方式是get*/
    private String show(@RequestParam("name")String name,@RequestParam("age")int age,ModelMap map){   /**@RequestParam("name")绑定请求地址中的name到参数name中    ModelMap map 存放返回内容*/
        Person person = new Person();
        person.setName(name);
        person.setAge(age);
        map.addAttribute("person",person);
        return "index";    /**返回的是显示数据的html的文件名*/
    }

}
第三步:创建index.html文件
<!DOCTYPE html>
<html xmlns:th="http://www.thymeleaf.org" lang="zh">
<head>
    <meta charset="UTF-8"/>
    <title>Title</title>
</head>
<body>

<span th:text="${person.name}"></span><hr/>
<span th:text="${person.age}"></span><hr/>
<span th:text="${person}"></span>

</body>
</html>
第四步:在application.properties中添加模板引擎
spring.thymeleaf.prefix=classpath:/templates/
spring.thymeleaf.suffix=.html
spring.thymeleaf.mode = HTML5
第五步: 在pom文件中添加依赖
<?xml version="1.0" encoding="UTF-8"?>
<project xmlns="http://maven.apache.org/POM/4.0.0" xmlns:xsi="http://www.w3.org/2001/XMLSchema-instance"
    xsi:schemaLocation="http://maven.apache.org/POM/4.0.0 http://maven.apache.org/xsd/maven-4.0.0.xsd">
    <modelVersion>4.0.0</modelVersion>

    <groupId>com.example.first</groupId>
    <artifactId>springboot</artifactId>
    <version>0.0.1-SNAPSHOT</version>
    <packaging>jar</packaging>

    <name>springboot</name>
    <description>Demo project for Spring Boot</description>

    <parent>
        <groupId>org.springframework.boot</groupId>
        <artifactId>spring-boot-starter-parent</artifactId>
        <version>1.5.6.RELEASE</version>
        <relativePath/> <!-- lookup parent from repository -->
    </parent>

    <properties>
        <project.build.sourceEncoding>UTF-8</project.build.sourceEncoding>
        <project.reporting.outputEncoding>UTF-8</project.reporting.outputEncoding>
        <java.version>1.8</java.version>
    </properties>

    <dependencies>
        <dependency>
            <groupId>org.springframework.boot</groupId>
            <artifactId>spring-boot-starter-web</artifactId>
        </dependency>

        <dependency>
            <groupId>org.springframework.boot</groupId>
            <artifactId>spring-boot-starter-test</artifactId>
            <scope>test</scope>
        </dependency>
        <dependency>
            <groupId>org.springframework.boot</groupId>
            <artifactId>spring-boot-starter-thymeleaf</artifactId>
        </dependency>

    </dependencies>

    <build>
        <plugins>
            <plugin>
                <groupId>org.springframework.boot</groupId>
                <artifactId>spring-boot-maven-plugin</artifactId>
            </plugin>
        </plugins>
    </build>


</project>
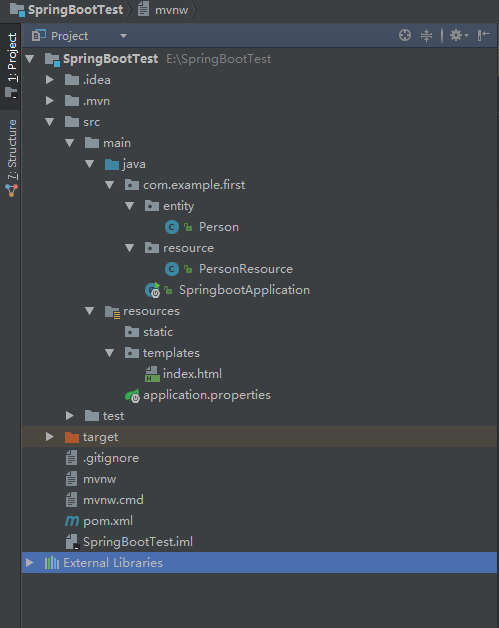
第五步:启动前目录结构
第六步: 配置启动

第七步:启动SpringbootApplication
package com.example.first;

import org.springframework.boot.SpringApplication;
import org.springframework.boot.autoconfigure.SpringBootApplication;
import org.springframework.web.bind.annotation.RestController;

@RestController
@SpringBootApplication
public class SpringbootApplication {

    public static void main(String[] args) {
        SpringApplication.run(SpringbootApplication.class, args);
    }
}
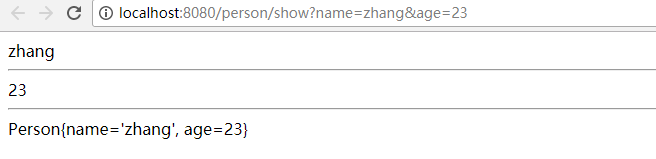
第八步:在地址栏输入http://localhost:8080/person/show?name=zhang&age=23
第九步: 显示效果