第一种方法:(未使用)


yum install docker
// 下载镜像
docker pull dperson/samba
// 启动镜像,具体看文档,但重要的配置是以下的注释
docker run --name samba
-it -p 139:139 -p 445:445
-v /home/technofiend:/home/technofiend                #共享目录
-d dperson/samba
-u "www;thisispasswd"                                 #访问用户
-s "technofiend;/home/technofiend/;yes;no;no;all;none" #共享配置
// 密码跟本机一致,1001为用户id,具体查看你本机的/etc/passwd文件,设置为共享目录所属用户
docker exec -it samba sed -i 's/1000/1001/g' /etc/passwd
// 组跟本机一致,1001为组id,具体查看你本机的/etc/group文件,设置为共享目录所属组
docker exec -it samba sed -i 's/1000/1001/g' /etc/group
// 替换samba的启动用户,与权限有关
docker exec -it samba sed -i 's/force user = smbuser/force user = www/g' /etc/samba/smb.conf
// 替换samba的启动组,与权限有关
docker exec -it samba sed -i 's/force group = users/force group = www/g' /etc/samba/smb.conf
// 重启samba
docker restart samba

用户id那块看清楚了。但docker实例里面新建的第一个用户是1000.这里跟你主机的用户权限需要一直,所以得替换成同样的id,用户和组也得要
就是新进容器建这个用户
第二种方法:(实验成功)
第一步安装docker:
yum install docker-engine
第二步启动服务:
service docker start
第三步:
docker pull dperson/samba
第四步:

docker run -it --name samba -p 139:139 -p 445:445 -v /home:/mount -d dperson/samba -u "www;overkill" -s "www;/mount/;yes;no;no;all;none"
开放了139和445端口。 用服务器访问即可!
要是想把容器的权限与宿主主机的用户权限一致的话,则只需要把用户和组文件映射到容器里面即可:
docker run -it --name samba -p 139:139 -p 445:445 -v /home:/mount -v /etc/passwd:/etc/passwd -v /etc/group:/etc/group -d dperson/samba -s "www;/mount/;yes;no;no;all;none"
请注意 -s 参数后面的第一个;前面的是现已存在的用户名。
官方使用教程:https://github.com/dperson/samba
三、配置方法
系统:ubuntu16.04
配置文件:/etc/samba/smb.conf
Samba的主配置文件叫smb.conf,默认在/etc/samba/目录下
配置文件详解
# This is the main Samba configuration file. You should read the
# smb.conf(5) manual page in order to understand the options listed
# here. Samba has a huge number of configurable options (perhaps too
# many!) most of which are not shown in this example
#
# Any line which starts with a ; (semi-colon) or a # (hash)
# is a comment and is ignored. In this example we will use a #
# for commentry and a ; for parts of the config file that you
# may wish to enable
#
# NOTE: Whenever you modify this file you should run the command "testparm"
# to check that you have not made any basic syntactic errors.
#
#======================= Global Settings =====================================
[global]

# workgroup = NT-Domain-Name or Workgroup-Name
   workgroup = MYGROUP
#设定 Samba Server 所要加入的工作组或者域
# server string is the equivalent of the NT Description field
   server string = Samba Server
#设定 Samba Server 的注释,可以是任何字符串,也可以不填。宏%v表示显示Samba的版本号

# This option is important for security. It allows you to restrict
# connections to machines which are on your local network. The
# following example restricts access to two C class networks and
# the "loopback" interface. For more examples of the syntax see
# the smb.conf man page
;   hosts allow = 192.168.1. 192.168.2. 127.
#表示允许连接到Samba Server的客户端,多个参数以空格隔开。可以用一个IP表示,也可以用一个网段表示。hosts deny 与hosts allow 刚好相反。
# if you want to automatically load your printer list rather
# than setting them up individually then you'll need this
   printcap name = /dev/null
   load printers = no

# It should not be necessary to spell out the print system type unless
# yours is non-standard. Currently supported print systems include:
# bsd, sysv, plp, lprng, aix, hpux, qnx
   printing = bsd

# Uncomment this if you want a guest account, you must add this to /etc/passwd
# otherwise the user "nobody" is used
;  guest account = pcguest

# this tells Samba to use a separate log file for each machine
# that connects
   log file = /dev/stdout
#日志文件的存储位置以及日志文件名称
# Put a capping on the size of the log files (in Kb).
   max log size = 50
#设置Samba Server日志文件的最大容量,单位为kB,0代表不限制
# Security mode. Most people will want user level security. See
# security_level.txt for details.
   security = user
#用户访问Samba Server的验证方式
;   password server = <NT-Server-Name>

# Password Level allows matching of _n_ characters of the password for
# all combinations of upper and lower case.
;  username level = 8

# You may wish to use password encryption. Please read
# ENCRYPTION.txt, Win95.txt and WinNT.txt in the Samba documentation.
# Do not enable this option unless you have read those documents
;  encrypt passwords = yes
;  smb passwd file = /etc/samba/smbpasswd

# The following are needed to allow password changing from Windows to
# update the Linux sytsem password also.
# NOTE: Use these with 'encrypt passwords' and 'smb passwd file' above.
# NOTE2: You do NOT need these to allow workstations to change only
#        the encrypted SMB passwords. They allow the Unix password
#        to be kept in sync with the SMB password.
   unix password sync = no
;  passwd program = /usr/bin/passwd %u
;  passwd chat = *New*UNIX*password* %n
 *ReType*new*UNIX*password* %n
 *passwd:*all*authentication*tokens*updated*successfully*

# Unix users can map to different SMB User names
;  username map = /etc/samba/smbusers

# Using the following line enables you to customise your configuration
# on a per machine basis. The %m gets replaced with the netbios name
# of the machine that is connecting
;   include = /etc/samba/smb.conf.%m

# Configure Samba to use multiple interfaces
# If you have multiple network interfaces then you must list them
# here. See the man page for details.
;   interfaces = 192.168.12.2/24 192.168.13.2/24

# Configure remote browse list synchronisation here
#  request announcement to, or browse list sync from:
#    a specific host or from / to a whole subnet (see below)
;   remote browse sync = 192.168.3.25 192.168.5.255
# Cause this host to announce itself to local subnets here
;   remote announce = 192.168.1.255 192.168.2.44

# Browser Control Options:
# set local master to no if you don't want Samba to become a master
# browser on your network. Otherwise the normal election rules apply
;   local master = no

# OS Level determines the precedence of this server in master browser
# elections. The default value should be reasonable
;   os level = 33

# Domain Master specifies Samba to be the Domain Master Browser. This
# allows Samba to collate browse lists between subnets. Don't use this
# if you already have a Windows NT domain controller doing this job
;   domain master = yes

# Preferred Master causes Samba to force a local browser election on startup
# and gives it a slightly higher chance of winning the election
;   preferred master = yes

# Use only if you have an NT server on your network that has been
# configured at install time to be a primary domain controller.
;   domain controller = <NT-Domain-Controller-SMBName>

# Enable this if you want Samba to be a domain logon server for
# Windows95 workstations.
;   domain logons = yes

# if you enable domain logons then you may want a per-machine or
# per user logon script
# run a specific logon batch file per workstation (machine)
;   logon script = %m.bat
# run a specific logon batch file per username
;   logon script = %U.bat

# Where to store roving profiles (only for Win95 and WinNT)
#        %L substitutes for this servers netbios name, %U is username
#        You must uncomment the [Profiles] share below
;   logon path = \%LProfiles\%U

# All NetBIOS names must be resolved to IP Addresses
# 'Name Resolve Order' allows the named resolution mechanism to be specified
# the default order is "host lmhosts wins bcast". "host" means use the unix
# system gethostbyname() function call that will use either /etc/hosts OR
# DNS or NIS depending on the settings of /etc/host.config, /etc/nsswitch.conf
# and the /etc/resolv.conf file. "host" therefore is system configuration
# dependant. This parameter is most often of use to prevent DNS lookups
# in order to resolve NetBIOS names to IP Addresses. Use with care!
# The example below excludes use of name resolution for machines that are NOT
# on the local network segment
# - OR - are not deliberately to be known via lmhosts or via WINS.
; name resolve order = wins lmhosts bcast

# Windows Internet Name Serving Support Section:
# WINS Support - Tells the NMBD component of Samba to enable it's WINS Server
;   wins support = yes

# WINS Server - Tells the NMBD components of Samba to be a WINS Client
#    Note: Samba can be either a WINS Server, or a WINS Client, but NOT both
;   wins server = w.x.y.z

# WINS Proxy - Tells Samba to answer name resolution queries on
# behalf of a non WINS capable client, for this to work there must be
# at least one    WINS Server on the network. The default is NO.
;   wins proxy = yes

# DNS Proxy - tells Samba whether or not to try to resolve NetBIOS names
# via DNS nslookups. The built-in default for versions 1.9.17 is yes,
# this has been changed in version 1.9.18 to no.
   dns proxy = no

# Case Preservation can be handy - system default is _no_
# NOTE: These can be set on a per share basis
   preserve case = yes
   short preserve case = yes
# Default case is normally upper case for all DOS files
   default case = lower
# Be very careful with case sensitivity - it can break things!
;  case sensitive = no

   pam password change = yes
   map to guest = bad user
   usershare allow guests = yes
   create mask = 0664
   force create mode = 0664
   directory mask = 0775
   force directory mode = 0775
#   force user = www
#   force group = www
   follow symlinks = yes
   load printers = no
   printing = bsd
   printcap name = /dev/null
   disable spoolss = yes
   socket options = TCP_NODELAY
   strict locking = no
   vfs objects = recycle
   recycle:keeptree = yes
   recycle:versions = yes
   min protocol = SMB2

[公共文件]
   path = /home/technofiend/public
   browsable = yes   #用来指定该共享是否可以浏览
   read only = no
   guest ok = no    #将设置客户端以该游客账号来访问共享
   veto files = /._*/.apdisk/.AppleDouble/.DS_Store/.TemporaryItems/.Trashes/desktop.ini/ehthumbs.db/Network Trash Folder/Temporary Items/Thumbs.db/
   delete veto files = yes
   valid users = @public
[网络开发文件]
   comment = group-web  #对该共享的描述,可以是任意字符串
   path = /home/technofiend/group/web  #共享目录路径
   public = yes        #用来指定该共享是否允许guest账户访问
   writable = yes     #用来指定该共享路径是否可写
   printable = no
   valid users = @web  #允许访问该共享的用户,组就用“@+组名”表示
[引擎开发文件]
  comment = ue4
  path = /home/technofiend/group/editor
  public = yes    #用来指定该共享是否允许guest账户访问
  writable = yes  #用来指定该共享路径是否可写
  printable = no
  valid users = @editor
[设计内部文件]
  comment = group public
  path = /home/technofiend/group/public
  public = yes    writable = yes #用来指定该共享路径是否可写
  printable = no
  valid users = @seji #允许访问该共享的用户,组就用“@+组名”表示
service smb restart 重启服务
检查语法是否正确:testparm -v
思路方法:
1)创建组:添加用户组
groupadd public 创建用户组
useradd -s /sbin/nologin -G web,public,group-public webtest1 添加到多个用户组
usermod -g seji cesiyonghu 添加到组
注意:useradd和adduser区别
useradd与adduser都是创建新的用户
在CentOs下useradd与adduser是没有区别的都是在创建用户,在home下自动创建目录,没有设置密码,需要使用passwd命令修改密码。
而在Ubuntu下useradd与adduser有所不同
1、useradd在使用该命令创建用户是不会在/home下自动创建与用户名同名的用户目录,而且不会自动选择shell版本,也没有设置密码,那么这个用户是不能登录的,需要使用passwd命令修改密码。
2、adduser在使用该命令创建用户是会在/home下自动创建与用户名同名的用户目录,系统shell版本,会在创建时会提示输入密码,更加友好。

userdel 删除用户,
userdel只能删除用户,并不会删除相关的目录文件。userdel -r 可以删除用户及相关目录。
2)变更文件夹的用户和用户组权限
chown -R :web group/web #表示所有web组
3)把用户添加到samba中
smbpasswd -a share #设置密码
4)激活用户
smbpasswd -e share
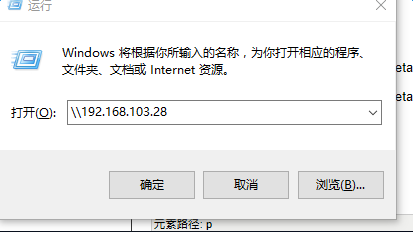
5)window下使用; 运行----输入\ip地址
文章出处:
http://blog.csdn.net/technofiend/article/details/52346303 主要转载这篇
http://blog.csdn.net/technofiend/article/details/51066262
更多注释详解:http://blog.csdn.net/dhgao38/article/details/43567403