0.特点:
a.持久化
b.单进程、单线程
c.5大数据类型
d.用于操作内存的软件。
e.虽然是缓存数据库但是可以做持久化的工作
MySQL是一个软件,帮助开发者对一台机器的硬盘进行操作。
redis是一个软件, 帮助开发者对一台机器的内存进行操作。
1.使用redis.那么现在我的云服务器上安装了redis,并且启动:

启动以后会看到如下的界面:
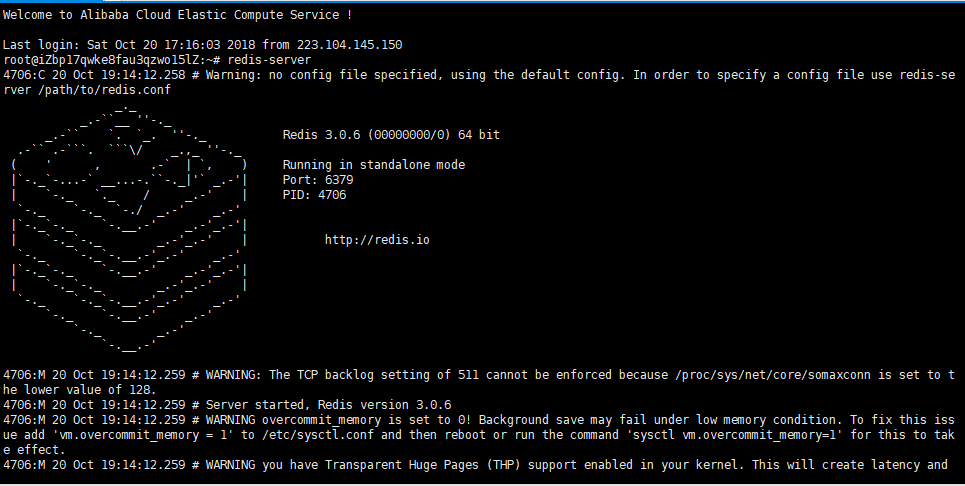
这里服务器已经启动。
2.redis配置文件初识:
配置文件路径:cd /etc/redis/redis.conf

如果出现redis下次无法启动的问题,找到该进程,关闭即可重新使用redis。
lsof -i:6379
kill pid
root@iZbp17qwke8fau3qzwo15lZ:~# ps -ef |grep redis
redis     4625     1  0 Oct20 ?        00:01:24 /usr/bin/redis-server 0.0.0.0:6379
root      5761     1  0 Oct21 ?        00:00:48 redis-server *:6379
root      6526  6502  0 09:22 pts/1    00:00:00 grep --color=auto redis
root@iZbp17qwke8fau3qzwo15lZ:~# kill -9 4625
3.下面就是使用python连接到redis.
首先
pip3 install redis
在文件中:
import redis

conn=redis.Redis(host="47.99.191.149",port=6379,password='xxxxx')   #链接到redis
conn.set("x1",'alex')                                               #给redis设置一个值

val=conn.get('x1')  #获取x1对应的值
print(val)          #alex
第二种方式:
import redis
#推荐使用连接池,链接不断开,不用长期connect
pool=redis.ConnectionPool(host="47.99.191.149",port=6379,password='xxxx',max_connections=1000)
conn=redis.Redis(connection_pool=pool)
conn.set('foo','Bar')
这种都不好,最后墙裂推荐使用单例模式来使用链接池!
1.创建一个单独的文件
import redis
pool = redis.ConnectionPool(host="47.99.191.149", port=6379, password='xxxxx', max_connections=1000)
2.在下面文件中导入这个,就是一个天然的单例连接池。(这也是提升redis性能的一个点)
import redis
from redis_poll import pool
# 创建连接池
while True:
    key=input("请输入key:")
    val=input("请输入val:")
    #去连接池中获取链接
    conn = redis.Redis(connection_pool=pool)
    #设置值
    conn.set(key, val)
连接池的源码分析:
使用连接池。不会夯住,因为使用了IO多路复用
while True:
    r,w,e=select.select([sk,sk,sk])
    一直在监测
    监测到某个sk发来消息,然后处理完返回
    三个都来,因为redis是单线程单进程,一个个的来,不用担心效率,内存操作很快。


源码中的连接池这么做!
在set的过程中建立socket对象,发了一个命令过去,发完把这connection从in_use_connection移除,
然后放到可用列表中 self.avaliable_connections.append()进去。
等下次有人想用的时候,直接pop一下把这个对象拿出来继续用。
本质:
本质就是维护一个已经和服务端链接成功的socket.以后再次发送数据直接获取socket,直接send数据,节省了开支,
这就是为什么使用连接池速度快的原因。
最后补充一个小点:
mysql端口号:3306
redis端口 :6379
接着昨天的内容继续写:
首先介绍的就是redis的五大数据类型:
        redis ={
            k1:'123',      #字符串
            k2:[1,2,3,4,4,2,1],  #列表
            k3:{1,2,3,4},        #集合
            k4:{name:123,age:666},#字典
            k5:{('alex',60),('eva',80),('yuan',70)} #有序集合
        }
操作字典:
import redis
pool=redis.ConnectionPool(host='47.99.191.149',port=6379,password="cyy520",max_connections=1000)
conn=redis.Redis(connection_pool=pool)

#字典操作:
conn.hset('k4','username','alex')
conn.hset('k4','age',18)
'''
上面的设置相当于下面这种结构

redis={
    k4:{
        username:alex,
        age:18
    }
}
'''
val=conn.hget('k4','username')      #获取字典内username的值
print(val)    #b'alex'
vals=conn.hgetall('k4')             #获取字典内所有的键值
print(vals)   #{b'username': b'alex', b'age': b'18'}
第二种多种设置方式:
conn.hmset('k5',{'username': 'alex', 'age': '19'})     #直接给k5设置键值对,不用像上面一个个的设置
val2=conn.hmget('k5','username','age')                 #获取多个值。
print(val2)   #[b'alex', b'19']
计数器:
原来的数据都写在数据库,每次做更新压力会大。现在不写在数据库,这一天都在redis里写,每天0点只往数据库更新一次,减少数据库的压力。
#计数器:
print(conn.hget('k4','age'))           #b'18'
conn.hincrby('k4','age',amount=1)      #每次增加1,amount为负时则自减
print(conn.hget('k4','age'))           #b'19'
现在抛出了一个问题:
#如果reids的k4对应的字典中假设有1000W条数据,请打印所有的数据

# result=conn.hgetall('k4')
# print(result)  #不可取,数据太多内存无法承受,爆栈
如果数据非常的多怎么把呢?通过hgetall取出全部的话,瞬间内存爆栈!
推荐通过下面方法取:
ret=conn.hscan_iter('k4',count=100)  #100个100个的取
for item in ret:
    print(item)
这个就是做成一个生成器,一个一个的迭代取。
源码中是这么写的:
    def hscan_iter(self, name, match=None, count=None):
        """
        Make an iterator using the HSCAN command so that the client doesn't
        need to remember the cursor position.

        ``match`` allows for filtering the keys by pattern

        ``count`` allows for hint the minimum number of returns
        """
        cursor = '0'
        while cursor != 0:
            #起始位置:0
            cursor, data = self.hscan(name, cursor=cursor,
                                      match=match, count=count)
            #corsor=100,data=数据
            for item in data.items():
                yield item           #在此yield住
注意事项:
-拿到的数据是bytes.
-redis操作时,只有第一层的value支持:list,dict...
            redis={
                k3:[1,2,3],   #只支持第一层的列表
                k4:{
                    id:1,
                    title:"xxx",
                    price_list:[
                    {id:1,title:"xx"},
                    {id:2,title:"oo"},
                    {id:3,title:"qq"},
                    {id:4,title:"aa"},
                    ]
                    #把列表json.dumps一下变成字符串
                    #取回来的时候bytes转成字符串,然后json.loads回来即可
                }
            }
Redis操作列表:
1.列表左插入
import redis
conn=redis.Redis(host="47.99.191.149",port=6379,password='cyy520')

#列表左插入
# conn.lpush('k1',11)
# conn.lpush('k1',22)
2.列表右插入
#列表右插入
# conn.rpush('k1',33)
3.左获取
# 左获取
# val=conn.lpop('k1')
# print(val)
# val=conn.blpop('k1',timeout=3)
# print(val)  #去取k1的数据,没有数据就夯住,可以加超时时间,过时返回None
4.右获取
#右获取
# val=conn.rpop('k1')
# print(val)
# val=conn.brpop('k1',timeout=3)
# print(val)  #去取k1的数据,没有数据就夯住,可以加超时时间,过时返回None
这里在以前业务中使用到这里的一个点:
'''
在这里把爬虫的URL放到一个队列中,爬虫每次去取URL爬取,我们在这边往里面放地址,
放到redis,使用分布式爬取,2台机器共享一个队列,然后每次都brpop一下。
'''
最后就是redis的其他类型都有上面提到的生成器逐步取数据,只有列表没有提供方法,那么需要我们自己来用生成器配合看过源码来照猫画虎做一个。
#通过yield创造一个生成器,一点点的获取数据,灵感源于字典生成器源码
def list_iter(key,count=2):
    index=0
    while True:
        data_list=conn.lrange(key, index, index+count-1)
        if not data_list:
            return
        index+=count

        for item in data_list:
            yield item
利用这个方法就可以通过调用List_iter方法逐步取数据了。
for item in list_iter('k1',count=3):
    print(item)
Redis支持事务操作:
import redis
'''
redis={
    k1:[1,2,3,4,5]
}
'''

conn=redis.Redis(host="47.99.191.149",port=6379,password='cyy520')


pipe=conn.pipeline(transaction=True)  #创建一个pipe,事务为True
pipe.multi()

pipe.set('k2',123)
pipe.hset('k3','n1',666)
pipe.lpush('k4','oldboy')

pipe.execute()    #一次发送三个命令,要成功都成功,要失败都失败。
4.Django使用redis
1.手动操作redis
想要在django程序中使用redis需要先安装一个模块:
pip3 install django-redis
然后在django的配置文件中设置一下。
#redis配置
CACHES = {
    "default": {
        "BACKEND": "django_redis.cache.RedisCache",
        "LOCATION": "redis://47.99.191.149:6379",                #redis服务器地址
        "OPTIONS": {
            "CLIENT_CLASS": "django_redis.client.DefaultClient",
            "CONNECTION_POOL_KWARGS": {"max_connections": 100},  #最大连接池100
            "PASSWORD": "cyy520",
        }
    }
}
这样在视图中就可以导入使用redis了。
import redis
from django.shortcuts import render,HttpResponse
from django_redis import  get_redis_connection  #导入连接池

def index(request):
    conn=get_redis_connection('default')        #拿到defalut这个redis连接池
    conn.set("name","egon")                     #设置值
    return HttpResponse("设置成功!")

def order(request):
    conn=get_redis_connection('default')
    name=conn.get("name")
    return HttpResponse(name)                   #返回值
这样访问order就可以拿到这个对应的值,egon.

2.全站缓存
'django.middleware.cache.UpdateCacheMiddleware'      #最上面
...其他中间件
'django.middleware.cache.FetchFromCacheMiddleware'   #最下面
这样全站都缓存上了。
3.视图缓存
只给单视图缓存,把刚才的中间件注释掉。
from django.views.decorators.cache import cache_page

@cache_page(60*15)   #60为秒
def index(request):
    ctime=str(time.time())
    return HttpResponse(ctime)
4.局部缓存
应用场景。比如抢购界面的商品简介等等不需要一直加载,可以做缓存,而剩余个数需要实时刷新。
{% load cache %}
<!DOCTYPE html>
<html lang="en">
<head>
    <meta charset="UTF-8">
    <title>Title</title>
</head>
<body>
    <h1>商品剩余个数</h1>

    {% cache 10  缓存key %}
        <div>商品简介</div>
    {% endcache %}

</body>
</html>v
1.首先{% load cache %}
2.然后给需要缓存的地方加上
    {% cache 10  缓存key %}
        <div>商品简介</div>
    {% endcache %}
这样这部分东西就会缓存,cache后面的是失效时间,10s, 后面是在redis里面放的缓存key,下面div里面的是key对应的值。
最后补充一点就是rest-framework的访问频率限制就是放在缓存系统中:
源码:
from rest_framework.throttling import SimpleRateThrottle
这里的cache=default_cache
class SimpleRateThrottle(BaseThrottle):
    """
    A simple cache implementation, that only requires `.get_cache_key()`
    to be overridden.

    The rate (requests / seconds) is set by a `rate` attribute on the View
    class.  The attribute is a string of the form 'number_of_requests/period'.

    Period should be one of: ('s', 'sec', 'm', 'min', 'h', 'hour', 'd', 'day')

    Previous request information used for throttling is stored in the cache.
    """
    cache = default_cache
    timer = time.time
    cache_format = 'throttle_%(scope)s_%(ident)s'
    scope = None
    THROTTLE_RATES = api_settings.DEFAULT_THROTTLE_RATES
点进来发现
cache = DefaultCacheProxy()
这个类就是下面的。
class DefaultCacheProxy:
    """
    Proxy access to the default Cache object's attributes.

    This allows the legacy `cache` object to be thread-safe using the new
    ``caches`` API.
    """
    def __getattr__(self, name):
        return getattr(caches[DEFAULT_CACHE_ALIAS], name)

def __setattr__(self, name, value):
        return setattr(caches[DEFAULT_CACHE_ALIAS], name, value)

    def __delattr__(self, name):
        return delattr(caches[DEFAULT_CACHE_ALIAS], name)

    def __contains__(self, key):
        return key in caches[DEFAULT_CACHE_ALIAS]

    def __eq__(self, other):
        return caches[DEFAULT_CACHE_ALIAS] == other