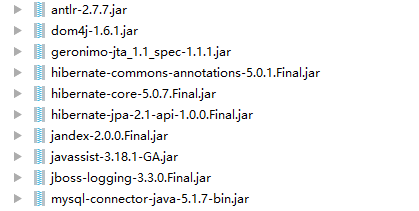
1、导包,包下载地址:http://hibernate.org/orm/downloads/
2、创建数据库,准备表,实体。示例:
CREATE TABLE `cst_customer` (
      `cust_id` BIGINT(32) NOT NULL AUTO_INCREMENT COMMENT '客户编号(主键)',
      `cust_name` VARCHAR(32) NOT NULL COMMENT '客户名称(公司名称)',
      `cust_source` VARCHAR(32) DEFAULT NULL COMMENT '客户信息来源',
      `cust_industry` VARCHAR(32) DEFAULT NULL COMMENT '客户所属行业',
      `cust_level` VARCHAR(32) DEFAULT NULL COMMENT '客户级别',
      `cust_linkman` VARCHAR(64) DEFAULT NULL COMMENT '联系人',
      `cust_phone` VARCHAR(64) DEFAULT NULL COMMENT '固定电话',
      `cust_mobile` VARCHAR(16) DEFAULT NULL COMMENT '移动电话',
      PRIMARY KEY (`cust_id`)
    ) ENGINE=INNODB AUTO_INCREMENT=1 DEFAULT CHARSET=utf8;
Customer.java
package cn.itheima.domain;

public class Customer {
    private Long cust_id;

    private String cust_name;
    private String cust_source;
    private String cust_industry;
    private String cust_level;
    private String cust_linkman;
    private String cust_phone;
    private String cust_mobile;
    public Long getCust_id() {
        return cust_id;
    }
    public void setCust_id(Long cust_id) {
        this.cust_id = cust_id;
    }
    public String getCust_name() {
        return cust_name;
    }
    public void setCust_name(String cust_name) {
        this.cust_name = cust_name;
    }
    public String getCust_source() {
        return cust_source;
    }
    public void setCust_source(String cust_source) {
        this.cust_source = cust_source;
    }
    public String getCust_industry() {
        return cust_industry;
    }
    public void setCust_industry(String cust_industry) {
        this.cust_industry = cust_industry;
    }
    public String getCust_level() {
        return cust_level;
    }
    public void setCust_level(String cust_level) {
        this.cust_level = cust_level;
    }
    public String getCust_linkman() {
        return cust_linkman;
    }
    public void setCust_linkman(String cust_linkman) {
        this.cust_linkman = cust_linkman;
    }
    public String getCust_phone() {
        return cust_phone;
    }
    public void setCust_phone(String cust_phone) {
        this.cust_phone = cust_phone;
    }
    public String getCust_mobile() {
        return cust_mobile;
    }
    public void setCust_mobile(String cust_mobile) {
        this.cust_mobile = cust_mobile;
    }
    @Override
    public String toString() {
        return "Customer [cust_id=" + cust_id + ", cust_name=" + cust_name + "]";
    }
}
3、书写orm元数据(对象与表的映射配置文件),也可以参考这里。
示例:Customer.hbm.xml
<?xml version="1.0" encoding="UTF-8"?>
<!DOCTYPE hibernate-mapping PUBLIC
    "-//Hibernate/Hibernate Mapping DTD 3.0//EN"
    "http://www.hibernate.org/dtd/hibernate-mapping-3.0.dtd">
   <!-- 配置表与实体对象的关系 -->
   <!-- package属性:填写一个包名.在元素内部凡是需要书写完整类名的属性,可以直接写简答类名了. -->
<hibernate-mapping package="cn.itheima.domain" >
    <!--
        class元素: 配置实体与表的对应关系的
            name: 完整类名
            table:数据库表名
     -->
    <class name="Customer" table="cst_customer" >
        <!-- id元素:配置主键映射的属性
                name: 填写主键对应属性名
                column(可选): 填写表中的主键列名.默认值:列名会默认使用属性名
                type(可选):填写列(属性)的类型.hibernate会自动检测实体的属性类型.
                        每个类型有三种填法: java类型|hibernate类型|数据库类型
                not-null(可选):配置该属性(列)是否不能为空. 默认值:false
                length(可选):配置数据库中列的长度. 默认值:使用数据库类型的最大长度
         -->
        <id name="cust_id"  >
            <!-- generator:主键生成策略(明天讲) -->
            <generator class="native"></generator>
        </id>
        <!-- property元素:除id之外的普通属性映射
                name: 填写属性名
                column(可选): 填写列名
                type(可选):填写列(属性)的类型.hibernate会自动检测实体的属性类型.
                        每个类型有三种填法: java类型|hibernate类型|数据库类型
                not-null(可选):配置该属性(列)是否不能为空. 默认值:false
                length(可选):配置数据库中列的长度. 默认值:使用数据库类型的最大长度
         -->
        <property name="cust_name" column="cust_name" >
            <!--  <column name="cust_name" sql-type="varchar" ></column> -->
        </property>
        <property name="cust_source" column="cust_source" ></property>
        <property name="cust_industry" column="cust_industry" ></property>
        <property name="cust_level" column="cust_level" ></property>
        <property name="cust_linkman" column="cust_linkman" ></property>
        <property name="cust_phone" column="cust_phone" ></property>
        <property name="cust_mobile" column="cust_mobile" ></property>
    </class>
</hibernate-mapping>
4、hibernate主配置 ,hibernate.cfg.xml
<?xml version="1.0" encoding="UTF-8"?>
<!DOCTYPE hibernate-configuration PUBLIC
    "-//Hibernate/Hibernate Configuration DTD 3.0//EN"
    "http://www.hibernate.org/dtd/hibernate-configuration-3.0.dtd">
<hibernate-configuration>
    <session-factory>

        <!--
        #hibernate.dialect org.hibernate.dialect.MySQLDialect
        #hibernate.dialect org.hibernate.dialect.MySQLInnoDBDialect
        #hibernate.dialect org.hibernate.dialect.MySQLMyISAMDialect
        #hibernate.connection.driver_class com.mysql.jdbc.Driver
        #hibernate.connection.url jdbc:mysql:///test
        #hibernate.connection.username gavin
        #hibernate.connection.password
         -->
         <!-- 数据库驱动 -->
        <property name="hibernate.connection.driver_class">com.mysql.jdbc.Driver</property>
         <!-- 数据库url -->
        <property name="hibernate.connection.url">jdbc:mysql:///hibernate_32</property>
         <!-- 数据库连接用户名 -->
        <property name="hibernate.connection.username">root</property>
         <!-- 数据库连接密码 -->
        <property name="hibernate.connection.password">1234</property>
        <!-- 数据库方言
            不同的数据库中,sql语法略有区别. 指定方言可以让hibernate框架在生成sql语句时.针对数据库的方言生成.
            sql99标准: DDL 定义语言  库表的增删改查
                      DCL 控制语言  事务 权限
                      DML 操纵语言  增删改查
            注意: MYSQL在选择方言时,请选择最短的方言.
         -->
        <property name="hibernate.dialect">org.hibernate.dialect.MySQLDialect</property>
        <!-- #hibernate.show_sql true
             #hibernate.format_sql true
        -->
        <!-- 将hibernate生成的sql语句打印到控制台 -->
        <property name="hibernate.show_sql">true</property>
        <!-- 将hibernate生成的sql语句格式化(语法缩进) -->
        <property name="hibernate.format_sql">true</property>
        <!--
        ## auto schema export  自动导出表结构. 自动建表
        #hibernate.hbm2ddl.auto create        自动建表.每次框架运行都会创建新的表.以前表将会被覆盖,表数据会丢失.(开发环境中测试使用)
        #hibernate.hbm2ddl.auto create-drop 自动建表.每次框架运行结束都会将所有表删除.(开发环境中测试使用)
        #hibernate.hbm2ddl.auto update(推荐使用) 自动生成表.如果已经存在不会再生成.如果表有变动.自动更新表(不会删除任何数据).
        #hibernate.hbm2ddl.auto validate    校验.不自动生成表.每次启动会校验数据库中表是否正确.校验失败.
         -->
        <property name="hibernate.hbm2ddl.auto">update</property>
        <!-- 引入orm元数据
            路径书写: 填写src下的路径
         -->
        <mapping resource="cn/itheima/domain/Customer.hbm.xml" />

    </session-factory>
</hibernate-configuration>
5、编写测试类
package cn.itheima.a_hello;

import org.hibernate.Session;
import org.hibernate.SessionFactory;
import org.hibernate.Transaction;
import org.hibernate.cfg.Configuration;
import org.junit.Test;

import cn.itheima.domain.Customer;

//测试Hibernate框架
public class Demo {

    @Test
    //保存客户
    public void fun1(){
        Configuration conf = new Configuration().configure();

        SessionFactory sessionFactory = conf.buildSessionFactory();

        Session session = sessionFactory.openSession();

        Transaction tx = session.beginTransaction();
        //----------------------------------------------
        Customer c = new Customer();
        c.setCust_name("google公司");

        session.save(c);//执行保存

        //----------------------------------------------
        tx.commit();
        session.close();
        sessionFactory.close();
    }
}
api讲解
Configuration对象
package cn.itheima.b_api;

import org.hibernate.Session;
import org.hibernate.SessionFactory;
import org.hibernate.Transaction;
import org.hibernate.cfg.Configuration;
import org.junit.Test;

import cn.itheima.domain.Customer;

//学习Configuration对象
// Configuration功能: 配置加载类.用于加载主配置,orm元数据加载
public class Demo {

    @Test
    public void fun1(){
        //1 创建,调用空参构造
        Configuration conf = new Configuration();
        //2 读取指定主配置文件 => 空参加载方法,加载src下的hibernate.cfg.xml文件
        conf.configure();
        //3 读取指定orm元数据(扩展),如果主配置中已经引入映射配置.不需要手动加载
        //conf.addResource(resourceName);
        //conf.addClass(persistentClass);

        //4 根据配置信息,创建 SessionFactory对象
        SessionFactory sf = conf.buildSessionFactory();

    }
}
SessionFactory对象
package cn.itheima.b_api;

import org.hibernate.Session;
import org.hibernate.SessionFactory;
import org.hibernate.Transaction;
import org.hibernate.cfg.Configuration;
import org.junit.Test;

import cn.itheima.domain.Customer;

//学习SessionFactory对象
// SessionFactory功能: 用于创建操作数据库核心对象session对象的工厂.
//                     简单说功能就一个---创建session对象
//注意:1.sessionfactory 负责保存和使用所有配置信息.消耗内存资源非常大.
//      2.sessionFactory属于线程安全的对象设计.
//结论: 保证在web项目中,只创建一个sessionFactory.
public class Demo2 {

    @Test
    public void fun1(){
        //1 创建,调用空参构造
        Configuration conf = new Configuration();
        //2 读取指定主配置文件 => 空参加载方法,加载src下的hibernate.cfg.xml文件
        conf.configure();
        //3 读取指定orm元数据(扩展),如果主配置中已经引入映射配置.不需要手动加载
        //conf.addResource(resourceName);
        //conf.addClass(persistentClass);

        //4 根据配置信息,创建 SessionFactory对象
        SessionFactory sf = conf.buildSessionFactory();
        //--------------------------------------------------
        //5 获得session
        //打开一个新的session对象
        sf.openSession();
        //获得一个与线程绑定的session对象(明天讲解)
        sf.getCurrentSession();
    }
}
session&transaction对象
package cn.itheima.b_api;

import org.hibernate.Session;
import org.hibernate.SessionFactory;
import org.hibernate.Transaction;
import org.hibernate.cfg.Configuration;
import org.junit.Test;

import cn.itheima.domain.Customer;

//学习Session对象
//session对象功能: 表达hibernate框架与数据库之间的连接(会话).session类似于
//                JDBC年代的connection对象. 还可以完成对数据库中数据的增删改查操作.
//                session是hibernate操作数据库的核心对象
public class Demo3 {

    @Test
    //事务操作
    public void fun1(){
        //1 创建,调用空参构造
        Configuration conf = new Configuration().configure();
        //2 根据配置信息,创建 SessionFactory对象
        SessionFactory sf = conf.buildSessionFactory();
        //3 获得session
        Session session = sf.openSession();
        //4 session获得操作事务的Transaction对象
        //获得操作事务的tx对象
        //Transaction tx = session.getTransaction();
        //开启事务并获得操作事务的tx对象(建议使用)
        Transaction tx2 = session.beginTransaction();
        //----------------------------------------------


        //----------------------------------------------
        tx2.commit();//提交事务
        tx2.rollback();//回滚事务
        session.close();//释放资源
        sf.close();//释放资源
    }

    @Test
    //session的新增
    public void fun2(){
        //1 创建,调用空参构造
        Configuration conf = new Configuration().configure();
        //2 根据配置信息,创建 SessionFactory对象
        SessionFactory sf = conf.buildSessionFactory();
        //3 获得session
        Session session = sf.openSession();
        //4 session获得操作事务的Transaction对象
        //获得操作事务的tx对象
        //Transaction tx = session.getTransaction();
        //开启事务并获得操作事务的tx对象(建议使用)
        Transaction tx2 = session.beginTransaction();
        //----------------------------------------------
        Customer c = new Customer();
        c.setCust_name("传智播客");

        session.save(c);
        //----------------------------------------------
        tx2.commit();//提交事务
        session.close();//释放资源
        sf.close();//释放资源
    }
    @Test
    //session的查询
    //查询id为1的customer对象
    public void fun3(){
        //1 创建,调用空参构造
        Configuration conf = new Configuration().configure();
        //2 根据配置信息,创建 SessionFactory对象
        SessionFactory sf = conf.buildSessionFactory();
        //3 获得session
        Session session = sf.openSession();
        //4 session获得操作事务的Transaction对象
        //获得操作事务的tx对象
        //Transaction tx = session.getTransaction();
        //开启事务并获得操作事务的tx对象(建议使用)
        Transaction tx2 = session.beginTransaction();
        //----------------------------------------------

        Customer customer = session.get(Customer.class, 1l);

        System.out.println(customer);
        //----------------------------------------------
        tx2.commit();//提交事务
        session.close();//释放资源
        sf.close();//释放资源
    }
    @Test
    //session的修改
    //修改id为1的customer对象的name属性为黑马程序员
    public void fun4(){
        //1 创建,调用空参构造
        Configuration conf = new Configuration().configure();
        //2 根据配置信息,创建 SessionFactory对象
        SessionFactory sf = conf.buildSessionFactory();
        //3 获得session
        Session session = sf.openSession();
        //4 session获得操作事务的Transaction对象
        //获得操作事务的tx对象
        //Transaction tx = session.getTransaction();
        //开启事务并获得操作事务的tx对象(建议使用)
        Transaction tx2 = session.beginTransaction();
        //----------------------------------------------
        //1 获得要修改的对象
        Customer c = session.get(Customer.class, 1l);
        //2 修改
        c.setCust_name("黑马程序员");
        //3 执行update
        session.update(c);
        //----------------------------------------------
        tx2.commit();//提交事务
        session.close();//释放资源
        sf.close();//释放资源
    }
    @Test
    //session的删除
    //删除id为1的customer对象
    public void fun5(){
        //1 创建,调用空参构造
        Configuration conf = new Configuration().configure();
        //2 根据配置信息,创建 SessionFactory对象
        SessionFactory sf = conf.buildSessionFactory();
        //3 获得session
        Session session = sf.openSession();
        //4 session获得操作事务的Transaction对象
        //获得操作事务的tx对象
        Transaction tx = session.getTransaction();
        tx.begin();
        //开启事务并获得操作事务的tx对象(建议使用)
        Transaction tx2 = session.beginTransaction();
        //----------------------------------------------
        //1 获得要修改的对象
        Customer c = session.get(Customer.class, 1l);
        //2 调用delete删除对象
        session.delete(c);
        //----------------------------------------------
        tx2.commit();//提交事务
        session.close();//释放资源
        sf.close();//释放资源
    }
}
封装Utils工具类
package cn.itheima.utils;

import org.hibernate.Session;
import org.hibernate.SessionFactory;
import org.hibernate.cfg.Configuration;

public class HibernateUtils {
    private static SessionFactory sf;

    static{
        //1 创建,调用空参构造
        Configuration conf = new Configuration().configure();
        //2 根据配置信息,创建 SessionFactory对象
         sf = conf.buildSessionFactory();
    }

    //获得session => 获得全新session
    public static Session openSession(){
                //3 获得session
                Session session = sf.openSession();

                return session;

    }
    //获得session => 获得与线程绑定的session
    public static Session getCurrentSession(){
        //3 获得session
        Session session = sf.getCurrentSession();

        return session;
    }
    public static void main(String[] args) {
        System.out.println(HibernateUtils.openSession());
    }
}