原链接:http://www.cnblogs.com/yingpp/archive/2009/02/10/1387429.html
最近做了一个winform程序,遇到程序更新的问题。【升级包】:简单的文件复制。此功能将程序中指定的文件复制到安装目录下达到升级程序,即简单的文件COPY,在网上有很多在线升级的功能。思路很清晰,但是内容有点点多,由于本人水平低,就用了一个比较笨的办法。
贴上源代码:

 Code
Code
1 using System;
2using System.Collections.Generic;
3using System.ComponentModel;
4using System.Data;
5using System.Drawing;
6using System.Linq;
7using System.Text;
8using System.Windows.Forms;
9using System.Collections;
10using System.Threading;
11using System.IO;
12
13namespace WindowsFormsApplication1
14 {
{
15 public partial class UpdaterFrm : Form
16
 {
{
17 public delegate void DelegateProgressBarAdd();
18 public DelegateProgressBarAdd m_DelegateProgressBarAdd;
19 private string targetPath = "";
20 private string fileName = "";
21 public UpdaterFrm()
22 {
23 InitializeComponent();
24 m_DelegateProgressBarAdd = new DelegateProgressBarAdd(this.ProgressBarAdd);
25
26 }
}
27 private void UpdaterFrm_Load(object sender, EventArgs e)
28 {
29
30 }
31
32 private void addFile(string directory, string targetPath)
33 {
34 try
35 {
36 ArrayList arraylist = new ArrayList();
37 int num = Directory.GetFiles(directory).Length;
38 this.progressBar1.Maximum = num;
39 string name = "";
40 string folder = "";
41 string temp = targetPath;
42 foreach (string fi in Directory.GetFiles(directory))
43 {
44 targetPath = temp;
45 string filetype = fi.Substring(fi.LastIndexOf(".") + 1);
46 string filename = fi.Substring(fi.LastIndexOf("\\") + 1);
47
48 if (File.Exists(targetPath + "\\" + filename.Trim()))
49 {
50
51 File.Delete(targetPath + "\\" + filename.Trim());//刪除文件
52 }
53 File.Copy(fi, targetPath + "\\" + filename.Trim());
54
55 /**/////File.Move(@"d:\" + filename.Trim(), @"e:\" + filename.Trim());//移動文件 }
56
57 foreach (string di in Directory.GetDirectories(directory))
58 {
59 name = di.Substring(di.LastIndexOf("\\"), di.Length - di.LastIndexOf("\\"));
60 folder = name.Substring(1, name.Length - 1);
61 targetPath = targetPath + name;
62
63 //文件夹中还在文件夹则创建子目录
64 if (!Directory.Exists(targetPath))
65 {
66 Directory.CreateDirectory(targetPath);
67 }
68
69 //COPY文件
70 addFile(di, targetPath);
71 }
72 if (progressBar1.Value < progressBar1.Maximum)
73 {
74
75 fileName = filename;
76 this.Invoke(m_DelegateProgressBarAdd, null);
77 Thread.Sleep(500);
78 Application.DoEvents();
79 }
80
81 }
82 this.btnUpdate.Text = "更新成功!";
83 this.btnUpdate.Enabled = false;
84 this.label2.Text = "更新完成";
85 }
86 catch(Exception ex)
87 {
88 MessageBox.Show("更新失败!","提示");
89 }
90
91 }
92
93 private void ProgressBarAdd()
94 {
95 this.progressBar1.Value++;
96 this.label2.Text = "正在更新:" + fileName + " 已完成" + string.Format("{0:p}", (double)this.progressBar1.Value / this.progressBar1.Maximum);
97 }
98
99
100 private void btnView_Click(object sender, EventArgs e)
101 {
102 //选择安装目录
103 FolderBrowserDialog fbd = new FolderBrowserDialog();
104 fbd.ShowDialog();
105 targetPath = fbd.SelectedPath; //获得选择的文件夹路径
106 this.txtPath.Text = targetPath;
107
108 }
109
110 private void btnExit_Click(object sender, EventArgs e)
111 {
112 this.Close();
113 }
114
115 private void btnUpdate_Click(object sender, EventArgs e)
116 {
117 //读取指定文件
118 const string FILENAME = "UpdateFiles";
119 string directory = System.Windows.Forms.Application.StartupPath + "\\" + FILENAME;
120 targetPath = this.txtPath.Text.Trim();
121
122
123 if (targetPath != "")
124 {
125 if (Directory.Exists(targetPath))
126 {
127 addFile(directory, targetPath);
128 }
129 else
130 {
131 MessageBox.Show("目录不存在,请重新选择!", "提示:");
132 return;
133 }
134 }
135 else
136 {
137 MessageBox.Show("请选择安装目录!","提示:");
138 return;
139 }
140 }
141
142
143
144 }
145
146 }
}
147 文件COPY的核心代码:
addFile(string directory, string targetPath)中,其中要注意的是:进度条,需要用异步处理,通过事件委托执行,
Application.DoEvents();【注释:处理当前在消息队列中所有的Window消息】这句代码是关键,如果无,则,再输出提示语句【this.label2.Text = "正在更新:" + fileName + " 已完成" + string.Format("{0:p}", (double)this.progressBar1.Value / this.progressBar1.Maximum);】的时候,虽然进度条一直再变化,但是label2.text 的值,一直到进度条执行完了,才显示。
源码下载:
/Files/yingpp/Updater.rar
源码中有还有个安装包的制作:
下面讲安装包中应该注意的事项:
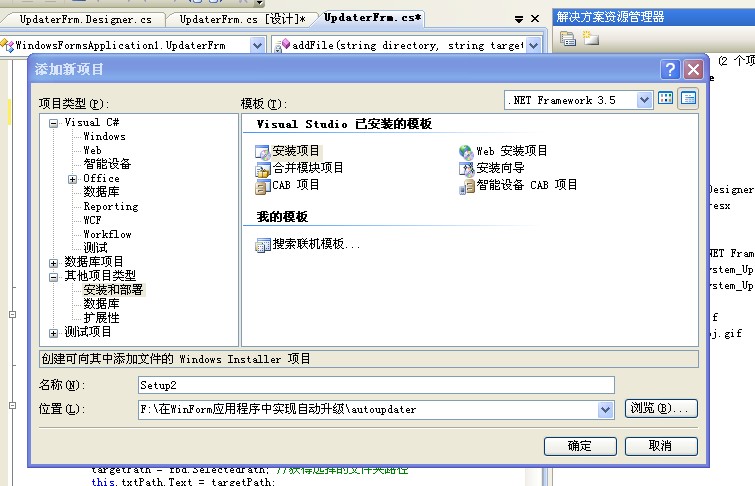
1,在解决方案下添加新项,选择:安装项目【安装向导也可以的】
如图:
2,选中新建安装项目,点右键,添加 项目输出:
如图: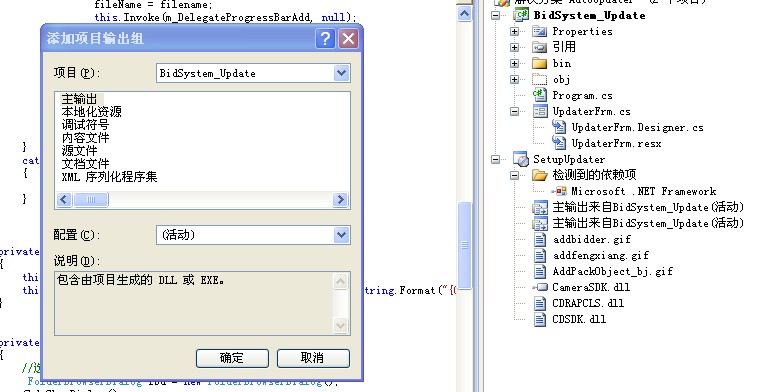
添加 主输出、本地化资源、内容文件等即可!
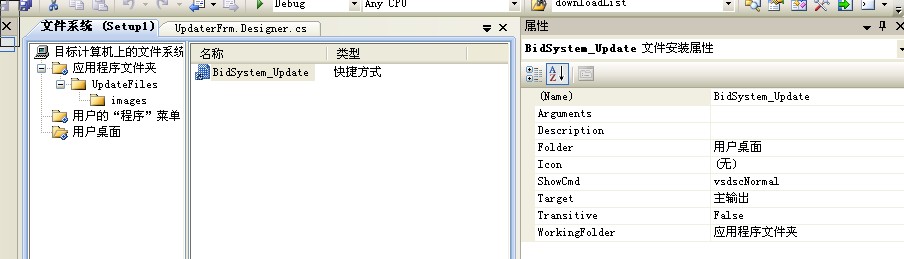
3,再次选择安装项目,右键,视图,-->文件系统
可以创建文件夹,上传文件,
创建桌面快捷方式:
用户桌面-->添加-->项目输出
然后 选择刚才添加的项目主输出,右键,创建快捷方式,设置属性即可
注意:WorkingFolder 设置为 应用程序文件夹
如图:
设置安装项目的属性:
RemovePreviousVersions设置为 True,在安装的时候,会先删除以前的版本。
根据以上步骤,编译生成。然后安装 即完成安装包的制作。