by hyc
1.Cloud-init安装
已有了一个安装好系统的镜像。
镜像名:ubuntu-test-14.04-server-amd64.img
用户名:user
密码:1
主机名:ubuntu
在ip为192.168.29.80的服务器上执行命令:
sudo kvm -m 2048 -drive file=/openstack_img/iso/ubuntu-14.04.2-server-amd64.iso,index=1,media=cdrom -drive file=/openstack_img/img/ubuntu-test-14.04-server-amd64.img,if=virtio -drive file=/openstack_img/driver/virtio-win.iso,index=3,media=cdrom -net nic,model=virtio -net user -nographic -vnc :9 -usbdevice tablet
登录后,执行以下命令安装必要的软件包:
# sudo apt-get -y update
# sudo apt-get -y upgrade
# sudo apt-get install curl
# curl http://mirror.rightscale.com/rightlink/rightscale.pub | apt-key add -
# echo "deb [arch=amd64] http://mirror.rightscale.com/rightscale_software_ubuntu/latest trusty main" > /etc/apt/sources.list.d/rightscale_extra.sources.list
# sudo apt-get -y --force-yes install cloud-init
# sudo apt-get -y install cloud-utils
参考资料:http://docs.rightscale.com/rl10/reference/rl10_cloud_init_installation.html
安装结束后,上传到ip为192.168.29.94的服务器上
# scp ubuntu-test-14.04-server-amd64.img user@192.168.29.94:/home/user
2.Cloud-init使用
登录192.168.29.94服务器后,将镜像上传到OpenStack上。
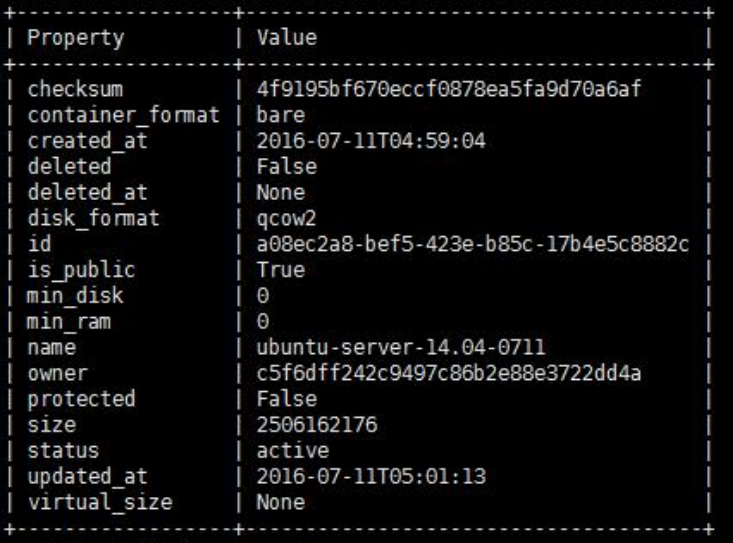
# glance image-create --name "ubuntu-server-14.04-0711" --is-public true --disk-format qcow2 --container-format bare --file ubuntu-test-14.04-server-amd64.img --progress
上传结束后,返回数据:
登录OpenStack控制台,点击“实例”。
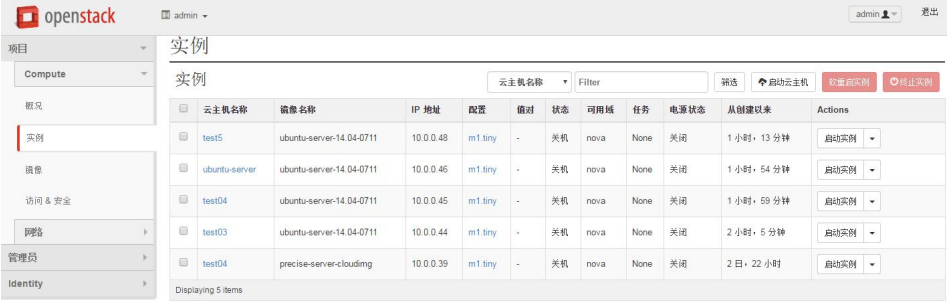
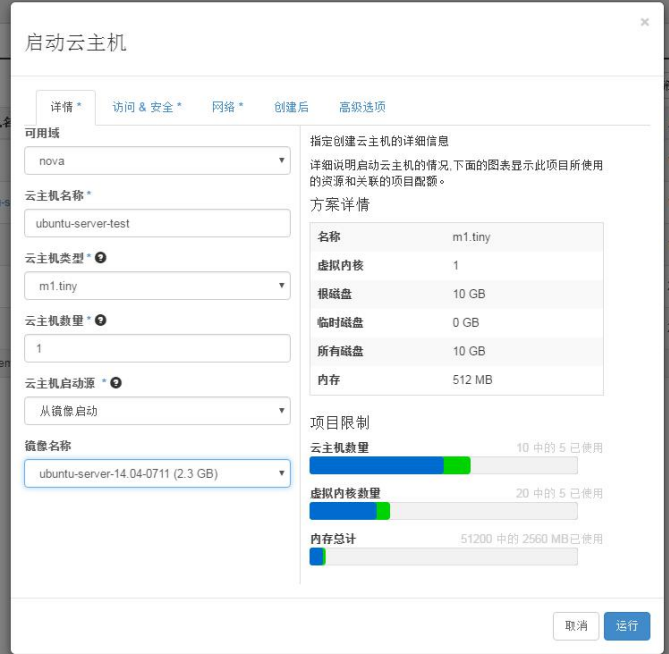
再点击“启动云主机”后,设置云主机名称为“ubuntu-test-server”,云主机启动源选择“从镜像启动”,镜像名称选择刚刚上传的“ubuntu-server-14.04-0711”。界面显示如下:
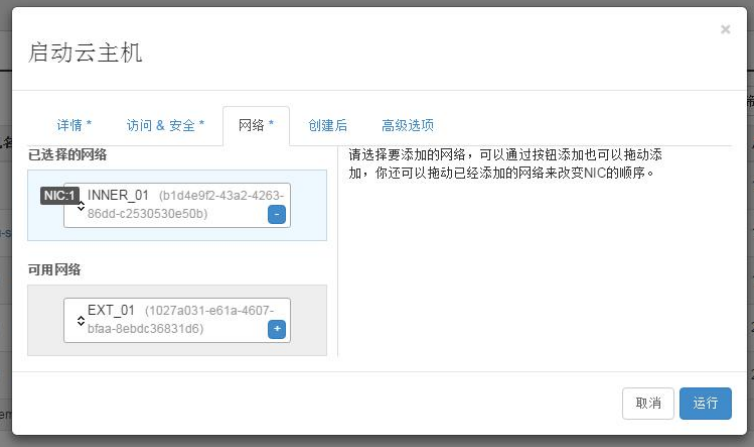
选择网络:
配置云主机:
选择“创建后”,选择“直接输入”。
#!/bin/sh
# 修改用户的密码
passwd ubuntu<<EOF
psd
psd
EOF
# 修改Liunx系统主机名
sed -i 's/ubuntu-test-server/hostnametest/g' /etc/hostname
sed -i 's/ubuntu/hostnametest/g' /etc/hosts
reboot
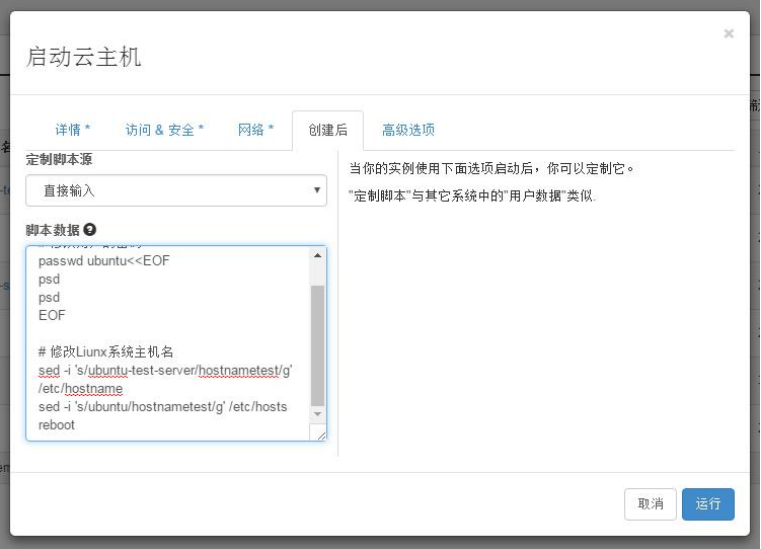
点击“运行”,则立即创建实例。等待一会创建成功。

用vnc连接进去后。用户名为“ubuntu”,密码为“psd”登录进去后。
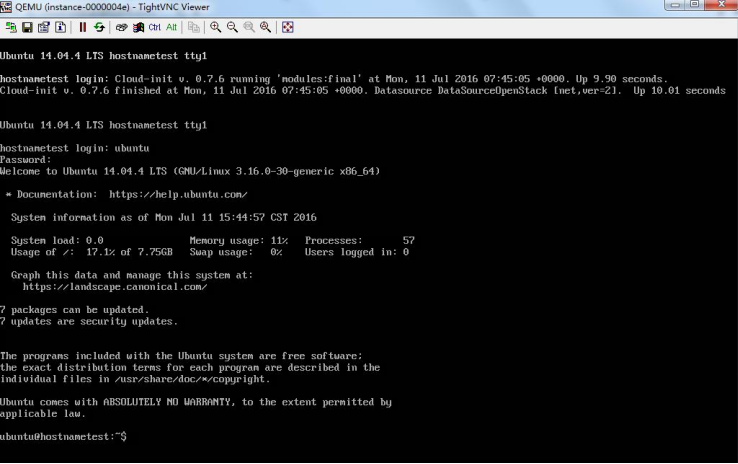
查看主机名,已改为你设置的。

查看/etc/hostname文件,主机名也改为了“hostnametest”。
查看/etc/hosts文件,安装系统后是ubuntu,现在改为了“hostnametest”。

注:
1.也可以用你安装系统时设置的用户名“user”和密码“1”登录。
2.主机名的设置可以在启动云主机后的“详情”里“云主机名名称”设置主机名,也可以在“创建后”用Shell命令设置主机名。
3./etc/hosts文件里的主机名也可以不修改,在用命令sudo可以正常执行,但是会弹出警告信息“sudo: unable to resolve host hostnametest”而这只是机器在反解上的问题, 所以就用命令对/etc/hosts文件进行设定(sed -i 's/ubuntu/hostnametest/g' /etc/hosts), 让hostnametest(hostname) 可以解回127.0.0.1 的IP 即可。