maven访问nexus有三种配置方法,分别为:
项目pom.xml,优先级最高;
user的settings.xml,优先级中,未在pom.xml中配置repository标签,则使用这个配置;
maven的settings.xml,优先级最低,在项目pom.xml和user的settings.xml都没有配置仓库时,才使用这个配置;
项目pom.xml配置,在pom.xml中添加以下内容:
    <repositories>
        <repository>
            <id>public</id>
            <name>public</name>
            <url>http://localhost:8081/nexus/content/groups/public/</url>
            <releases>
                <enabled>true</enabled>
            </releases>
            <snapshots>
                <enabled>true</enabled>
            </snapshots>
        </repository>
    </repositories>
    <pluginRepositories>
        <pluginRepository>
            <id>public</id>
            <name>public</name>
            <url>http://localhost:8081/nexus/content/groups/public/</url>
            <releases>
                <enabled>true</enabled>
            </releases>
            <snapshots>
                <enabled>true</enabled>
            </snapshots>
        </pluginRepository>
    </pluginRepositories>
以上仓库配置也可以在maven用户的setting.xml文件中(注意localhost应为设计的ip地址或url),如下:
  <profiles>
    <profile>
        <id>ourRepositoryGroup</id>
        <repositories>
            <repository>
                <id>public</id>
                <name>public</name>
                <url>http://localhost:8081/nexus/content/groups/public/</url>
                <releases>
                    <enabled>true</enabled>
                </releases>
                <snapshots>
                    <enabled>true</enabled>
                </snapshots>
            </repository>
        </repositories>
        <pluginRepositories>
            <pluginRepository>
                <id>public</id>
                <name>public</name>
                <url>http://localhost:8081/nexus/content/groups/public/</url>
                <releases>
                    <enabled>true</enabled>
                </releases>
                <snapshots>
                    <enabled>true</enabled>
                </snapshots>
            </pluginRepository>
        </pluginRepositories>

    </profile>
  </profiles>

  <activeProfiles>
    <activeProfile>ourRepositoryGroup</activeProfile>
  </activeProfiles>
关注maven配置文件的优先级,简单的做法是让其保持一致。
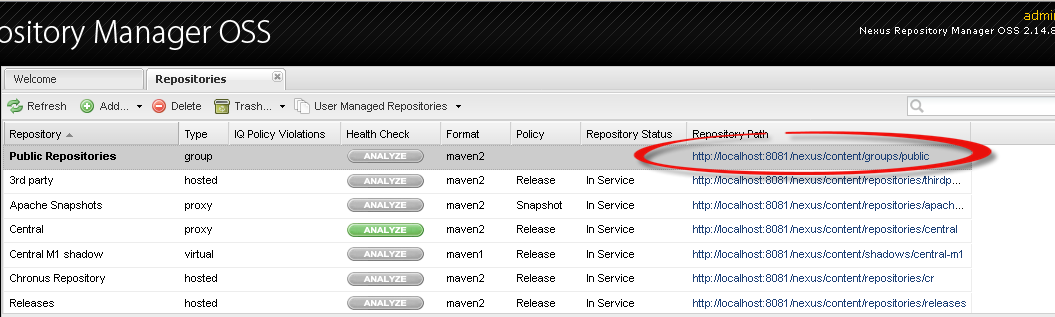
以上配置了访问Nexus的Public Repositories仓库组,id和name都无关紧要,要紧的是url必须适配。
发布项目到Nexus,在pom.xml中添加以下内容:
    <!-- 发布项目到Nexus -->
    <distributionManagement>
        <repository>
            <id>releases</id>
            <url>http://localhost:8081/nexus/content/repositories/releases</url>
        </repository>
        <snapshotRepository>
            <id>snapshots</id>
            <url>http://localhost:8081/nexus/content/repositories/snapshots</url>
        </snapshotRepository>
    </distributionManagement>
带源码发布的插件配置,在pom.xml中添加以下内容:
    <build>
        <plugins>
            <!-- 发布源码,需要这个插件 -->
            <plugin>
                <groupId>org.apache.maven.plugins</groupId>
                <artifactId>maven-source-plugin</artifactId>
                <version>3.0.1</version>
                <executions>
                    <execution>
                        <id>attach-sources</id>
                        <goals>
                            <goal>jar</goal>
                        </goals>
                    </execution>
                </executions>
            </plugin>
        </plugins>
    </build>
发布需要nexus登录
在user的settings.xml
        <!--配置nexus仓库认证信息 -->
        <server>
            <id>releases</id>
            <username>admin</username>
            <password>admin123</password>
        </server>
        <server>
            <id>snapshots</id>
            <username>admin</username>
            <password>admin123</password>
        </server>