对于Spring Boot整个的启动,“SpringBoot源码分析之SpringBoot的启动过程”这篇文章分析得很详细所以一懒就不想写了~这里主要想讨论下Spring Boot里内嵌Tomcat的启动。
主要的入口是“createApplicationContext()”方法,目前看很多书和文章都是提到的“AnnotationConfigEmbeddedWebApplicationContext”类,但是查源码的时候发现这个类只在Spring boot 1.x版本中有,应该是2.x版本有所调整。
这里先梳理一下逻辑:
Spring Boot项目的启动是从“SpringApplication.run(Application.class, args);”这句开始的,而这一句定位到代码中,实际会执行的代码如下:
 1 /**
 2      * Run the Spring application, creating and refreshing a new
 3      * {@link ApplicationContext}.
 4      * @param args the application arguments (usually passed from a Java main method)
 5      * @return a running {@link ApplicationContext}
 6      */
 7     public ConfigurableApplicationContext run(String... args) {
 8         StopWatch stopWatch = new StopWatch();
 9         stopWatch.start();
10         ConfigurableApplicationContext context = null;
11         Collection<SpringBootExceptionReporter> exceptionReporters = new ArrayList<>();
12         configureHeadlessProperty();
13         SpringApplicationRunListeners listeners = getRunListeners(args);
14         listeners.starting();
15         try {
16             ApplicationArguments applicationArguments = new DefaultApplicationArguments(args);
17             ConfigurableEnvironment environment = prepareEnvironment(listeners, applicationArguments);
18             configureIgnoreBeanInfo(environment);
19             Banner printedBanner = printBanner(environment);
20             context = createApplicationContext();
21             exceptionReporters = getSpringFactoriesInstances(SpringBootExceptionReporter.class,
22                     new Class[] { ConfigurableApplicationContext.class }, context);
23             prepareContext(context, environment, listeners, applicationArguments, printedBanner);
24             refreshContext(context);
25             afterRefresh(context, applicationArguments);
26             stopWatch.stop();
27             if (this.logStartupInfo) {
28                 new StartupInfoLogger(this.mainApplicationClass).logStarted(getApplicationLog(), stopWatch);
29             }
30             listeners.started(context);
31             callRunners(context, applicationArguments);
32         }
33         catch (Throwable ex) {
34             handleRunFailure(context, ex, exceptionReporters, listeners);
35             throw new IllegalStateException(ex);
36         }
37
38         try {
39             listeners.running(context);
40         }
41         catch (Throwable ex) {
42             handleRunFailure(context, ex, exceptionReporters, null);
43             throw new IllegalStateException(ex);
44         }
45         return context;
46     }
这里我们只点进20行继续跟踪,可以看到:
 1 /**
 2      * Strategy method used to create the {@link ApplicationContext}. By default this
 3      * method will respect any explicitly set application context or application context
 4      * class before falling back to a suitable default.
 5      * @return the application context (not yet refreshed)
 6      * @see #setApplicationContextClass(Class)
 7      */
 8     protected ConfigurableApplicationContext createApplicationContext() {
 9         Class<?> contextClass = this.applicationContextClass;
10         if (contextClass == null) {
11             try {
12                 switch (this.webApplicationType) {
13                 case SERVLET:
14                     contextClass = Class.forName(DEFAULT_SERVLET_WEB_CONTEXT_CLASS);
15                     break;
16                 case REACTIVE:
17                     contextClass = Class.forName(DEFAULT_REACTIVE_WEB_CONTEXT_CLASS);
18                     break;
19                 default:
20                     contextClass = Class.forName(DEFAULT_CONTEXT_CLASS);
21                 }
22             }
23             catch (ClassNotFoundException ex) {
24                 throw new IllegalStateException(
25                         "Unable create a default ApplicationContext, please specify an ApplicationContextClass", ex);
26             }
27         }
28         return (ConfigurableApplicationContext) BeanUtils.instantiateClass(contextClass);
29     }
继续~注意第14行,不难找到“DEFAULT_SERVLET_WEB_CONTEXT_CLASS”的值为:
"org.springframework.boot."
+ "web.servlet.context.AnnotationConfigServletWebServerApplicationContext"
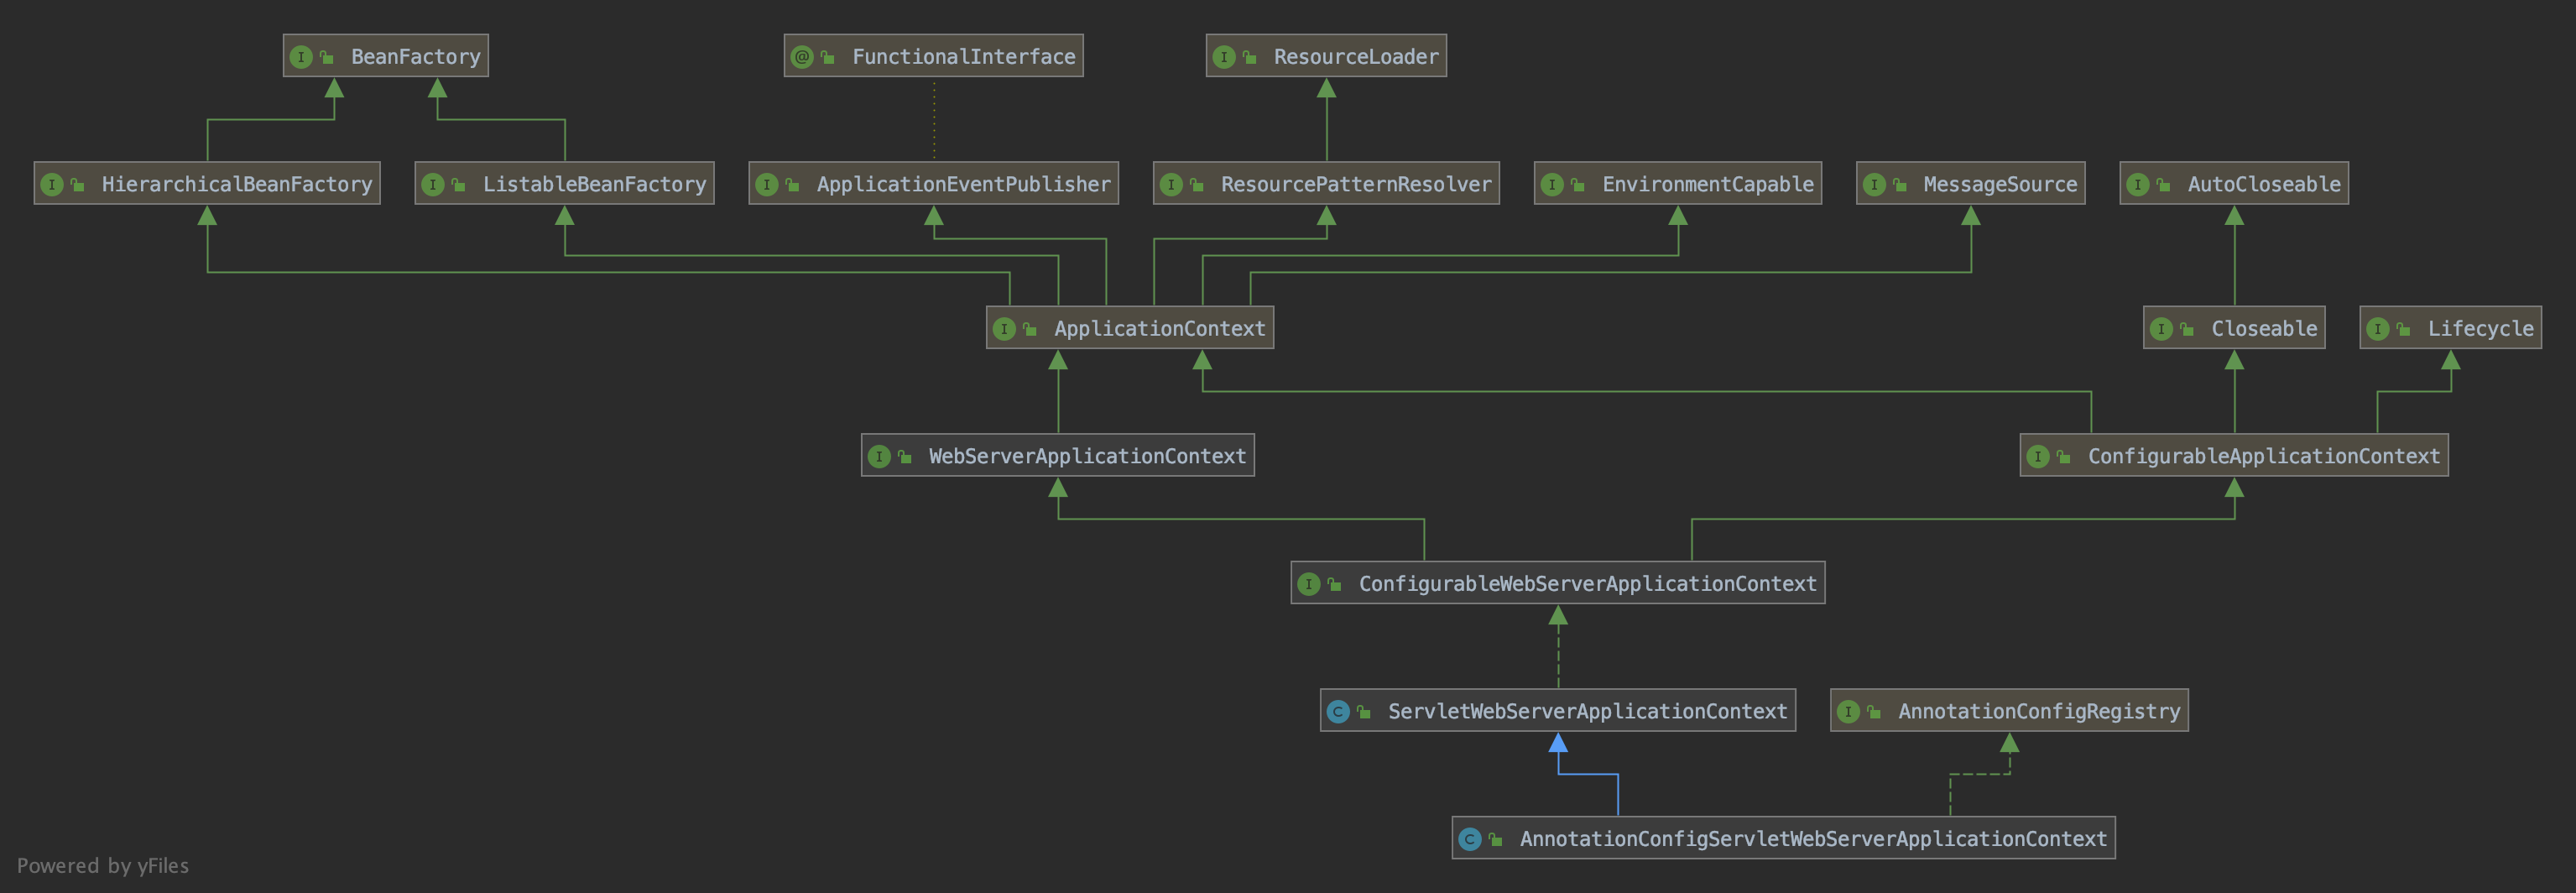
然后我们再来看看相关的类图:

类太多不要紧,我们只需要重点关注上面的几个类:
AnnotationConfigServletWebServerApplicationContext(也就是我们刚刚说的类),ServletWebServerApplicationContext,AbstractApplicationContext。
AnnotationConfigServletWebServerApplicationContext继承自ServletWebServerApplicationContext,而ServletWebServerApplicationContext则重写了AbstractApplicationContext中refresh()方法中提到的提供给子类来重写的onRefresh()方法。(接下来继续一步一步跟踪下方标红的代码)
 1 @Override
 2 protected void onRefresh() {
 3         super.onRefresh();
 4         try {
 5             createWebServer();
 6         }
 7         catch (Throwable ex) {
 8             throw new ApplicationContextException("Unable to start web server", ex);
 9         }
10 }
 1 private void createWebServer() {
 2         WebServer webServer = this.webServer;
 3         ServletContext servletContext = getServletContext();
 4         if (webServer == null && servletContext == null) {
 5             ServletWebServerFactory factory = getWebServerFactory();
 6             this.webServer = factory.getWebServer(getSelfInitializer());
 7             getBeanFactory().registerSingleton("webServerGracefulShutdown",
 8                     new WebServerGracefulShutdownLifecycle(this.webServer));
 9             getBeanFactory().registerSingleton("webServerStartStop",
10                     new WebServerStartStopLifecycle(this, this.webServer));
11         }
12         else if (servletContext != null) {
13             try {
14                 getSelfInitializer().onStartup(servletContext);
15             }
16             catch (ServletException ex) {
17                 throw new ApplicationContextException("Cannot initialize servlet context", ex);
18             }
19         }
20         initPropertySources();
}

然后我们点进TomcatServletWebServerFactory可以看到具体的实现:
 1 @Override
 2     public WebServer getWebServer(ServletContextInitializer... initializers) {
 3         if (this.disableMBeanRegistry) {
 4             Registry.disableRegistry();
 5         }
 6         Tomcat tomcat = new Tomcat();
 7         File baseDir = (this.baseDirectory != null) ? this.baseDirectory : createTempDir("tomcat");
 8         tomcat.setBaseDir(baseDir.getAbsolutePath());
 9         Connector connector = new Connector(this.protocol);
10         connector.setThrowOnFailure(true);
11         tomcat.getService().addConnector(connector);
12         customizeConnector(connector);
13         tomcat.setConnector(connector);
14         tomcat.getHost().setAutoDeploy(false);
15         configureEngine(tomcat.getEngine());
16         for (Connector additionalConnector : this.additionalTomcatConnectors) {
17             tomcat.getService().addConnector(additionalConnector);
18         }
19         prepareContext(tomcat.getHost(), initializers);
20         return getTomcatWebServer(tomcat);
21     }