mybatis
1. 添加依赖:
<dependency>
			<groupId>org.mybatis.spring.boot</groupId>
			<artifactId>mybatis-spring-boot-starter</artifactId>
            <version>${mybatis.version}</version>
		</dependency>

		<dependency>
			<groupId>mysql</groupId>
			<artifactId>mysql-connector-java</artifactId>
			<!--这里如果不写版本会自动继承spring-boot-starter-parent里的版本号-->
			<version>${mysql.version}</version>
</dependency>
2. dao层定义UserMapper.xml文件和UserMapper类
3. 使用注意:
- 使用mybatisGenerator插件(idea里直接装需要收费,参考:http://blog.csdn.net/luanlouis/article/details/43192131)
- 添加依赖
<plugin>
               <groupId>org.mybatis.generator</groupId>
               <artifactId>mybatis-generator-maven-plugin</artifactId>
               <version>${mybatis-generator.version}</version>
               <configuration>
                   <verbose>true</verbose>
                   <overwrite>true</overwrite>
               </configuration>
</plugin>
添加一个“Run运行”选项,使用maven运行mybatis-generator-maven-plugin插件, 在 “Command line” 选项中输入“mybatis-generator:generate -e”
- 当mapper.xml文件不是放在resource文件下时,需要加插件将其生成到target里。 每次修改后需要install。
<plugin>
				<artifactId>maven-resources-plugin</artifactId>
				<version>2.5</version>
				<executions>
					<execution>
						<id>copy-xmls</id>
						<phase>process-sources</phase>
						<goals>
							<goal>copy-resources</goal>
						</goals>
						<configuration>
							<outputDirectory>${basedir}/target/classes</outputDirectory>
							<resources>
								<resource>
									<directory>${basedir}/src/main/java</directory>
									<includes>
										<include>**/*.xml</include>
									</includes>
								</resource>
							</resources>
						</configuration>
					</execution>
				</executions>
</plugin>- 只添加@Mapper注解或者(@MapperScan("com.example.demo.server.dao")) 时idea会报错,但是可以运行,所以强迫症可以加一个@Repository。
restful接口
1. restful接口定义
(参考:http://websystique.com/spring-boot/spring-boot-rest-api-example/):
- GET request to /users/ returns a list of users
- GET request to /users/1 returns the user with ID 1
- POST request to /users/ with a user object as JSON creates a new user
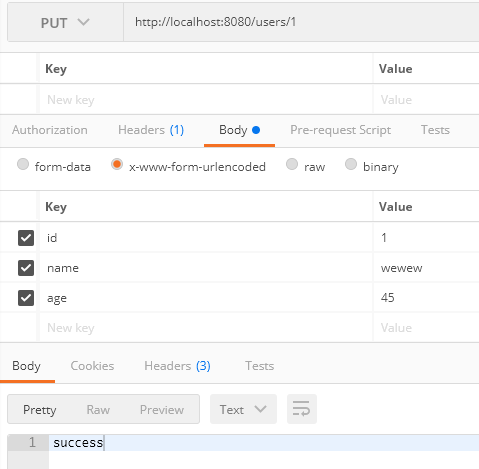
- PUT request to /users/1 with a user object as JSON updates the user with ID 1
- DELETE request to /users/1 deletes the user with ID 1
- DELETE request to /users/ deletes all the users
2. controller里主要代码
@Autowired
   IUserService userService;

   /**
    * 查询所有用户
    * @return
    */
   @RequestMapping(value = "/", method = RequestMethod.GET)
   public List<User> listAllUsers() {
       List<User> users = userService.findAllUsers();
       return users;
   }

   /**
    * 根据id查询用户
    * @param id
    * @return
    */
   @RequestMapping(value = "/{id}", method = RequestMethod.GET)
   public User getUser(@PathVariable("id") int id) {
       logger.info("Fetching User with id {}", id);
       User user = userService.findById(id);
       if (user == null) {
           logger.error("User with id {} not found.", id);
       }
       return user;
   }

   /**
    * 新建一个用户
    * @param user
    * @return
    */
   @RequestMapping(value = "/", method = RequestMethod.POST)
   public String createUser(@ModelAttribute  User user) {
       //除了@ModelAttribute绑定参数之外,还可以通过@RequestParam从页面中传递参数/RequestBody ?
       logger.info("Creating User : {}", user);
       User exitUser = new User();
       exitUser.setId(user.getId());
       if (userService.isUserExist(exitUser)) {
           logger.error("Unable to create. A User with id {} already exist", exitUser.getId());
       }
       userService.saveUser(user);
       return "success";
   }

   /**
    * 根据id更新用户信息
    * @param id
    * @param user
    * @return
    */
   @RequestMapping(value = "/{id}", method = RequestMethod.PUT)
   public String updateUser(@PathVariable("id") int id, @ModelAttribute User user) {
       //RequestBody
       logger.info("Updating User with id {}", id);

       User currentUser = userService.findById(id);

       if (currentUser == null) {
           logger.error("Unable to update. User with id {} not found.", id);
           return "fail";
       }
       currentUser.setName(user.getName());
       currentUser.setAge(user.getAge());
       userService.updateUser(currentUser);
       return "success";
   }

   /**
    * 根据id删除用户
    * @param id
    * @return
    */
   @RequestMapping(value = "/{id}", method = RequestMethod.DELETE)
   public String deleteUser(@PathVariable("id") int id) {
       logger.info("Fetching & Deleting User with id {}", id);

       User user = userService.findById(id);
       if (user == null) {
           logger.error("Unable to delete. User with id {} not found.", id);
           return "fail";
       }
       userService.deleteUserById(id);
       return "success";
   }


   /**
    * 删除所有用户
    * @return
    */
   @RequestMapping(value = "/", method = RequestMethod.DELETE)
   public String deleteAllUsers() {
       logger.info("Deleting All Users");

       userService.deleteAllUsers();
       return "success";
   }
测试(使用postman):
查询所有用户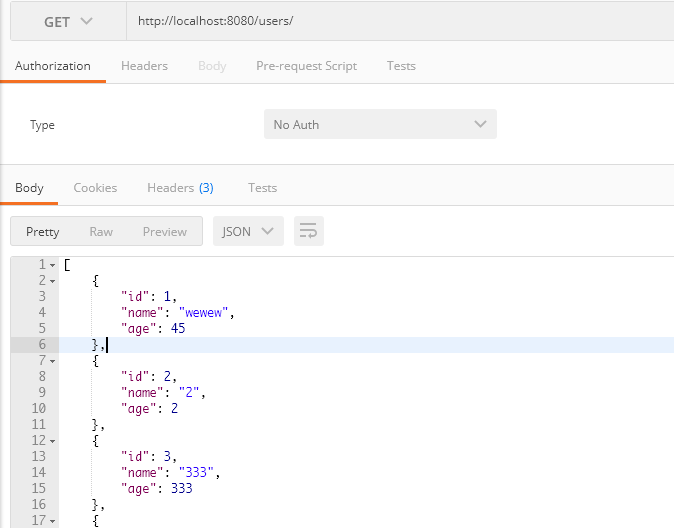
查询id为1的用户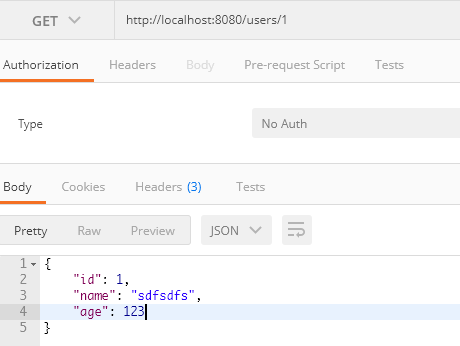
创建一个用户

更新id为1的用户

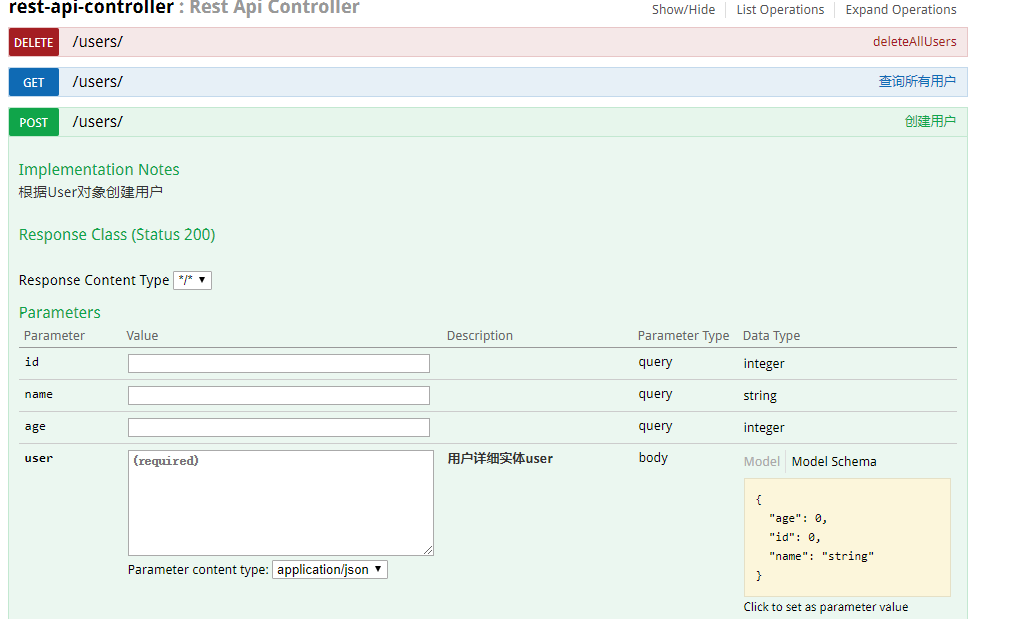
3.使用swagger2生成api文档
(参考http://blog.didispace.com/springbootswagger2/)
- 引入依赖
<dependency>
           <groupId>io.springfox</groupId>
           <artifactId>springfox-swagger2</artifactId>
           <version>2.2.2</version>
       </dependency>
       <dependency>
           <groupId>io.springfox</groupId>
           <artifactId>springfox-swagger-ui</artifactId>
           <version>2.2.2</version>
</dependency>- 创建Swagger2配置类
@Configuration
@EnableSwagger2
public class Swagger2 {
    @Bean
    public Docket createRestApi() {
        return new Docket(DocumentationType.SWAGGER_2)
                .apiInfo(apiInfo())
                .select()
                .apis(RequestHandlerSelectors.basePackage("com.example.demo.server.controller"))
                .paths(PathSelectors.any())
                .build();
    }
    private ApiInfo apiInfo() {
        return new ApiInfoBuilder()
                .title("Spring Boot中使用Swagger2构建RESTful APIs")
                .description("使用Swagger2构建RESTful APIs")
                .termsOfServiceUrl("http://www.wjcoding.cn/")
                .contact("Jill")
                .version("1.0")
                .build();
    }
}- controller里使用:
@ApiOperation(value="创建用户", notes="根据User对象创建用户")
    @ApiImplicitParam(name = "user", value = "用户详细实体user", required = true, dataType = "User")
    @RequestMapping(value = "/", method = RequestMethod.POST)
    public String createUser(@ModelAttribute  User user) {
    //代码略
}- 查看api文档: 启动Spring Boot程序,访问:http://localhost:8080/swagger-ui.html
国际化
(参考博客:http://412887952-qq-com.iteye.com/blog/2312274)
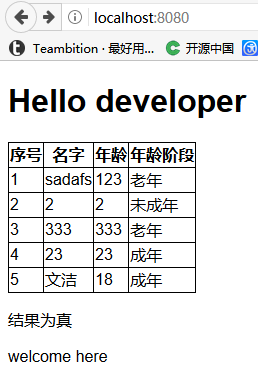
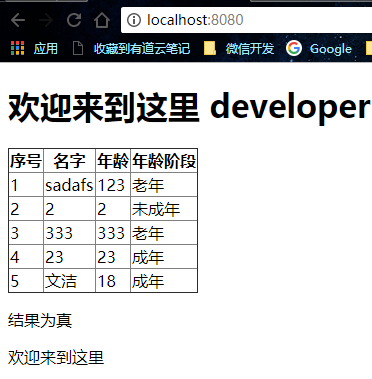
1. 页面中使用国际化
创建messages.properties(messages_zh_CN.properties,messages_en_US.properties)文件 thymeleaf里使用#{key}显示,例如:<p th:text="#{welcome}"></p>
2. 国际化文件相关配置
#指定message的basename,多个以逗号分隔,如果不加包名的话,默认从classpath路径开始,默认: messages spring.messages.basename=i18n/messages #设定加载的资源文件缓存失效时间,-1的话为永不过期,默认为-1 spring.messages.cache-seconds=3600 #设定Message bundles的编码,默认: UTF-8 #spring.messages.encoding=UTF-8
验证:火狐地址栏里输入about:config回车,搜索accept_languages,改成en_US,en
3. 代码中使用国际化
- 创建messages.properties(messages_zh_CN.properties,messages_en_US.properties)文件
- 代码里先获取区域,再国际化信息:
Locale locale = LocaleContextHolder.getLocale();
(或者Locale locale = RequestContextUtils.getLocale(request);)
String msg = messageSource.getMessage("welcome", null,locale);-
区域解析器 默认:AcceptHeaderLocaleResolver 根据HTTP请求的头部信息accept-language来解析区域
-
会话区域解析器:SessionLocaleResolver
@Bean
  public LocaleResolver localeResolver() {
      SessionLocaleResolver slr = new SessionLocaleResolver();
      //设置默认区域
      slr.setDefaultLocale(Locale.CHINA);
      return slr;
  }
request.getSession().setAttribute(SessionLocaleResolver.LOCALE_SESSION_ATTRIBUTE_NAME, new Locale("en", "US"))- Cookie区域解析器:CookieLocaleResolver
@Bean
    public LocaleResolver localeResolver() {
       CookieLocaleResolver slr = new CookieLocaleResolver();
        //设置默认区域
        slr.setDefaultLocale(Locale.CHINA);
        slr.setCookieMaxAge(3600);//设置cookie有效期.
        returnslr;
}- 固定的区域解析器:FixedLocaleResolver
@Bean
    public LocaleResolver localeResolver() {
       FixedLocaleResolver slr = new FixedLocaleResolver ();
        //设置默认区域
        slr.setDefaultLocale(Locale.US);
        returnslr;
}- 使用参数修改用户的区域 将LocaleChangeInterceptor拦截器应用到处理程序映射中,它会发现当前HTTP请求中出现的特殊参数。 其中的参数名称可以通过拦截器的paramName属性进行自定义。 如果这种参数出现在当前请求中,拦截器就会根据参数值来改变用户的区域。
@Bean
 public LocaleChangeInterceptor localeChangeInterceptor() {
        LocaleChangeInterceptor lci = new LocaleChangeInterceptor();
        // 设置请求地址的参数,默认为:locale
        // lci.setParamName(LocaleChangeInterceptor.DEFAULT_PARAM_NAME);
        return lci;
}

@Override
public void addInterceptors(InterceptorRegistry registry) {
   registry.addInterceptor(localeChangeInterceptor());
}
注意这个是可以和会话区域解析器以及Cookie区域解析器一起使用的, 但是不能和FixedLocaleResolver一起使用,否则会抛出异常信息。
验证:

aop
(参考:http://blog.didispace.com/springbootaoplog/)
1. 添加依赖
<dependency>
			<groupId>org.springframework.boot</groupId>
			<artifactId>spring-boot-starter-aop</artifactId>
</dependency>
2. 使用:
实现AOP的切面主要有以下几个要素:
- 使用@Aspect注解将一个java类定义为切面类
- @Order(i)注解来标识切面的优先级。i的值越小,优先级越高。
- 在切入点前的操作,按order的值由小到大执行
- 在切入点后的操作,按order的值由大到小执行
- 使用@Pointcut定义一个切入点,可以是一个规则表达式,比如下例中某个package下的所有函数,也可以是一个注解等。 根据需要在切入点不同位置的切入内容
- 使用@Before在切入点开始处切入内容
- 使用@After在切入点结尾处切入内容
- 使用@AfterReturning在切入点return内容之后切入内容(可以用来对处理返回值做一些加工处理)
- 使用@Around在切入点前后切入内容,并自己控制何时执行切入点自身的内容
- 使用@AfterThrowing用来处理当切入内容部分抛出异常之后的处理逻辑
@Aspect
@Component
@Order(1)
public class WebLogAspect {
    private Logger logger = Logger.getLogger(WebLogAspect.class);
    ThreadLocal<Long> startTime = new ThreadLocal<>();

    @Pointcut("execution(public * com.example.demo.server.controller..*.*(..))")
    public void webLog(){}

    @Before("webLog()")
    public void doBefore(JoinPoint joinPoint) throws Throwable {
        startTime.set(System.currentTimeMillis());
        // 接收到请求,记录请求内容
        ServletRequestAttributes attributes = (ServletRequestAttributes) RequestContextHolder.getRequestAttributes();
        HttpServletRequest request = attributes.getRequest();
        // 记录下请求内容
        logger.info("URL : " + request.getRequestURL().toString());
        logger.info("HTTP_METHOD : " + request.getMethod());
        logger.info("IP : " + request.getRemoteAddr());
        logger.info("CLASS_METHOD : " + joinPoint.getSignature().getDeclaringTypeName() + "." + joinPoint.getSignature().getName());
        logger.info("ARGS : " + Arrays.toString(joinPoint.getArgs()));
    }

    @AfterReturning(returning = "ret",pointcut = "webLog()")
    public void doAfterReturning(Object ret) throws Throwable {
        // 处理完请求,返回内容
        logger.info("RESPONSE : " + ret);
        logger.info("RESPONSE : " + ret);
        logger.info("SPEND TIME : " + (System.currentTimeMillis() - startTime.get()));
    }
}

结果:

validator
(参考http://www.jianshu.com/p/a9b1e2f7a749)
1. 添加限制
//这里不能用@NotBlank,因为id类型为int
  private int id;

  //使用groups属性来给分组命名,然后在需要的地方指定命令即可
  @NotBlank(groups=NAME.class)
  private String name;

  @Min(1)
  private Integer age;
2. 使用验证
@RestController
public class ValidateController {
    @RequestMapping(value="testUser")
    public void testStudent(@Validated User user) {
    }

    @RequestMapping(value="testUser1")
    public void testStudent1(@Validated(User.NAME.class) User user) {
    }
}
使用 @ScriptAssert 注解校验复杂的业务逻辑: 如果需要校验的业务逻辑比较复杂,可以使用@ScriptAssert来指定进行校验的方法, 通过方法来进行复杂业务逻辑的校验,然后返回 true或false来表明是否校验成功。
@ScriptAssert(lang="javascript",script="com.learn.validate.domain
.Student.checkParams(_this.name,_this.age,_this.classes)",
groups=CHECK.class)
public class Student {
//其他代码
/注意进行校验的方法要写成静态方法,否则会出现
 //TypeError: xxx is not a function 的错误
 public static boolean checkParams(String name,int age,String classes) {
  if(name!=null&&age>8&classes!=null)
  {
   return true;
  }
  else
  {
   return false;
  }
 }
}
3. 注意:
在Hibernate Validator(org.hibernate.validator.constraints)中:
@NotEmpty://CharSequence, Collection, Map 和 Array 对象不能是 null 并且相关对象的 size 大于 0。 @NotBlank://String 不是 null 且去除两端空白字符后的长度(trimmed length)大于 0。
验证:
