在使用vue开发过程中,难免需要去本地数据地址进行请求,而原版配置在dev-server.js中,新版vue-webpack-template已经删除dev-server.js,改用webpack.dev.conf.js代替,所以 配置本地访问在webpack.dev.conf.js里配置即可。
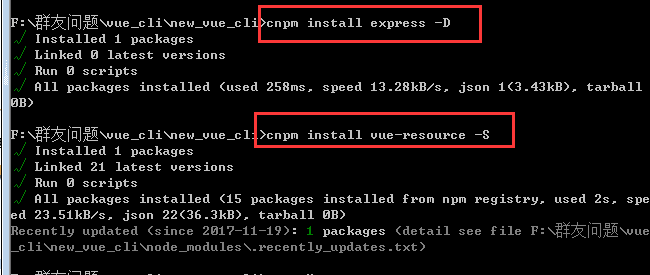
现在我们就来用node里的express来解决本地数据请求的问题。主要为下面三步:安装express和resource、注册并使用vue-resource、配置express并设置路由规则
1、安装node的express,和vue-resource

2、注意: 这里安装vue-resource后需要在main.js注册并使用下
import VueResource from 'vue-resource'
Vue.use(VueResource)
3、在webpack.dev.conf配置express并设置路由规则
#webpack.dev.conf.js
// 首先在const portfinder = require('portfinder')后添加

// nodejs开发框架express,用来简化操作
const express = require('express')
// 创建node.js的express开发框架的实例
const app = express()
// 引用的json地址
var appData = require('../data.json')
// json某一个key
var goods = appData.result

var apiRoutes = express.Router()
app.use('/api', apiRoutes)
(1)get请求配置
#webpack.dev.conf.js
// 在devServer选项中添加以下内容
before(app) {
  app.get('/api/someApi', (req, res) => {
    res.json({
      // 这里是你的json内容
    })
  })
}
注意: 修改配置文件完毕后,需要重新运行命令npm run dev即可。
(2)post请求配置。如果要配置post请求,需要在该文件夹配置如下:
#webpack.dev.conf.js
apiRoutes.post('/foods', function (req, res) { //注意这里改为post就可以了
  res.json({
    error: 0,
    data: foods
  });
})
// 在组件里面
#...vue
created () {
 this.$http.post('http://localhost:8080/api/foods').then((res) => {
  console.log(res)
 })
}
(3)完整配置
'use strict'
const utils = require('./utils')
const webpack = require('webpack')
const config = require('../config')
const merge = require('webpack-merge')
const path = require('path')
const baseWebpackConfig = require('./webpack.base.conf')
const CopyWebpackPlugin = require('copy-webpack-plugin')
const HtmlWebpackPlugin = require('html-webpack-plugin')
const FriendlyErrorsPlugin = require('friendly-errors-webpack-plugin')
const portfinder = require('portfinder')

const HOST = process.env.HOST
const PORT = process.env.PORT && Number(process.env.PORT)

//增加express --start
const express = require('express')
const app = express()
var appData = require('../goods.json')
var goods = appData.goods
var apiRoutes = express.Router()
app.use('/api', apiRoutes)
//增加express --end

const devWebpackConfig = merge(baseWebpackConfig, {
  module: {
    rules: utils.styleLoaders({ sourceMap: config.dev.cssSourceMap, usePostCSS: true })
  },
  // cheap-module-eval-source-map is faster for development
  devtool: config.dev.devtool,

  // these devServer options should be customized in /config/index.js
  devServer: {
    clientLogLevel: 'warning',
    historyApiFallback: {
      rewrites: [
        { from: /.*/, to: path.posix.join(config.dev.assetsPublicPath, 'index.html') },
      ],
    },
    hot: true,
    contentBase: false, // since we use CopyWebpackPlugin.
    compress: true,
    host: HOST || config.dev.host,
    port: PORT || config.dev.port,
    open: config.dev.autoOpenBrowser,
    overlay: config.dev.errorOverlay
      ? { warnings: false, errors: true }
      : false,
    publicPath: config.dev.assetsPublicPath,
    proxy: config.dev.proxyTable,
    quiet: true, // necessary for FriendlyErrorsPlugin
    watchOptions: {
      poll: config.dev.poll,
    },
    //增加express --start
    before(app) {
      app.get('/api/goods', (req, res) => {
        res.json({
          code: 0,
          data: goods
        })
      })
    }
    //增加express --end
  },
  plugins: [
    new webpack.DefinePlugin({
      'process.env': require('../config/dev.env')
    }),
    new webpack.HotModuleReplacementPlugin(),
    new webpack.NamedModulesPlugin(), // HMR shows correct file names in console on update.
    new webpack.NoEmitOnErrorsPlugin(),
    // https://github.com/ampedandwired/html-webpack-plugin
    new HtmlWebpackPlugin({
      filename: 'index.html',
      template: 'index.html',
      inject: true
    }),
    // copy custom static assets
    new CopyWebpackPlugin([
      {
        from: path.resolve(__dirname, '../static'),
        to: config.dev.assetsSubDirectory,
        ignore: ['.*']
      }
    ])
  ]
})

module.exports = new Promise((resolve, reject) => {
  portfinder.basePort = process.env.PORT || config.dev.port
  portfinder.getPort((err, port) => {
    if (err) {
      reject(err)
    } else {
      // publish the new Port, necessary for e2e tests
      process.env.PORT = port
      // add port to devServer config
      devWebpackConfig.devServer.port = port

      // Add FriendlyErrorsPlugin
      devWebpackConfig.plugins.push(new FriendlyErrorsPlugin({
        compilationSuccessInfo: {
          messages: [`Your application is running here: http://${devWebpackConfig.devServer.host}:${port}`],
        },
        onErrors: config.dev.notifyOnErrors
        ? utils.createNotifierCallback()
        : undefined
      }))

      resolve(devWebpackConfig)
    }
  })
})
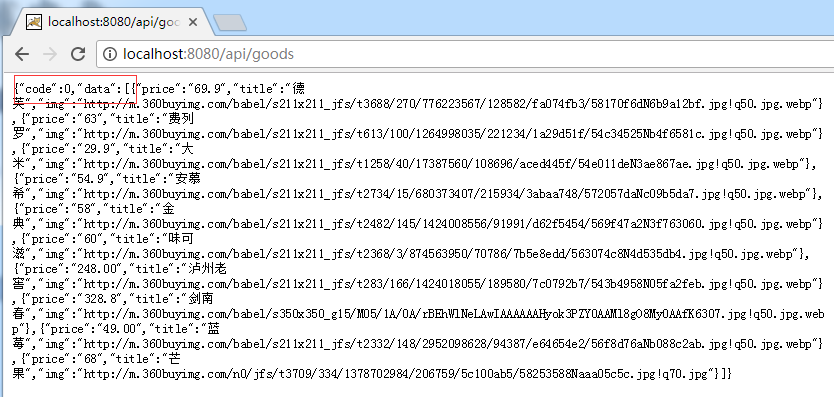
4、检测 npm run dev 后,在浏览器地址栏中输入http://localhost:8080/api/goods即可看到数据
注意:新建goods.json引入时候的路径

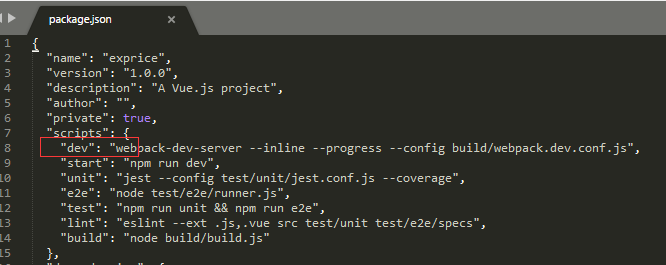
在使用中有个粗心的位置,就是npm run dev的时候总是报错:missing scripts dev,导致项目启动不了。
考虑到可能是package.json文件里的scripts里面没有dev导致,所以查看,结果却有:
最后就是粗心导致的问题,原来我是在 cd vueCli 这个目录下去 npm run dev 的,所以肯定会missing scripts dev;改成cd exprice目录下去 npm run dev 就行了。所以一定得细心啊。