背景
我们谈到Spring的时候一定会提到IOC容器、DI依赖注入。Spring通过将一个个类标注为Bean的方法注入到IOC容器中,这样可以避免我们手动去将bean构造出来,而是在有需要的时候由IOC容器为我们提供它“制造”好的bean, 从而达到了控制反转的效果。
既然要让Spring来帮我们完成bean的注入,我们就需要通过一定的方法让Spring知道我们需要它为我们管理哪些bean。一般来说有两种种方法来配置spring注入:xml文件配置、注解
xml文件注入
这是最原始的注入方法,在Spring的配置文件 appilcationContext.xml 中用<bean>标签一个一个注入:
<bean id="student" class="com.autowiredtest.entity.Student">
    <property name="name" value="小红"/>
</bean>
启动项目的时候,使用ClassPathXmlApplicationContext 去装载这个xml文件,spring 容器就会自动的为我们管理这些bean的生命周期。
但当项目较大的时候,会有成千上百个Bean要去注入,一行行去写就太麻烦了。于是Spring为我们提供了用注解来实现注入的方法。
使用注解注入
要启用注解,需要在配置文件中开启:
    <!-- 自动扫描 -->
    <context:annotation-config />
    <context:component-scan base-package="com.autowiredtest">
    </context:component-scan>
这个配置告诉spring去自动扫描并处理com.autowiredtest包下的所有注解
具体来说,有多种注解的方法都可以实现注入。
配置类+@Bean注解
假设我们的bean的定义如下:
public class Student {
    private String name;
    //setter & getter
}
这种方式其实是对xml文件配置bean的一种映射。首先我们需要专门写一个配置类,这个配置类就对应上一种方法的xml文件。上一种方法用xml文件指示Spring如何装配bean, 这种方法用java代码(配置类)来指示Spring如何装配。
首先我们需要写一个配置类, 并为它打上@configuration注解,这个配置类就对应上一种方法的xml文件:
@Configuration
public class StudentConfiguration {
}
然后我们可以在配置类中写入生成bean的方法, 并为这些方法打上@Bean注解。这些方法就对应上一种方法xml文件中一行行<bean>配置:
@Configuration
public class StudentConfiguration {
    @Bean
    Student student01(){
        Student student = new Student();
        student.setName("long");
        return student;
    }

    @Bean
    Student student02(){
        Student student = new Student();
        student.setName("xing");
        return student;
    }
}
这里面的student01和student02方法就是告诉Spring容器去生成两个Student类型的bean,生成的bean的名称由方法名称决定。上面两个方法生成的bean在IOC容器的实例的名称分别为student01和student02。知道了名称之后方便我们去使用它,如@Resource注解默认就是按照bean的名称去IOC容器中找实例。
配置类处理好了,接下来就是使用了。使用很简单,在有需要这些bean的地方,打上@Autowired或者 @Resource注解即可。这里有关于@Autowired和@Resource的区别
@Controller
public class AutowiredController {
    @Autowired
    Student student01; //有了@Autowired注解,Spring容器会自动在这个地方注入student01的实例,无需为它额外赋值或者创建实例。
    @Autowired
    Student student02;

    @RequestMapping("/good")
    @ResponseBody
    public String say(){
        String answer = "ok";
        System.out.println(student01.getName());
        System.out.println(student02.getName());
        return answer+" " + student01.getName()+" "+student02.getName();
    }
}
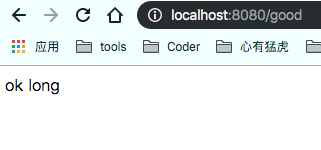
这样当项目启动起来,我们用浏览器访问 localhost:8080/good, 就会得到如下结果:

@Component注解注入
不需要写额外的配置类,在定义类的时候,只要给这个类加上@Component注解,Spring容器就可以为我们自动的去管理这个类的实例化。像下面的这样,我们定义SchoolComponent类的时候加上了@Component注解,后面我们需要SchoolComponent实例的时候,使用@Autowired或者@Resource就可以把它召唤出来啦!
@Component
@Data
public class SchoolComponent {
    @Autowired //此处是沿用了之前的Student类的注解设置,直接让Spring框架注入student01。
    private Student student01;
}
测试类,注意我们并没有在配置类中为SchoolComponent类写用@Bean标注的配置函数哦。
@Controller
public class AutowiredController {
    @Autowired
    SchoolComponent schoolComponent;

    @RequestMapping("/good")
    @ResponseBody
    public String say(){
        String answer = "ok";
        return answer+" " + schoolComponent.getStudent01().getName();
    }
}
测试结果,我们仍然能为schoolComponent注入实例:

这种方法实例化的时候,除了用上述的@Autowired注解注入属性外,还可以通过设置该类的setter方法或者 写该类的构造方法来为该类的实例提供属性的设置。
也就是说,下面三种方法为SchoolComponent的实例化提供属性设置的效果是一样的:
@Component
@Data
public class SchoolComponent {
    /*下面三种方法是等效的*/

    //通过@Autowired属性注入
    @Autowired
    private Student student01;

    //通过构造函数设置属性
    @Autowired
    public SchoolComponent(Student student01){
      this.student01 = student01;
    }

    //通过set方法设置属性
    @Autowired
    public void setStudent(Student student01){
        this.student01 = student01;
    }
}
需要注意的是我们在使用构造函数或者setter方法设置属性的时候,仍然需要在在这两个方法上打上@Autowired注解,这是在让方法的入参自动注入。
另外我们常见的 @Controller注解, @Service注解,@Repository注解, 都是Component的细化注解,这几个注解也能像上面@Component注解这样使用,只不过他们有着更细分的使用场景。
- @Controller 标注在Controller层
- @Service 标注在Service层
- @Repository 标注在dao层
参考文章 : Spring注入Bean的几种方式