使用 Spring-Boot 连接Redis数据库
总览
使用Spring-Boot和Redis实现数据的增删改查。首先要保证Redis服务已经安装并启动。
本教程采用Spring Data Redis --
which provides the abstractions of the Spring Data platform to Redis
## 项目结构 ``` $ tree . ├── java │ └── com │ └── example │ └── accessingredis2 │ ├── AccessingRedis2Application.java │ ├── configs │ │ └── RedisConfiguration.java │ ├── controller │ │ └── StudentController.java │ ├── dao │ │ └── StudentRepository.java │ ├── entity │ │ └── Student.java │ └── service │ └── StudentService.java └── resources └── application.properties ```
Maven 依赖
在pom文件中添加下列依赖
        <dependency>
            <groupId>org.springframework.boot</groupId>
            <artifactId>spring-boot-starter</artifactId>
        </dependency>

        <dependency>
            <groupId>org.springframework.boot</groupId>
            <artifactId>spring-boot-configuration-processor</artifactId>
            <optional>true</optional>
        </dependency>

        <dependency>
            <groupId>org.projectlombok</groupId>
            <artifactId>lombok</artifactId>
            <optional>true</optional>
        </dependency>

        <!---Spring Boot 封装的redis驱动-->
        <dependency>
            <groupId>org.springframework.data</groupId>
            <artifactId>spring-data-redis</artifactId>
        </dependency>

        <!--Redis 客户端依赖,除了驱动外还需要有访问redis的客户端, 类似于JDBC的作用-->
        <dependency>
            <groupId>redis.clients</groupId>
            <artifactId>jedis</artifactId>
        </dependency>

        <dependency>
            <groupId>org.springframework.boot</groupId>
            <artifactId>spring-boot-starter-web</artifactId>
        </dependency>
详细代码
RedisConfiguration.java
@Configuration
public class RedisConfiguration {
    @Bean
    JedisConnectionFactory jedisConnectionFactory(){
        RedisStandaloneConfiguration standaloneConfiguration = new RedisStandaloneConfiguration();
        standaloneConfiguration.setHostName("localhost");
        standaloneConfiguration.setPort(6379);
        return new JedisConnectionFactory(standaloneConfiguration);
    }

    @Bean
    public RedisTemplate<String, Object> redisTemplate(){
        RedisTemplate<String, Object> template = new RedisTemplate<>();
        template.setConnectionFactory(jedisConnectionFactory());
        return template;
    }
}
说明: RedisConfiguration.java是Redis的配置类, 要使用 java访问Redis数据库,需要加载Redis驱动,设置连接url及端口号等,获得数据库连接实例。上面的jedisConnectionFactory()返回由Jedis管理的Redis连接实例的工厂类,在这里面使用RedisStandaloneConfiguration配置类设置了连接Redis的url和端口;
redisTemplate()方法返回Redis操作模版类的实例RedisTemplate ,拿到了template实例我们就可以用它对数据库做增删改查;
Student.java
@Data
@AllArgsConstructor
@RedisHash("Student")
public class Student implements Serializable {
    private String id;
    private String name;
    private String gender;
    private int grade;
}
说明: 实体类,这个类说明了我们要保存在数据库中的数据的格式是一个 Student,有id, name, gender和grade 四种属性。注意这个类要实现Serializable接口,才能序列化到数据库。其次需要打上由spring-data-redis提供的@RedisHash注解,表明我们要讲这个类按Hash结构储存到Redis中
StudentRepository.java
@Repository
public interface StudentRepository extends CrudRepository<Student, String> {
}
说明: 只需像上面一样创建一个StudentRepository接口并继承CrudRepository类, 打上@Repository注解, 无需实现任何方法。Spring会帮我们创建数据库访问实例。
StudentService.java
@Service
public class StudentService {
    @Autowired
    StudentRepository studentRepository;

    public void add(Student student) {
        studentRepository.save(student);
    }

    public Student find(String id) {
        return studentRepository.findById(id).get();
    }

    public boolean delete(String id) {
        if (studentRepository.existsById(id)) {
            studentRepository.deleteById(id);
            return true;
        }
        else
            return false;
    }

    public void deleteAll() {
        studentRepository.deleteAll();
    }

    public boolean update(Student student) {
        String id = student.getId();
        if (studentRepository.existsById(id)) {
            studentRepository.save(student);
            return true;
        } else {
            return false;
        }
    }

    public List<Student> getAll() {
        List<Student> students = new ArrayList<>();
        studentRepository.findAll().forEach(students::add);
        return students;
    }
}
说明: StudentService类中包含了一个自动注入的StudentRepository对象,这个对象提供了对Redis数据进行增删改查的各项功能。上面的StudentService类相当于对Student数据的增删该查提供了包装,其实这个类应该属于DAO, 名称改为StudentDao.java更合适一点。
StudentController.java
@RestController
@RequestMapping("/demo")
public class StudentController {
    @Autowired
    StudentService studentService;

    @PostMapping(path = "/add")
    public @ResponseBody String add(@RequestParam String id, @RequestParam String name, @RequestParam String gender, @RequestParam int grade){
        studentService.add(new Student(id, name, gender, grade));
        return "OK";
    }

    @PostMapping("/getStudent")
    public Student getStudent(@RequestParam String id){
        return studentService.find(id);
    }

    @GetMapping("/deleteAll")
    public String deleteAll(){
        studentService.deleteAll();
        return "OK";
    }

    @GetMapping("/getAll")
    public List<Student> getAll(){
        return studentService.getAll();
    }

    @PostMapping("/update")
    public boolean update(@RequestParam String id, @RequestParam String name, @RequestParam String gender, @RequestParam int grade){
       Student student = new Student(id, name, gender, grade);
       boolean flag = studentService.update(student);
       return flag;
    }

    @PostMapping("/delete")
    public boolean delete(@RequestParam String id){
        return studentService.delete(id);
    }
}
说明: StudentController类提供了对外访问服务,通过引入StudentService对象提供服务。
application.properties
server.port=9021
说明: 配置类,配置服务在9021端口启动
测试
启动项目后,用Postman来向服务发请求。直接用浏览器请求,组装post请求比较麻烦。可以使用Postman来发请求。
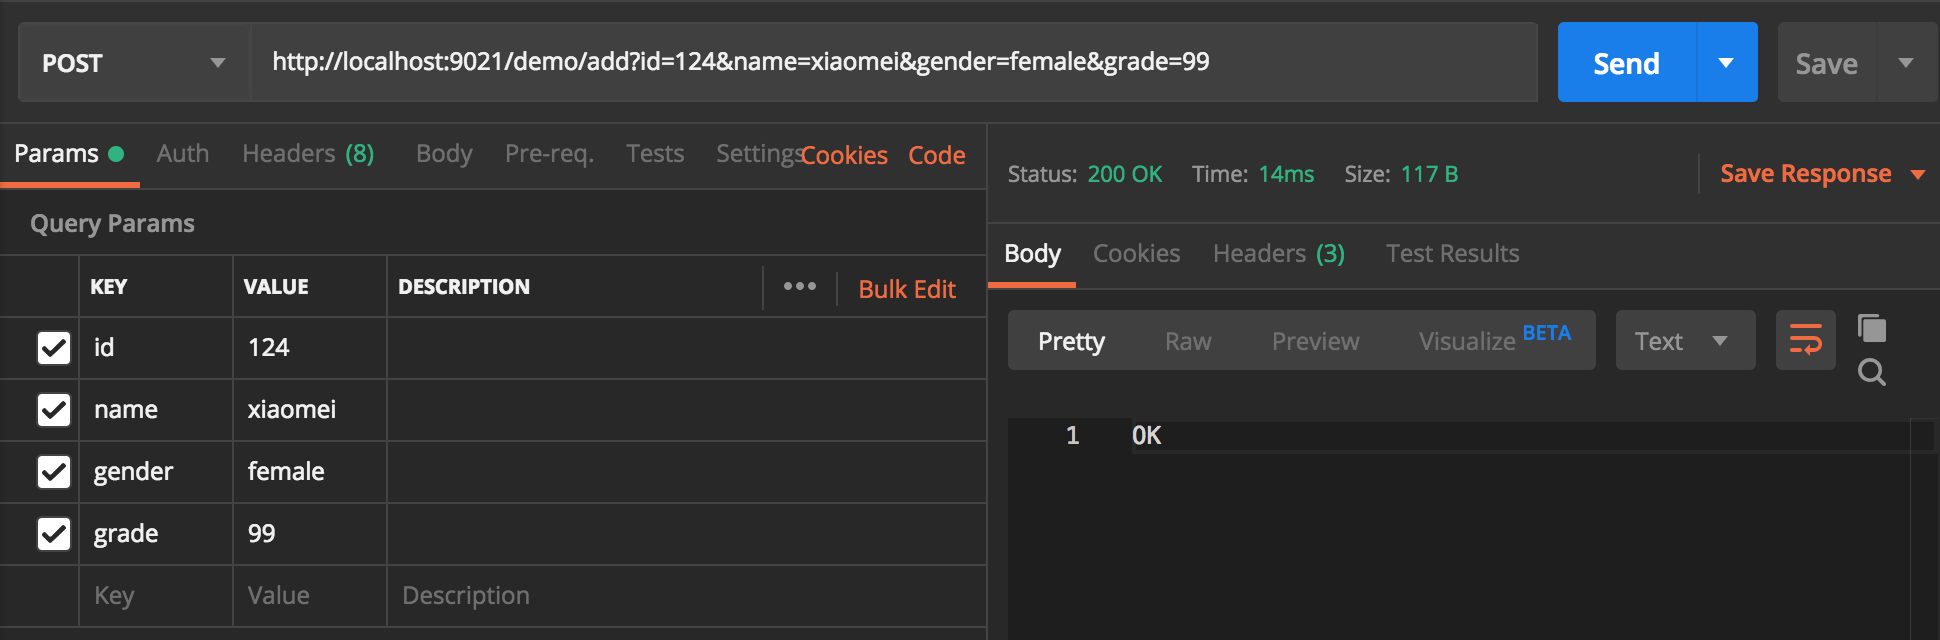
- 添加两条学生数据

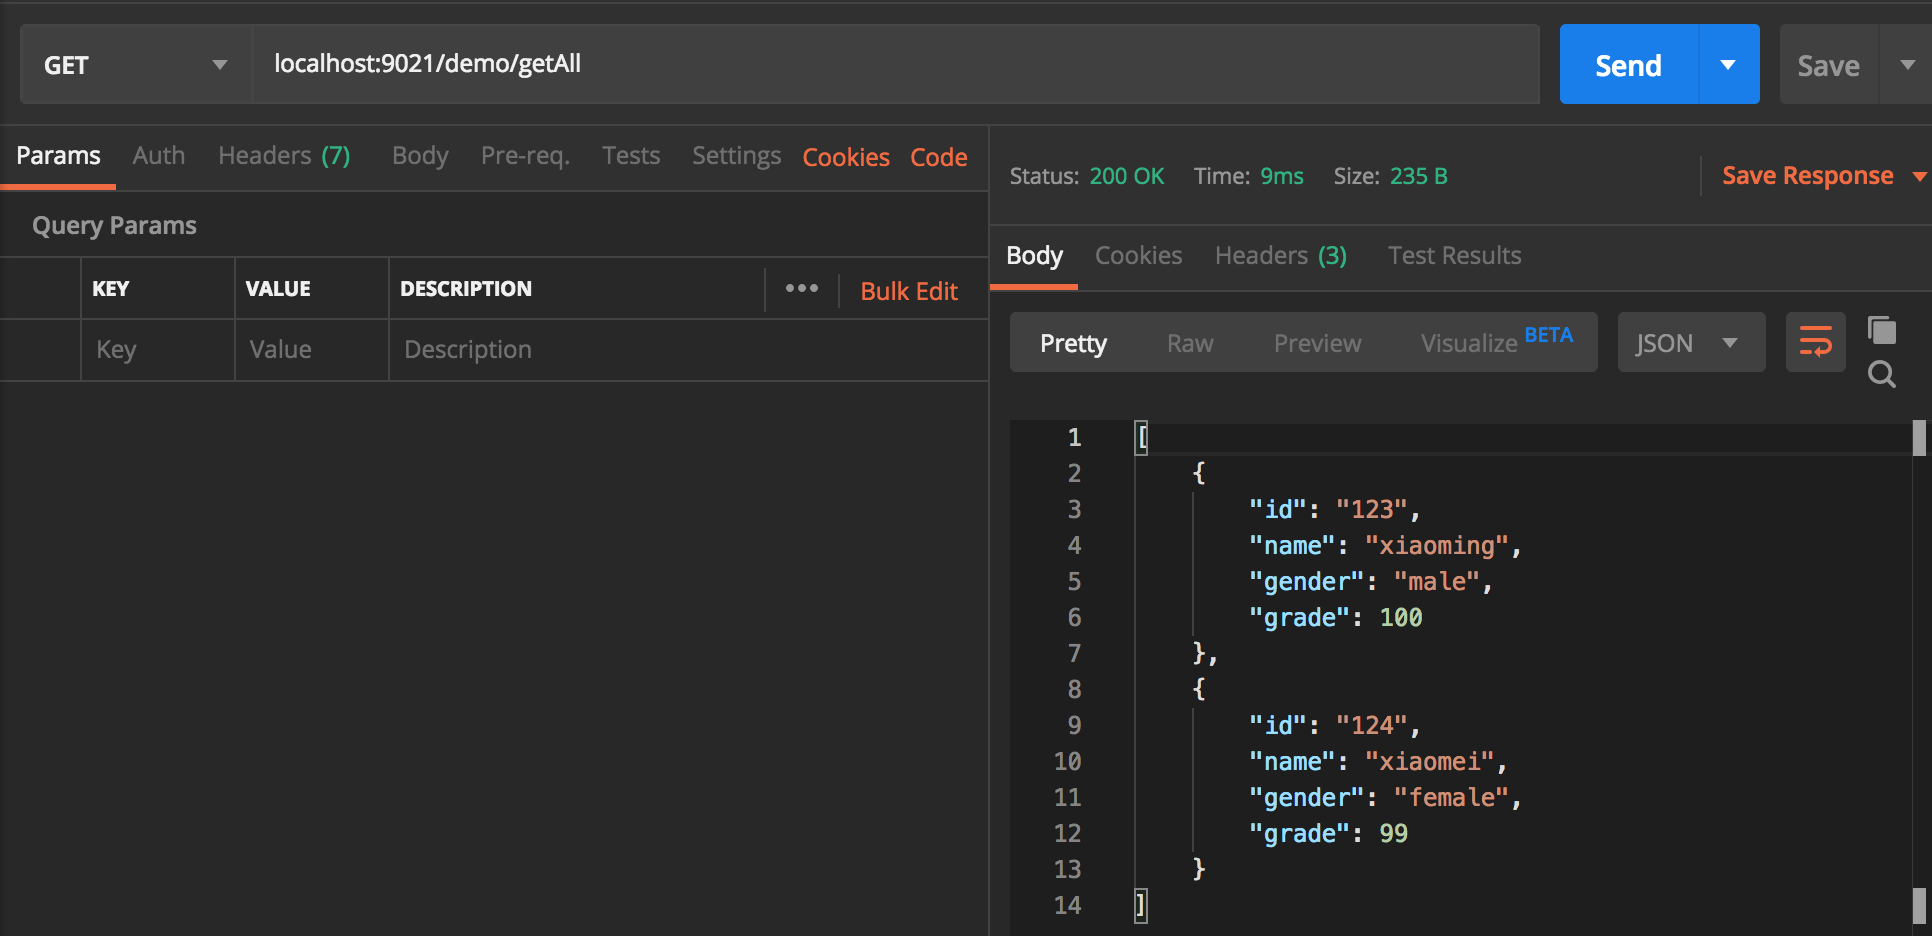
- 查询所有数据
- 按学号查询学生

- 更新学生信息
会先查询数据库有无对应学号的学生,如果有则更新信息并返回true,无则返回false。
http://localhost:9021/demo/update?id=125&name=gg&gender=ok&grade=111
返回false
- 删除给定学生信息(按学号)
http://localhost:9021/demo/delete?id=125
- 删除所有学生信息
http://localhost:9021/demo/deleteAll